Smash Combat Field Guide - Herbertofury/Advent-of-Ascension GitHub Wiki
Smash: read the wind-up, keep a way out
Open modern Smash stats and illustrated loot · Boss dossiers
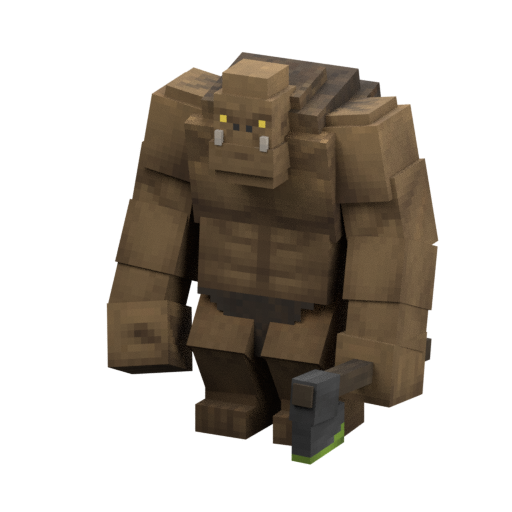
Scope: normal Smash in the pinned 1.21 source snapshot, with base attributes and loot resources separately extracted from AoA 3.7.16.1 for Minecraft 1.21.1. The tactics below are deductions from those source behaviours, not a live-tested guarantee. Elite Smash and older releases need their own guides. A source-defined encounter does not establish its complete survival summoning route.
Before you engage
Bring a reliable damage source, its ammunition or runes, food and room to move sideways. Keep pets away from the fight: the source explicitly includes owned living entities in its nearby-target sensor. Avoid choosing a cramped dead end as your fighting area.
The released normal builder specifies 275 maximum health, 15 base melee strength, 10 armour, 10 armour toughness and 0.9 knockback resistance. Difficulty and other modifiers can change the actual encounter. High knockback resistance is a reason to plan around movement and attack cues rather than assuming every hit will push him away.
What to watch for
| Cue or situation | What the inspected code does | Practical response to test |
|---|---|---|
| Axe swing | A distinct swing state, with its own warm-up and attack interval | Move out of the attack line and avoid committing to a long action during the wind-up. Exact safe timing needs runtime validation. |
| Charge-up animation | A delayed charge captures a direction toward the target; this Smash setup does not request retargeting at charge launch | Move sideways after the tell rather than retreating along the same line. Keep clear of walls that limit your escape. |
| Axe slam after an unreachable-target response | The slam is centred on the target, with a configured coordinate radius of 4; its damage selection checks grounded living targets | Simply standing farther from Smash is not a sufficient answer to this target-centred attack. A timed jump is a source-supported tactic to test, not a blanket immunity claim. |
| Belly drum | Applies temporary resistance, movement-speed and strength effects, alongside an attack-cooldown memory | Treat the animation as a warning that the following exchange can be stronger. Reposition and assess rather than assuming the whole animation is free damage. |
| Enrage | Adds persistent damage, armour and toughness modifiers and plays an enrage cue | Expect the late fight to change. Preserve healing and resources instead of spending everything before this phase. |
Important: enrage is not only a low-health phase
The normal server AI checks for health below 25% and enrages once. The unreachable-target reaction also calls enrage(), then switches to the axe-slam state. A tower or inaccessible perch can therefore provoke the response without waiting for the low-health threshold.
That is why this guide does not recommend “stand somewhere he cannot reach” as a proven safe strategy. The source also contains an enraged flee response when the target remains unreachable. Pathfinding, task ordering and terrain affect what happens in a real fight.
Your shield is not a universal solution
The inspected canDisableShield() returns true outside the axe-slam state. Do not assume holding a shield makes normal swings or charges harmless. Conversely, the false result during the slam state is not proof that every part of a slam can be safely blocked: the damage path and other combat rules still matter.
A cautious encounter loop
- Stay where you have lateral space and can see the animation.
- Identify the current cue before committing to damage.
- Reposition around the charge line or target-centred slam behaviour.
- Use the next opening to attack, then check food, health and weapon resources.
- On the enrage cue, reassess rather than repeating the same exchange at lower health.
- After the fight, inspect the release-specific loot panel and recipe links before discarding unfamiliar drops.
The creature-associated released table includes nested rare and Nowhere-boss tables as well as its own entries. The browser displays those paths and pictures; this guide does not turn table weights into unverified per-kill percentages.
What still needs live verification
- Survival access and summoning route for this exact release
- Telegraph-to-hit timing, shield outcomes and airborne slam evasion
- Multiplayer targeting, latency and pet behaviour
- Normal versus elite differences and actual final damage
- Loot binding, global modifiers and repeatable encounter reset