AddInWithoutAdmin - Helmut-Ortmann/EnterpriseArchitect_hoTools GitHub Wiki
Do you want to install your EA Add-Ins without admin privileges? This article shows you how to make a WIX installer which supports a non-admin installation of your EA Add-In. If you already have a WIX installer, you see how to make just a few changes to install your EA-Addin without admin rights.
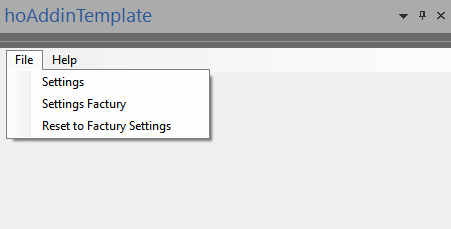
There is also a mini Add-In Visual Studio Solution, hoAddinTemplate, to have a simple running example to start from.
You may also check:
- hoAddinTemplate, Install Add-In with or without Admin privileges
- EXPloring EA Non-admin installation of AddIns
- Tutorial, Geert Bellekens: Addin in 10 Minutes.
All here described you can see in hoTools projects:
With WIX for creating your *.msi installer file you can make:
-
Simple non-admin installer, per-user installation
- Modify your WIX installation with just a few modifications
- No admin privileges required
- No dialogue, just click and eberything runs almost invisible
-
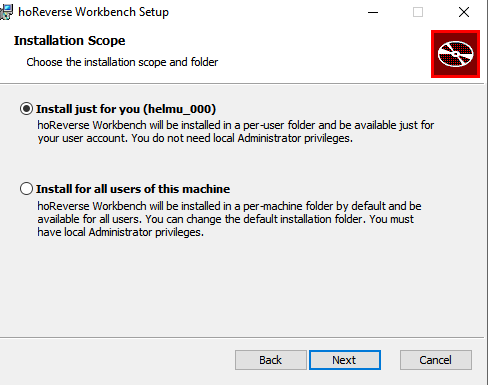
GUI for per-user or per-machine installer, Single Package Authoring
- Make your WIX Installation with GUI where you can choose
- per-user or
- per-machine
- Make your WIX Installation with GUI where you can choose
If you use GUI for per-user or per-machine installer, Single Package Authoring:
If you use Simple non-admin installer, per-user installation, you see nothing.
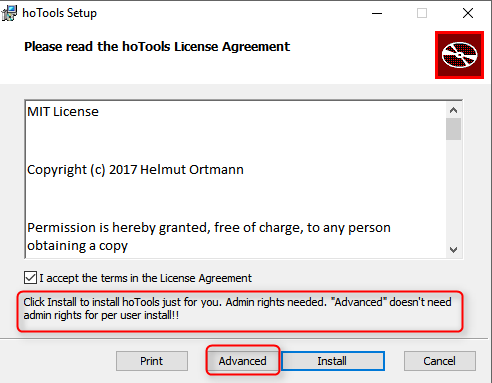
A per-user installation doesn't need any admin privileges. If you want to install your EA Add-In as per-machine installation this is only possible with local admin privileges.
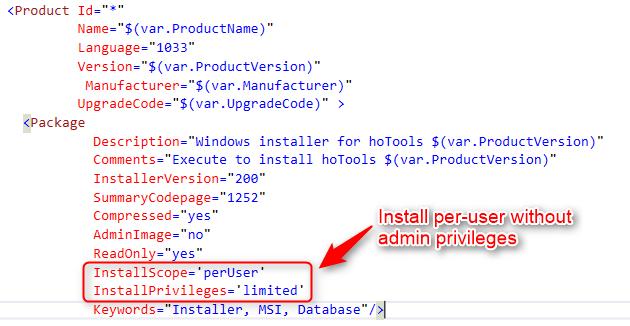
The Microsoft Installer, Single Package Authoring, can install per-user without admin privileges. No admin install needs some precautions:
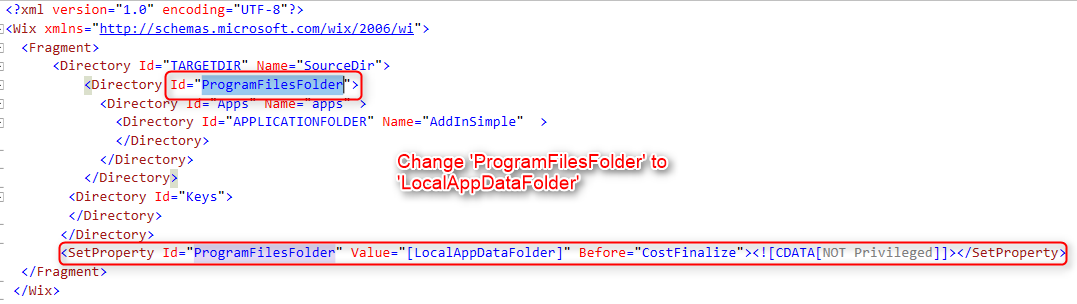
- Install in 'LocalAppDataFolder'
- Register Add-In in 'HKMU'
- Register the DLLs in 'HKCR'
- Say the installer you want per-user with limited privileges
- InstallScope='perUser'
- InstallPrivileges='limited'
Here you find a lot of explanations. Usually you:
- Adapt Product.wxs with a few information
- Add your components/ files to your file.wxs
- Add your default install folder to directories.wxs
- Don't touch (just takeover or don't use, only used for GUI solution, Single Authoring Package)
- Per-user installation, just click, and your Add-In installs smoothly
- GUI for per-user or per-machine installer, Single Package Authoring
The simplest way is to modify your running WIX installation to install per-user without admin privileges. Just click on the *.msi file, no dialogue and everything runs smoothly.
Have a look at the *.wxs files of AddinSimpleNoAdminSetup.
My organization is:
- Product.wxs General settings
- Files.wxs Files, Registry-Entries, dll registration
- Directories.wxs The Directory, usually 'APPLICATIONFOLDER'
In Product.wxs:
In Directories.wxs:
In Files.wxs
If you use the registration keys:
- HKMU: Register your Add-In by EA
- HKCR: Register your COM Objects, if you use Heat/Collect.bat Heat takes care of it
the installer will put the registry enters into the correct registry location, per-user or per-machine.

You have to register the COM-dlls with:
'<RegistryValue Root="HKCR"..'
If you use Heat to collect the registry information you don't have to change anything.
I put the collection of the COM-DLL registry information with Heat in a batch file:
The first installation may need administration privileges because it has to deinstall the old installation.
Choose during installation with a GUI whether you want to install per-user without admin rights or per-machine.
With WIX and the UI Advanced, you can make a Single Package Authoring. The principles and parts of the WIX implementation you find in WIX: GUI for per-user and per-machine installation.
The major steps are:
- Embed and configure WIX UI Advanced (Product.wxs
- No need to change WixUI_Advanced.wxs)
- Optional: Make your texts to help the user to install your Add-In, Localization.wxl
- Customizable texts in WIX GUI via Localization.wxl
- Install per-user without admin privileges
- Install per-machine with admin privileges

- Product.wxs
- Dictionary.wxs
- Files.wxs
- Collect.bat (get the COM-Component registry information)
- WixUI_Advanced.wxs (GUI definition)
- Localization.wxl (the changed texts in GUI)
Usually you just have to link this file from Product.wxs.
See WixUI_Advanced.wxs (GUI definition)
Make sure the following properties are set in Product.wxs, (defining the installation location):
- <?define Manufacturer="ho" ?>
- <?define ProductName="hoTools" ?>
results in installation folder:
- ho\hoTools\
Integration of GUI:

You need Microsoft COM Objects for:
- The root of your Add-In
- For every Window/Tab you want to integrate in EA
- Repository.AddTab(string TabName, string ProgID), see Repository Methods
- Repository.AddWindow(string WindowName, string ProgID), see Repository Methods
You have to register every COM object with your EA Add-In installer.
For all other dlls there is no need to register COM objects.
There are a lot of traps to fall into and I also fall into them. Usualy I copy an existing solution like AddInSimple or hoTools and change it. You find further information:
A COM object is identified by its 'ProgId'. There are a lot of possibilities to do it. A suggestion is to use 'Namespace.ClassName'.
I explicitly specify the needed information like (see AddInSimple.cs):
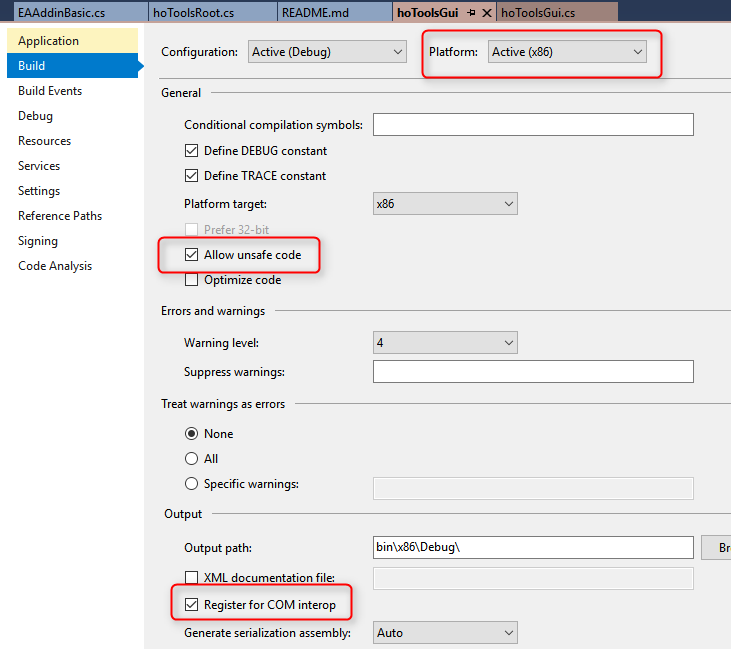
// Make sure Project Properties for Release has the Entry: 'Register for COM interop'
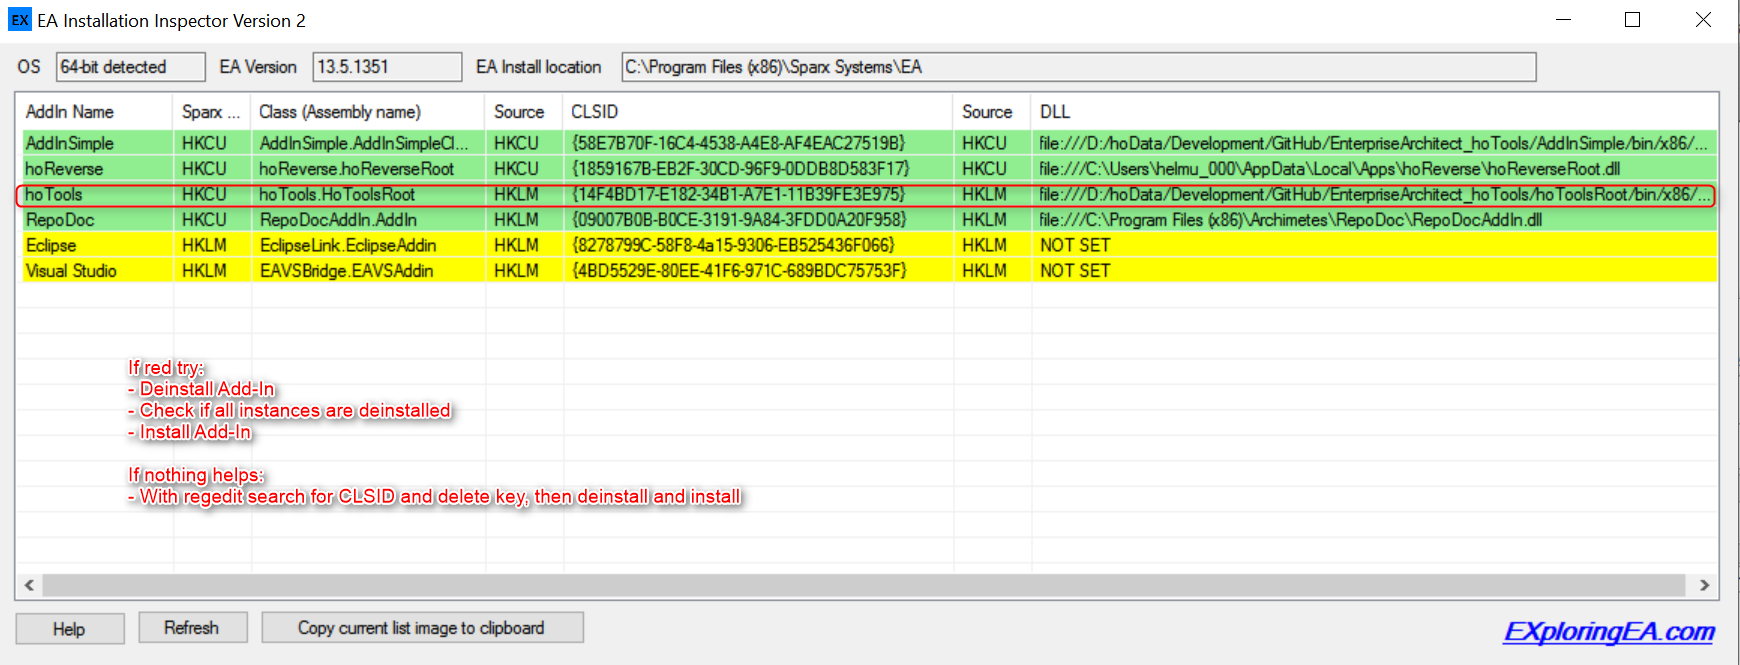
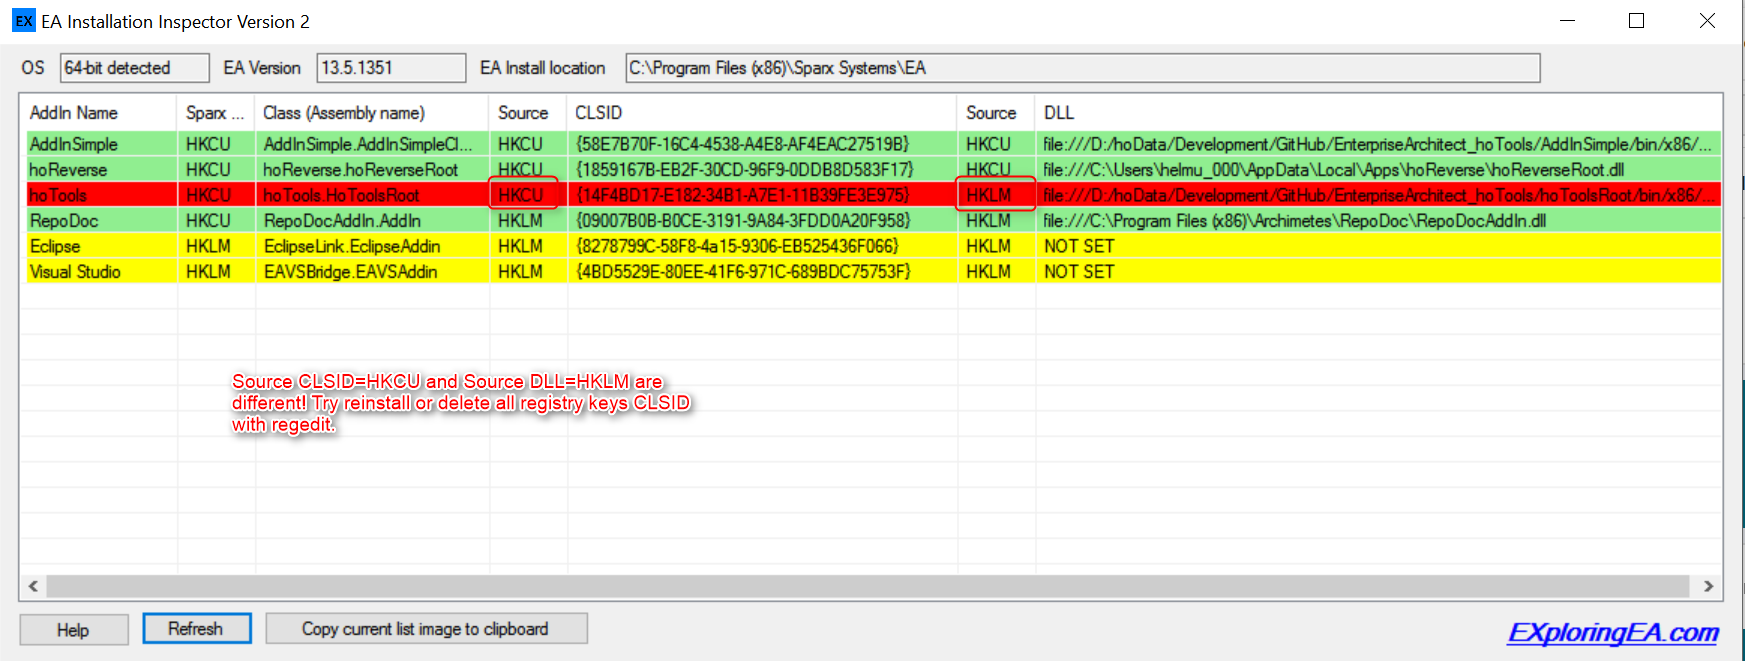
// You may check registration with: https://community.sparxsystems.com/community-resources/772-ea-installation-inspector
[ComVisible(true)]
[ClassInterface(ClassInterfaceType.None)]
[Guid("58E7B70F-16C4-4538-A4E8-AF4EAC27519B")]
// ProgID is the same as the string to register for EA in 'Sparx Systems:EAAddins:AddInSimple:Default'
// In description: 'Namespace.ClassName'
// EA uses always the ProId.
[ProgId("AddInSimple.AddInSimpleClass")]
public sealed class AddInSimpleClass : EaAddInBase
You can register your COM objects by:
- WIX: Collect register information with WIX Heat
- WIX: Register by yourself
- During install, dynamic register the COM Cobjects
Each approach has its own pro and cons. I use the solution with WIX Heat because I hope that Heat will abstract me from changes and I haven't to care about details.
Heat is a little program which makes a Component Entry for the WIX installation. It is part of WIX Toolset.
Steps:
- Identify the DDLs to register, I use one DLL for each COM Object
- Adapt the Heat collect batch file
- Insert the Component entry in your WIX installation file (e.g files.wxs)
- Adapt Component entry
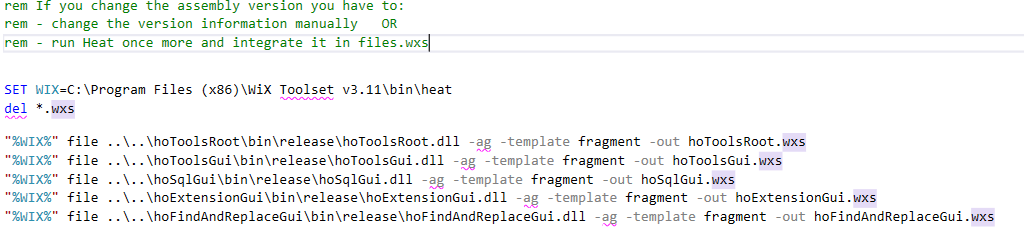
I use the Heat Collect.bat to collect all COM object registration information. Each *.wxs file is the component definition to put in the Files.wxs file.
Remember: I put one COM object into one dll-file, one WIX '<..</Component> definition for each COM-object.
Insert the collected Component entry from heat (*.wxs file).
- From
- To
Add a comment before the component entry like, update your dll-name of course:
<!--
  Update the following line with File Id=:
  <File Id="filCA8A52E7876A339B3756985923353460" KeyPath="yes"  Name="hoToolsRoot.dll" Source="$(var.hoToolsRoot.TargetPath)" />
  by
  Name="hoToolsRoot.dll" Source="$(var.hoToolsRoot.TargetPath)" />

  If you changed assembly version: '[assembly: AssemblyVersion("2.1.4")]'
  Change all occurences of the version manually in this dll registration
-->
Usually you maintain the Assembly Version of your DLLs in the properties of your VS Code. This looks like:
// my DLL Assembly version, if COM Object don't forget to update version in registry of files.wxs
'[assembly: AssemblyVersion("2.1.4")]'
Because the Assembly version is part of the COM dll registration information you have to update the assembly version in the component definition of Files.wxs.

I use EA Installation Inspector V4 to check the installation. It ships with a valuable description.
Visual Studio clean solution often helps!
In case of installation issues like can't load Add-In:
- If you change an assembly version ('[assembly: AssemblyVersion("2.1.4")]') of a dll with a COM object of your Add-In (Root + every Window) you have to update the Component/File information (collect by WIX or simply update the version in the Component definition)
- Use EA Installation Inspector


- Add-Ins tips
- Add-In simple
- Exploring EA, Non-admin installation of AddIns
- Microsoft: Single Package Authoring
- WIX: GUI for per-user and per-machine installation
- Tutorial, Geert Bellekens: Addin in 10 Minutes
- EA Forum: Distributing Add-Ins with no admin privileges
- WIX
- DLL registration by yourself
- DLL registration by code
- Microsoft Component Object Model, COM
- Sparx Tricks and Traps