Integrate bughole with you PHP website within 5 minutes - HelloLyfing/bughole GitHub Wiki
This wiki includes:
- Setup an example php website (so that we can integrate bughole within it)
- Setup bughole frontend in nginx
- Run backend agent and change Xdebug config file for the agent
Before we continue this tutorial, please make sure that you have cloned this git repo into /tmp directory in your machine which runs nginx and php-fpm (let's call the machine WebServer).
cd /tmp && git clone https://github.com/HelloLyfing/bughole.git
1. Setup an example php website
This repo includes an example-php-website, we'll first setup it, after that we'll integrate bughole within it, so that we can use bughole to debug the example-php-website. More than that, after bughole has been setup, we can debug every php script hosted on the WebServer! Isn't cool?
If you already have setup a PHP website, please jump to 2nd part: Setup bughole frontend in nginx
OK! Let's setup the example php website first. Add below config at the end of your nginx.conf file (or any other appropriate files that nginx cares)
server {
    listen 80;
    server_name example-php-website.com;

    location / {
        root /tmp/bughole/src/example-php-website;
        index index.php;
    }

    location ~* \.php {
        set $root_url /tmp/bughole/src/example-php-website;
        # FYI: fastcgi_pass config may differs according to your php-fpm config, please change it if needed
        fastcgi_pass    127.0.0.1:9001;
        include         fastcgi_params;
        fastcgi_split_path_info                 ^(.+\.php)(.*)$;
        fastcgi_param SCRIPT_FILENAME           $root_url/$fastcgi_script_name;
        fastcgi_param PATH_INFO                 $fastcgi_path_info;
    }
}
Remember to reload / restart your nginx, so that above config can take effect.
Then change your WorkingPC's hosts file, so that we can visit example-php-website.com locally.
# /etc/hosts
Your-WebServer-Ip-Addr example-php-website.com
You should see this after you visit http://example-php-website.com/ on your WorkingPC.

FYI: the index.php serves home request for example-php-website.com, it's location is here: /tmp/bughole/src/example-php-website/index.php.
2. Setup bughole frontend in nginx
Bughole is composed of two parts: 1) frontend UI which let you take control of one-step-debugging, and 2) backend agent which communicates with both frontend UI and Xdebug engine.
Let's setup the frontend UI first. To do that, we need to change the nginx config we just provided above to below one:
server {
    listen 80;
    server_name example-php-website.com;

    location / {
        root /tmp/bughole/src/example-php-website;
        index index.php;
    }

    location ~* \.php {
        set $root_url /tmp/bughole/src/example-php-website;
        # FYI: fastcgi_pass config may differs according to your php-fpm config, please change it if needed
        fastcgi_pass    127.0.0.1:9001;
        include         fastcgi_params;
        fastcgi_split_path_info                 ^(.+\.php)(.*)$;
        fastcgi_param SCRIPT_FILENAME           $root_url/$fastcgi_script_name;
        fastcgi_param PATH_INFO                 $fastcgi_path_info;
    }

    #--- changed content start ---
        # config below is the key to integrate bughole with your PHP website

        # frontend UI static files
        location ~ ^/static_bughole/(.*)$ {
            alias /tmp/bughole/src/static/$1;
        }

        # frontend UI use this HTTP path to communicate with the backend agent
        location ~ ^/bughole/.*$ {
            proxy_pass http://127.0.0.1:21734;
        }
    #--- changed content end ---
}
Remember to reload / restart your nginx, so that above config can take effect.
Now the frontend UI setup is done, let's visit the frontend UI: http://example-php-website.com/static_bughole/html/bughole_ui.html . It should look like this:
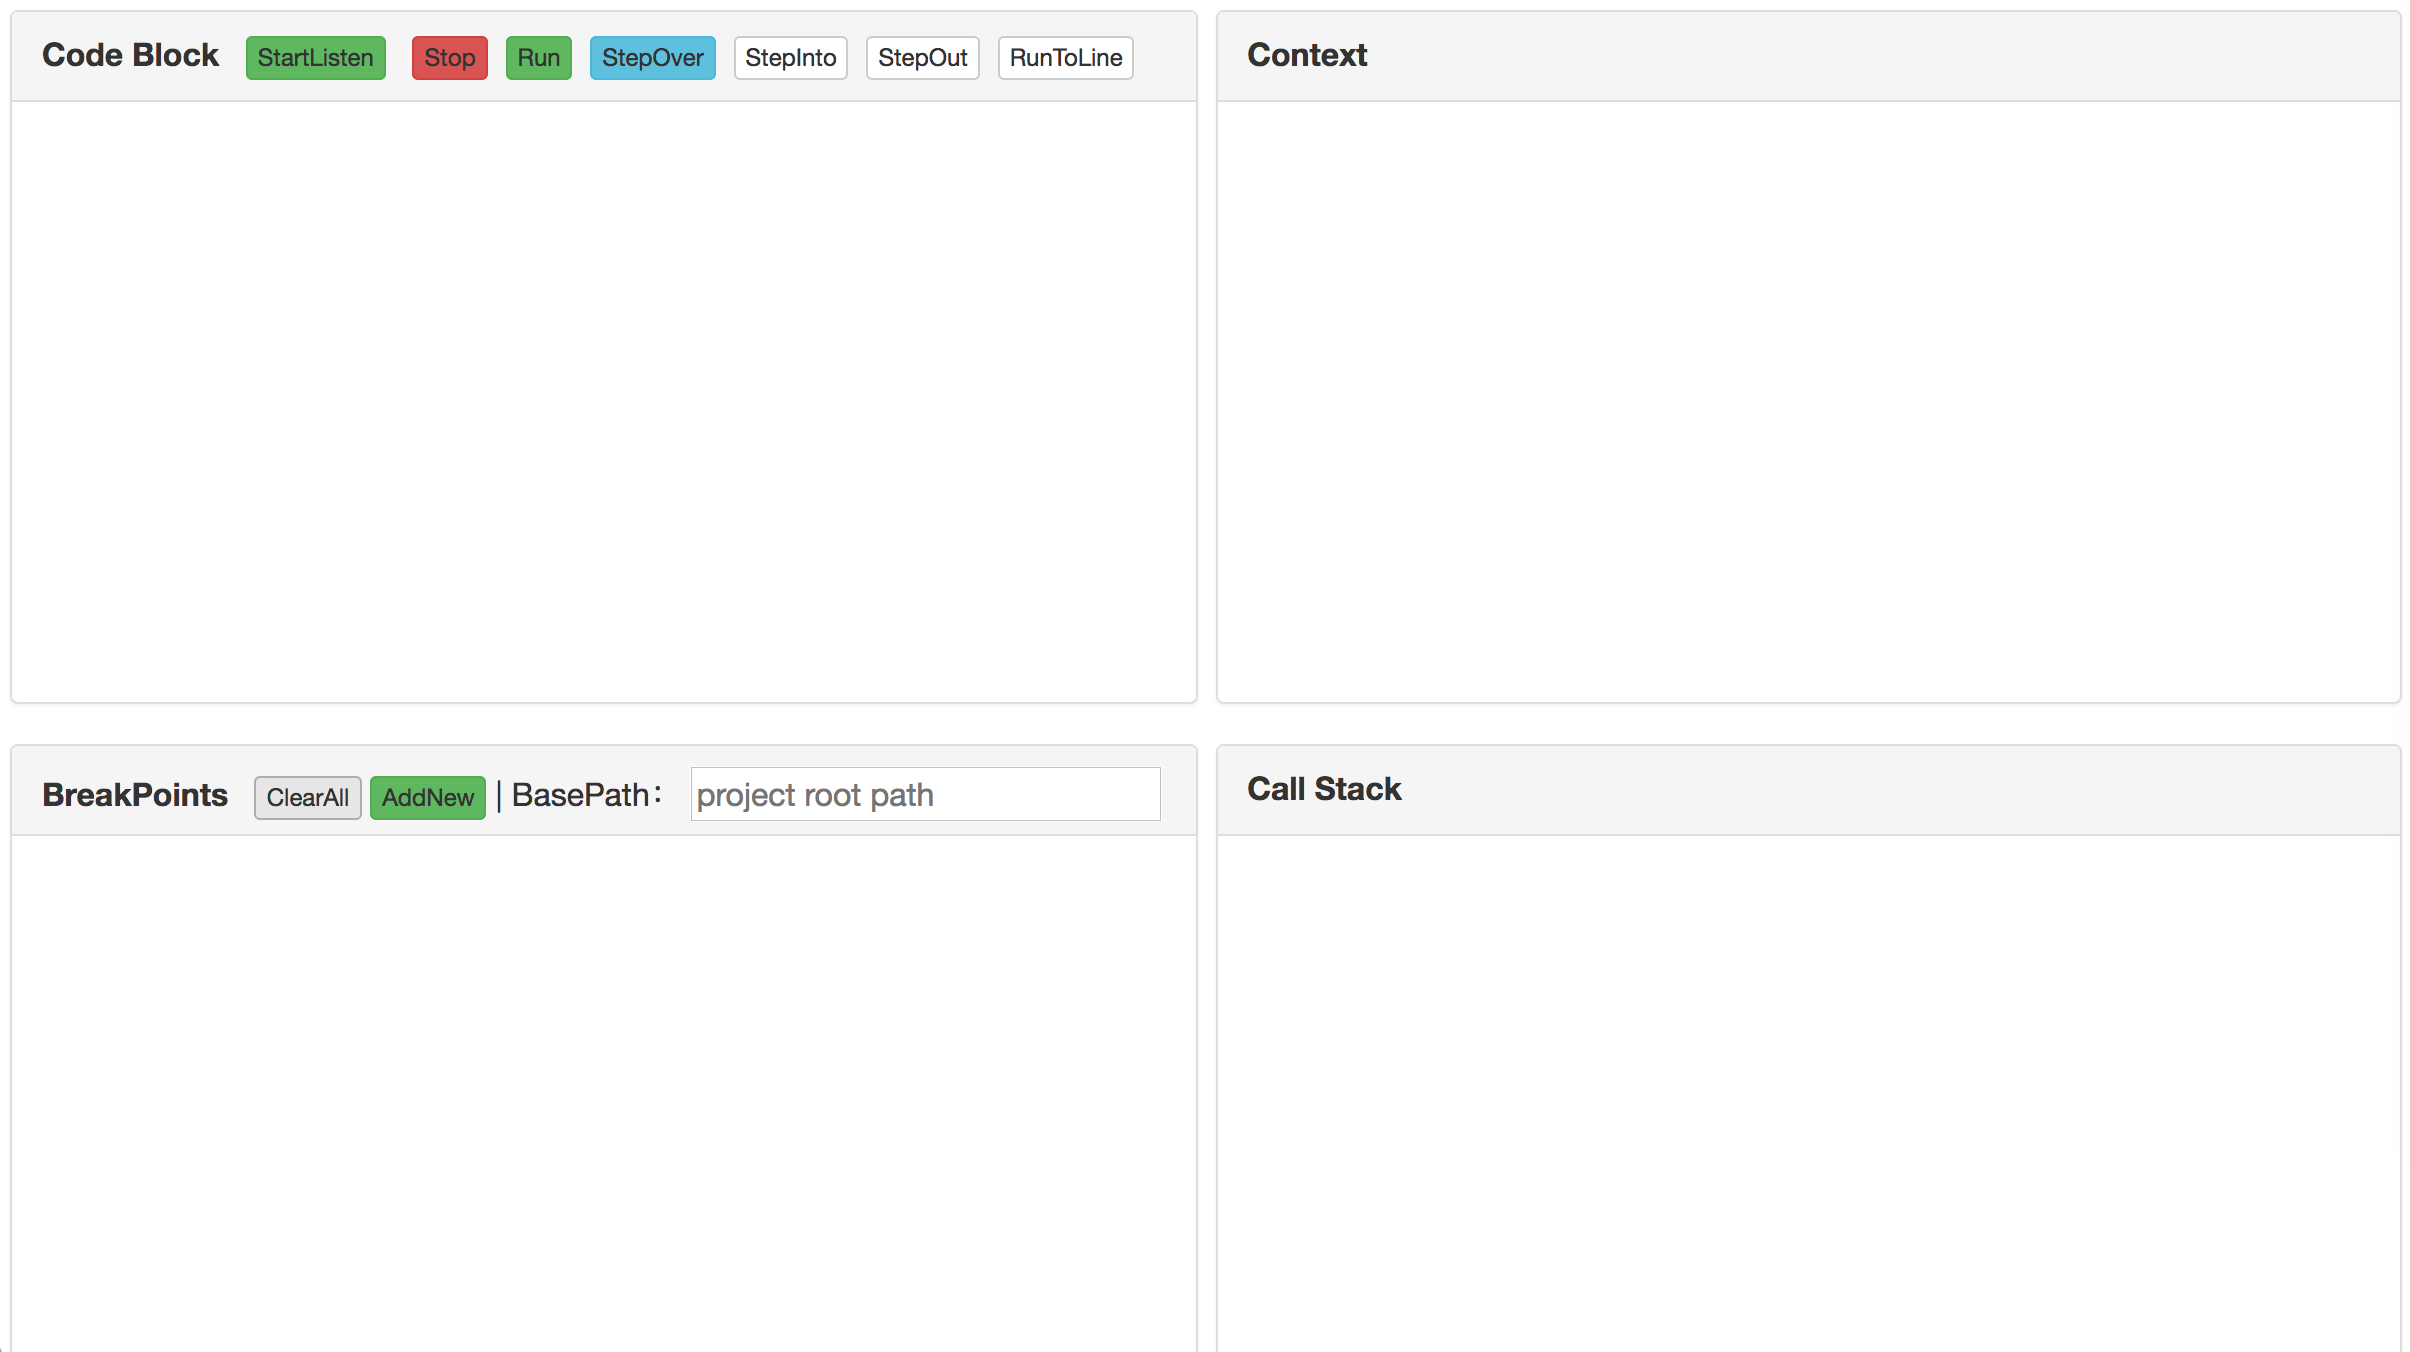
3. Run backend agent and change Xdebug config file for the agent
Go to your WebServer and run the backend agent:
python /tmp/bughole/src/python_agent/agent.py > /tmp/bughole-agent.log 2>&1 &
Change your Xdebug config as below:
xdebug.remote_host = 127.0.0.1
xdebug.remote_port = 21733

xdebug.remote_enable = 1
xdebug.remote_autostart = 0
xdebug.remote_connect_back = 0
xdebug.remote_handler = dbgp
xdebug.remote_mode = req
xdebug.idekey = bughole
Remember to restart php-fpm so that above config can take effect.