Texture & TextureRegion - GuidebeeGameEngine/Raindrop GitHub Wiki
#Texture A Texture is nothing more than a decoded image loaded into the GPU’s memory in raw format. Traditionally to display textures (images) on the screen, a few things have to be done first. A mesh, usually a rectangular polygon is used to describe the geometry for the texture mapping to be made on.
Texture mapping is the process of working out where in space the texture (image) will be applied. It is very simple to imagine it in 2D. To stick a poster on the wall, one needs to figure out where on the wall he will be gluing the corners of the paper.
The wall is the space, the paper is the mesh (rectangle), the image printed on the paper is the texture.
In a software application, the wall is the canvas (window), the paper is the rectangular mesh (consisting of 4 points – vertices) and the image is the texture.
#TextureRegion Most of the times the game has multiple drawable elements. To draw all the images at once onto the screen, each element needs to be turned into a texture. It sounds straight-forward but in reality it is very expensive on the GPU side as each texture needs to be uploaded to the GPU, before being drawn and bound so OpenGL will take the active one to map it. The texture binding and switching is very expensive.
TextureRegion solves this issue by cutting out a region from a texture and lets SpriteBatch work with it. This means that a single texture can be created for all the elements needed to be drawn and when drawing them, only the region corresponding to the element will be drawn. A texture that contains multiple elements (sprites) is also called a sprite sheet.
#Note The above definition of Texture and TextureRegion are taken from the libGdx document, they are related to OpenGL ES, since graphics eventually are displayed on screen via OpenGL ES library. but if you have not interest in OpenGL ES. This is a simple concepts of Texture and TextureRegion. Texture is one big image stored in file, while TextureRegion is part of the whole big images. The usage of TextureRegion mainly because of performance improvement. you don’t need to load image each time into memory when drawing ,instead of load one big image into memory once, later only draw part of the image as needed. But since the game engine use OpenGL ,which requires image(Texture) size to be POT (power of two). while textureRegion has no such constraint.
For example I have a sprite sheet of Mario have size of 282 (W) X 256 (H) ,in order to be used as a Texture for OpenGL ,I have to padding the sprite sheet as 512 X 256

You can divide this big Mario sprite sheet into small regions.
Before we start write code for Mario actors, let’s first look the following diagram of relations of Texture ,TextureRegion and related interface and classes. they are the building blocks for most of graphics used in game development:
 The four classes SVGImage , Pixmap ,Texture and TextureAtlas can load resources from file (Image Assets). Pixmap is a bridge between vector graphics (SVG image and dynamically vector graphics from Graphics2D). At the end of day, all images resource have to become a Texture Object before they can be used by OpenGL library. normally if you use Actor-Stage pattern (defined in scene page) ,you only need to use TextureRegion (some time Texture). the other classes only provided for convenient and performance purpose. TextureAtlas provides an efficient way to manage image resources, while SpriteBatch is a convenience class which makes drawing onto the screen extremely easy and it is also optimized. SpriteBatch can handle multiple drawable elements at once and optimises the work with the GPU and it queues up commands. Stage class internally uses SpriteBatch to improve graphics render performance. Most of time ,you don’t need to use it directly. We will cover TextureAtlas in later blogs.
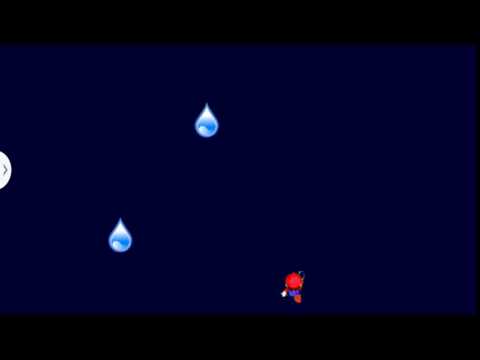
Now we add a Mario Actor to the rainDrop game (ask Mario to catch the raindrop :-)).
To make Mario walk ,we can use Animation class ,An animation consists of multiple frames which are shown in a sequence at set intervals. The mario sprite sheet include four directions for Mario, frame sequence for moving forward ,moving left, moving right and moving backward. with the reference of Bucket class and use Animation class, we define Mario as following:
package com.mapdigit.game.tutorial.drop.actor;

import com.guidebee.game.GameEngine;
import com.guidebee.game.Input;
import com.guidebee.game.graphics.Animation;
import com.guidebee.game.graphics.Texture;
import com.guidebee.game.graphics.TextureRegion;
import com.guidebee.game.scene.Actor;
import com.guidebee.math.Vector3;
import com.guidebee.utils.collections.Array;

import static com.guidebee.game.GameEngine.assetManager;
import static com.guidebee.game.GameEngine.graphics;
import static com.guidebee.game.GameEngine.input;


public class Mario extends Actor {

    private final Animation forwardAnimation;
    private final Animation backwardAnimation;
    private final Animation leftAnimation;
    private final Animation rightAnimation;
    private final Texture marioTexture;

    private final int SPRITE_HEIGHT=64;
    private final int SPRITE_WIDTH=47;
    private final int SPRITE_FRAME_SIZE=6;
    private float elapsedTime = 0;

    public Mario() {
        super("Mario");
        marioTexture=assetManager.get("mario2.png",Texture.class);
        Array<TextureRegion> keyFramesForward=new Array<TextureRegion>();
        Array<TextureRegion> keyFramesRight=new Array<TextureRegion>();
        Array<TextureRegion> keyFramesBackward=new Array<TextureRegion>();
        Array<TextureRegion> keyFramesLeft=new Array<TextureRegion>();
        int i=0;
        for(int j=0;j<SPRITE_FRAME_SIZE;j++){
            TextureRegion textureRegion=new TextureRegion(marioTexture,
                    j*SPRITE_WIDTH,
                    i*SPRITE_HEIGHT,
                    SPRITE_WIDTH,SPRITE_HEIGHT );
            keyFramesForward.add(textureRegion);

        }
        i++;
        for(int j=0;j<SPRITE_FRAME_SIZE;j++){
            TextureRegion textureRegion=new TextureRegion(marioTexture,
                    j*SPRITE_WIDTH,i*SPRITE_HEIGHT,
                    SPRITE_WIDTH,SPRITE_HEIGHT );
            keyFramesRight.add(textureRegion);

        }
        i++;
        for(int j=0;j<SPRITE_FRAME_SIZE;j++){
            TextureRegion textureRegion=new TextureRegion(marioTexture,
                    j*SPRITE_WIDTH,i*SPRITE_HEIGHT,
                    SPRITE_WIDTH,SPRITE_HEIGHT );
            keyFramesBackward.add(textureRegion);

        }
        i++;
        for(int j=0;j<SPRITE_FRAME_SIZE;j++){
            TextureRegion textureRegion=new TextureRegion(marioTexture
                    ,j*SPRITE_WIDTH,i*SPRITE_HEIGHT,
                    SPRITE_WIDTH,SPRITE_HEIGHT );
            keyFramesLeft.add(textureRegion);

        }

        forwardAnimation=new Animation(0.1f,keyFramesForward);
        backwardAnimation=new Animation(0.1f,keyFramesBackward);
        rightAnimation=new Animation(0.1f,keyFramesRight);
        leftAnimation=new Animation(0.1f,keyFramesLeft);
        setTextureRegion(leftAnimation.getKeyFrame(0));
        setPosition(800/2-64/2,20);


    }


    @Override
    public void act(float delta){
        elapsedTime += GameEngine.graphics.getDeltaTime();
        setTextureRegion(forwardAnimation.getKeyFrame(elapsedTime,true));
        if(input.isTouched()){
            Vector3 touchPos=new Vector3();
            touchPos.set(input.getX(),input.getY(),0);
            getStage().getCamera().unproject(touchPos);
            setX(touchPos.x-64/2);
        }
        if(input.isKeyPressed(Input.Keys.LEFT)){

            setTextureRegion(leftAnimation.getKeyFrame(elapsedTime,true));
            setX(getX() - 200 * graphics.getDeltaTime());
        }
        if(input.isKeyPressed(Input.Keys.RIGHT)){

            setTextureRegion(rightAnimation.getKeyFrame(elapsedTime,true));
            setX(getX() + 200*graphics.getDeltaTime());
        }
        if(getX()<0)  setX(0);
        if(getX() > 800- 64) setX(800-64);
    }
}