Master Play - Gerfunky/TinyPixelMapper GitHub Wiki
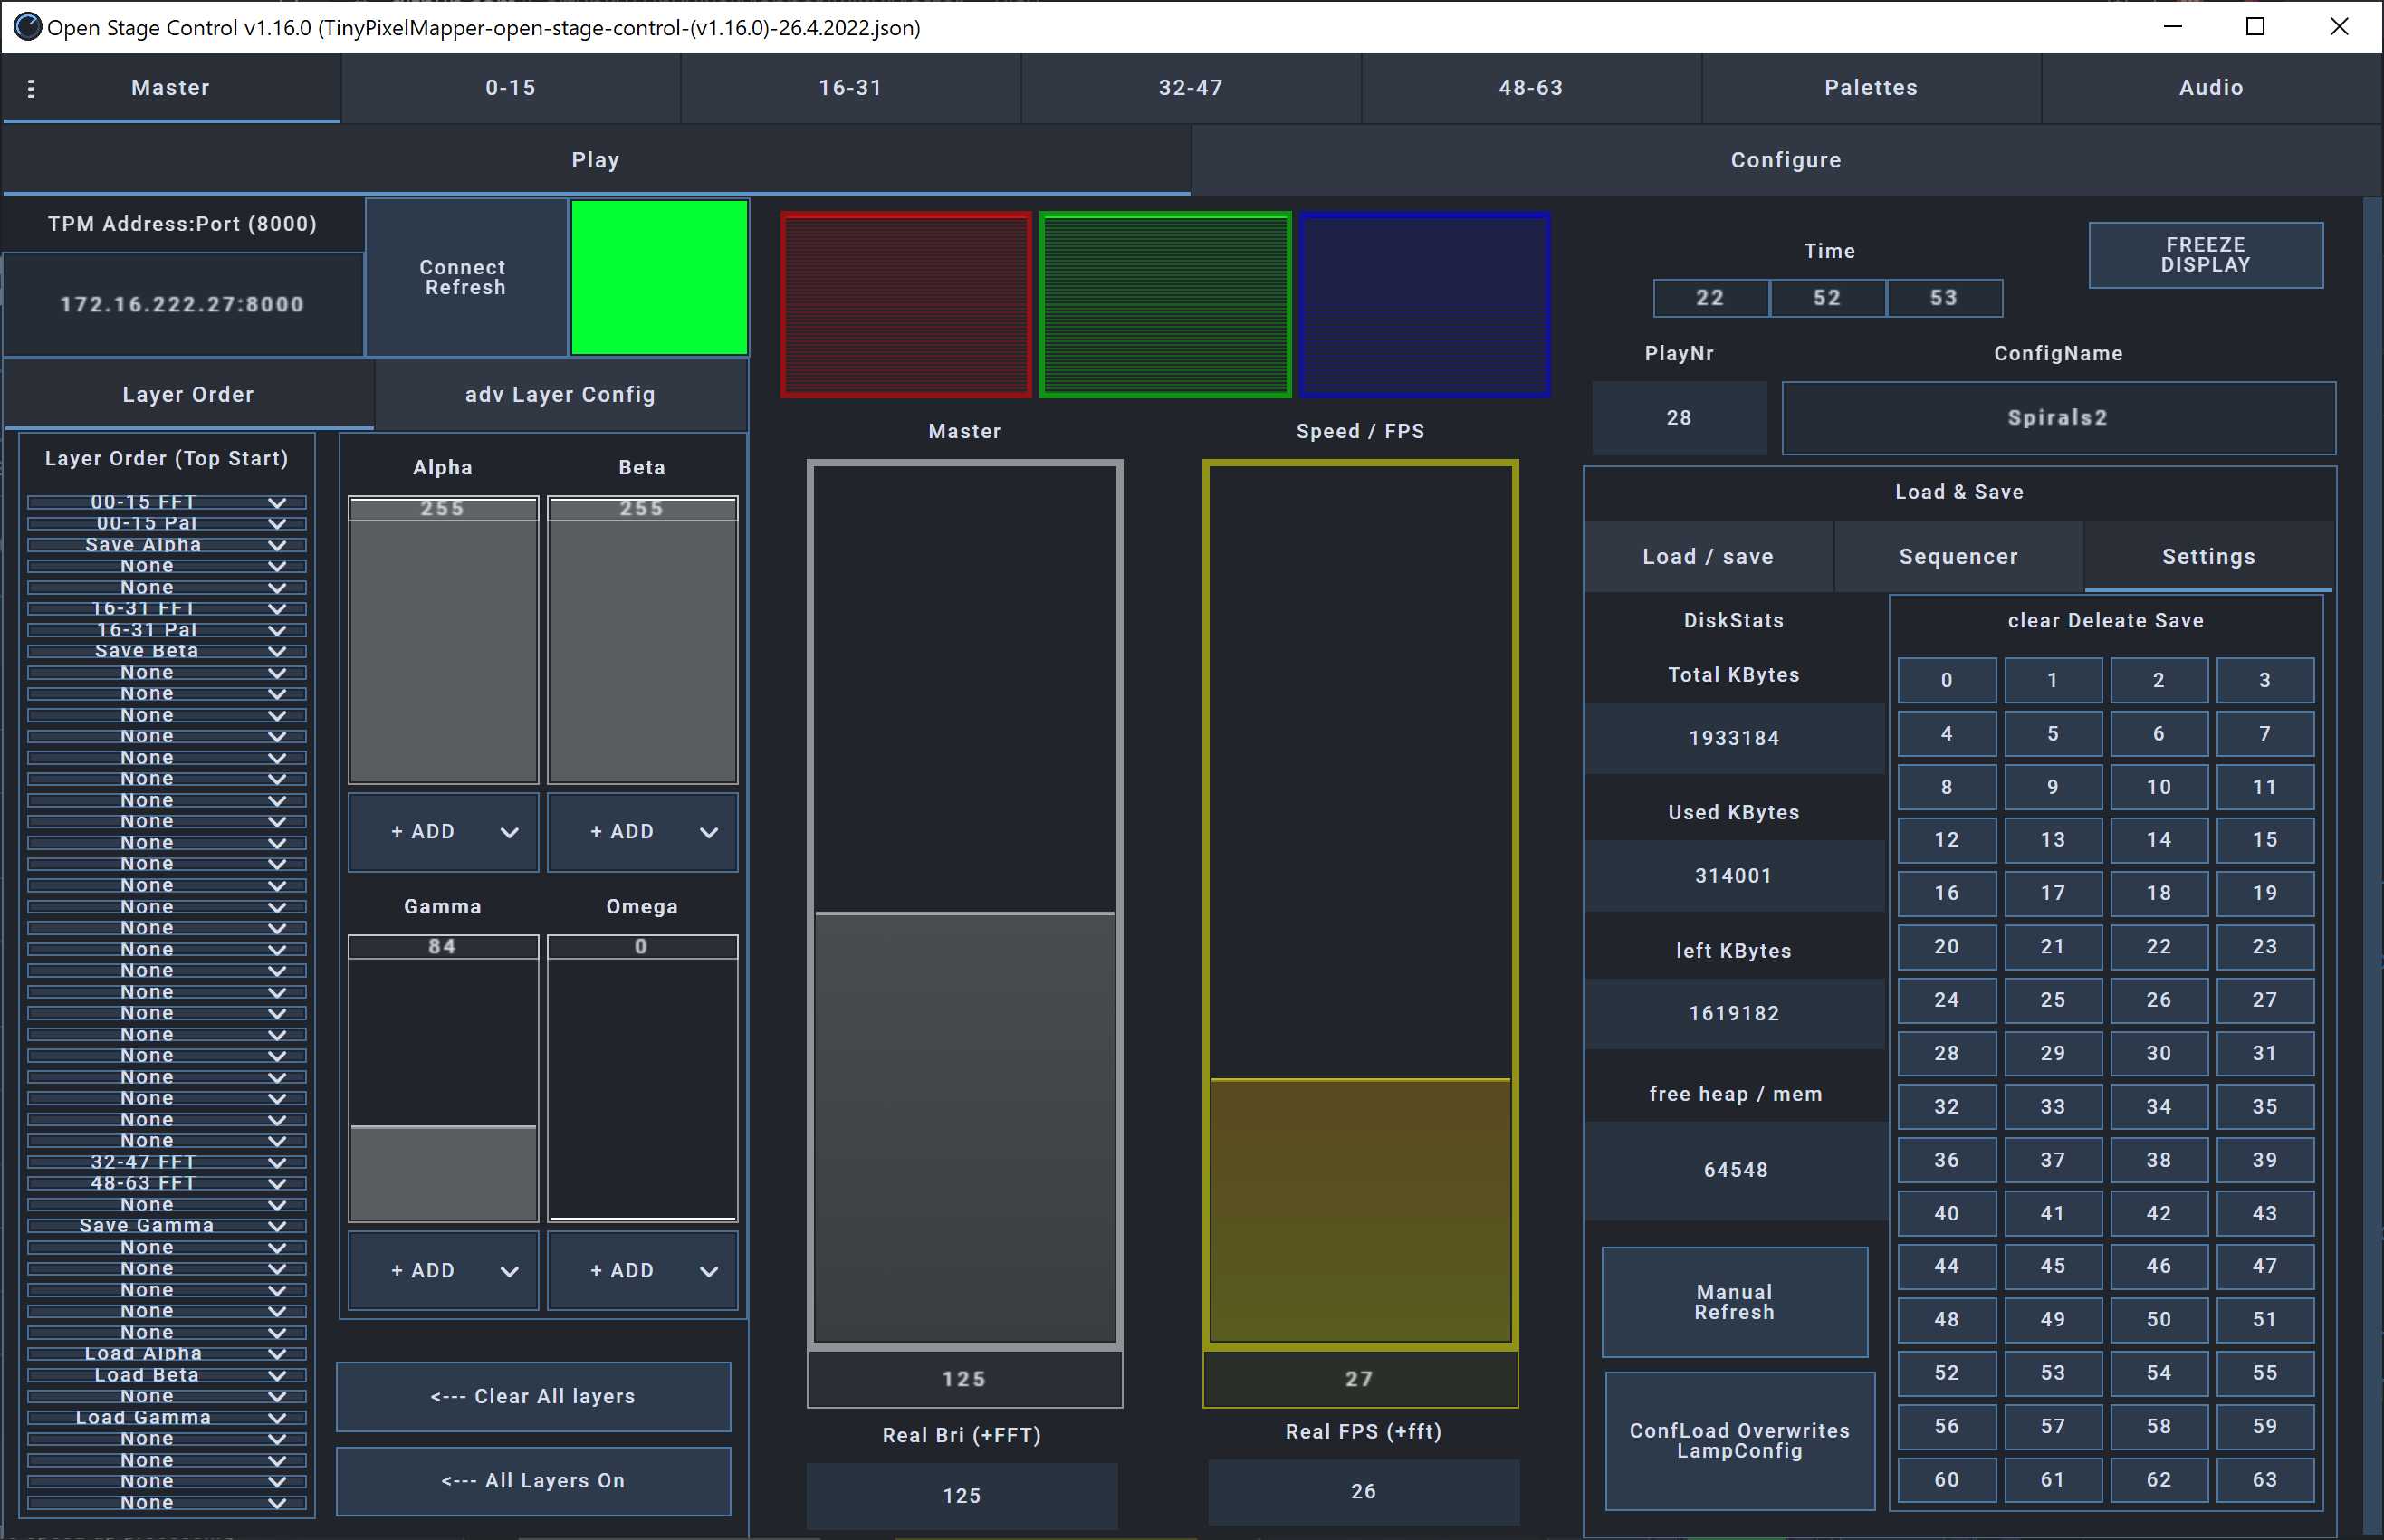
Very Important
The system dos not send out data without requesting it. When you load a config or press Connect/Refresh on the Main Page it will by default send you all Settings. Watch the LED when it goes green the sending is done. We send the data between led output so that the leds dont freeze. Almost All Refesh buttons are Invisible in Auto Refresh mode.
TMP ADDRESS: PORT(800)
Enter the IP address of the TinyPixelMapper you want to connect to followed by :8000 (172.16.222.21:8000) This can frezze the Program for some time since it need to change the Taget on a lot of objects. After you enter a new setting it will be stored so that it loads it correctly the next time.
Led
The Led Flashes Redish while the TPM is sending. Once It goes green the TPM is finished.
Connect/Refresh
This by Default Loads all settings from the TPM. Wait for the Led to go Green before changing Stuff.
Manual Refresh
You can switch back to Manual refresh. In the Settings Tab in the Load/Save Panel. ( Manual Refresh toggle )
To get the newest information when manually refreshing (Top Right next to the Led) on any page you need to press the REFRESH Button! When loading a config dont forget to Refresh on the TABs in the system or you wont see the new data and work with old settings!
Layers
Layer Order Tab
This selects in what order to play the different layers starting from the top moving down. You need to add the correct layer or it will not output anything! And It will Only Save Active Layers. There are 4 Save Layers (Alpha, Beta, Gamma, Omega), This means you can build a MIX of layers and then save it to an Array. You can then Load the Array at a lower position and decide how you want to mix it onto the LED output. For example a mix of different Black/White Paletts to subtract from an FFT data.
These 4 Sliders are also Visible in the Minimal Phone Version. So you can play with them if the Patterns uses them.
ADV Layer Config Tab
Here you can limit the Save layers to certain regions of the LED array. This speeds up processing. Only the Selected Leds will be Blacked out after the Save to Layer.
Levels
Red/Green/Blue
Here you can configure how much of the 3 Primary colors you want to allow on the Output.
Master
This is the Master Brightness. It can be automated by Audio data. Audio data will allways add to the value you have set.
Speed/FPS
This selects the Number of Frames Pers Second(FPS). Below the slider it will show the actual FPS. IF there are to many leds on a line that the output takes to long it will slow down the system. Same if there are to many layers to calculate it can slow down the system. Please note to press REFRESH to get the newest information. It can be automated by Audio data. Audio data will allways add to the value you have set.
Most Effects run with FPS. Dots dont they have a BPM counter so changing the FPS wont make the dot move faster.
Configname Field
Here you can see the name of the Current configuration that is running. And you can also set the name by editing it and then saving the config to a Save Slot.
PlayNr Field
Here you can see the Last Save Or load you did. And what SaveNr is currently Playing.
LOAD/SAVE
Here you can load/save your Settings/Patterns. With the release of the SD card version there are now 64 Save/Load Buttons. And Unlimited Custom Saves. On boot it will allways load configuration That is set in "LED CONFIG" by default. When Loading or Saving the display will fade to black and then load the config and fade back in. Deppending on the size of the configuration it can take a few seconds to load. Only Strips that have a "Nr of LEDS" configured, And the Layer Selected will be saved to the file. So to speed up loading set the "Nr of Leds" for unused strips to 0.
LOAD NAMES Button
This will load the names in the Configuration file. Led output can be interupted by pressing this button till the load finishes.
Load & Save Sequencer Tab
Here you can select what configs should play and for how long. To enable the Sequencer select enable for your desired confgurations, Set the Time in the MIN field for how long that config should play. and then Hit the "Sequencer On" button. Dont forget to click "SAVE". This will make it start in sequencer mode on every boot until you disable and save again.
Load & Save Settings TAB
Here you can clear/delete unwanted configs. You can also see the used and left over space on the SPIFFS/SD and the Free HEAP/Memory
Manual Refresh Toggle
If enabled You need to manualy Refresh the Pages. If disabled When Loading a config it sends all settings. During Sending the Led Flickers Redish. When the Led Turn Green the Send is over.
ConfLoad overrides LampConfig Toggle
When a pattern is saved the Whole led Setup is saved Along with it. When this button is enabled it will override the Lamp Config Set in Led Configuration and use the Values from the SaveFile insted.
Freeze Display Button
This button freezes the display no data is sent out to the leds. In the background the Tinypixelmapper is still calculating everything and moving forward in the animation! We use this for taking pictures.
Clock time
Here you can check what the Tinypixelmapper has set as the current time. Usefull when using checking the Clock FX. You can set the Time over these fields for example if you are using Access Point mode where there is no connection to the internet so we cant use NTP in this case. In the Network settings you can set an NTP sever.