BlitzWolf SHP2 - FengtianGu/Sonoff-Tasmota GitHub Wiki
- Product Page: https://www.blitzwolf.com/Wifi-Smart-Socket-EU-p-244.html or sold under this brand gosund-sp1
OTA install
Since SHP2 is one of those Tuya based devices this OTA Tasmota installation method works just fine: https://github.com/ct-Open-Source/tuya-convert
The Tuya-convert has a built in Tasmota v6.5.0 basic(but you can define any firmware during the install), remember, that basic version doesn't come with homeassistant auto discovery support, but Tasmota OTA works as expected.
This method does't need any wiring.
Serial Connection
Please see the Hardware Preparation page for general instructions.
Step 1.
Be sure it is NOT plugged in!
Remove the 4 triangle screws. Triangular 2.3mm Screwdriver required (a Torx T6 works well too)!

Step 2.
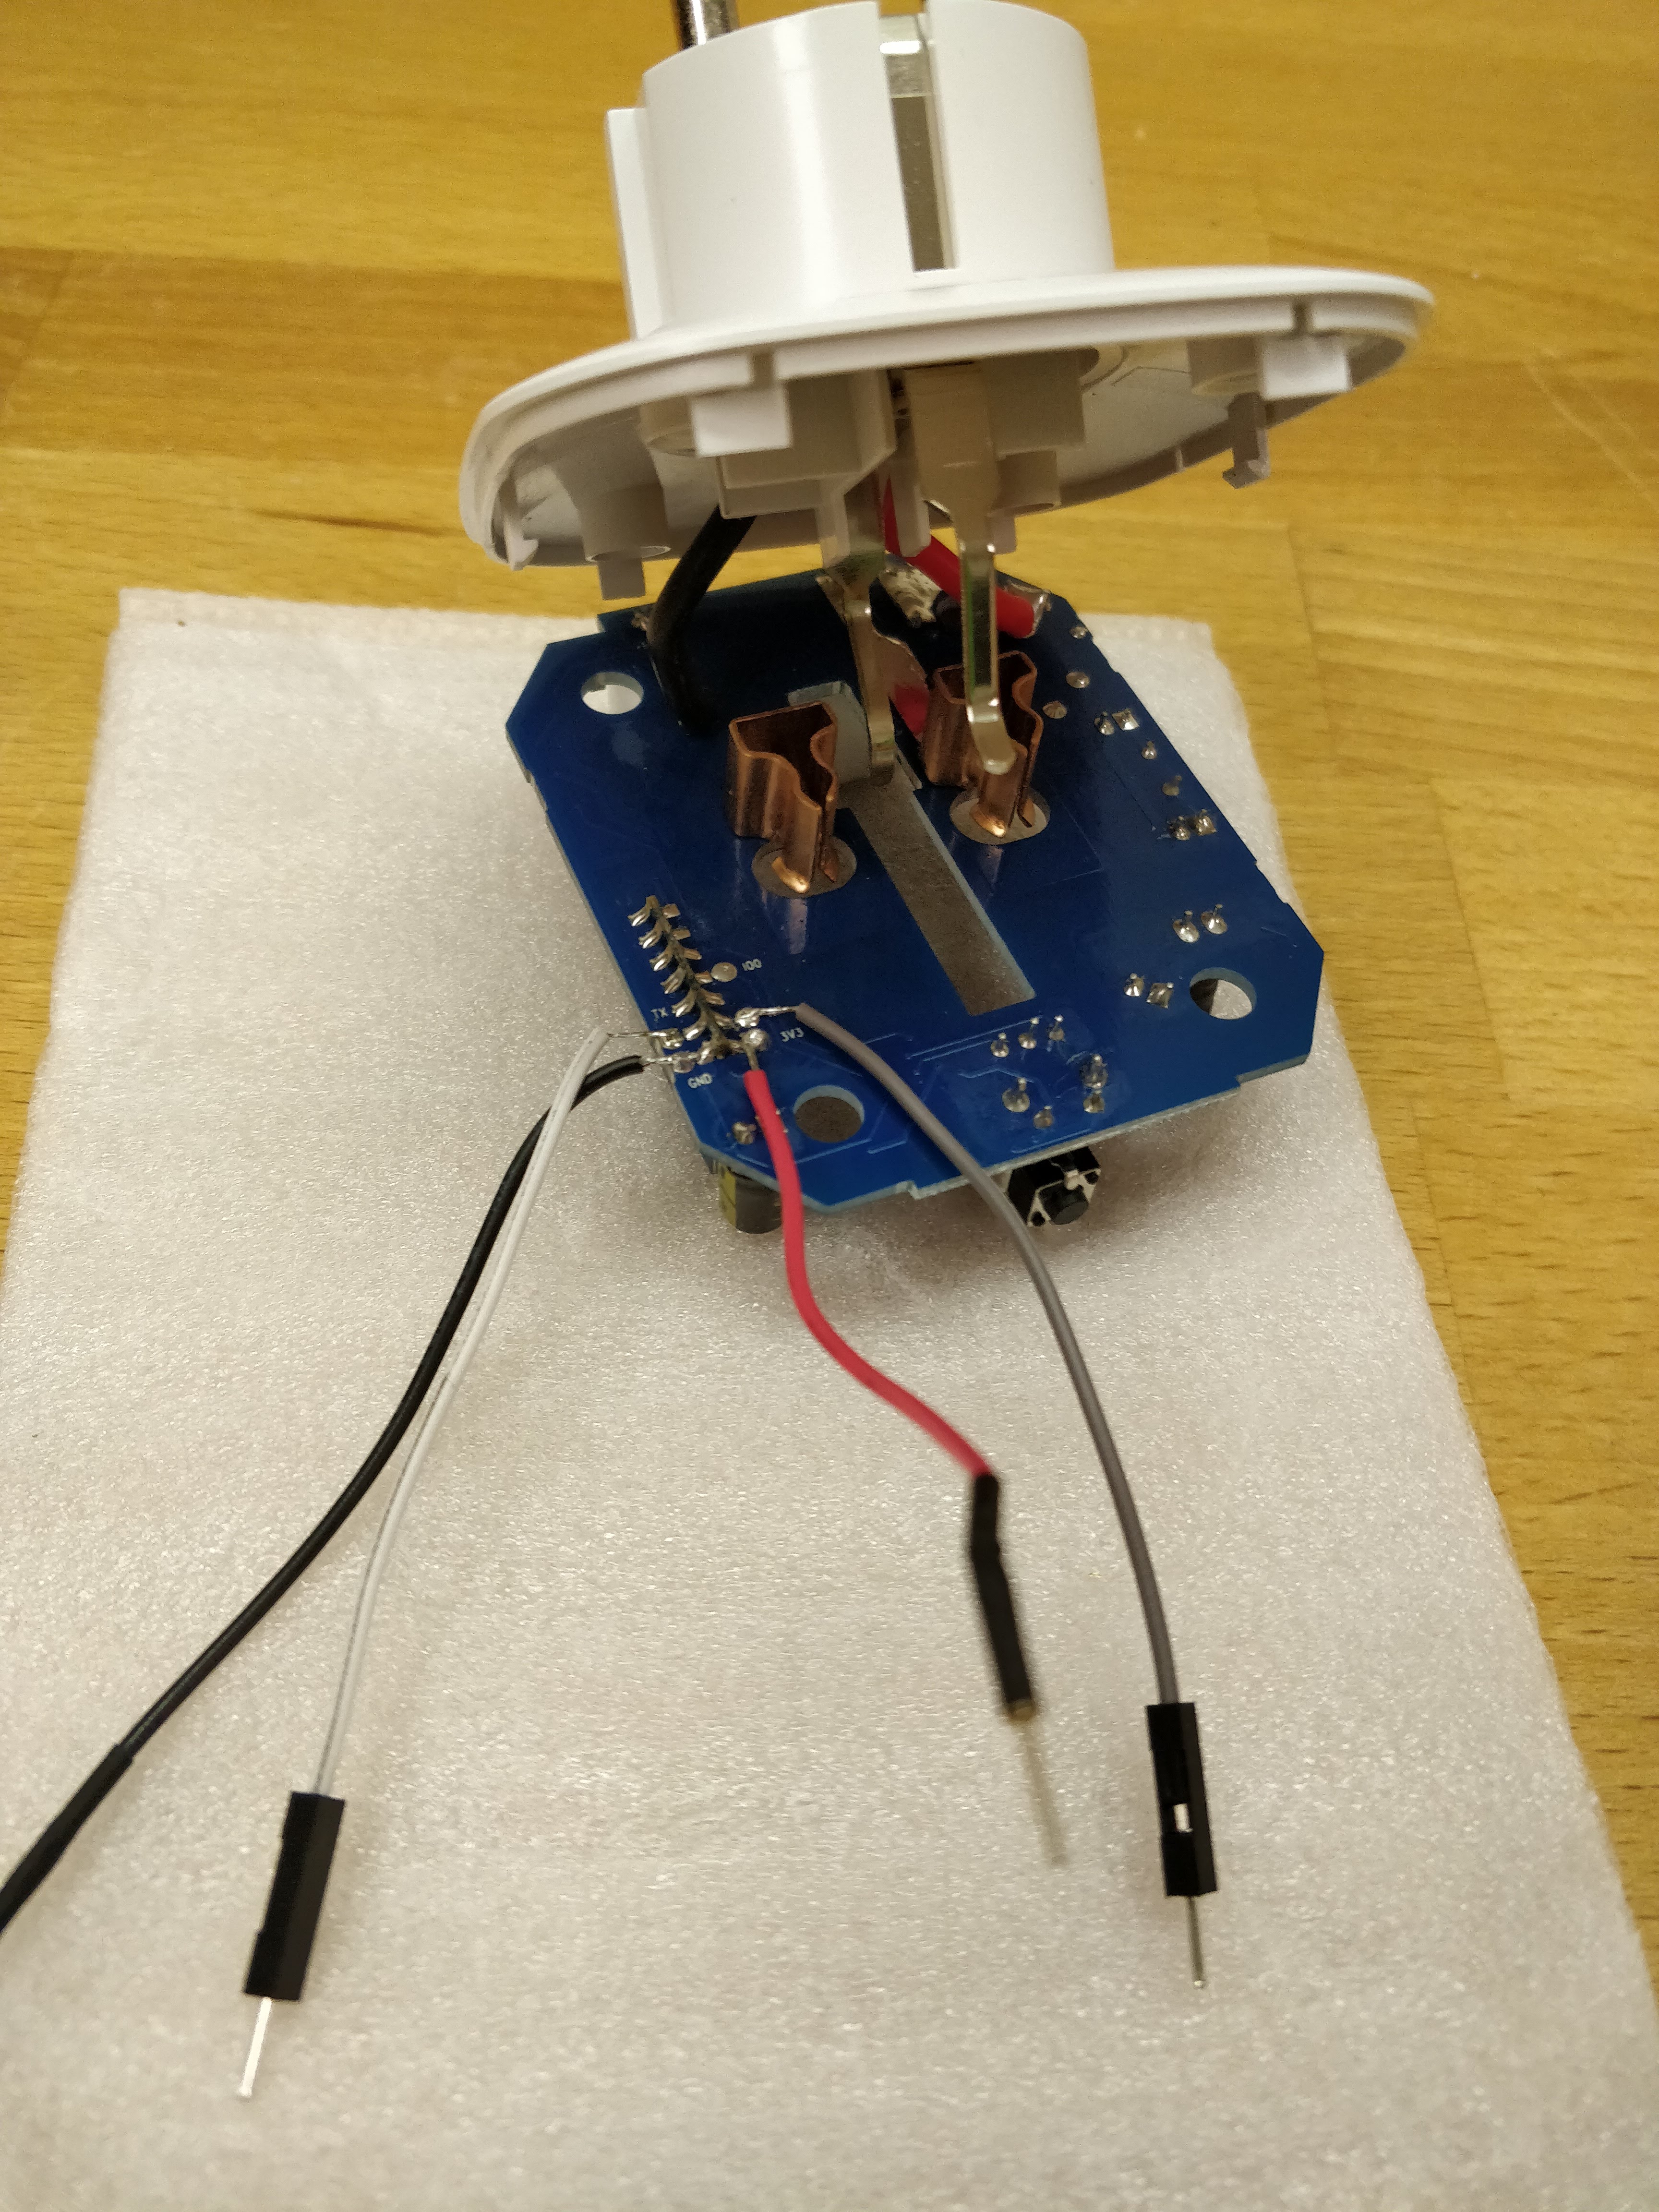
Solder cables to the ESP Pins


Step 3.
Connect serial adapter and make a shortwire between Pin IO0 and GND during startup.
(For entering flashmode)
RX and TX must be crossed.

Step 4.
Flash Tasmota
OpenHab configuration
sonoff.items:
Switch BlitzwoIFSHP2 "Switch"  { mqtt=">[broker:cmnd/BlitzwoIFSHP2/POWER:command:*:default],<[broker:stat/BlitzwoIFSHP2/POWER:state:default]" }
Number Power_Total "Total: [%.3f kWh]"  { mqtt="<[broker:tele/BlitzwoIFSHP2/SENSOR:state:JSONPATH($.ENERGY.Total)]" }
Number Power_Today "Today: [%.3f kWh]"  { mqtt="<[broker:tele/BlitzwoIFSHP2/SENSOR:state:JSONPATH($.ENERGY.Today)]" }
Number Power_Yesterday "Yesterday: [%.3f kWh]"  { mqtt="<[broker:tele/BlitzwoIFSHP2/SENSOR:state:JSONPATH($.ENERGY.Yesterday)]" }
Number Power "Power: [%.1f Watt]"  { mqtt="<[broker:tele/BlitzwoIFSHP2/SENSOR:state:JSONPATH($.ENERGY.Power)]" }
Number Voltage "Voltage: [%.0f V]"  { mqtt="<[broker:tele/BlitzwoIFSHP2/SENSOR:state:JSONPATH($.ENERGY.Voltage)]" }
Number Current "Current: [%.3f A]"  { mqtt="<[broker:tele/BlitzwoIFSHP2/SENSOR:state:JSONPATH($.ENERGY.Current)]" }
Number Factor "Factor: [%.2f]"  { mqtt="<[broker:tele/BlitzwoIFSHP2/SENSOR:state:JSONPATH($.ENERGY.Factor)]" }
default.sitemap:
Switch item=BlitzwoIFSHP2 label="BlitzWoIF SHP2" icon="socket" mappings=[OFF="Off",ON="On"]
Text item=Power label="Power: [%.1f Watt]" icon="energy"
Text item=Voltage label="Voltage: [%.0f V]" icon="energy"
Text item=Current label="Current: [%.3f A]" icon="energy"
Text item=Factor label="Factor: [%.2f]" icon="energy"
Text item=Power_Total label="Power Total: [%.3f kWh]" icon="energy"
Text item=Power_Today label="Power Today: [%.3f kWh]" icon="energy"
Text item=Power_Yesterday label="Power Yesterday: [%.3f kWh]" icon="energy"
Home Assistant configuration
configuration.yaml
switch:
  - platform: mqtt
    name: "Blitzwolf"
    state_topic: "stat/blitzwolf/POWER"
    command_topic: "cmnd/blitzwolf/POWER"
    payload_on: "ON"
    payload_off: "OFF"
    retain: false

sensor:
  - platform: mqtt
    name: "Blitzwolf Energy Today"
    state_topic: "tele/blitzwolf/SENSOR"
    value_template: '{{ value_json["ENERGY"]["Today"] }}'
    unit_of_measurement: "kWh"
  - platform: mqtt
    name: "Blitzwolf Energy Yesterday"
    state_topic: "tele/blitzwolf/SENSOR"
    value_template: '{{ value_json["ENERGY"]["Yesterday"] }}'
    unit_of_measurement: "kWh"
  - platform: mqtt
    name: "Blitzwolf Energy Total"
    state_topic: "tele/blitzwolf/SENSOR"
    value_template: '{{ value_json["ENERGY"]["Total"] }}'
    unit_of_measurement: "kWh"
  - platform: mqtt
    name: "Blitzwolf Power"
    state_topic: "tele/blitzwolf/SENSOR"
    value_template: '{{ value_json["ENERGY"]["Power"] }}'
    unit_of_measurement: "W"
  - platform: mqtt
    name: "Blitzwolf Voltage"
    state_topic: "tele/blitzwolf/SENSOR"
    value_template: '{{ value_json["ENERGY"]["Voltage"] }}'
    unit_of_measurement: "V"
  - platform: mqtt
    name: "Blitzwolf Power Factor"
    state_topic: "tele/blitzwolf/SENSOR"
    value_template: '{{ value_json["ENERGY"]["Factor"] }}'
Attention
There is a newer hardware revision (v2.3) which is supported too. Use latest release. See also https://github.com/arendst/Sonoff-Tasmota/wiki/Gosund-SP1