Use FATE Client to Build Jobs in Jupyter Notebook - FederatedAI/KubeFATE GitHub Wiki
Overview
The FATE project, an open-source federated learning framework, has released the v1.5 version recently. As a long-term support version (LTS), it highly improved performance and stability from previous versions. It is recommended that users update FATE to this version.
FATE v1.5 includes two important changes: one is support for Spark as the underlying computing engine; the other is to provide development tool, "fate_client", which simplifies the interactions between users and FATE clusters . This document will focus on the use of "fate_client" within Jupyter Notebook. Users who are interested in using Spark as the underlying computing engine can follow this series of documents, where we will introduce its architecture and usage in the future.
Preparing the Jupyter Notebook Environment
For users who use KubeFATE to deploy a cluster, they will find a container named "client" when listing containers through the docker or kubectl commands. The container is a Jupyter Notebook service and has an integrated "fate_client", so users can, after opening Notebook, directly use the corresponding package to interact with the FATE cluster.
The way to access Notebook service varies depending on the deployment mode, with details as follows:
-
Docker-compose deployment: access port 20000 of deployment node, such as 192.168.0.1:20000.
-
Kubernetes deployment: access by domain name, such as accessing the Notebook of party 9999 by "9999.notebook.example.com". For detailed domain name settings, refer to "optional-add-kubefatenet-to-host-file".
For users who have not used KubeFATE to deploy the cluster, they also need to enable the Jupyter Notebook service and install "fate_client" through pip. Assuming that a user already has a python 3.7 environment, the steps are as follows:
$ pip install notebook fate-client
$ jupyter notebook --ip=0.0.0.0 --port=20000 --allow-root --debug --no-browser --NotebookApp.token='' --NotebookApp.password=''
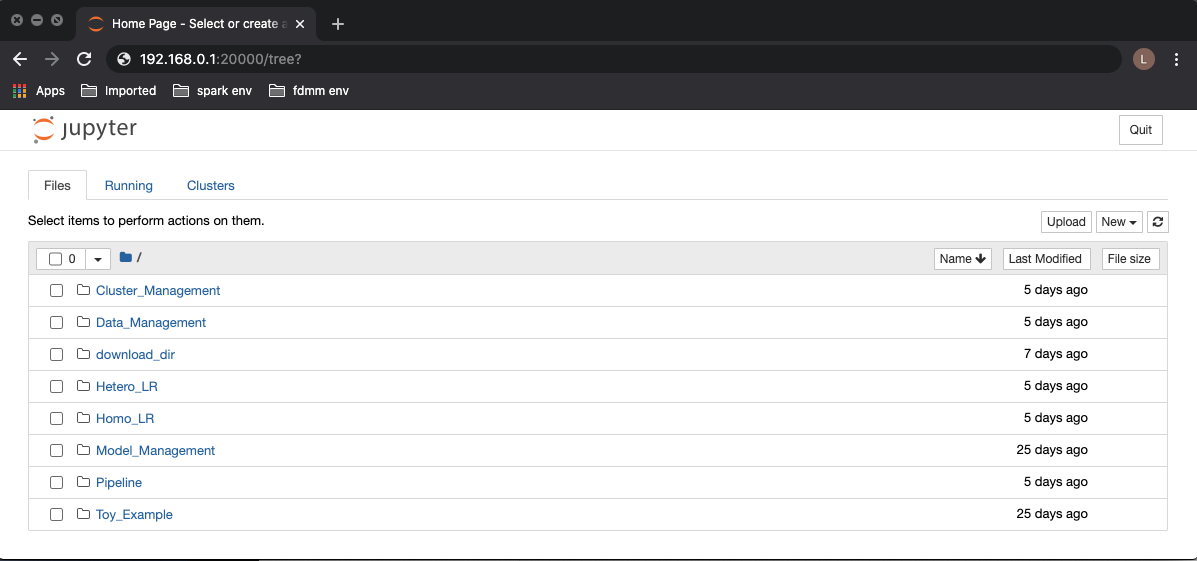
The second command above will start the Jupyter Notebook service and listen port 20000. After the service is enabled, the user can access Notebook by "IP: Port". The figure below shows how to access Notebook service via a browser.
Jupyter Notebook deployed by KubeFATE comes with some examples, which are used to interact with the FATE cluster through fml_manager. As fml_manager will soon be integrated into fate_client, we will not discuss this further in this document.
Introduction to FATE Client
At present, fate_client has been packaged and uploaded to PyPI, so it can be installed directly through pip install.
In terms of code, it is mainly divided into the following three parts:
flow_sdk
This is an encapsulation of HTTP API provided by fate_flow, so it supports corresponding operations for the data structures commonly used in FATE such as job, component, etc. A user can import it into code to interact with the FATE cluster. Here is an example of submitting a training job through flow_sdk:
from flow_sdk.client import FlowClient
client = FlowClient('127.0.0.1', 9380, 'v1')
client.job.submit(conf_path, dsl_path)
In the above Python code, the connection to fate_flow is initialized through FlowClient('127.0.0.1', 9380, 'v1').
job.submit is then called to submit the job, and the job's configuration and DSL files are specified by conf_path and dsl_path respectively. For more operations supported by flow_sdk, refer to "flow_sdk/README.rst".
flow_client
This module is an encapsulation based on fate_sdk, enabling interaction with FATE clusters directly through the command line.
flow_client needs to be initialized during its first execution, and the address of fate_flow needs to be specified using the following command:
$ flow init --ip 127.0.0.1 --port 9380
It only needs to be initialized once. After initialization, jobs can be submitted as the following example:
$ flow job submit -c fate_flow/examples/test_hetero_lr_job_conf.json -d fate_flow/examples/test_hetero_lr_job_dsl.json
For more commands supported by flow_client, refer to "flow_client/README.rst".
pipeline
This module is also an encapsulation based on fate_sdk, and its core function is to package all algorithms supported by FATE into Python classes. Previously, job processes can only be defined by json files, but now with the pipeline module, they can be defined through code in a more concise and convenient manner.
pipeline will eventually submit the job to the FATE cluster for execution through flow_sdk, so it also needs to be initialized in order to pass the address of fate_flow to flow_sdk. An example of initialization is given below:
$ flow init --ip 127.0.0.1 --port 9380 -d ./log
In which, -d specifies the path to the output log.
For specific examples of using Pipeline to build jobs, refer to the next section. For more details about pipeline, refer to "pipeline/README.rst".
Define and Submit Jobs in Notebook
Next, we will use an example to elaborate how to define and execute jobs through "Pipeline". Users can download the "usage_of_fate_client.ipynb" and try by themselves.
Notebook is modified from "pipeline-mini-demo.py" of FATE.
In this example, the original dataset "breast_cancer" is split by column into two parts: "breast_hetero_guest" and "breast_hetero_host". The host involved in training holds an unlabeled "breast_hetero_host", and the guest holds a labeled "breast_hetero_guest". Then the guest and host will work together to make heterogeneous logistic regression training of the dataset, and finally, when completing the training, they will use a model to execute the inference job offline.
For simplicity, only one FATE cluster appears in the Notebook example and takes on the roles of both guest and host concurrently, but in real applications, these two roles should be taken up by different FATE clusters.
For users who do not use KubeFATE to deploy the cluster, they need to follow the previous section to initialize "Pipeline", while those who use KubeFATE can access Notebook directly. For convenience, the Notebook service accessed below is deployed by KubeFATE, with a party_id of 10000.
The logs of each subsequent execution will be output to the Pipeline/logs directory for users to easily view them through Notebook.
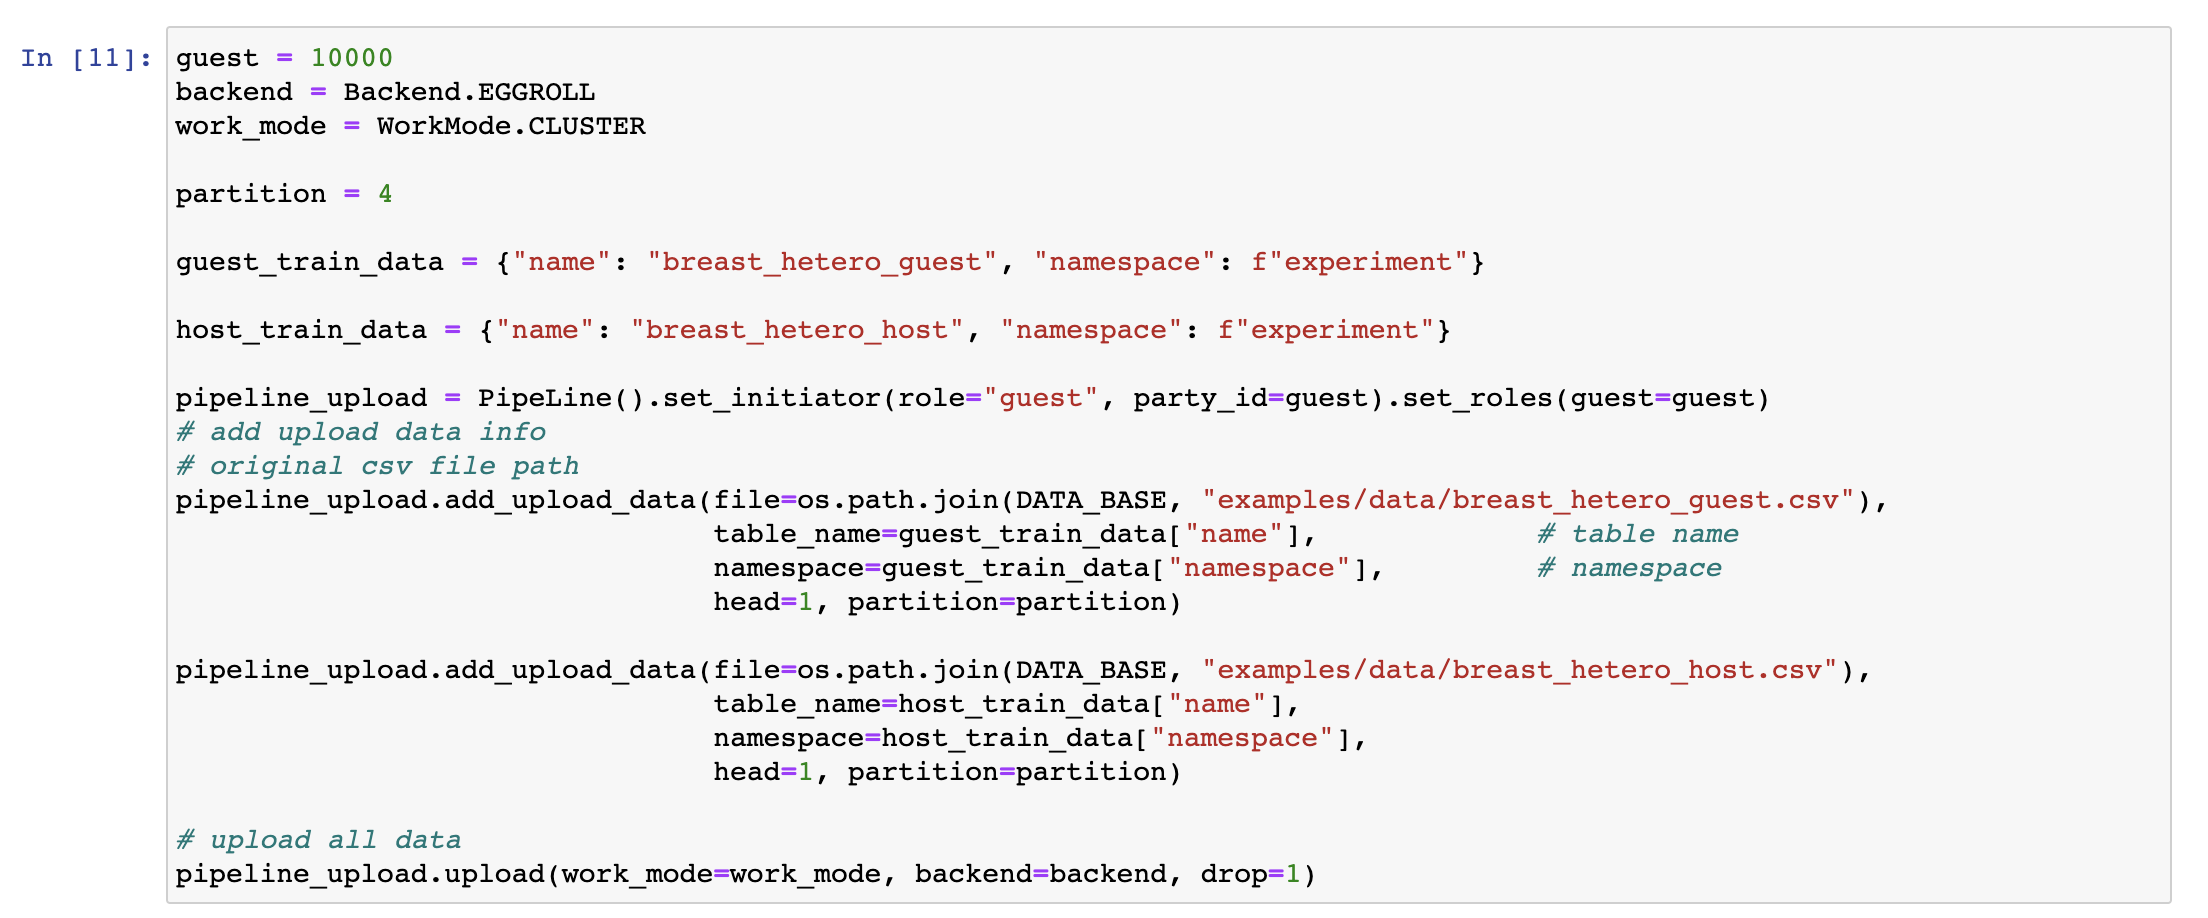
Upload Data
To execute a training job in FATE, a user needs to upload the original dataset to the cluster and specify ("namespace", "name") as its unique identifier in the system. In the following code, two datasets guest_train_data and host_train_data are defined, and the original data "breast_hetero_guest.csv" and "breast_hetero_host.csv" are respectively uploaded to the corresponding datasets.
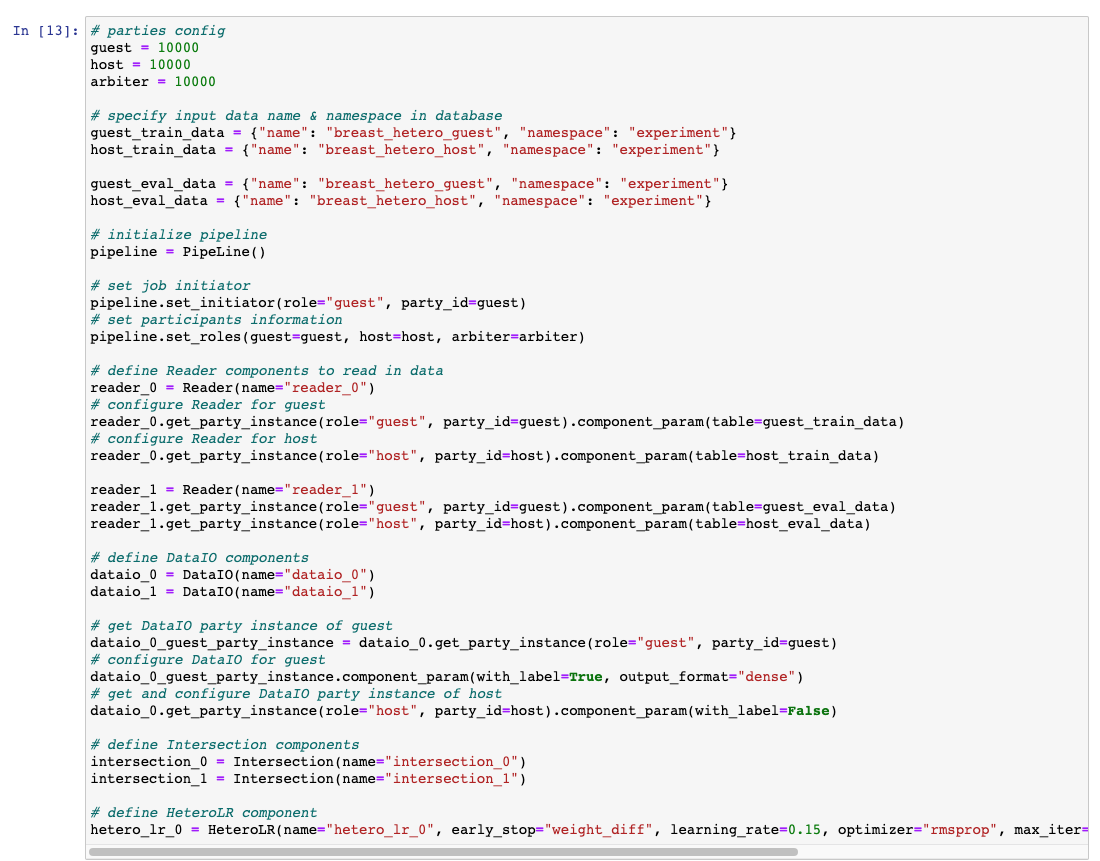
Define Training Components
In the following code, guest_train_data, host_train_data, guest_eval_data, and host_eval_data are used to specify the data to be used by the job. After the job pipeline is initialized through PipeLine(), set_initiator and set_roles are used to set the information related to the guest and the host. Finally, Reader, DataIO, Intersection and HeteroLR are defined, in which reader_0 and reader_1 are used to read the training and verification data respectively; dataio_0 and dataio_1 are used to convert the read data into the format that can be used by subsequent components; intersection_0 and intersection_1 are used to find intersections between the training dataset and verification dataset respectively; hetero_lr_0 is used to define the specific parameters of the heterogeneous logistic regression algorithm.
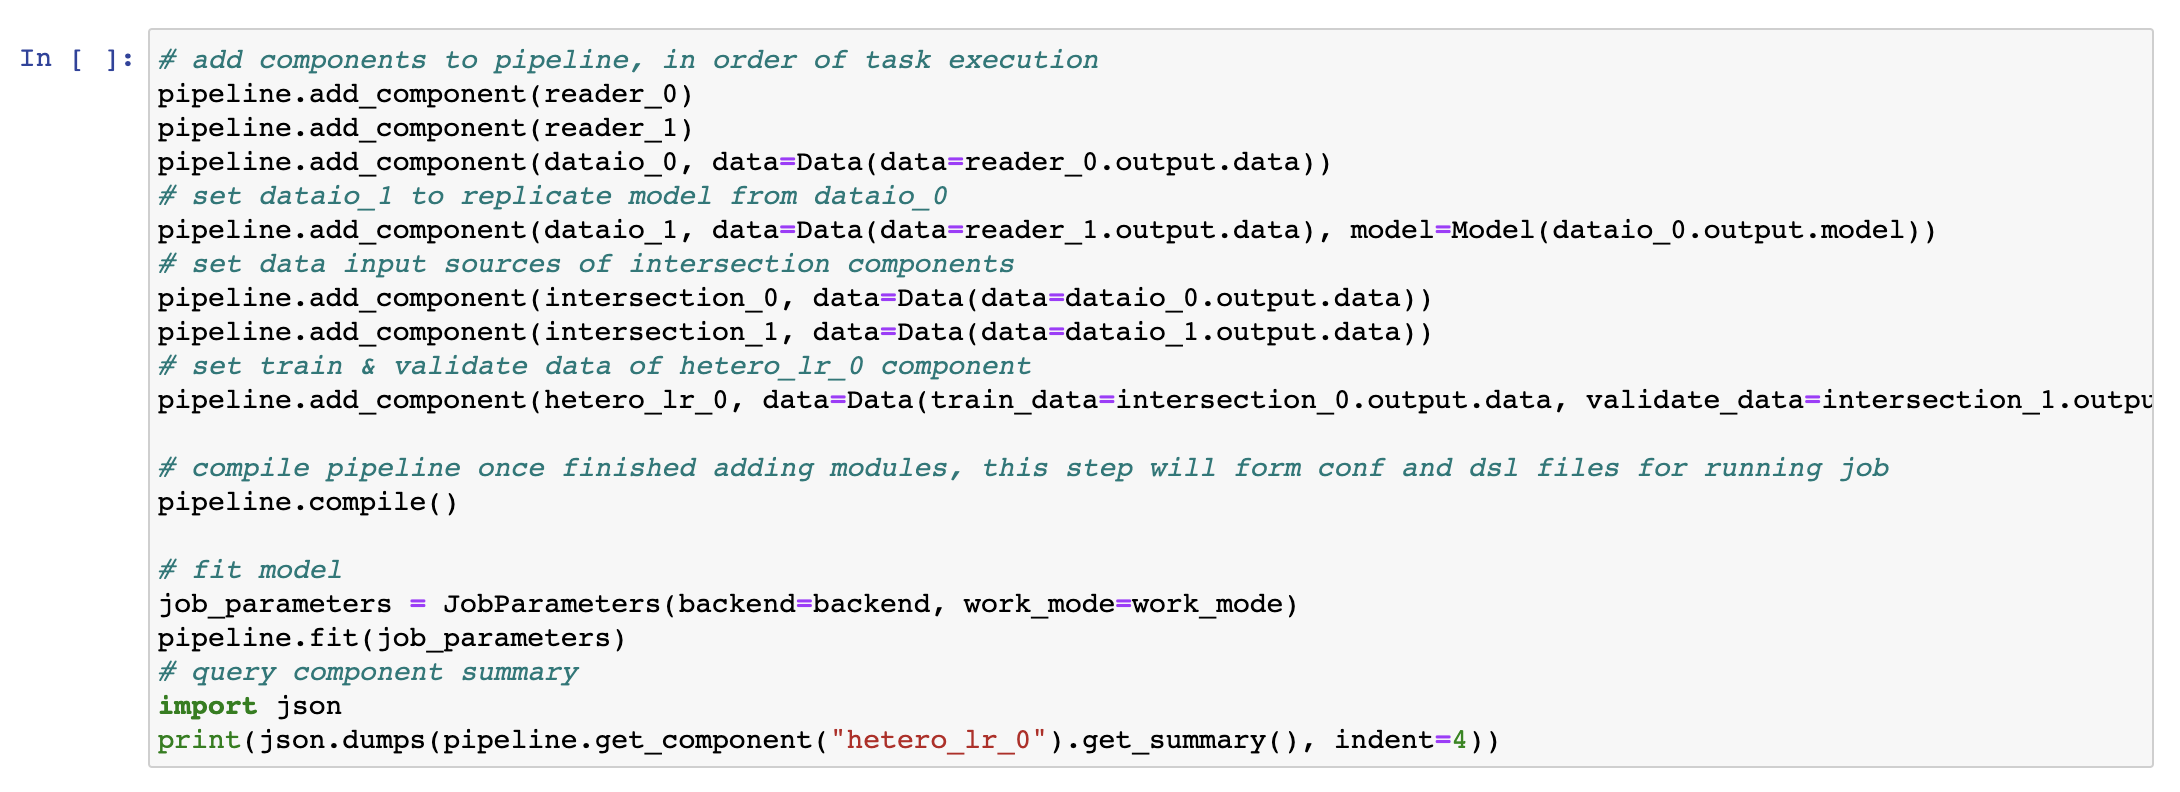
Build and Execute Training Process
The code segment first adds the components defined in the previous step to the pipeline of the job by calling add_component(), with the calling sequence consistent with the execution sequence of the components. Then it uses compile() to verify and compile the pipeline, and uses job_parameters to specify the job's computing engine, working mode and other parameters, and finally calls fit to submit and run the job.
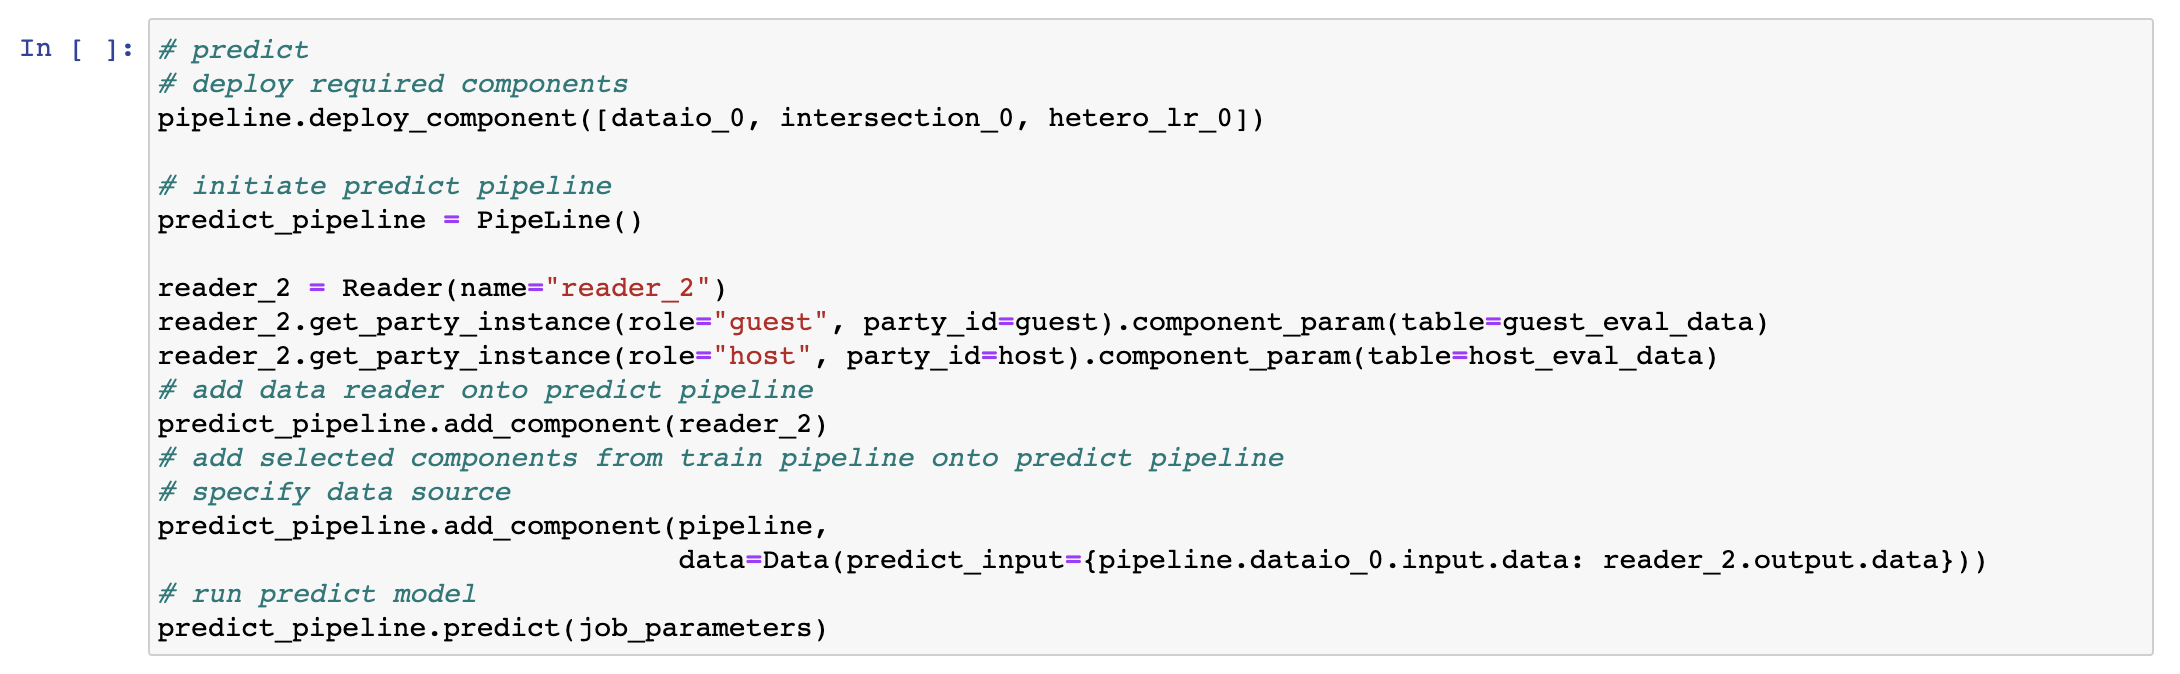
Define and Execute Prediction
The prediction job is completed by a new pipeline instance predict_pipeline. Before prediction, essential components need to be deployed through pipeline.deploy_component(), and then used in predict_pipeline.
The prediction results can be viewed through FATEBoard, as shown below: 
Currently, FATE comes with many examples of using "Pipeline": examples/pipeline. Interested readers may convert and use them in Notebook.
Conclusion
Compared with previous versions, FATE v1.5 has improved significantly in all aspects, especially in terms of user-friendliness. This document only introduces some of the updates. For more details, refer to FATE's github codebase and its official website.