Replacing A Texture - EverestAPI/Resources GitHub Wiki
This tutorial involves creating a simple mod that replaces a texture within Celeste and packaging it to be ready for release.
This page assumes that you have already set up Everest 🔗.
Click to expand the Table of Contents
Follow the Mod Setup Tutorial to set up your mod.
Create the following folders inside your mod folder. The Graphics folder should be next to the everest.yaml file:
Celeste
- Mods
  - MyExampleMod
    - Graphics
      - Atlases
        - Gameplay
Vanilla textures are available in the Graphics Dump 🔗. Download it and extract 🔗 it somewhere not in your game files.
In Celeste, graphics are separated into multiple Atlases 🔗 based on where they are used.
In this tutorial we will only be using on the Gameplay atlas, but other notable ones are the Gui atlas, for high-resolution overworld and UI textures, and the Portraits atlas for character dialog portraits.
Open the graphics dump and navigate to Graphics/Atlases/Gameplay/decals/1-forsakencity/. In this folder there will be an number of PNG image files that are used for the decals specific to Chapter 1.
In the Gameplay/ folder you created earlier, create the following additional folders:
- Gameplay
  - decals
    - 1-forsakencity
ℹ️ This must match the folder structure of the graphics dump exactly.
Download this image file 
@juno (raine)#3540) and move it into the 1-forsakencity folder. Make sure that the image file is named sign_under_construction.png. You may need to turn on file extensions to verify this.
Now open (or restart) Celeste and enter the very first room of Forsaken City to see your new texture. If it does not show up in place of the "under construction" sign, please create a post in the #modding_help channel of the Celeste Discord 🔗.
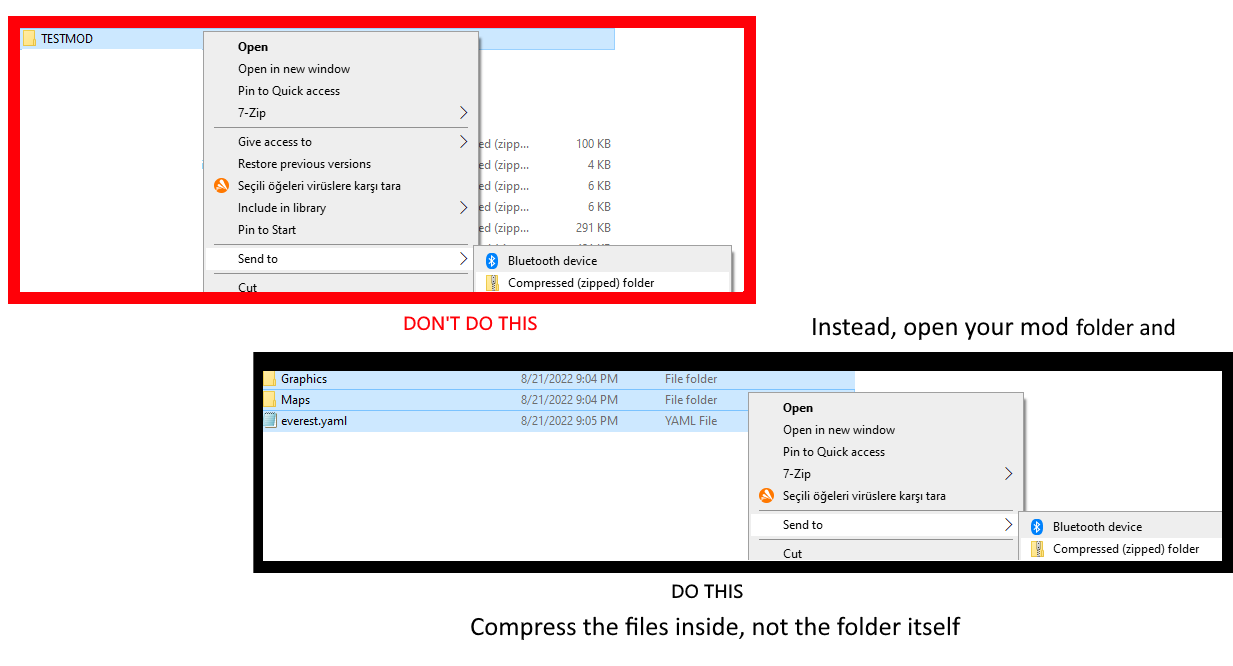
Since you already have the everest.yaml set up for your mod, all that is needed to package it is to compress it into a zip archive.