Getting started - ElsaTam/obsidian-extended-graph GitHub Wiki
After installing the plugin, you might need to reload Obsidian, if the plugin doesn't seem to load in your graph views.
Configure features
Access the plugin settings to select the features you want to use:
- Show tags and use them to filter nodes.
- Show properties and use them to filter nodes.
- Assign links types types using properties and use them to filter links.
- Add images to nodes, or icons and emojis
- Change node shapes to use triangles, squares, stars, etc.
- Show folders area around nodes.
- Use statistical visualization options.
- Customize arrows, node names, and other display options
- and others
If you now you have a good computer, you can increase the number of maximum nodes in the Performances settings section. The default is 20, for security reasons, but it should be safe to increase it at least to 100 on most of computers. Still, I recommend to first try the plugin on a sub-portion of your graph, or in a local graph, where number of nodes is limited.
Save your graph settings
Open the graph view. When you will enable the plugin, you will be switched to the default state. By default, this state doesn't contain any saved settings and will be like a fresh new graph. If you want to keep your current graph settings:
- Open the graph control panel
- Expends the Extended Graph "Options" section
- Click "Save for default state"
Learn more here: Graph States
Toggle plugin
By default, the plugin is disabled for new graphs to prevent performance issues. To activate it:
- Click the
button in the graph view.
- If the graph contains too many nodes, the plugin will not enable itself. Adjust the node limit in settings (see Performances).
Filter your graph
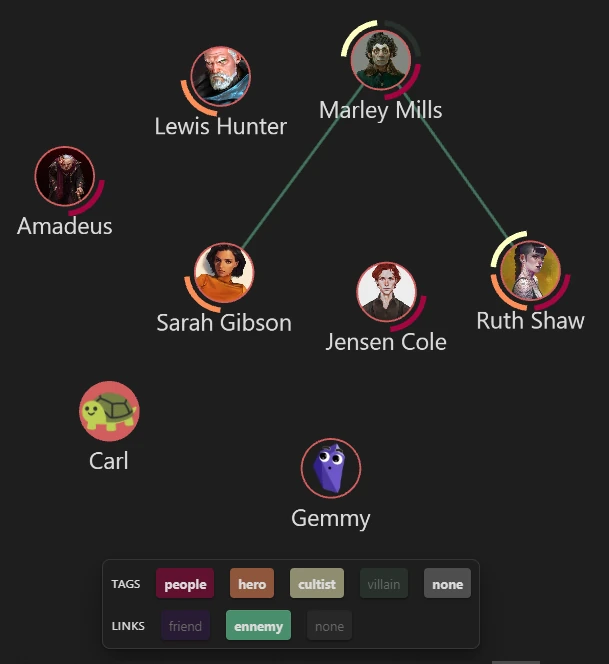
Display the legend by clicking the icon. From there, you can toggle various links, tags, and properties according to your configured settings.

Save your state
Adjust the graph settings and filters using the interactive legend. Once you've configured a state you want to preserve, open the state panel ( icon) and save it as a new state by clicking the
+ button. Enter a name, confirm, and your current state will be saved so that you can quickly revisit anytime.
⚠️ Switching to a new state without saving changes will discard any unsaved settings.
Learn more here: Graph States