How to create your first addon cloth resource - DurtyFree/durty-cloth-tool GitHub Wiki
[!WARNING]
This information is most likely OUTDATED. Documentation has been reworked and is now available at https://docs.gta.clothing/getting-started/first-cloth-resource
Durty Cloth Tool is an extensive tool allowing users to create add-on clothing packs for AltV, FiveM, Single Player and RageMP.

1 - First, visit our patreon and subscribe to our Durty Cloth Tool License or Durty Cloth Tool License + Premium plan. Your payment may take up to 48hrs to process depending on your country of origin and is out of our control. If you face any issues, please join our discord and have a chat with us.
Your license file can be found in your PlebMaster's account under licensing.
2 - Download the latest available version of the Durty Cloth Tool from our GitHub releases page.
3 - Navigate to your downloads output folder and search for the DurtyClothTool.App.zip you just downloaded.
Open the context menu by right clicking on this file and select 'Extract All' or any other option from your ZIP Extraction tool of choice.

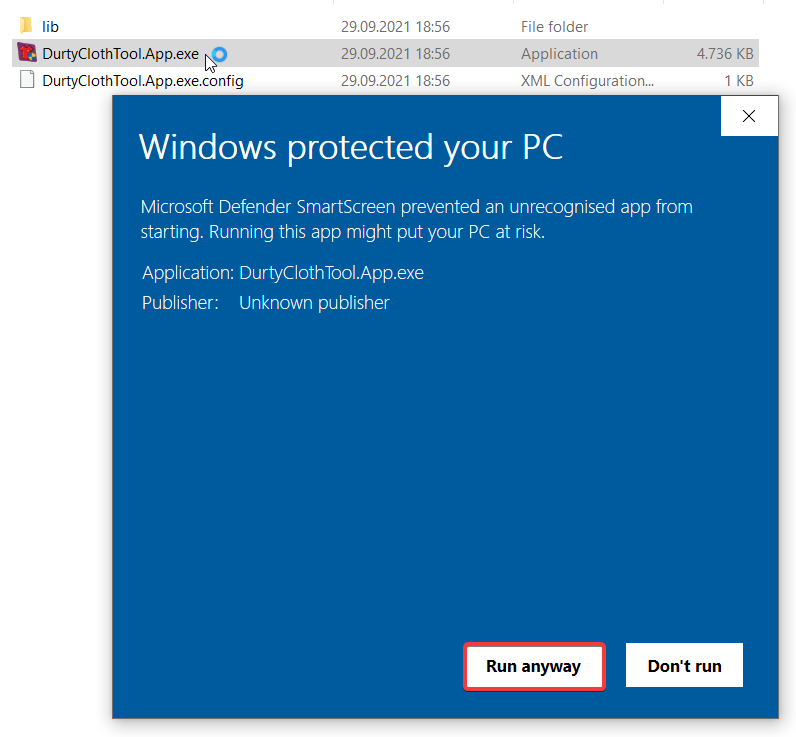
4 - Navigate into the just extracted DurtyClothTool.App folder and double click on the DurtyClothTool.App.exe to start it up. In case you get an "Windows protected your PC" popup, press on 'More info' and choose Run anyway.

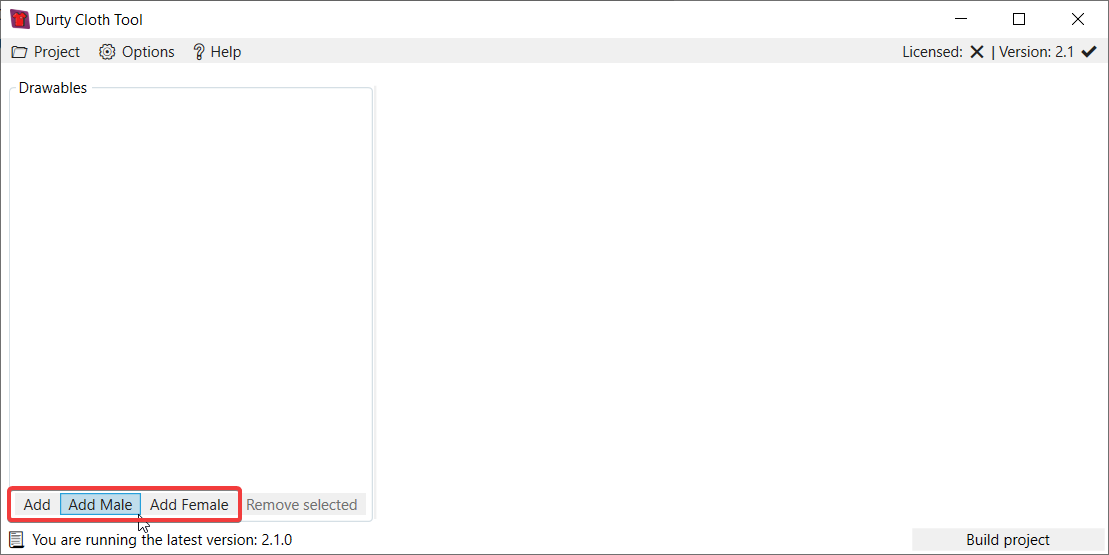
5 - The first screen you should see is the tool running with a newly created, empty, clothes project. Click on any of the "Add" buttons to start adding cloth drawables to your project.
Cloth drawable files are files of the type YDD, they normally come with different texture variations, which have the file type YTD.
Using the "Add" button will open a dialog that supports you on adding multiple clothes automatically from a folder. It will try to automatically resolve gender and more based on the filename for all possible cloth drawable files it can find.
Using the "Add male" or "Add female" buttons will open a dropdown with options to either add single files or add from folders. These options will always add the cloth drawables for the target gender you have selected based on the dropdown.
Textures for your cloth drawables are usually automatically detected and added, if not you will be able to manually add them by selecting the target cloth drawable on the left and pressing the "+" button on the right side in the textures list.

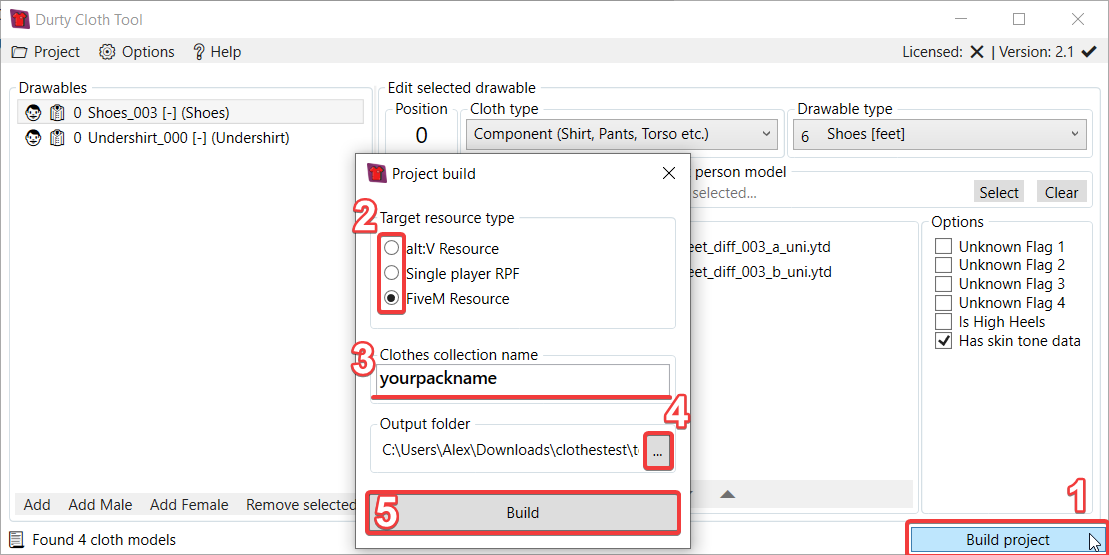
6 - If you have finished adding all your clothes and made sure you are happy with the options, you can open the build window to generate your GTA 5 addon cloth pack output.
Select your target resource type / platform, give your cloth pack collection a unique (short)name and select the output directory of your addon pack.

7 - You just created your first GTA 5 addon cloth pack! Make sure to save your project using the "File > Save" menu item, so you can always continue working on your GTA 5 addon cloth pack by adding, removing or replacing files.