Creating New Weapons - DotModGroup/ColdWaters-DotMod GitHub Wiki
Introduction
This is a brief introduction describing how to create simple weapon models in Blender to be used in Cold Waters. This Tutorial will cover how to make the UUM-125B Sea Lance, using a Mk-50 torpedo model that I have already created. All files are available on this Git Hub or are creatable from files on this Git Hub.
Step 0 - Unity Editor Set Up
We are going to use the Unity Editor to build our assets into a format that the game can understand, so there are a few steps to do first.
- Download Unity 5.4 from here: https://download.unity3d.com/download_unity/a6d8d714de6f/Windows32EditorInstaller/UnitySetup32-5.4.0f3.exe
- Create a new Unity project, I have called mine "Cold Waters Modding"
- Create a folder called "Models", a folder called "Materials", and a folder called "Textures" uder the "Assets" folder (you may need to create this).
- Create a folder called "Editor" under the "Assets" folder and download this file into it: https://raw.githubusercontent.com/FirebarSim/Cold-Waters-Expanded/master/CWE%20Sample%20Data/Assets/Editor/CWEBuildAssetBundles.cs
- Open the file you just downloaded and on line 9 change:
string outputPath = "E:\\Games\\Steam\\SteamApps\\common\\Cold Waters\\ColdWaters_Data\\StreamingAssets\\override\\bundles";to the location of your Cold Waters install. These steps mean that we can use the full power of Unity in creating our assets later!
Step 1 - Sizing
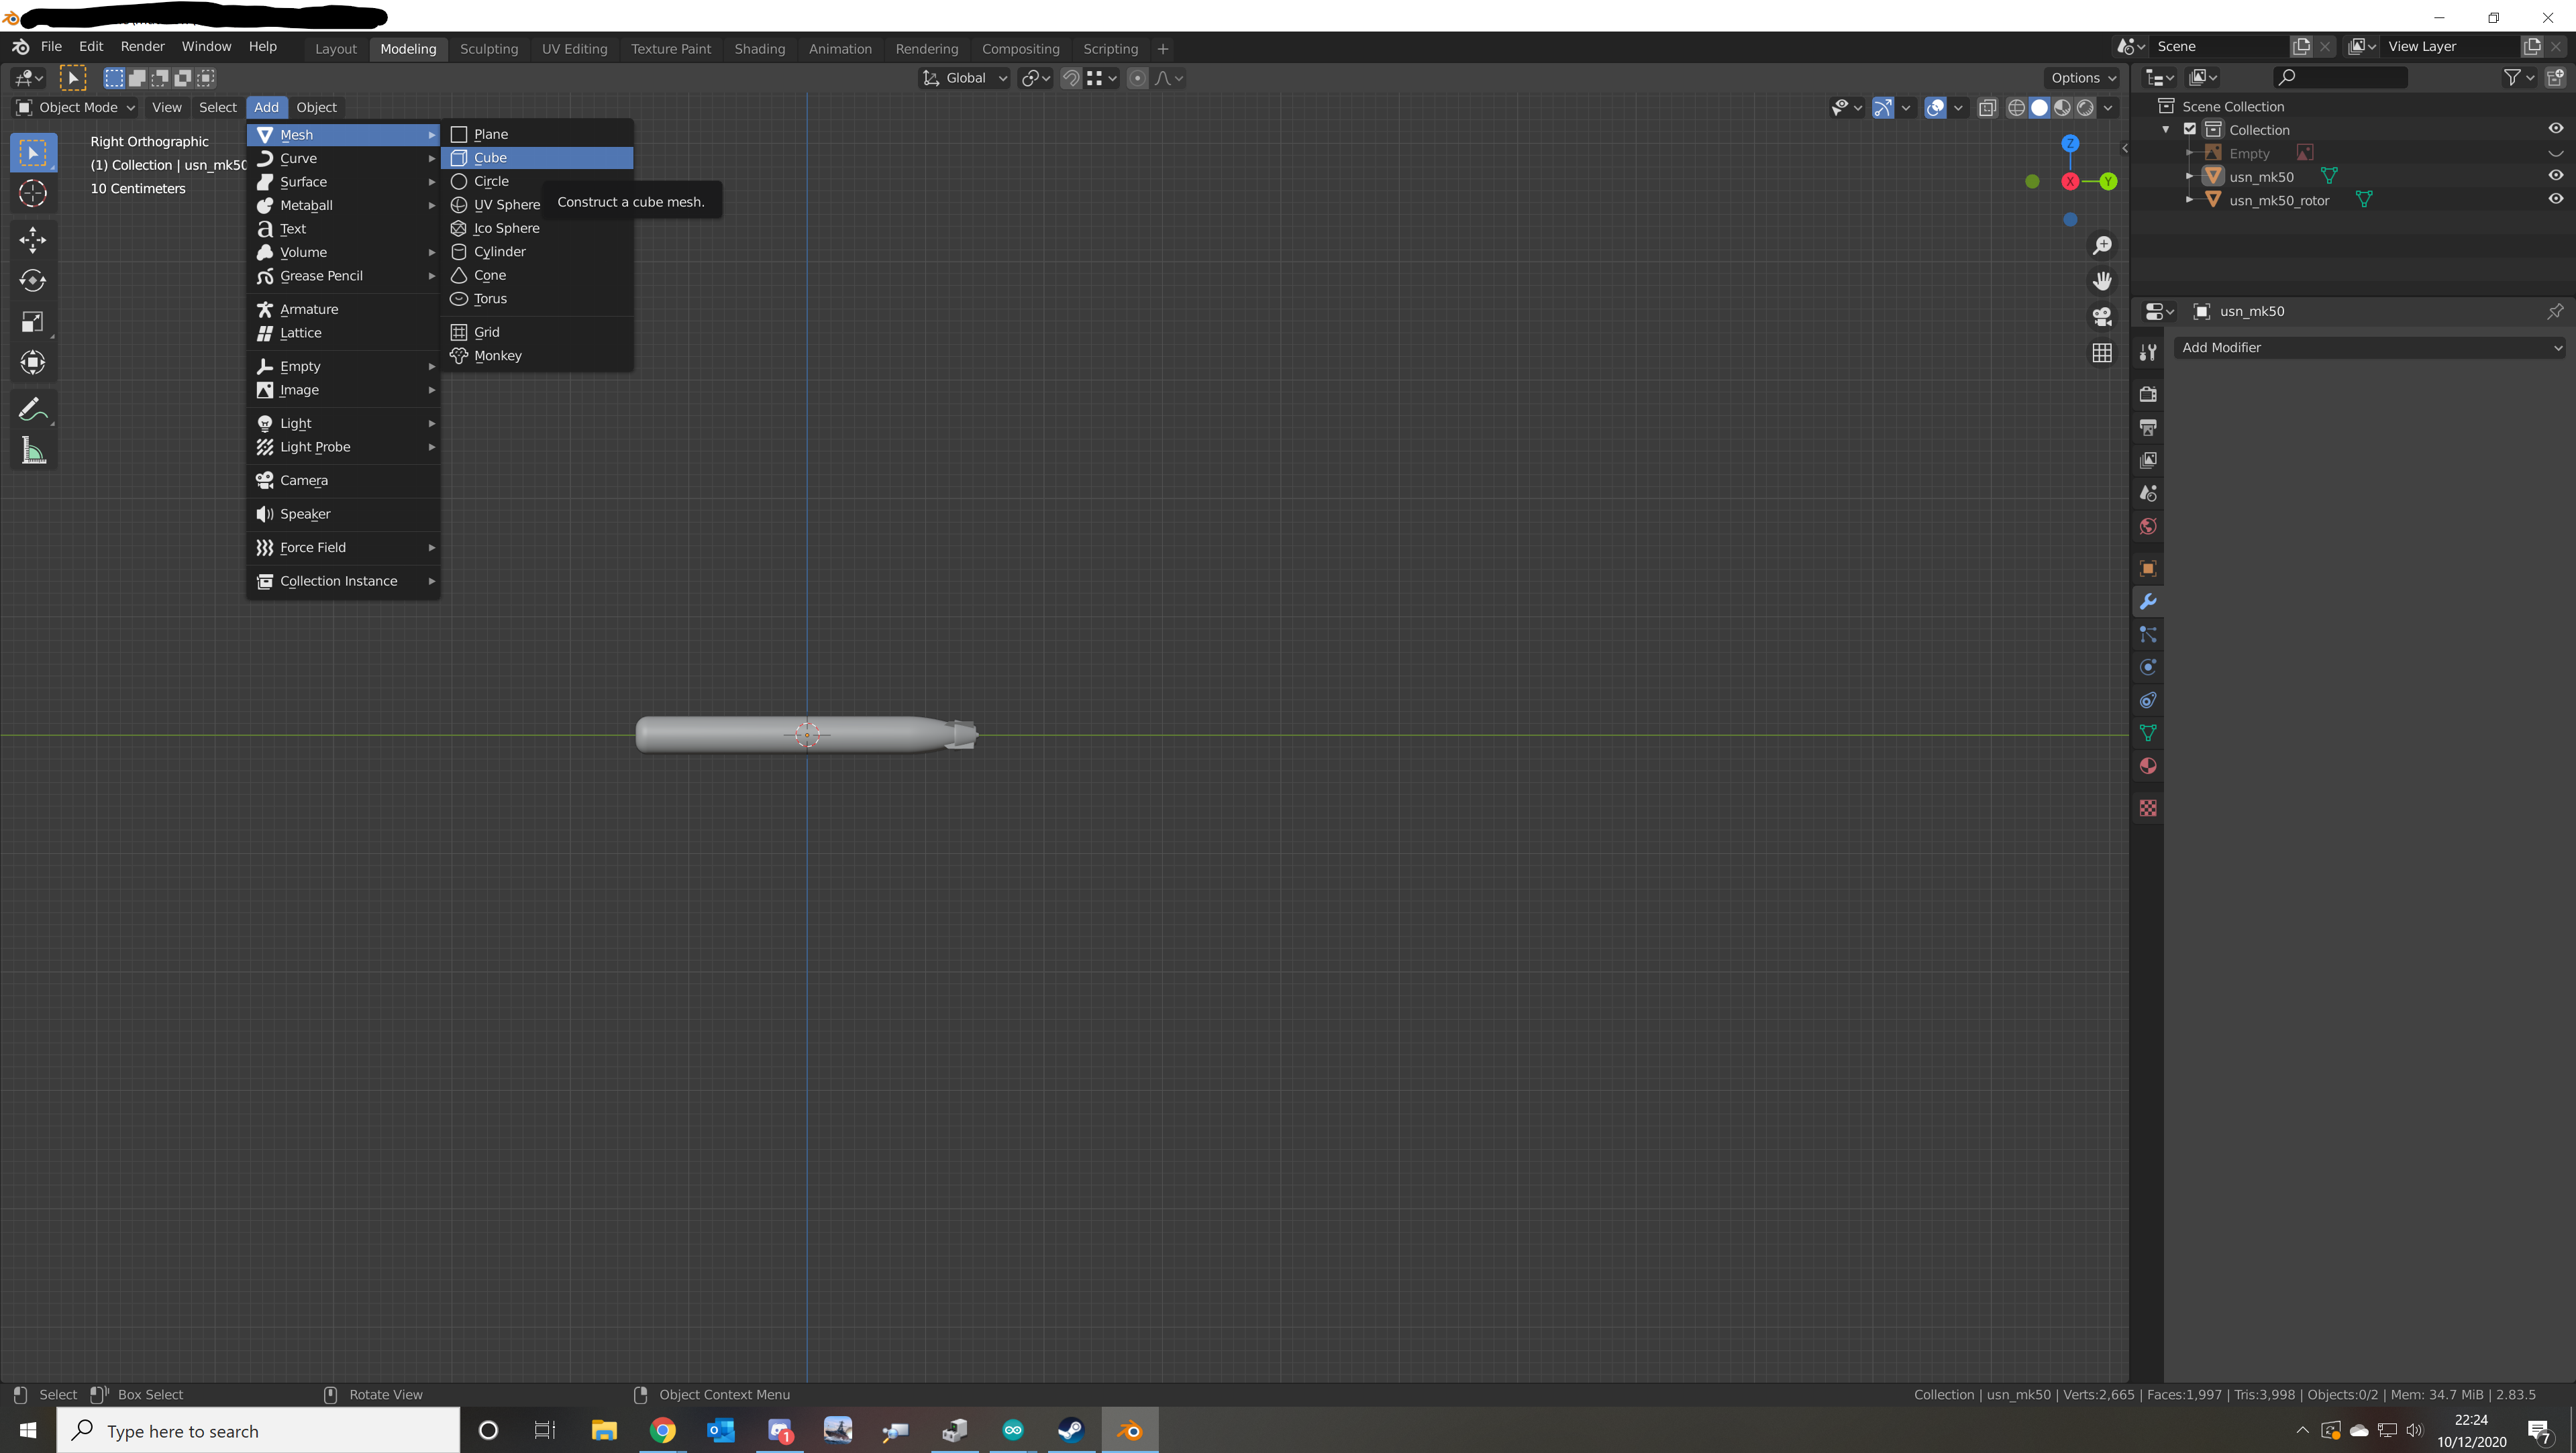
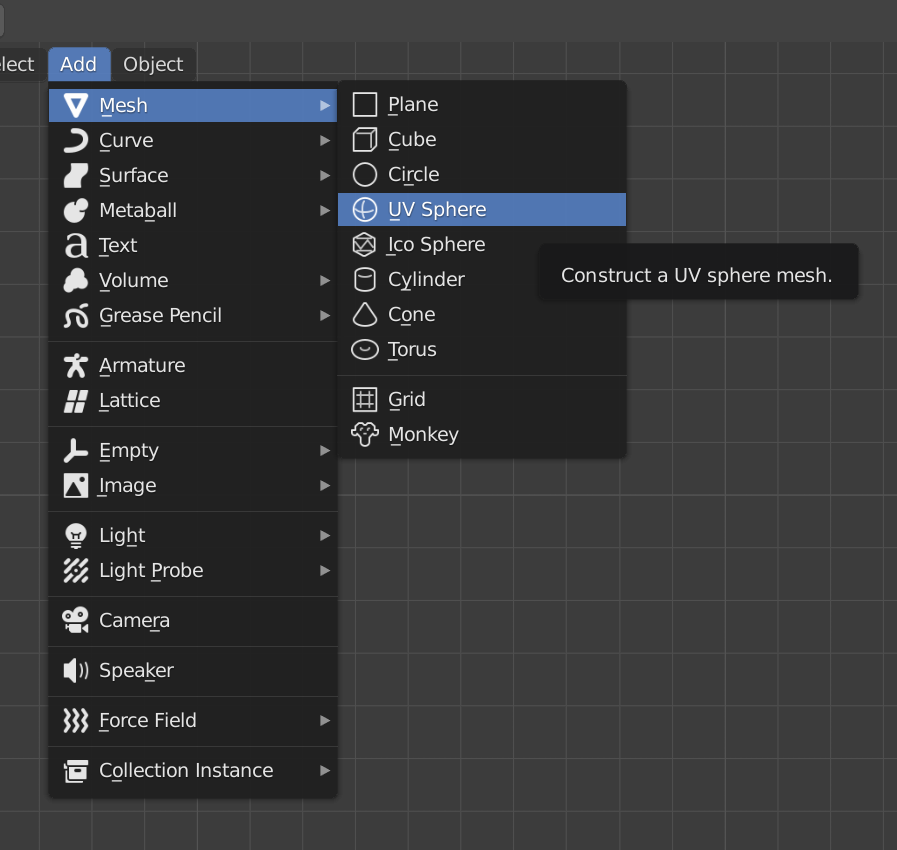
The first step is to get our model's sizing correct, I am going to start out by creating a dimension box this is a cube that matches the maximum dimensions of the subject model. We begin by creating a Cube by selecting: Add > Mesh > Cube
Then we toggle into Edit Mode by pressing Tab and select wireframe view by pressing Shift+Z this means we can select items we couldnt normall see in a view.
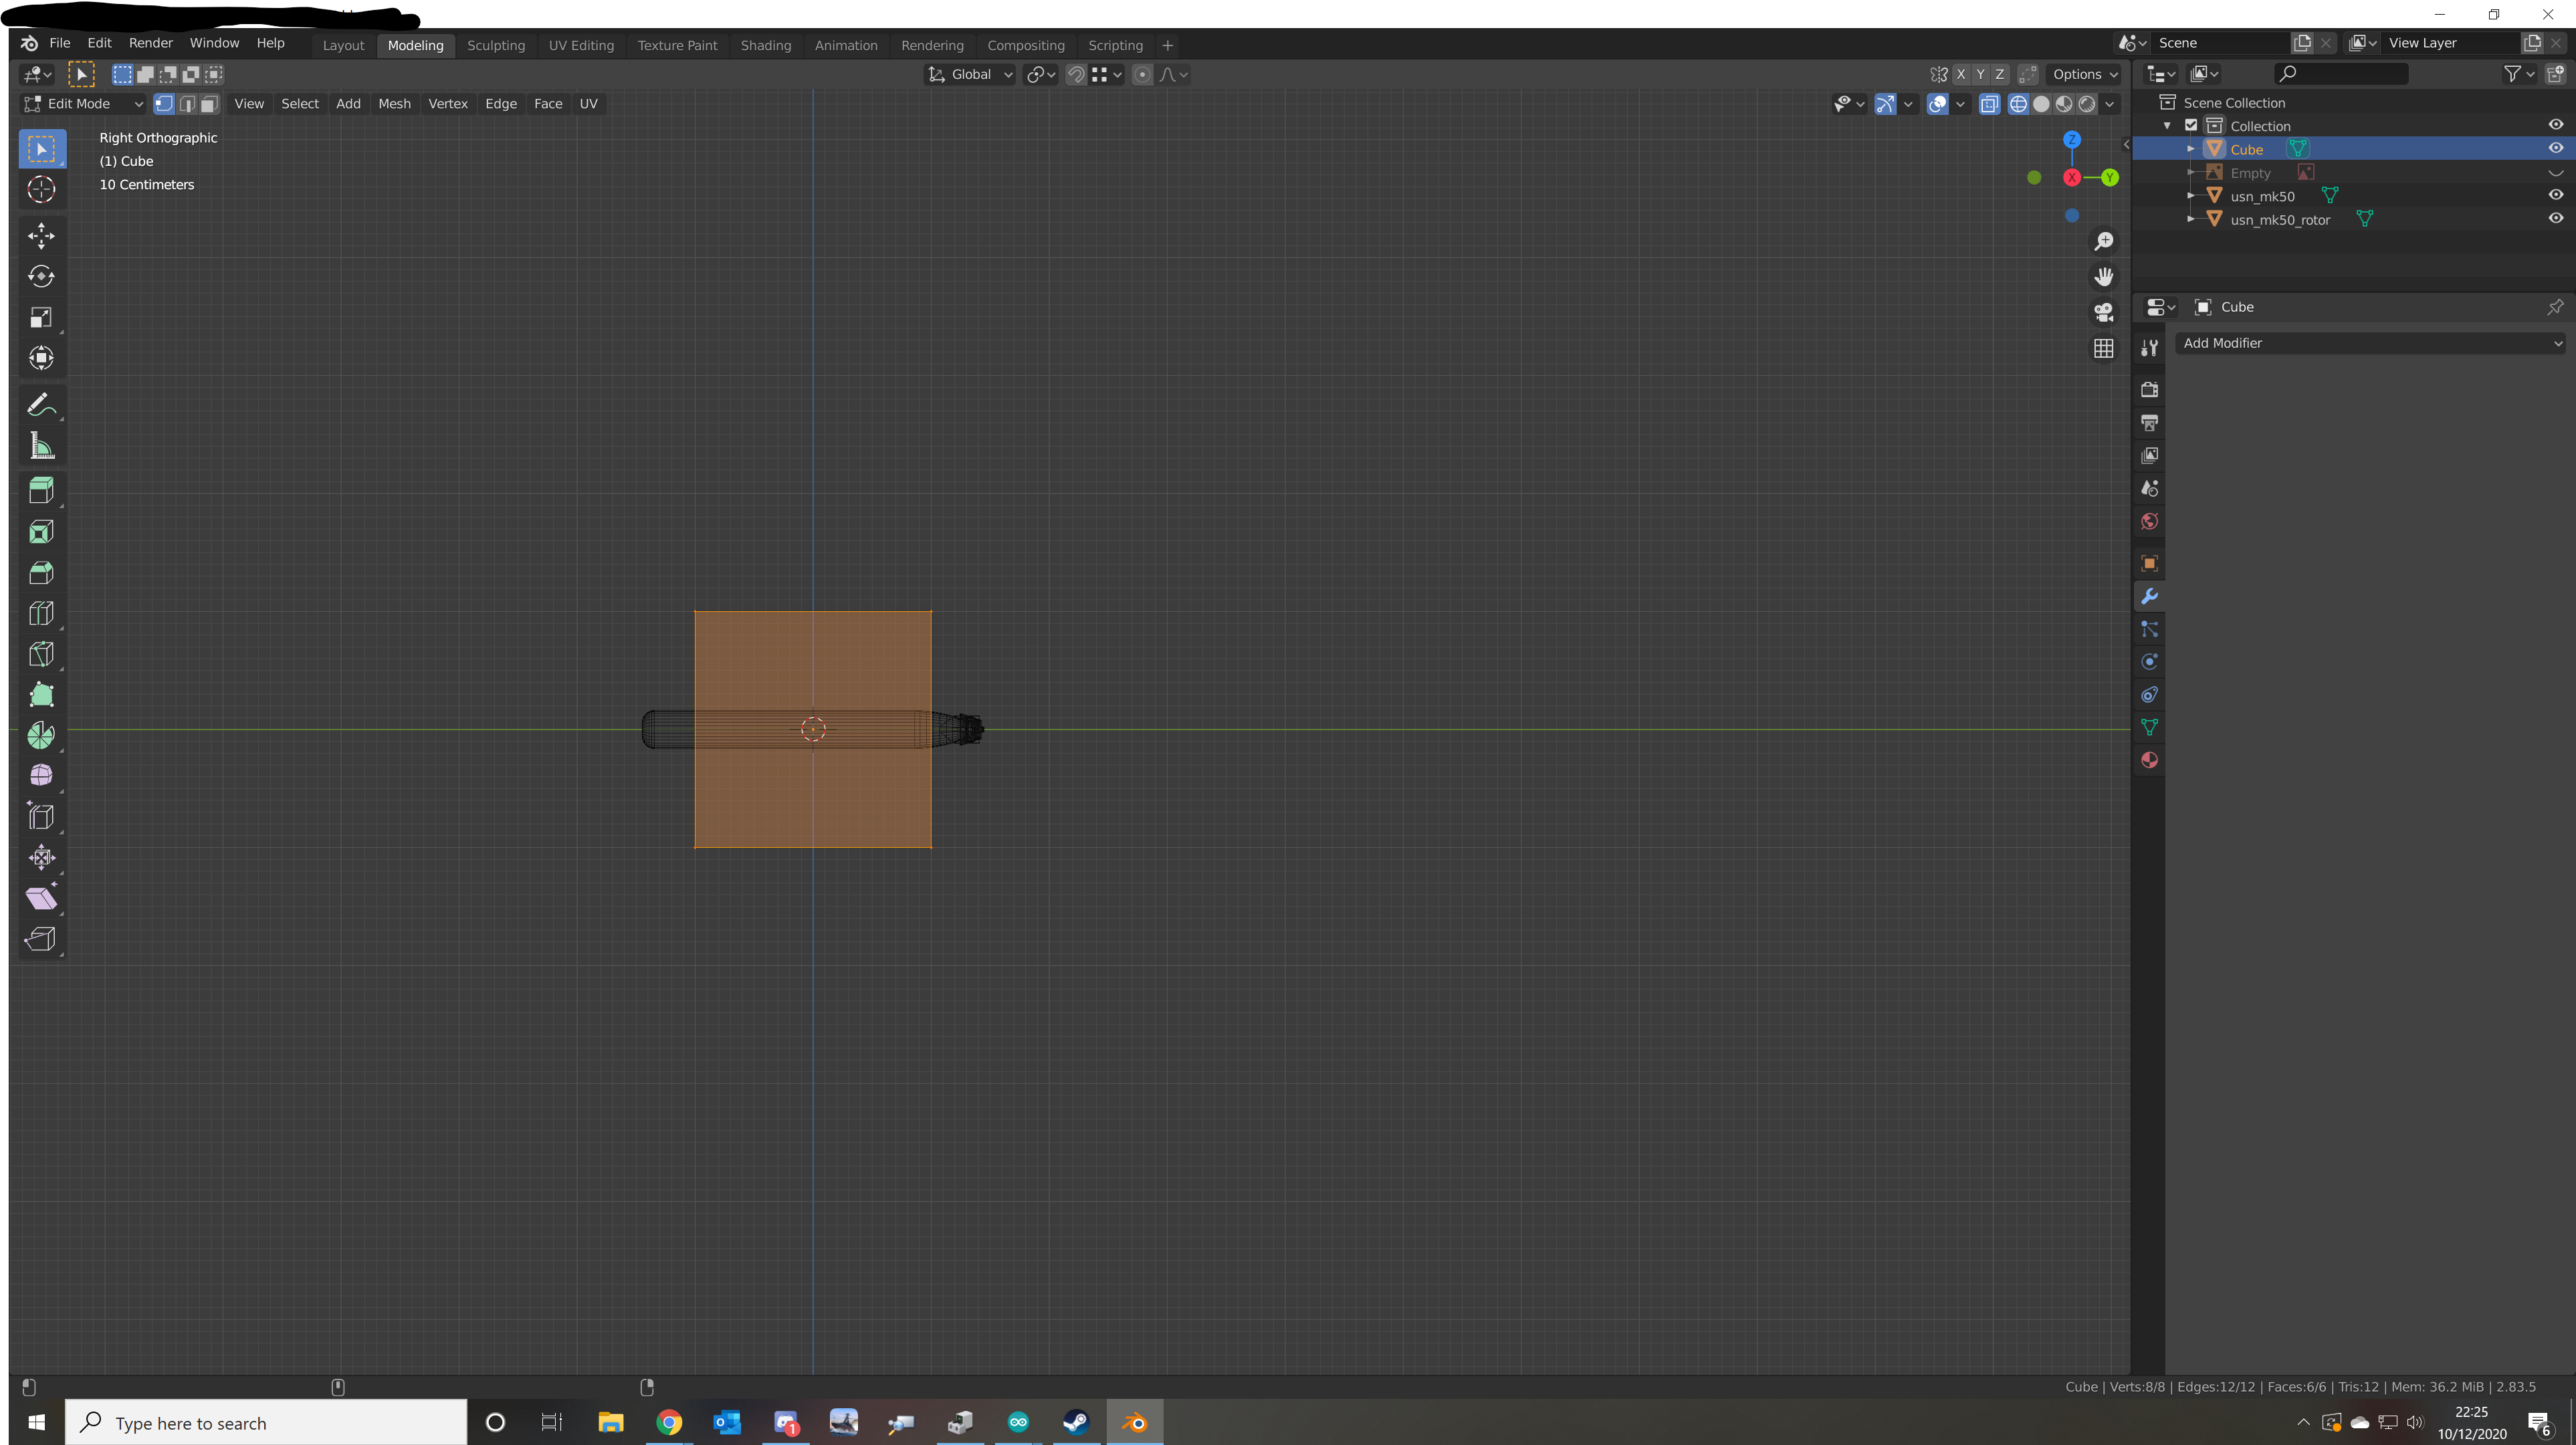
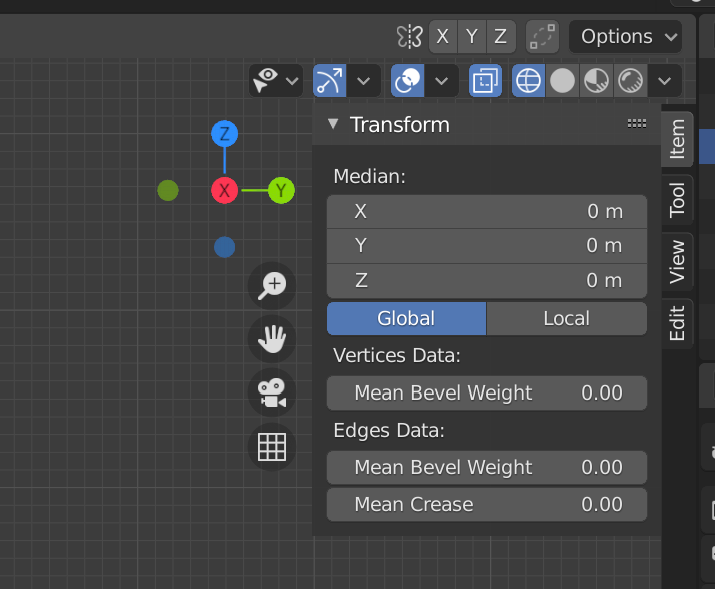
Using the window in the top right of the viewport we select Global for our transform reference (that is relative to the 0,0,0 global axis system, not the 0,0,0 local axis system).
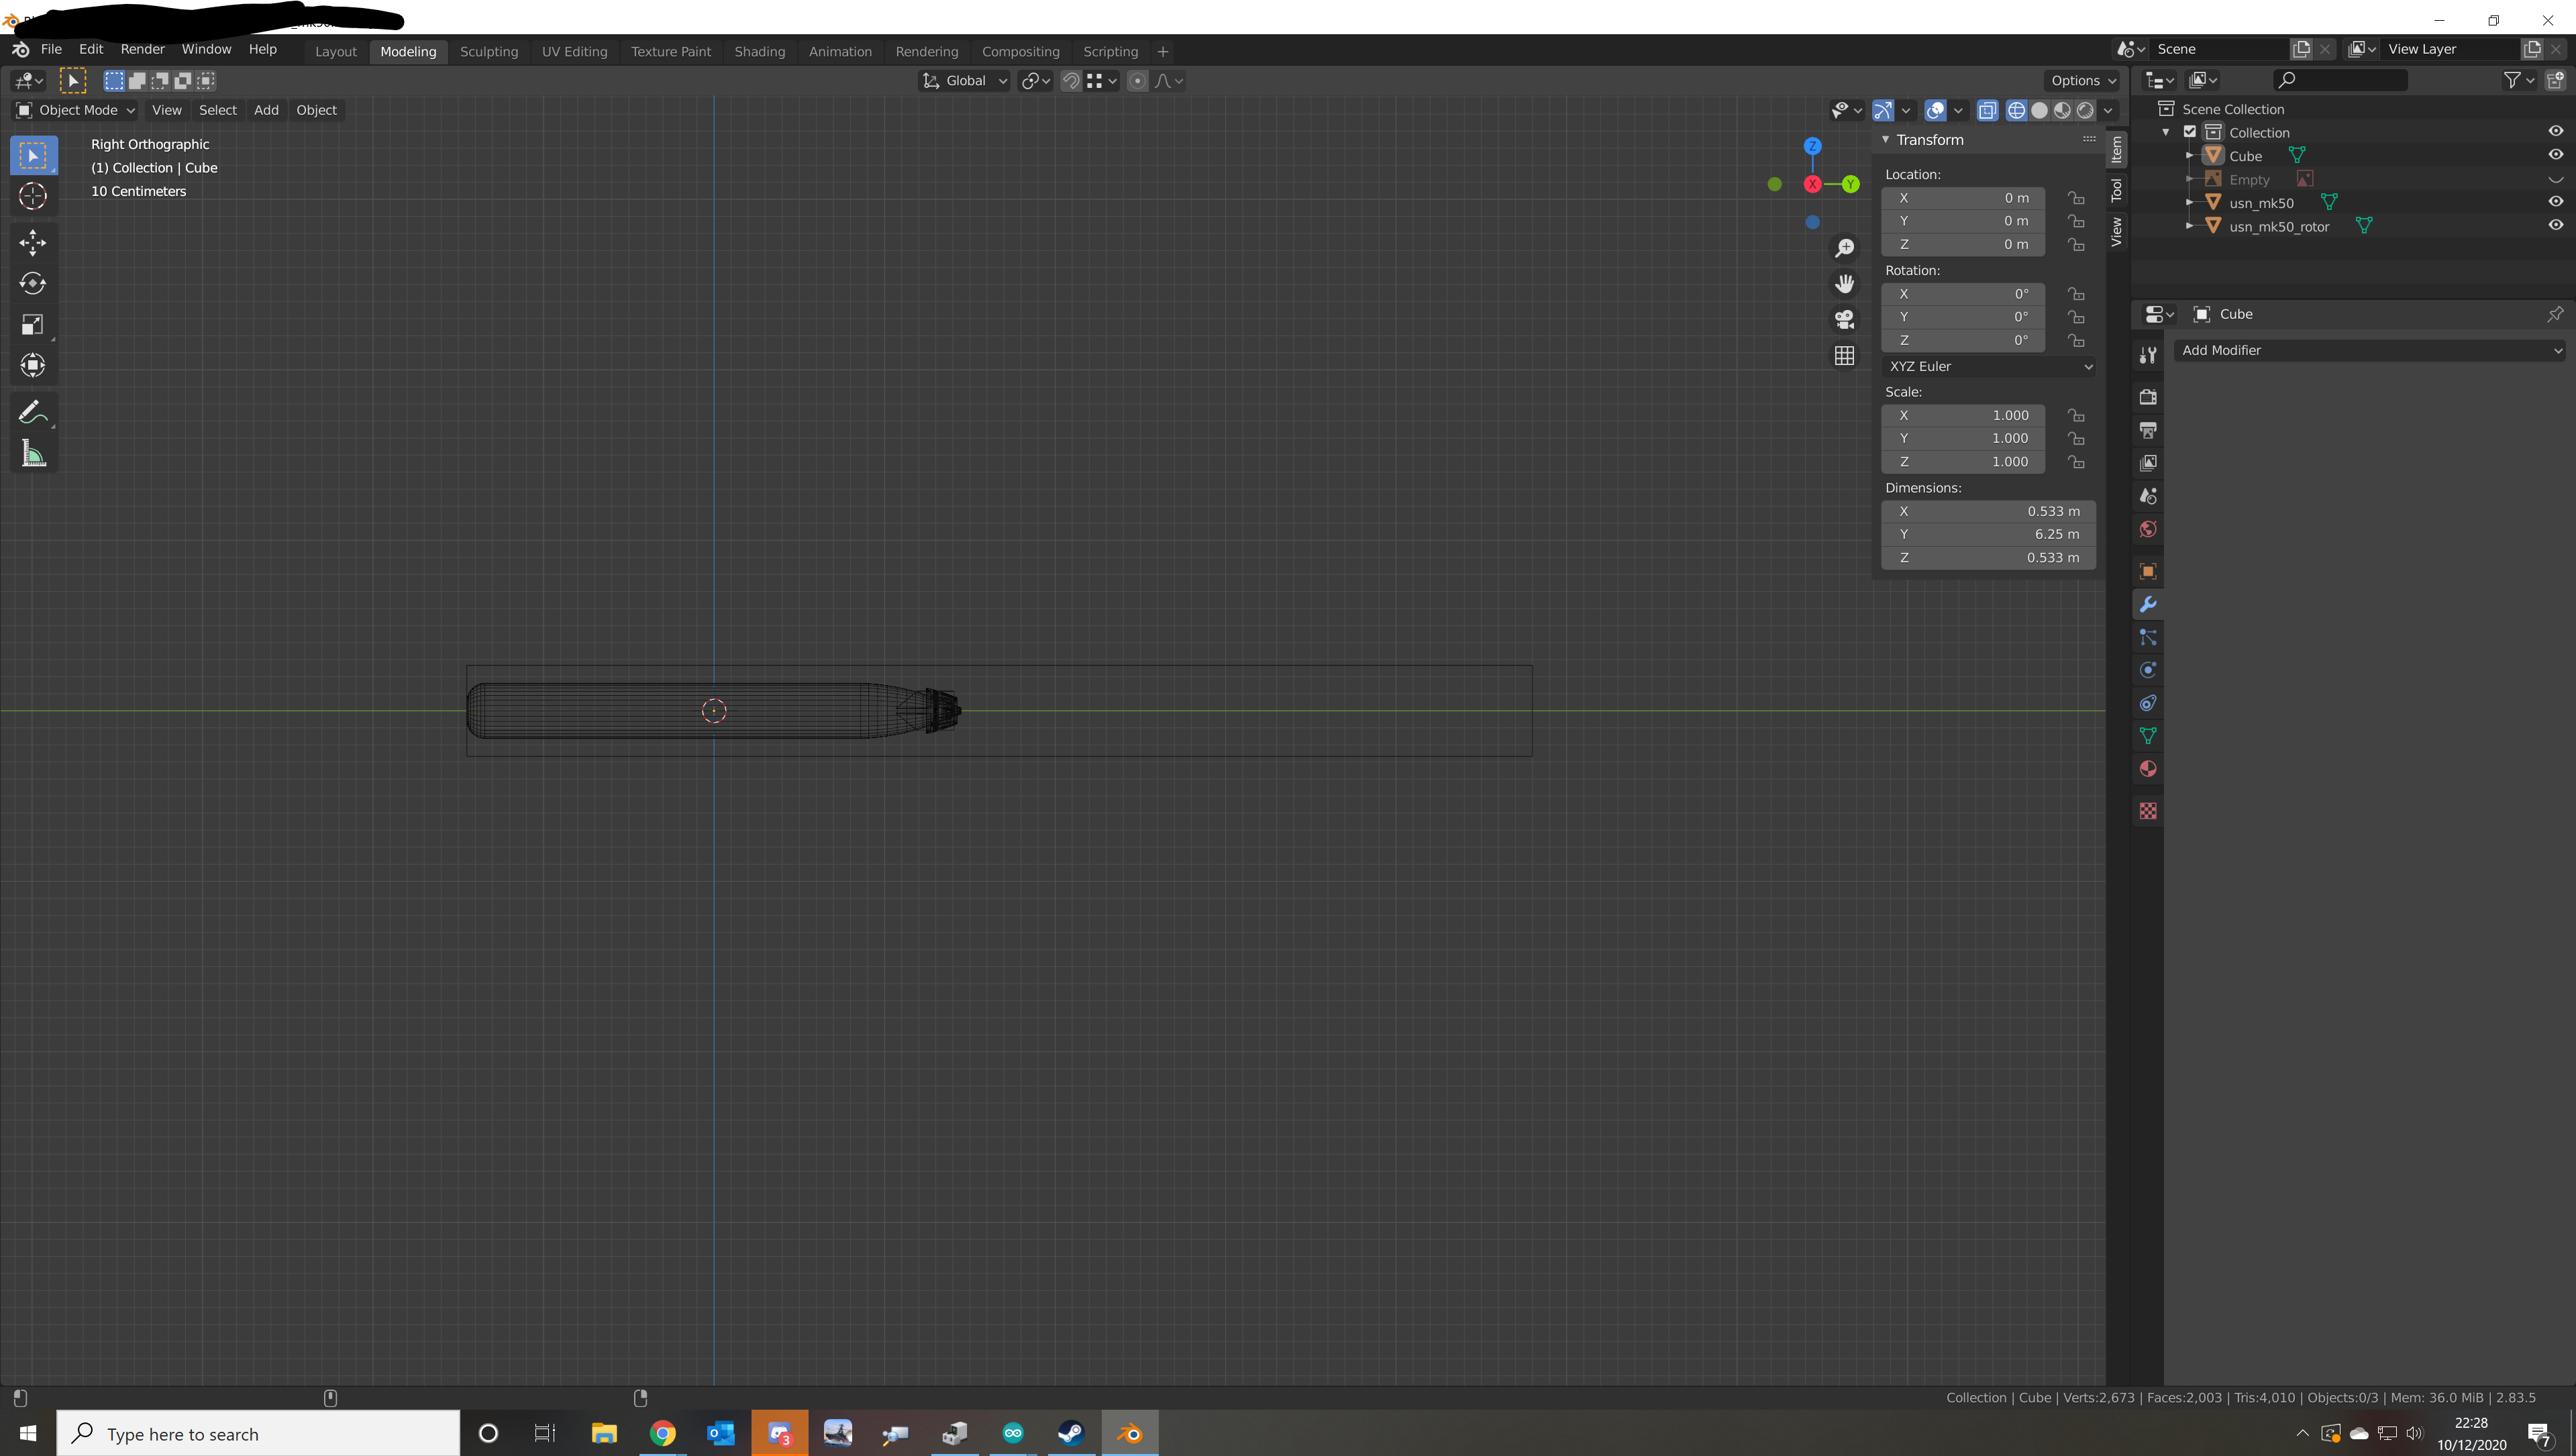
We now position the top and bottom of the cube at z=21/2" and z=-21/2" respectively this is because this missile fits in a 21 inch torpedo tube, Blender will do the maths of converting this to metres for us.
Then we do the same for the left and right edges, setting them to x=+/- 21/2".
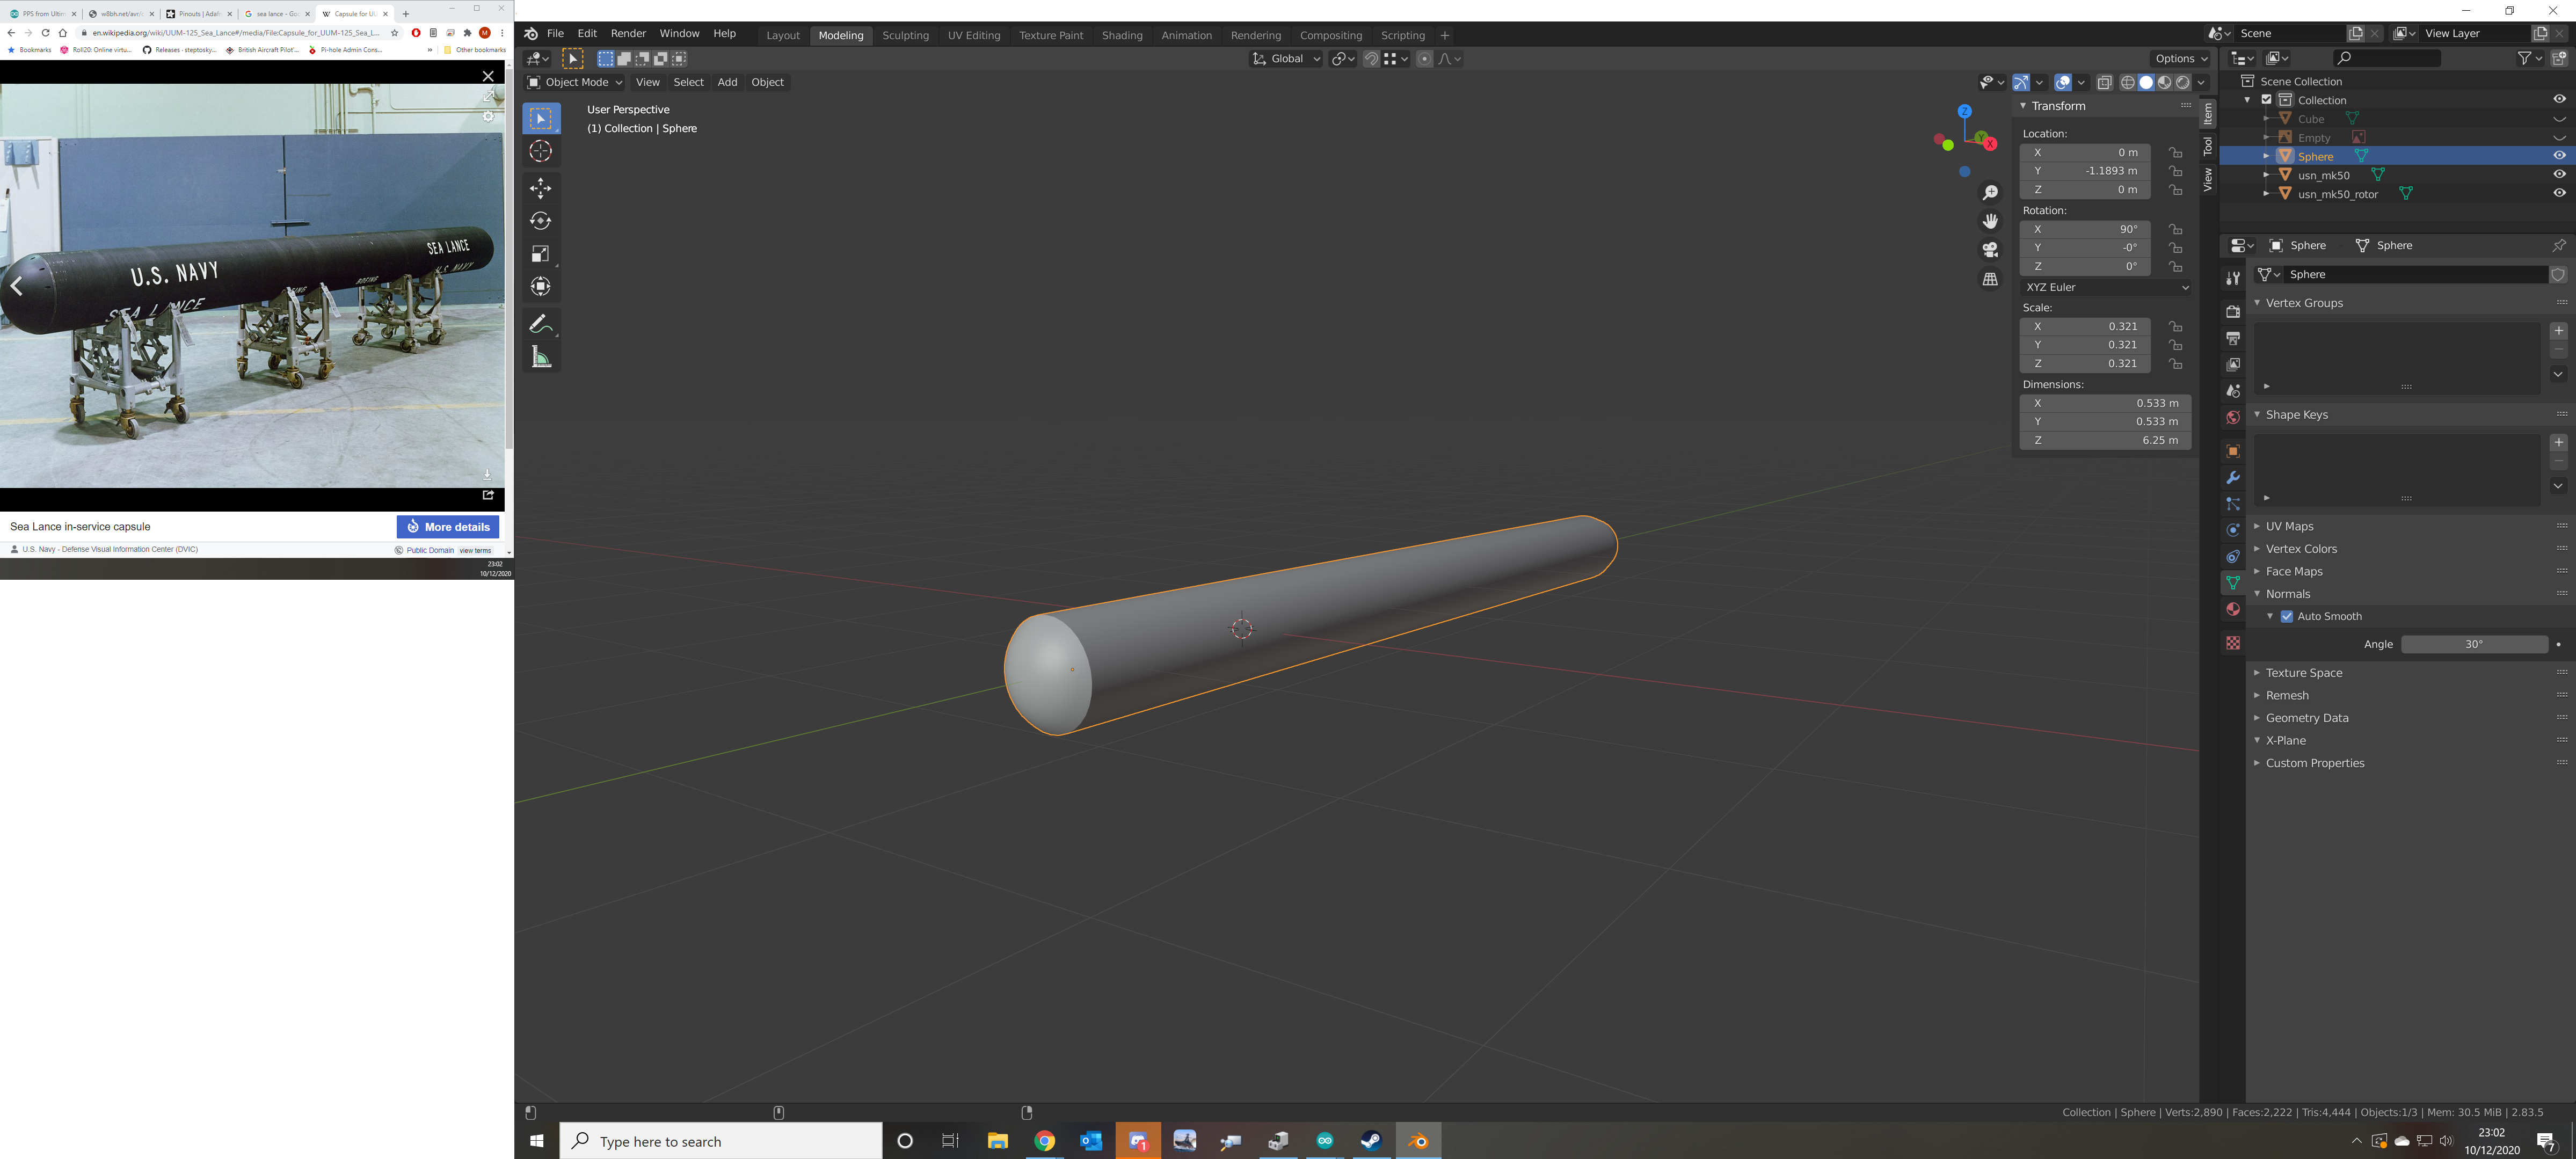
Finally we do the front, I set this to y=-1.45 as I know this is the forward extent of this Mk-50 torpedo and the back I set to y=6.25-1.45 again letting blender do the maths for me.
I now have a box the dimensions of the UUM-125B capsule.
Step 2 - Simple Mesh by Extrusion
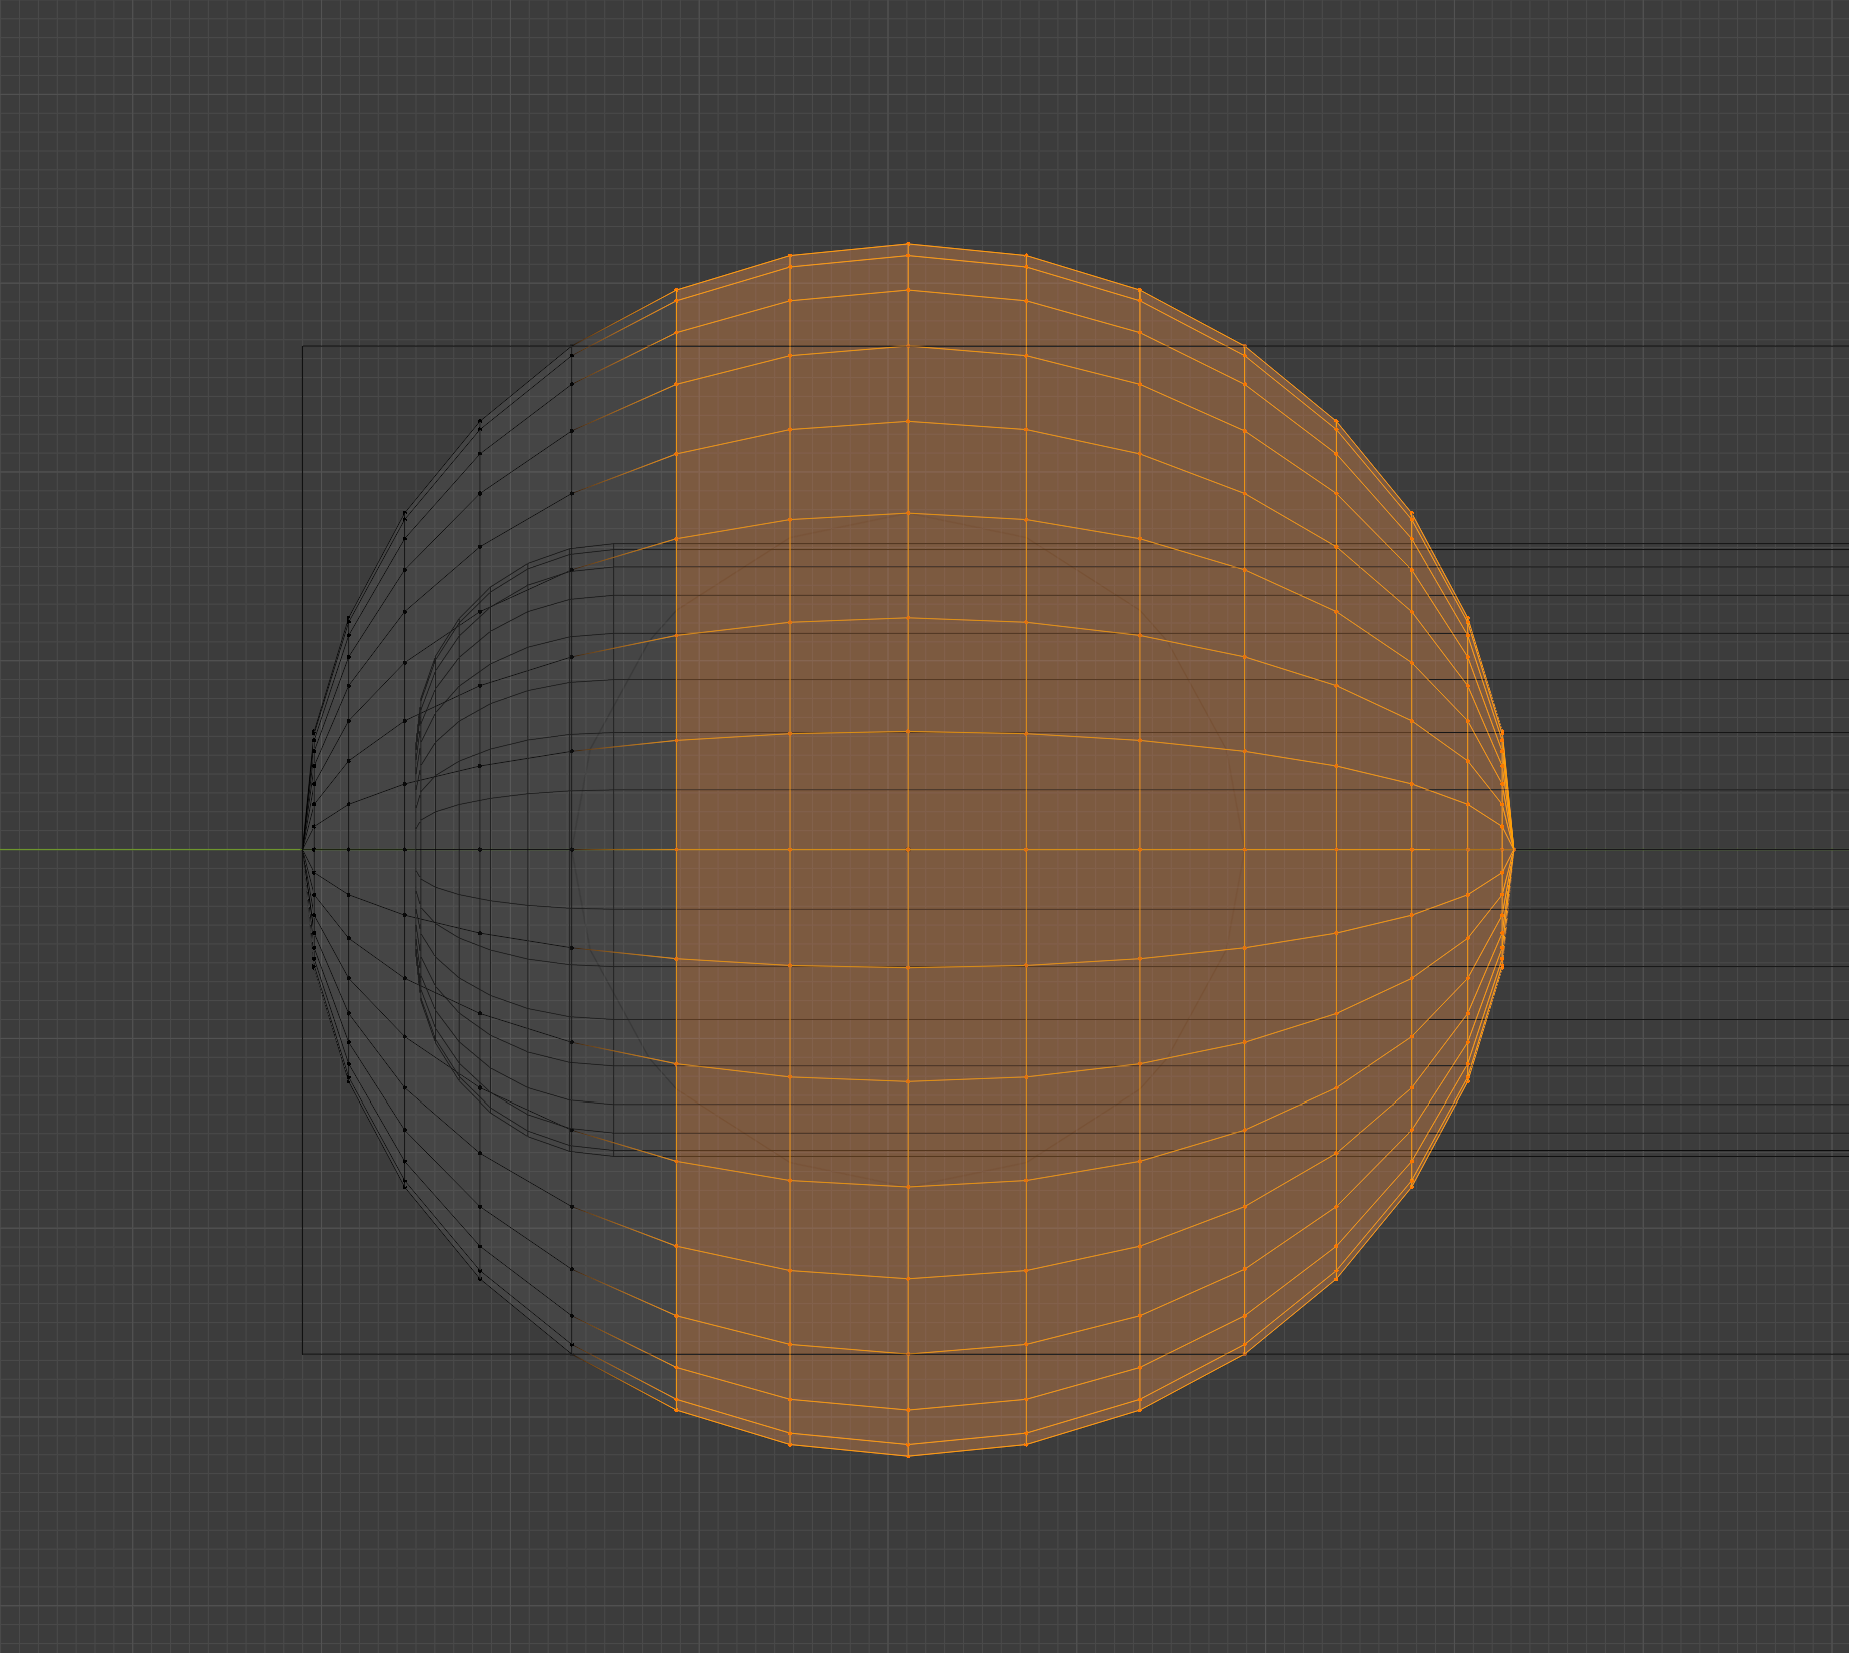
My next step is to create the capsule, I do this be creating a UV Sphere by selecting Add > Mesh > UV Sphere. This places a UV sphere at the 3d Cursor.
I then move the sphere along the y axis by pressing g and then y until it is close to the nose of the torpedo, I scale the shape down until it is a good match for the shape of the nose by pressing s. Then I Tab into edit mode and select the verticies that fall outside the dimension box. If you rotate or move outside of Edit Mode it is important that you Apply the rotation/location transform or you will need to correct with MeshPosition commands in the weapon file!!
The next bits come in quick sucession and give an idea of how quickly meshes can be built up in blender.
I delete the verticies I just selected by pressing delete and selecting verticies.
Then I select all the verticies along the back edge of the remaining part of the sphere.
Next I press f to create a new face from these verticies.
Then I press e and then y to extrude this face along the y axis only. I drag the face almost all the way to the back of the dimension box and then fix it in place by clicking.
I then press e and y again to extrude, I move the face an arbitrary amount and fix it by clicking. Then in the window we used to set up the dimension box I set y=6.25-1.45 and the face will exactly align with the dimension box.
The capsule has a slight taper at the end so i now press s to scale the last ring of verticies down.
Next I right click and select Shade Smooth and then in the Mesh Panel on the right I expan the normals section and turn on Auto Smooth to leave me with a mesh like below.
Step 3 - Simple UV Mapping
The next step is getting prepared to put a texture on the model, via a technique called UV Mapping. This translates coordinates in 3d space to 2d Space to map a flat texture to a 3d model.
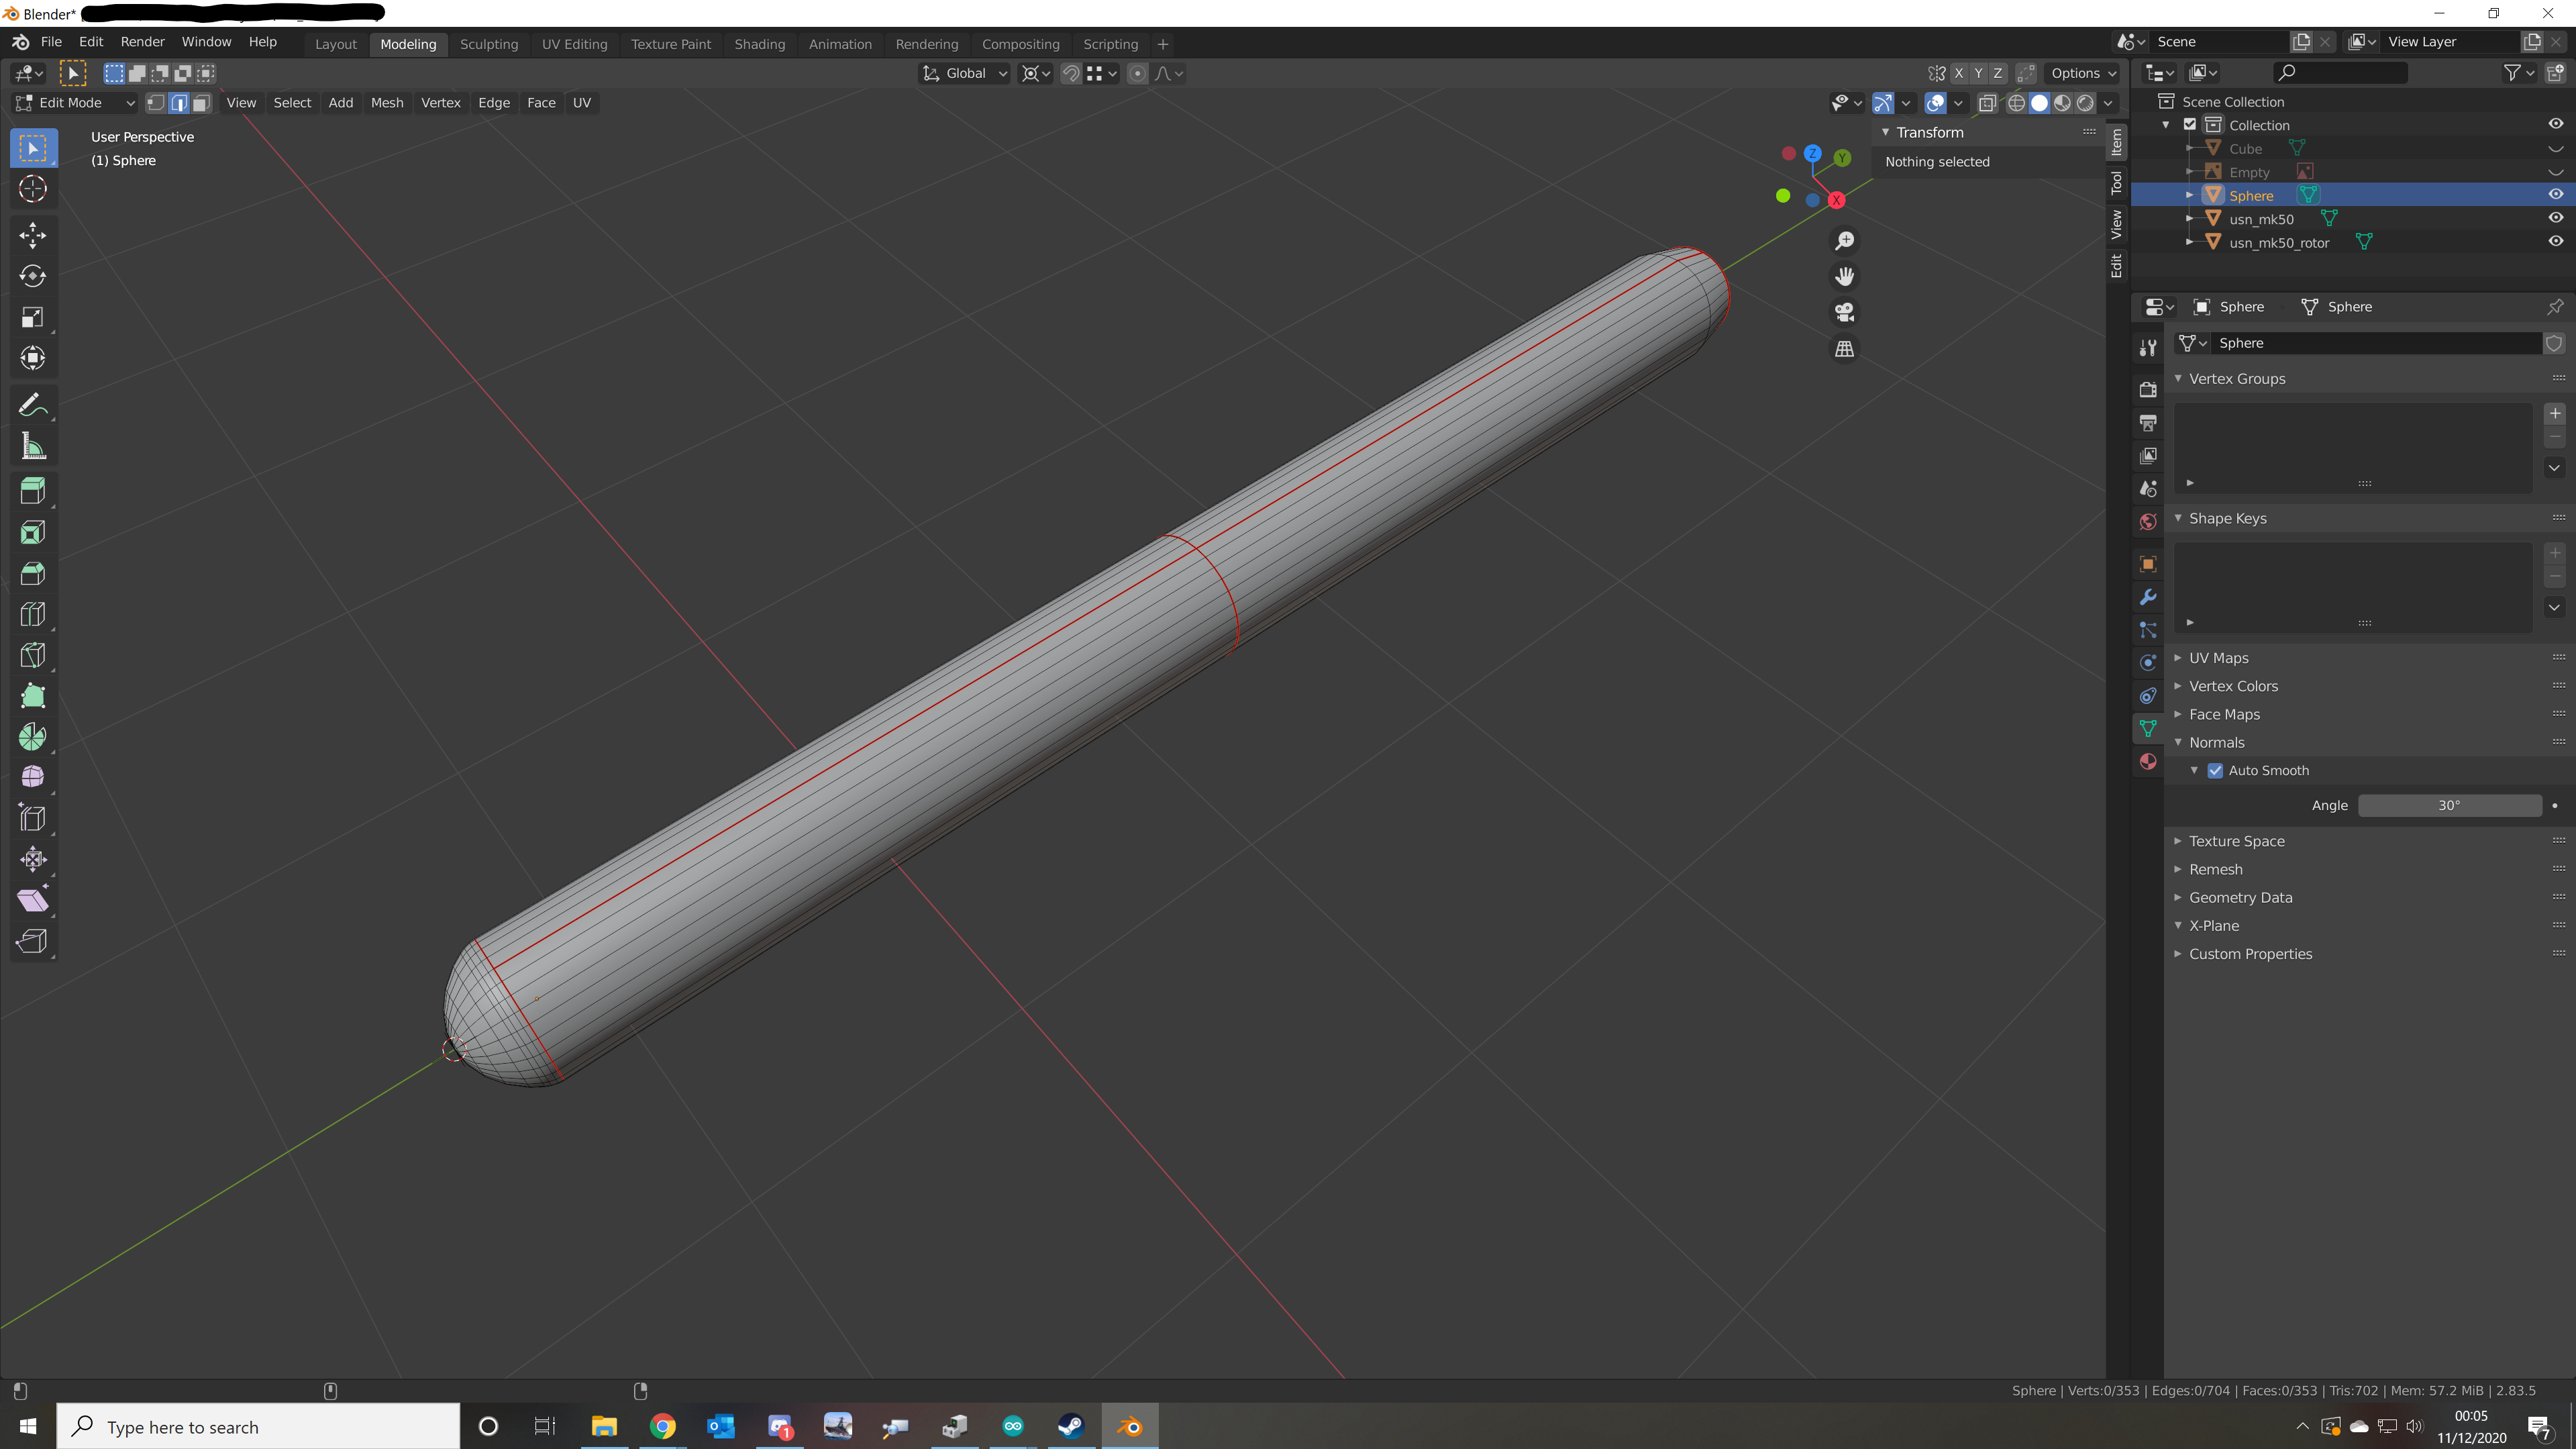
We start by marking in a seam around the nose cap of the capsule, we change our selection mode to edges and select all the edges where we extruded the first time. Then we right click and select Mark Seam.

I do the same along the top and bottom most long edges of the capsule and the two rings of verticies at the back.
At the same time I decide to add another ring of verticies in the middle to make mapping easier. I do this by selecting all the edges in the long section of the capsule, then right click and select subdivide. I make this new ring of edges a seam too.
I then decide to smooth the transition between the dome and the tube of the capsule. I select the edge ring, then press Ctrl+E and select Bevel Edges I play with the number of edges and the amout until it looks nice. Then I remove the extra seam that crept in.
This leaves me with the below.
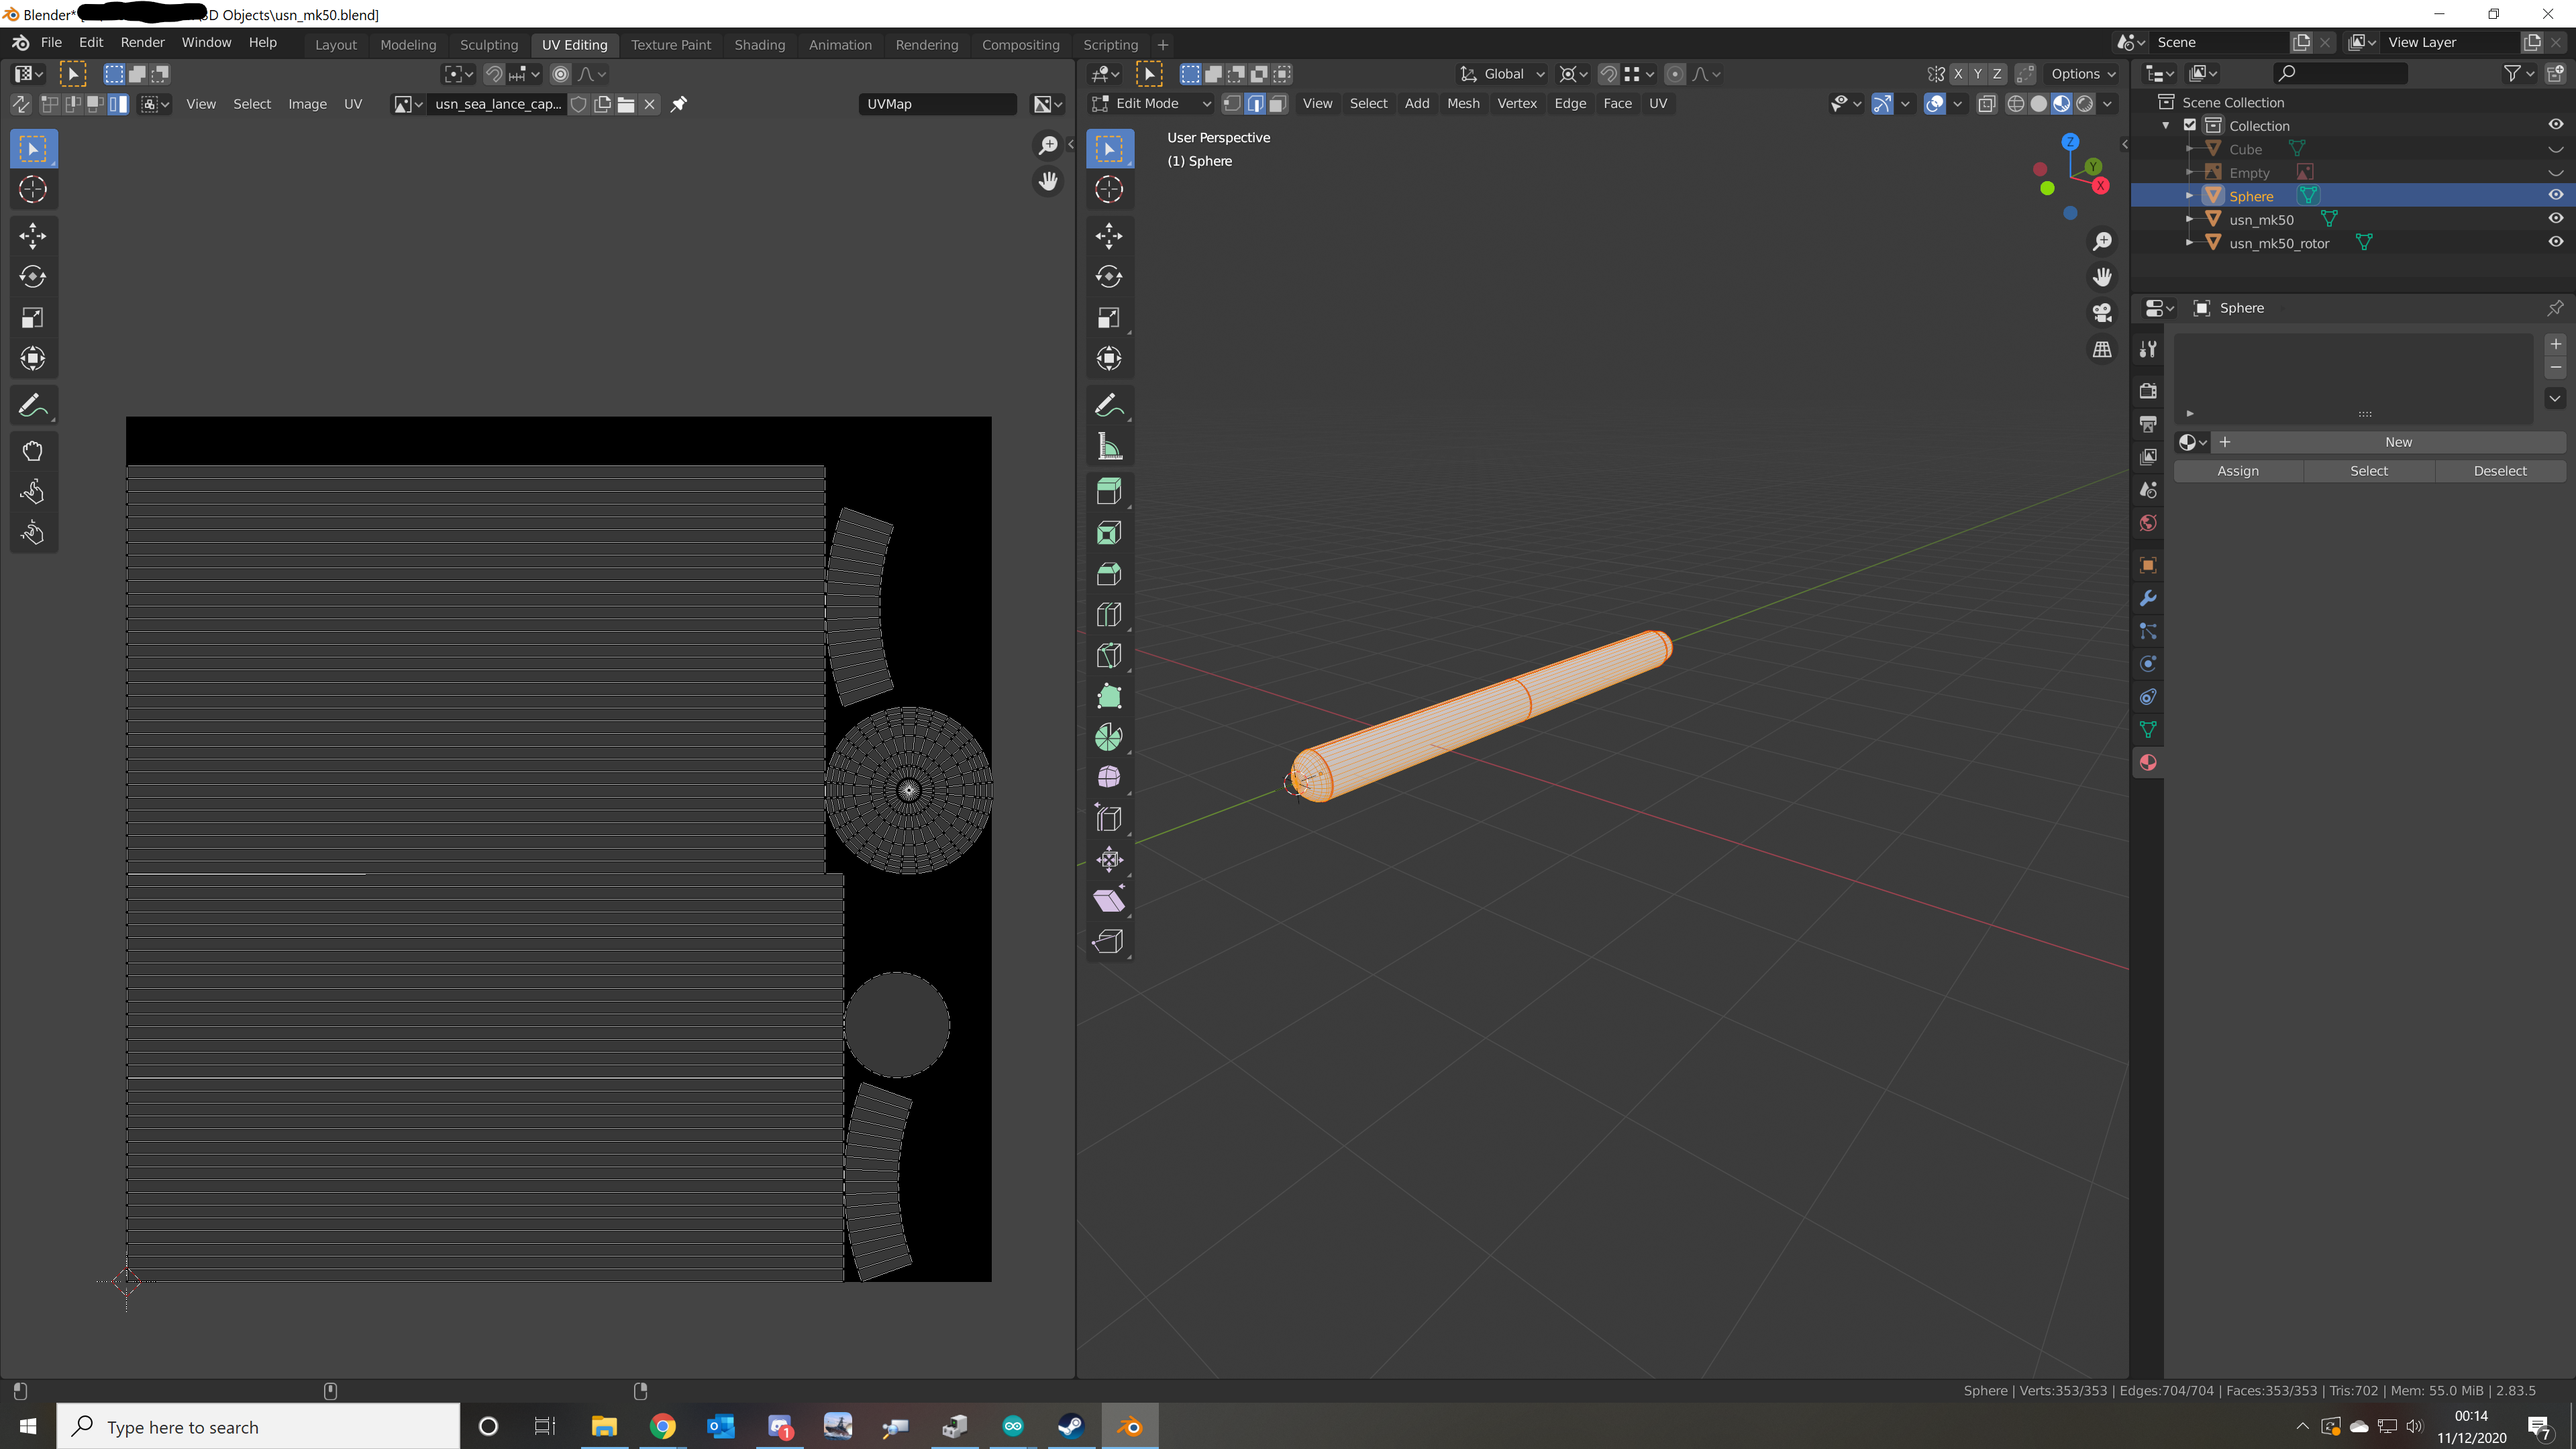
Next I switch to the UV Mapping Tab at the top of the Window. This presents me with two views, the left is the texture map and the right the model.
With the mouse in the model pane I press a to select all, then I move the mouse to the UV Pane and press u this performs a quick UV unwrap and fits everything it. I wont do anything more for this model.
My screen now looks something like this.
We are now going to create a UV template for ourselves to work from in out favourite texture editor (I use Gimp https://www.gimp.org/ ). Move the mouse to the right hand window, press a to select everything and then select UV > Export UV Layout
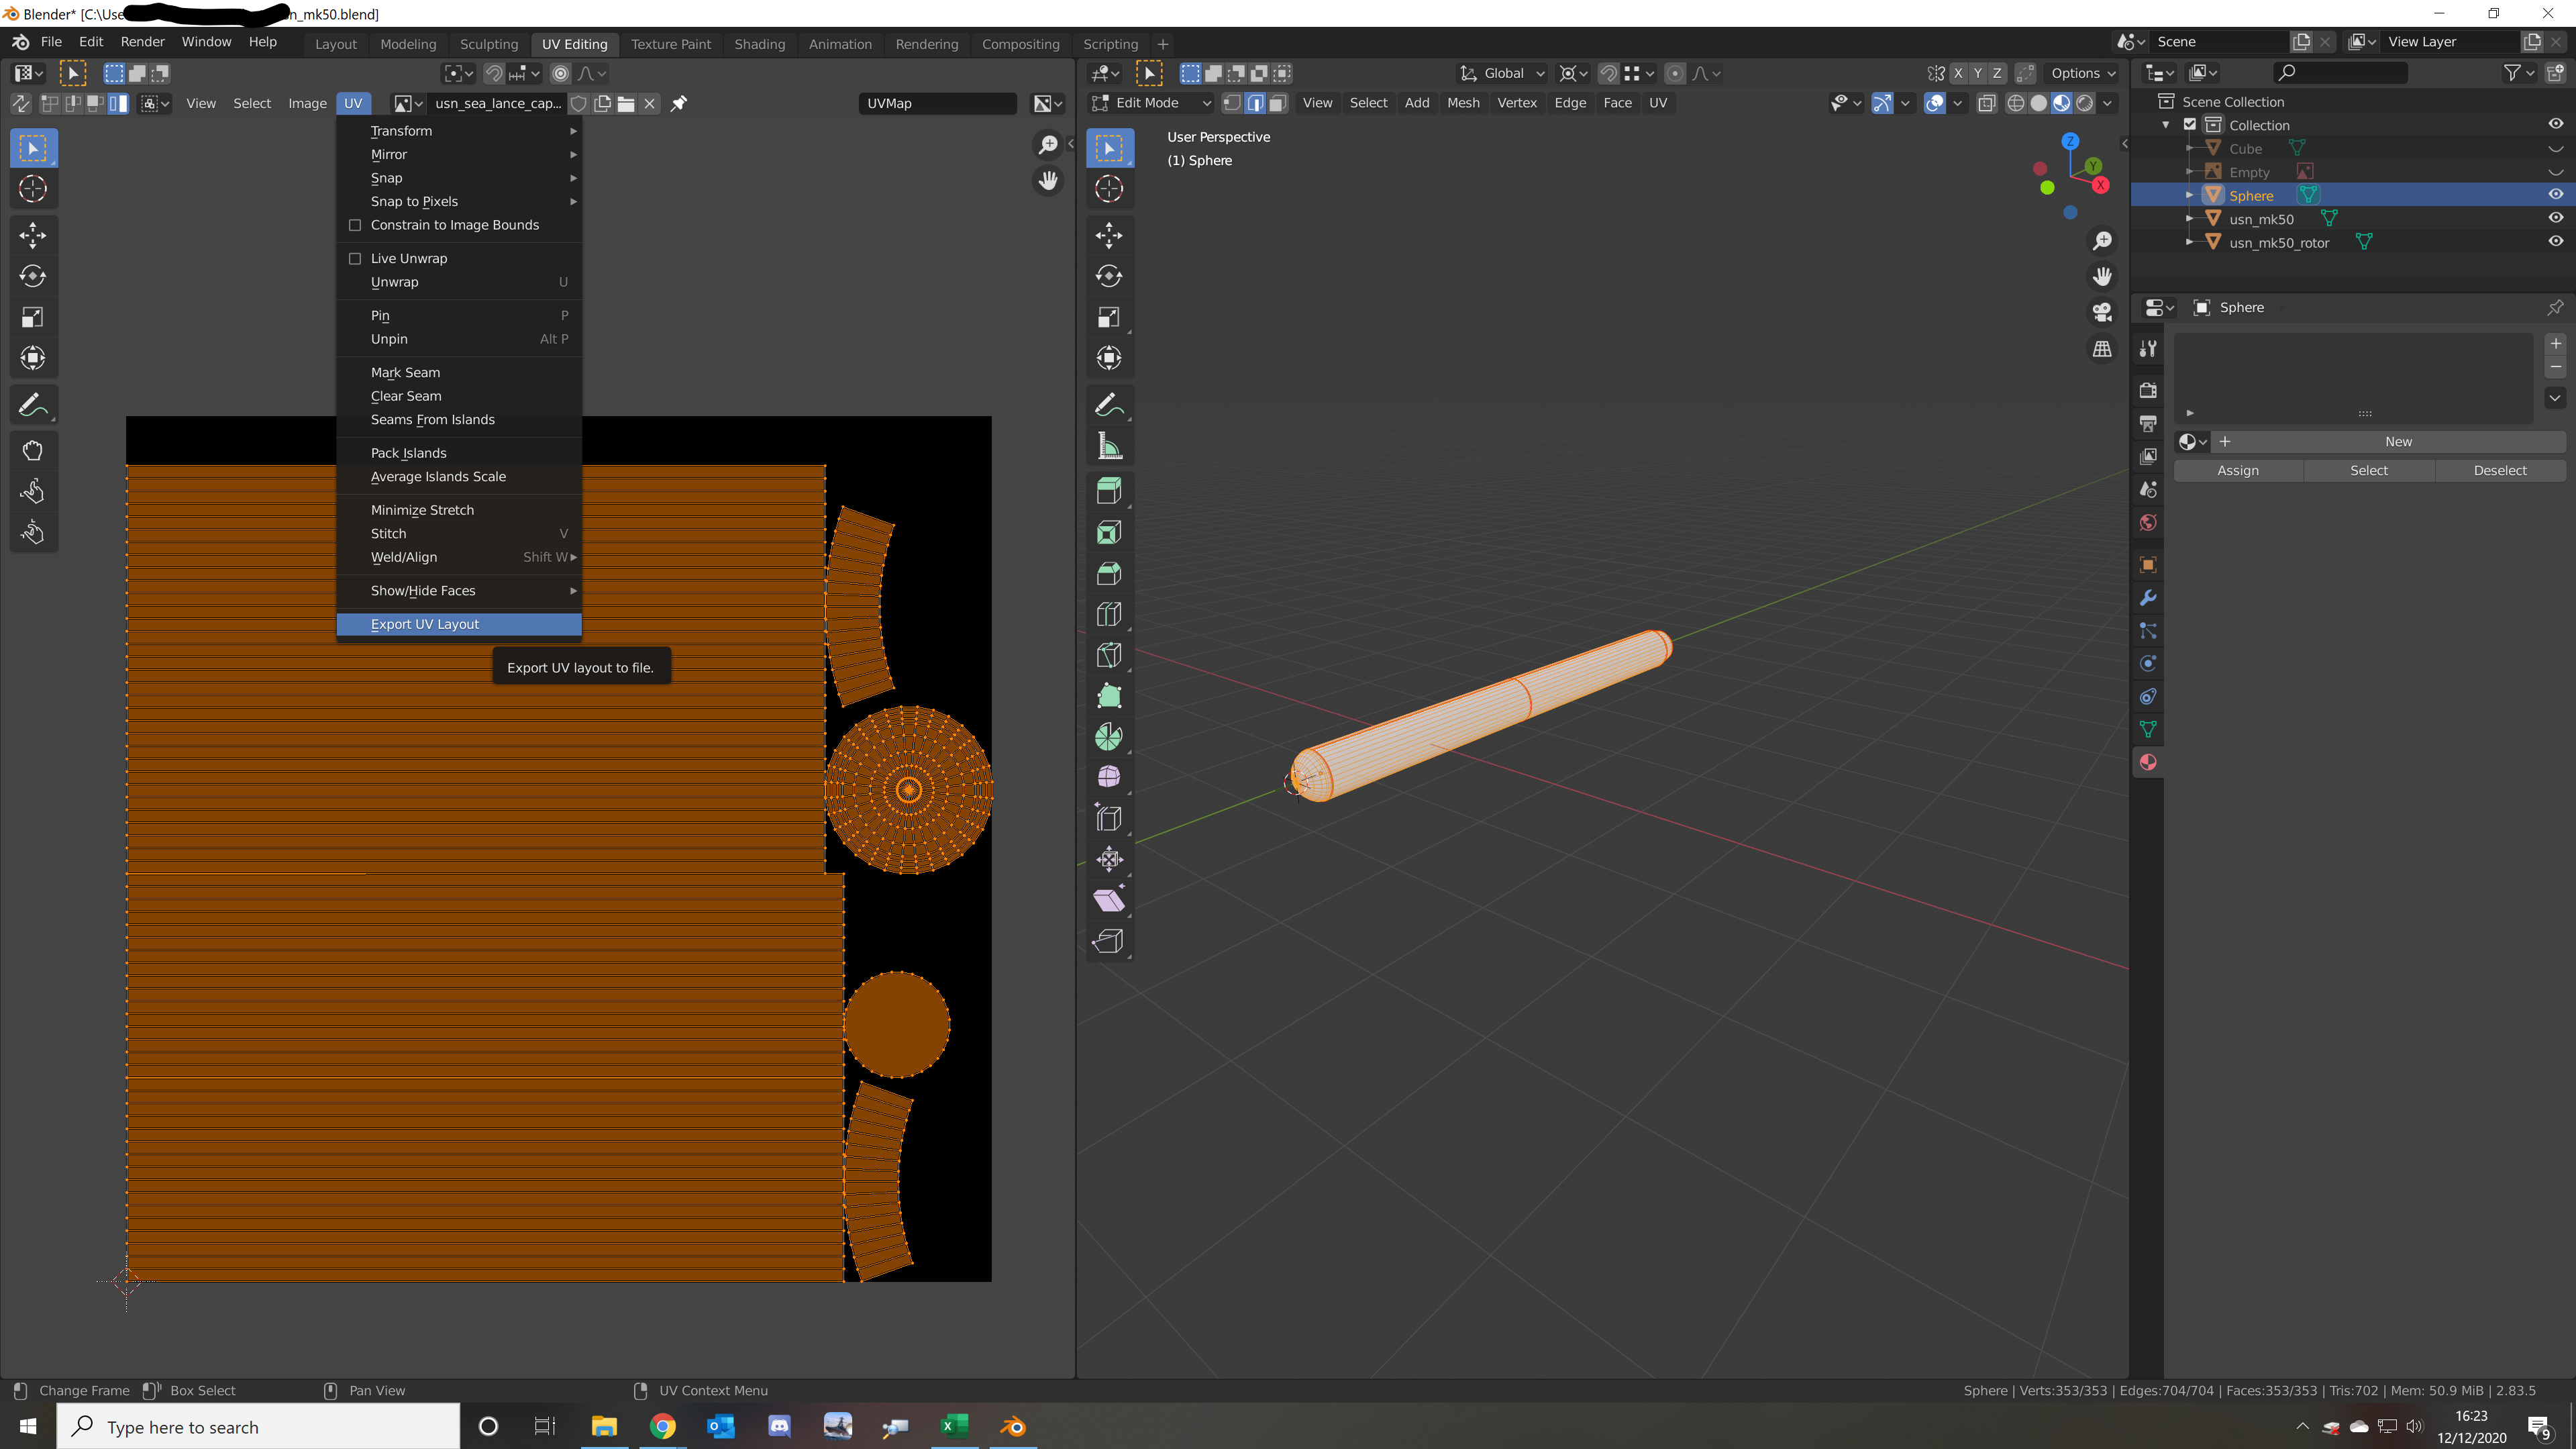
We are now going to export this into the Assets/Textures file that we created in Step 0, this means that we can automatically load changes into our Unity project. Here the export file name of my image has turned red because I already have an image of the same name in the folder.
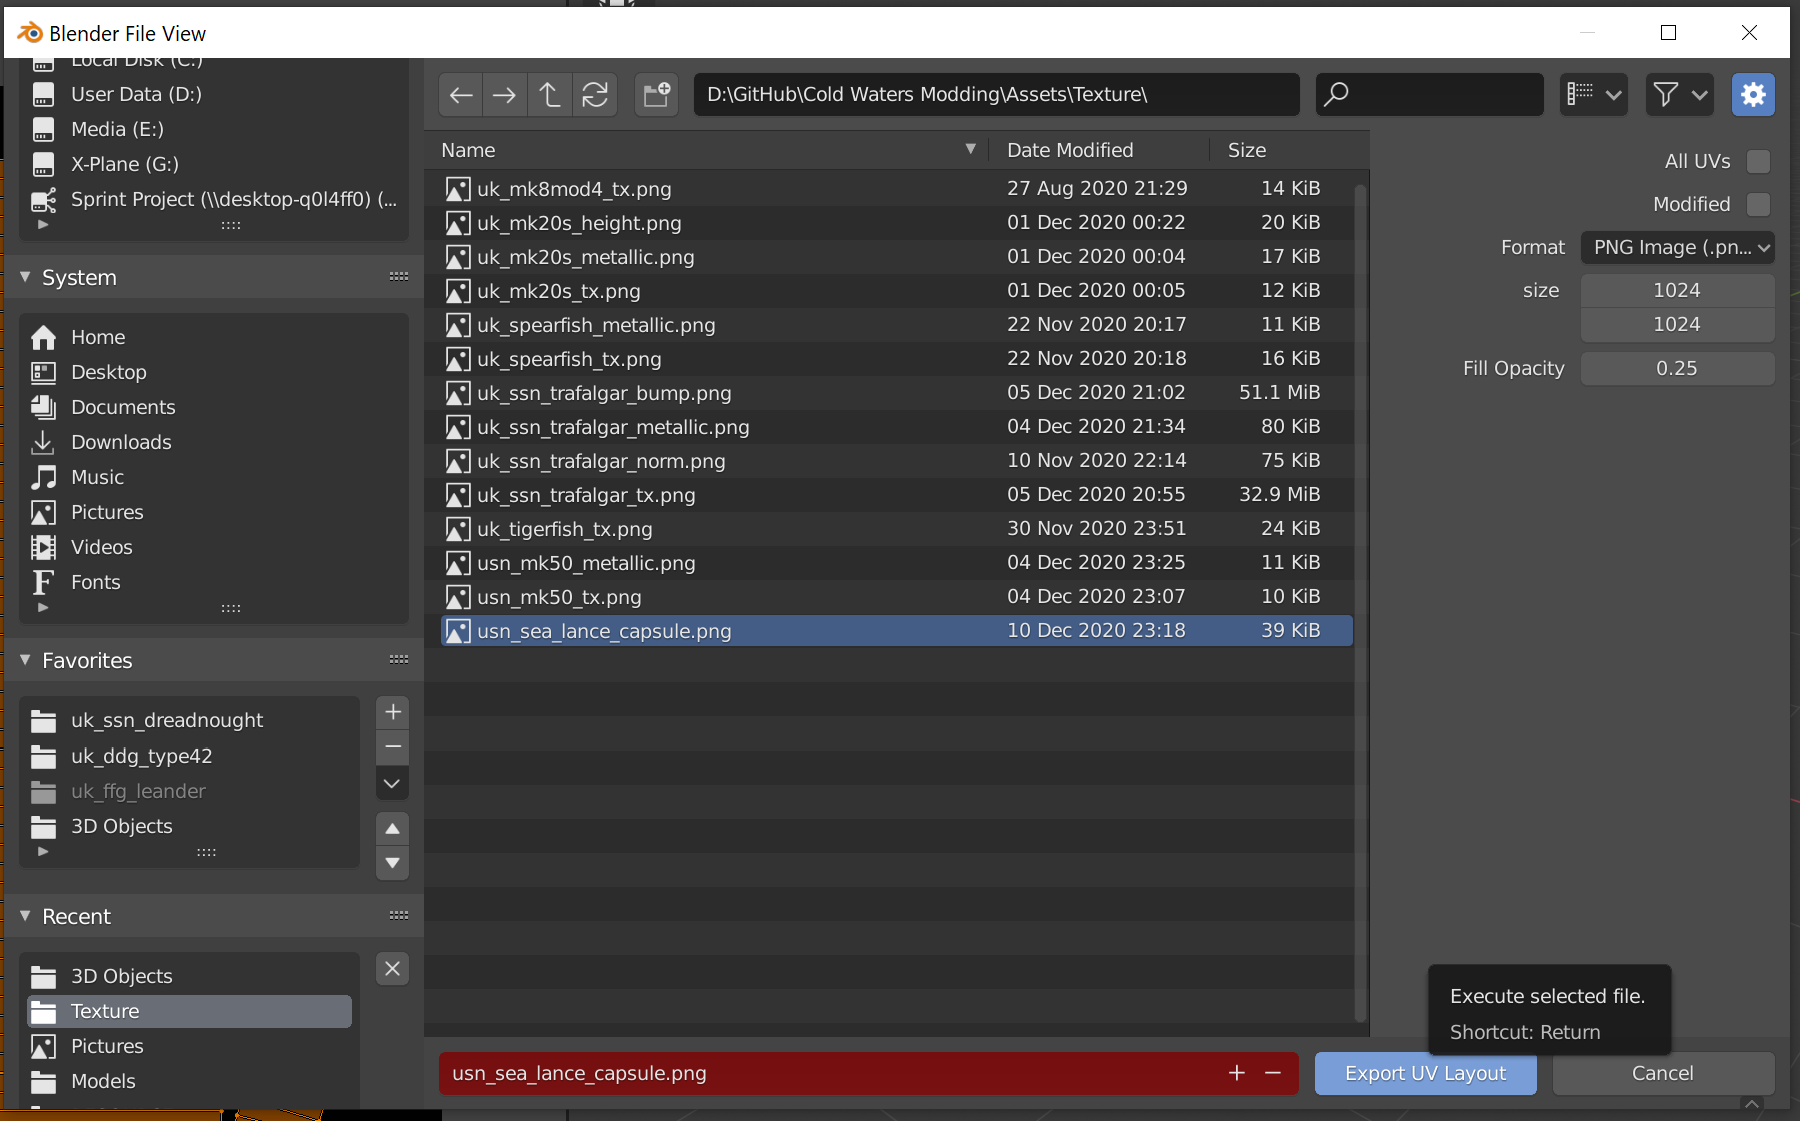
You can now edit this file in your texture editor of choice and after the next two steps changes will remain synchronised between Unity and Blender.
Step 4 - Materials
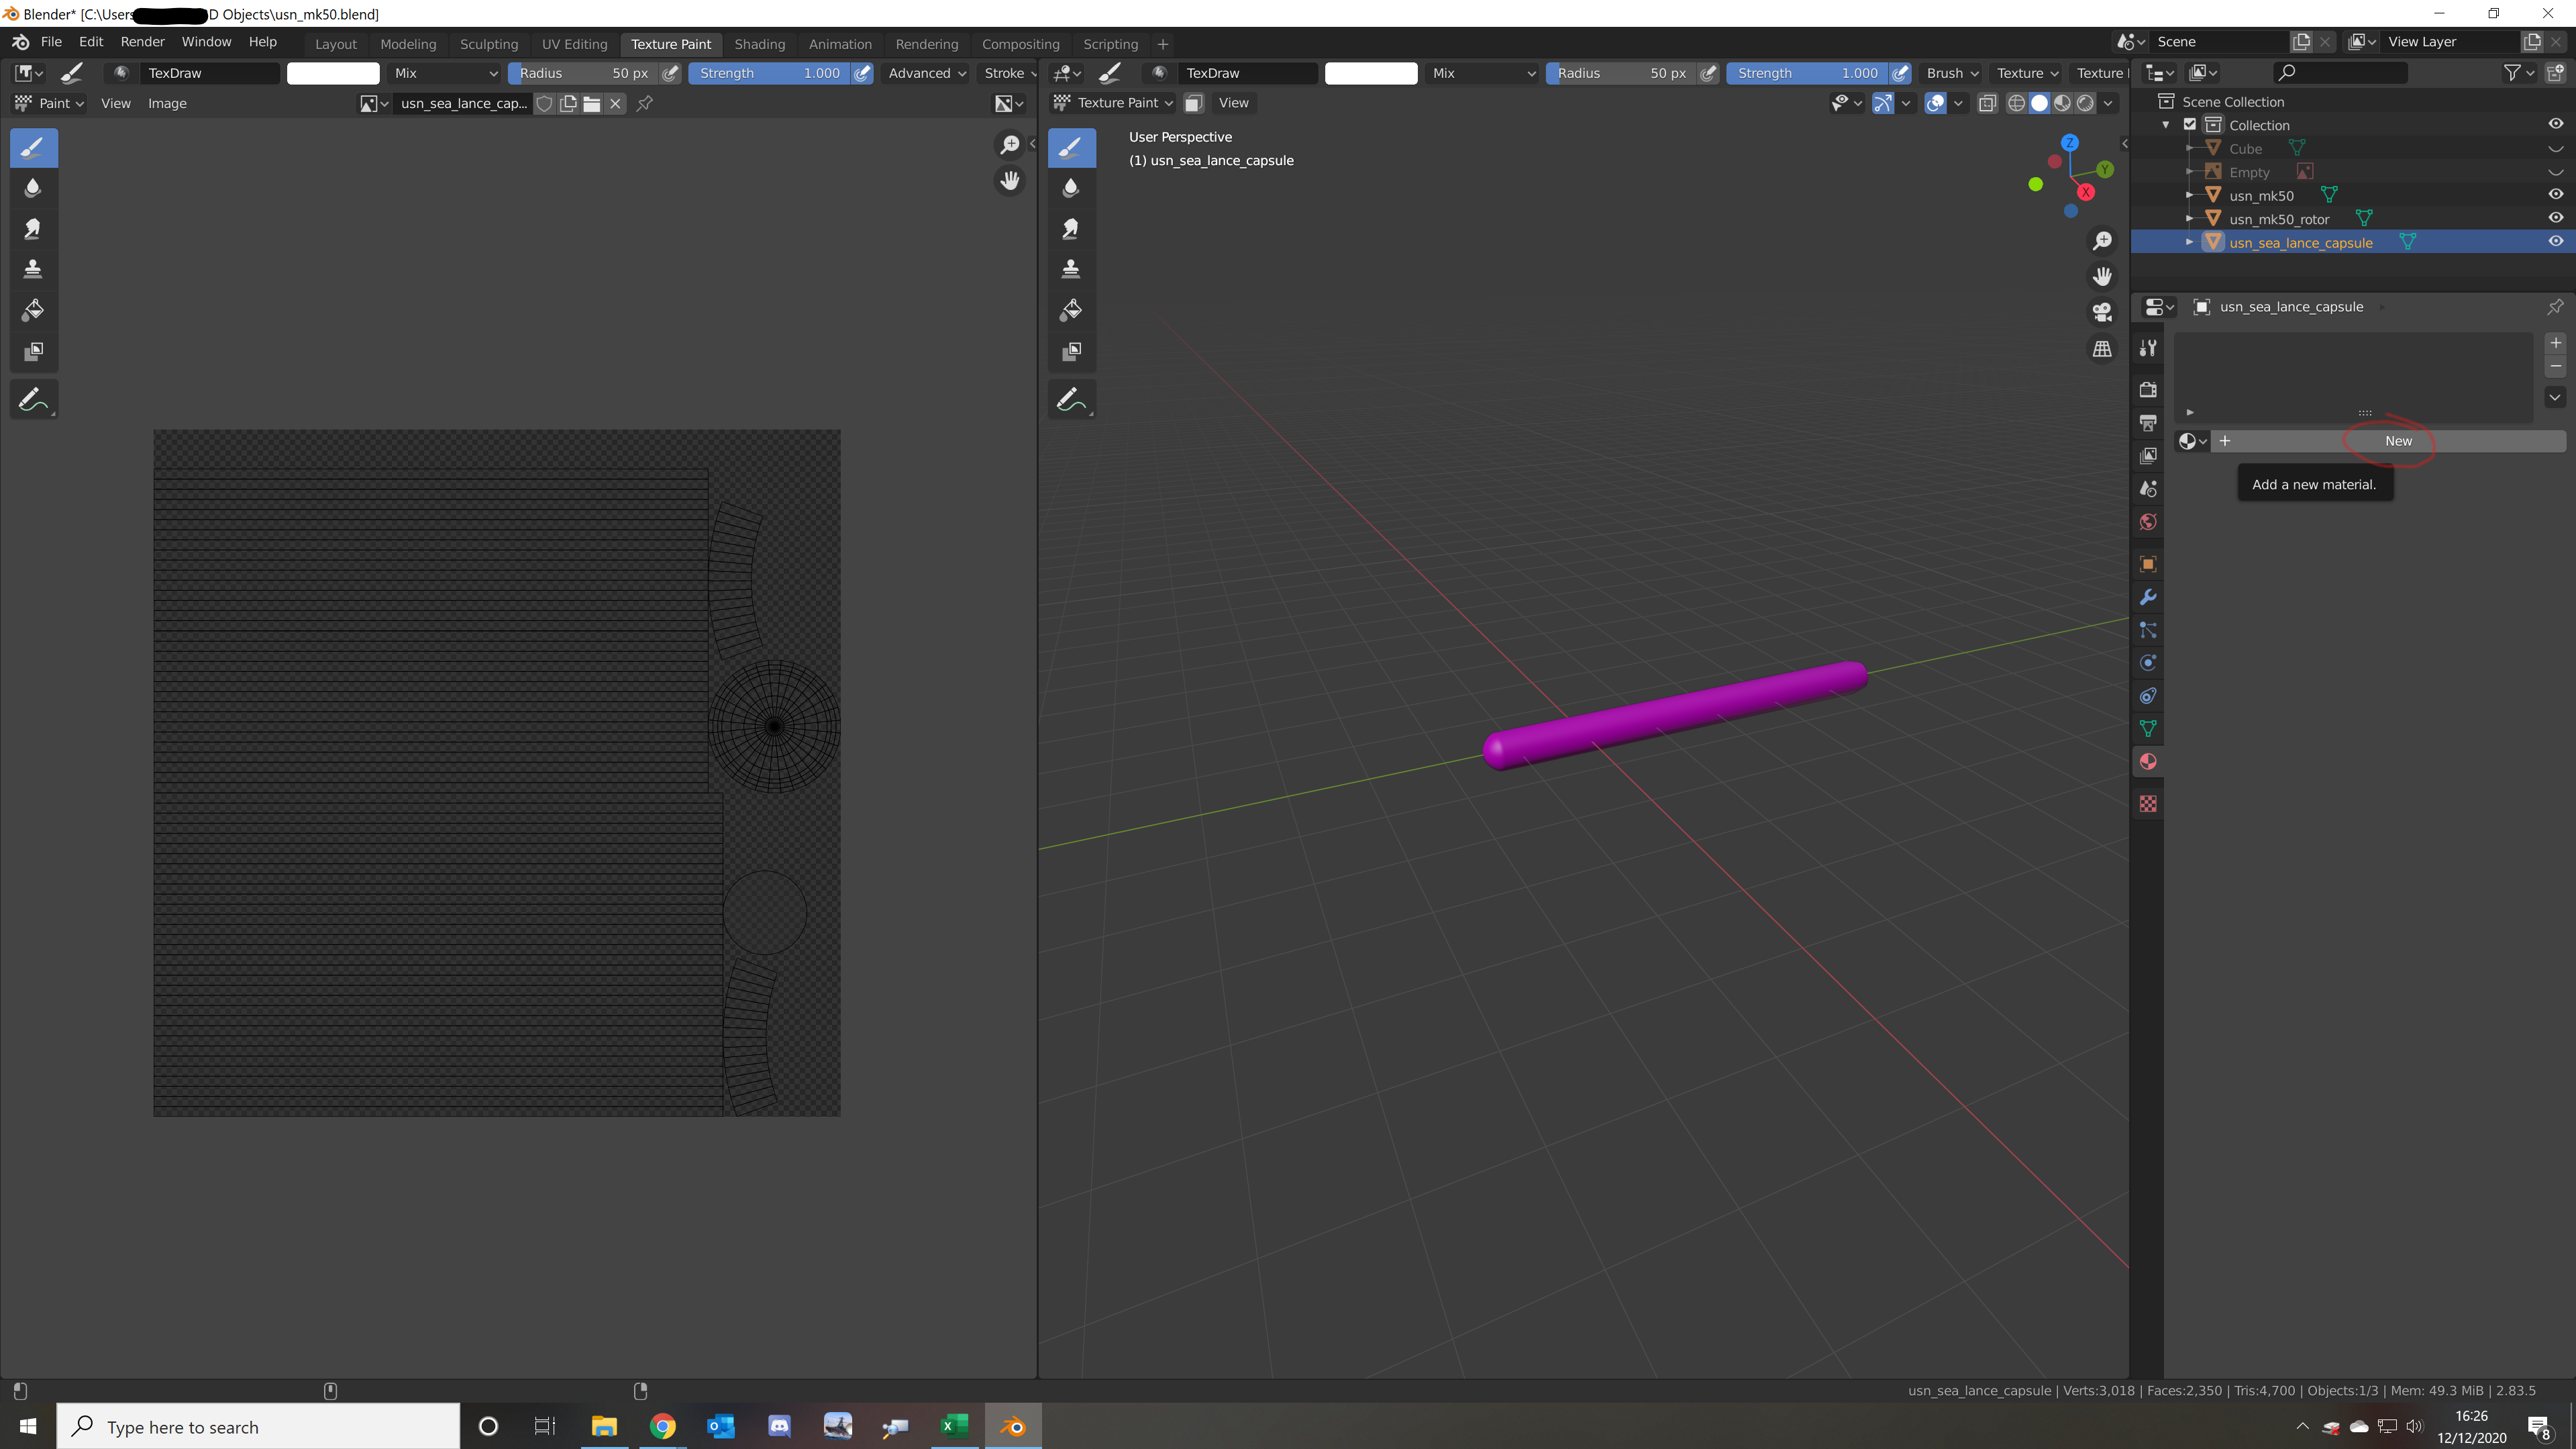
The next step is to set up a material on our Blender model, unfortunately this is where there will be some duplication of effort between Unity and Blender as Unity doesnt understand all of Blender's material system.
First I switch to the Texture Paint Tab in Blender, showing me this. Our mesh is Purple! What is going on?! Well this is what most 3D programs do when you don't have a material or a texture! (If you see a purple asset in future now you know what's happening!).
First we select our object, named usn_sea_lance_capsule here (the name of the object is what we use to find the mesh in game). and then click the material tab, second from bottom. Then we click new
This creates us a new material on the mesh, of type Principled BSDF, I then click the circle next to Base Color and select Image Texture.
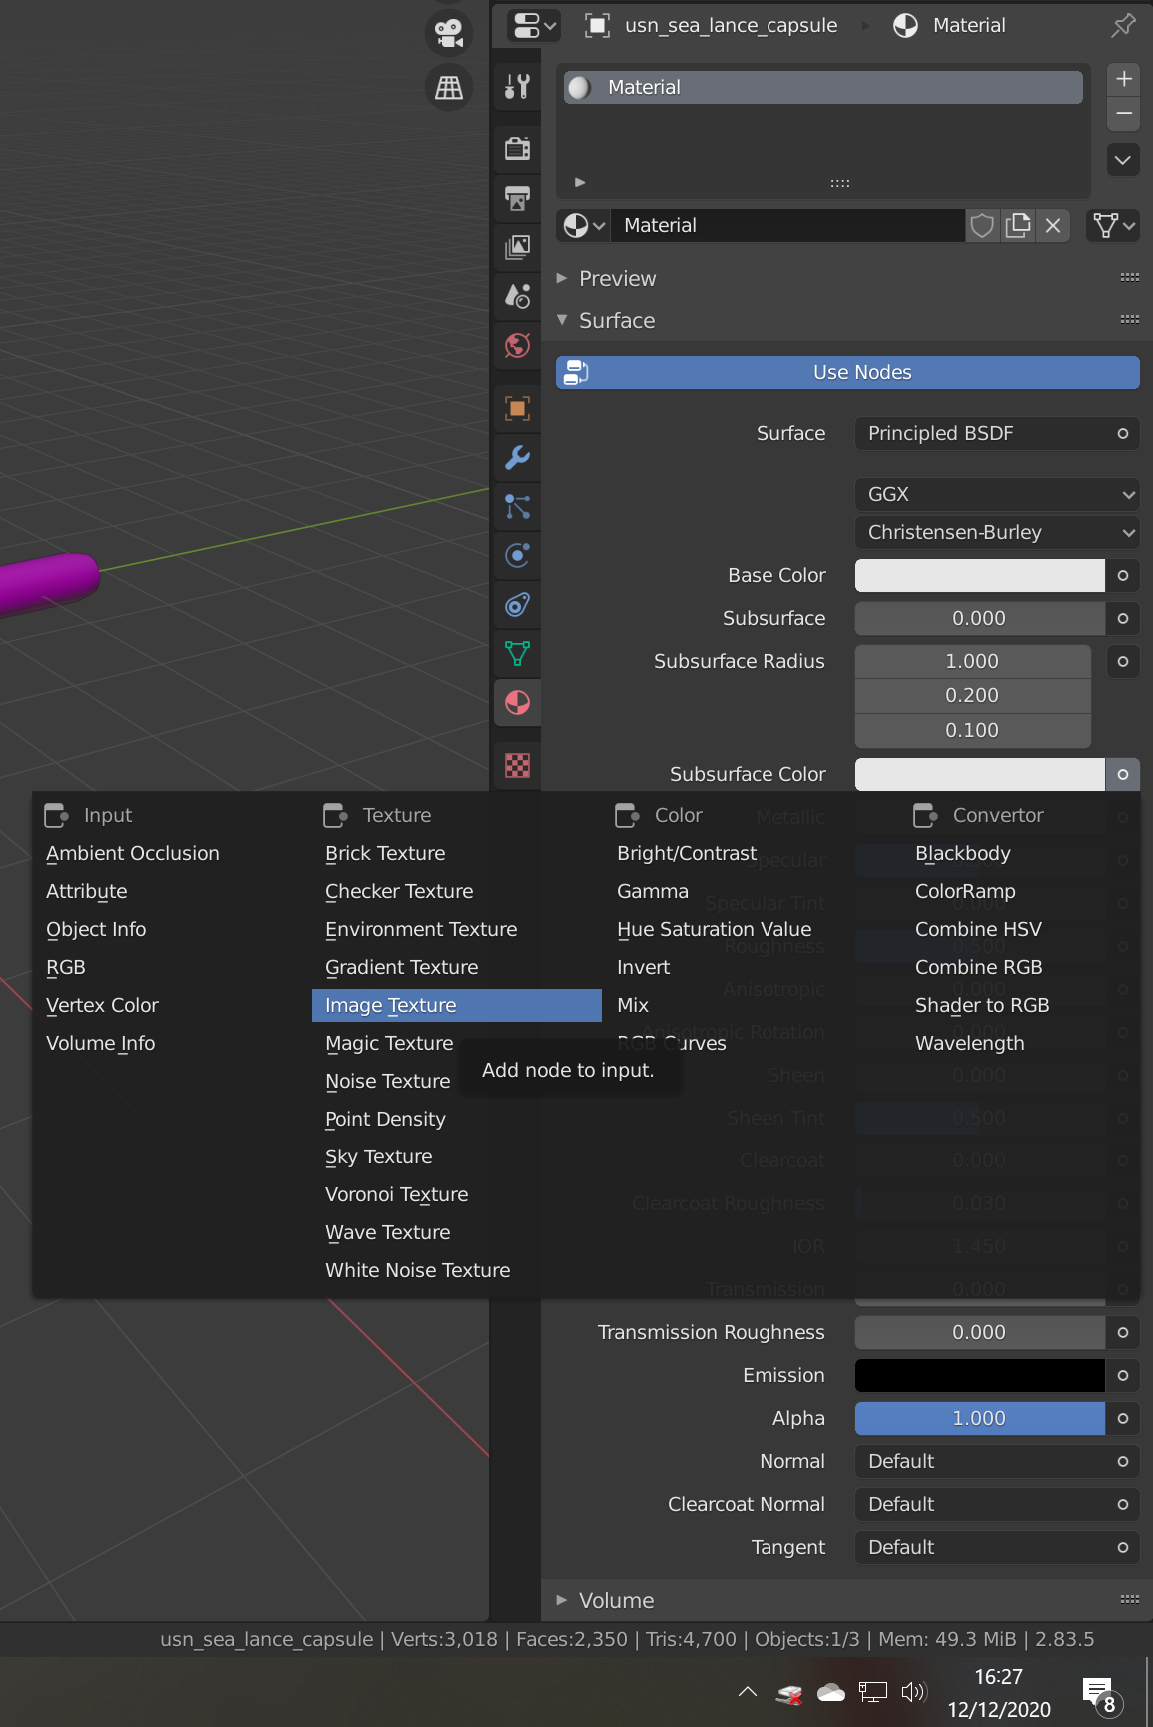
Under Base Color there is now a selector for the Image, I click the little drop down, which shows us images already in our scene, I then select the one we saves just a moment ago.
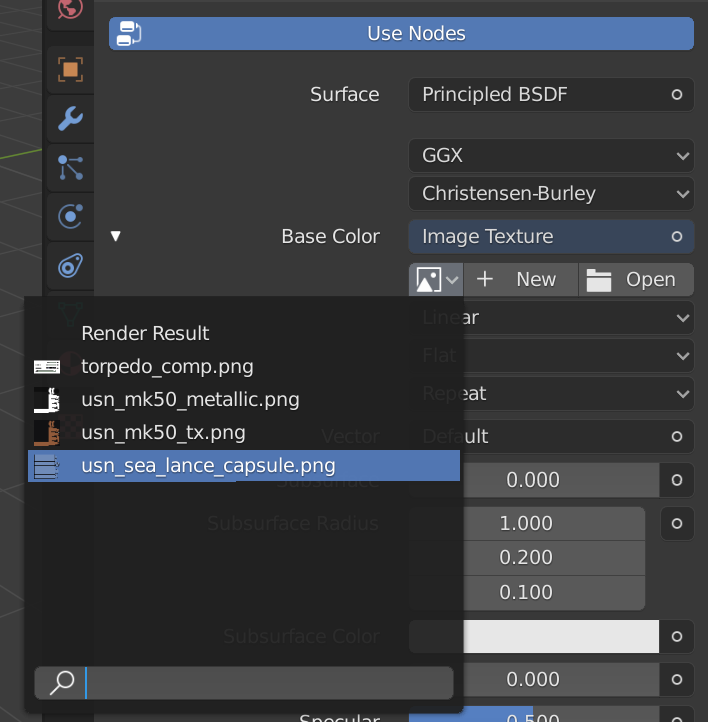
That's it! Material applied, I have renamed it to usn_sea_lance_capsule to save me time later! And now we get ready to export our model.
Step 5 - Model Export
Now select all the object that you want to export, for me this is just the capsule at the moment, as the Mk 50 model is already in my Unity Editor.
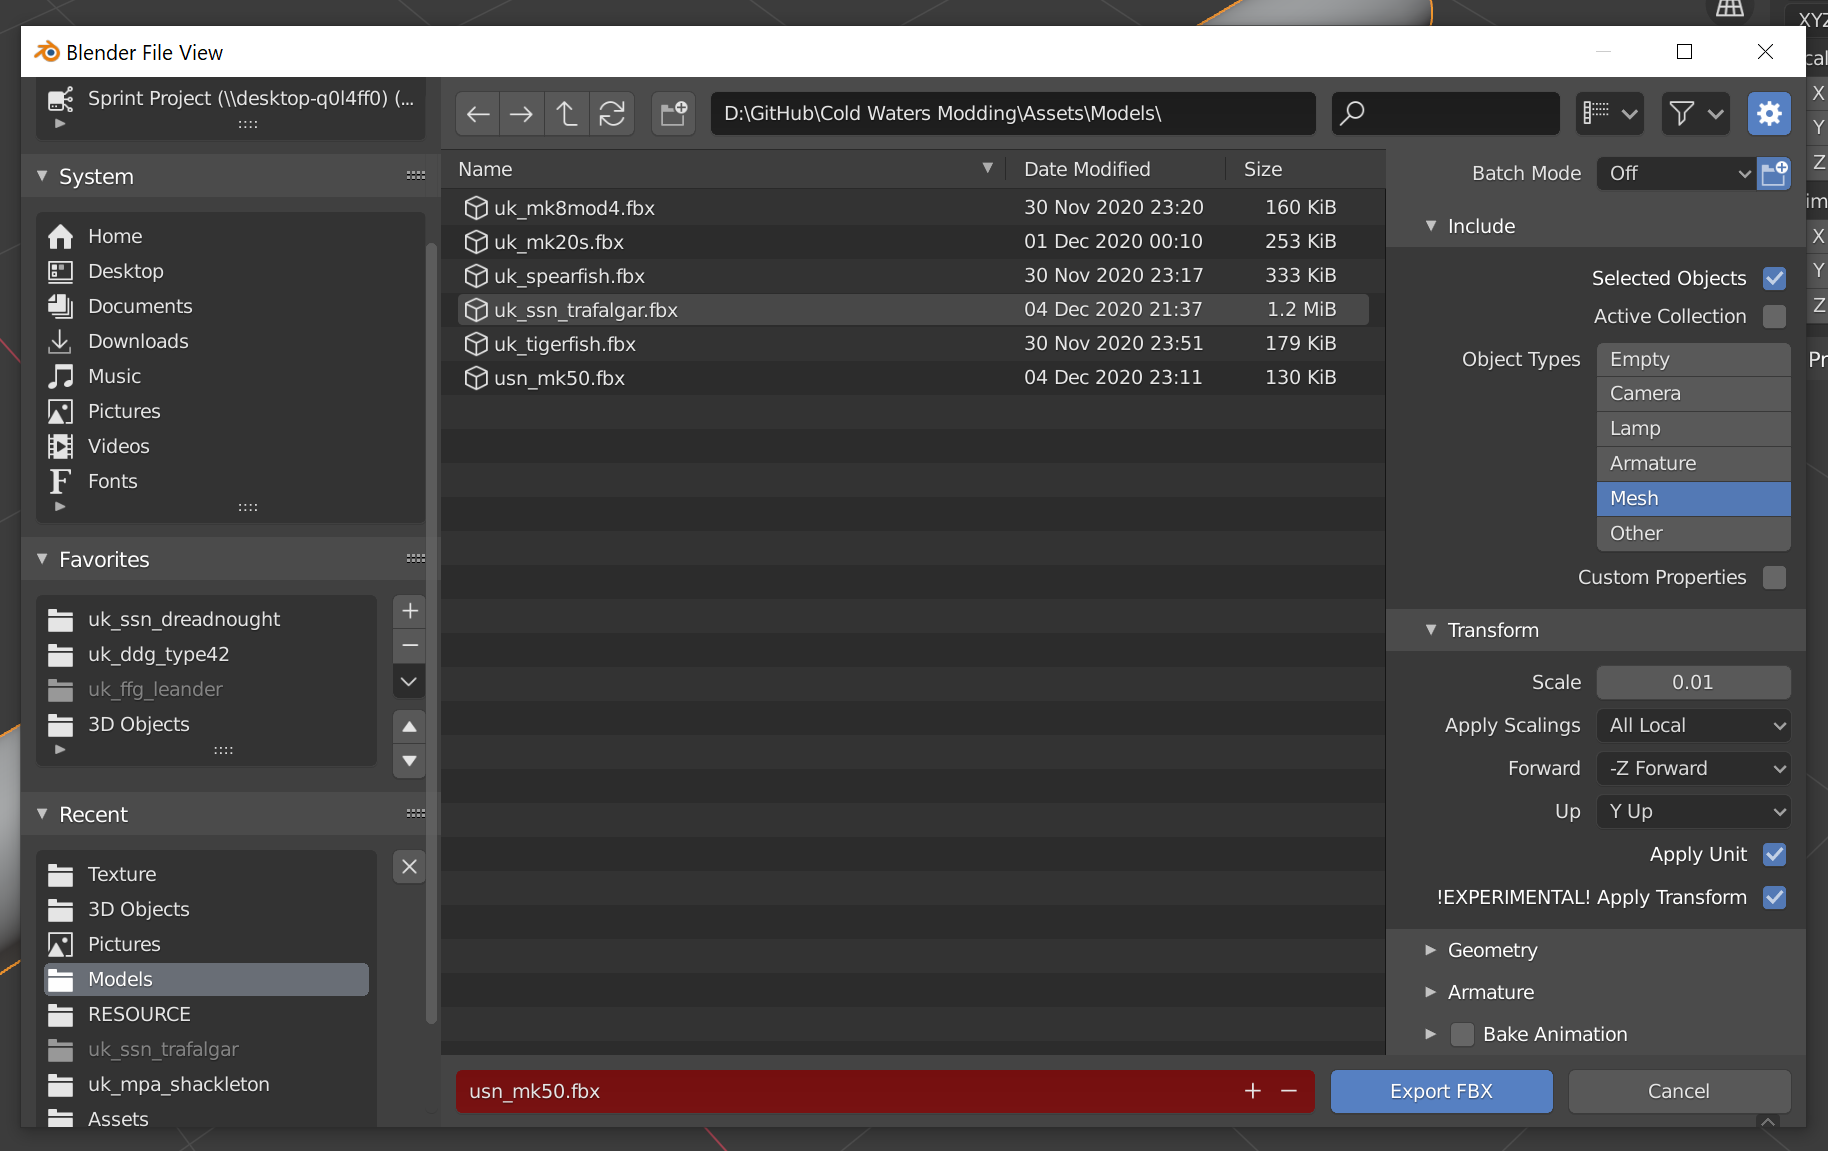
Then select File > Export > FBX
.png)
The Export settings window pops up, you will need to reenter these settings each time you reopen Blender.
Set up as follows:
- Tick
Selected Objects(as I only want to export the capsule) - Select Object Types to Mesh only
- In the scale box type
3.2808/225.39. This scales the model from Real Scale to world scale. - Tick
Apply Unit - Tick
Apply Transform - Untick
Bake Animation
Navigate to the Assets/Models folder we created in Step 0 and click Export FBX.
That's it! Model exported!
Step 6 - Unity Editor Preparation and Export
Now we move back to Unity, because of where we saved our model and textures they should have been automatically imported! I have a folder called Materials in the Model folder and a model called usn_sea_lance
To check how it looks I drag the model into the scene window (you don't need to do this!). And here the model is!
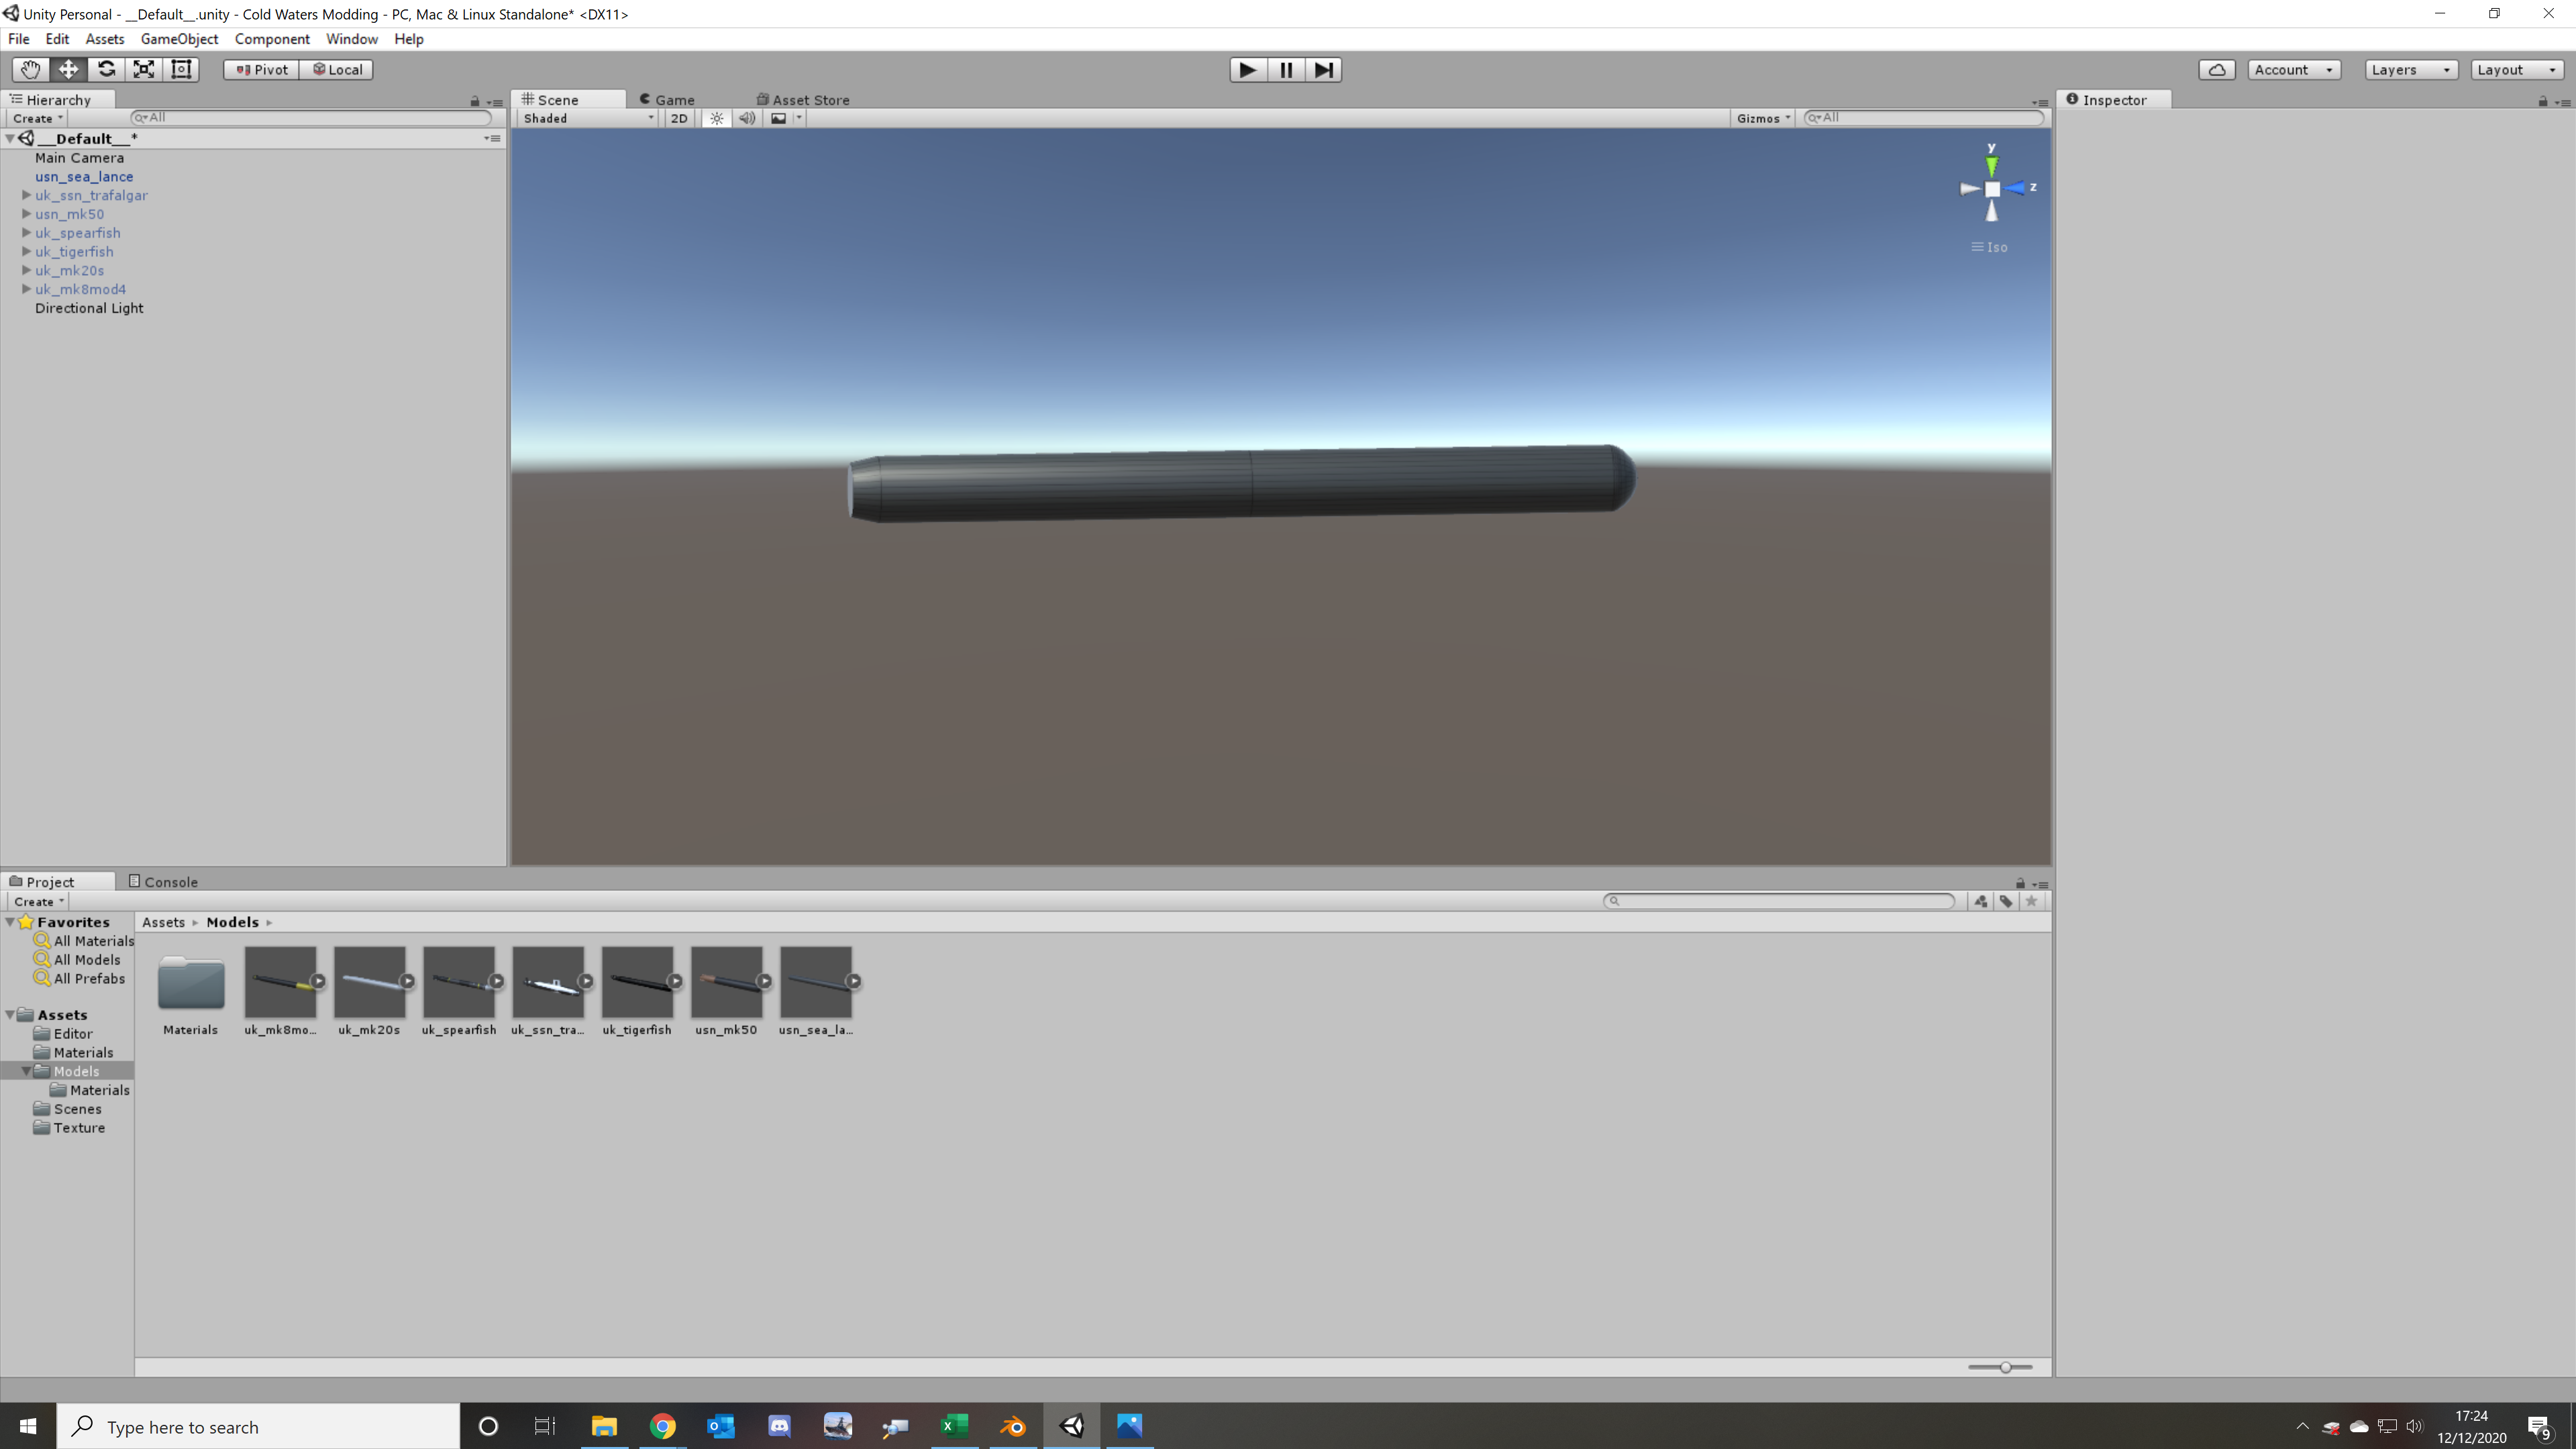
I tend to do a bit of tidying and move the material into the Assets/Materials folder we created in Step 0, but this isn't needed, so long as you remember where things are.
The next step is to set the assets to be included in a bundle, select the model in the assets window and in the far bottom right select the assets bundle to include this in, in my case I am bundling this with my Mk 50, but you will likely click New and type the name you want.
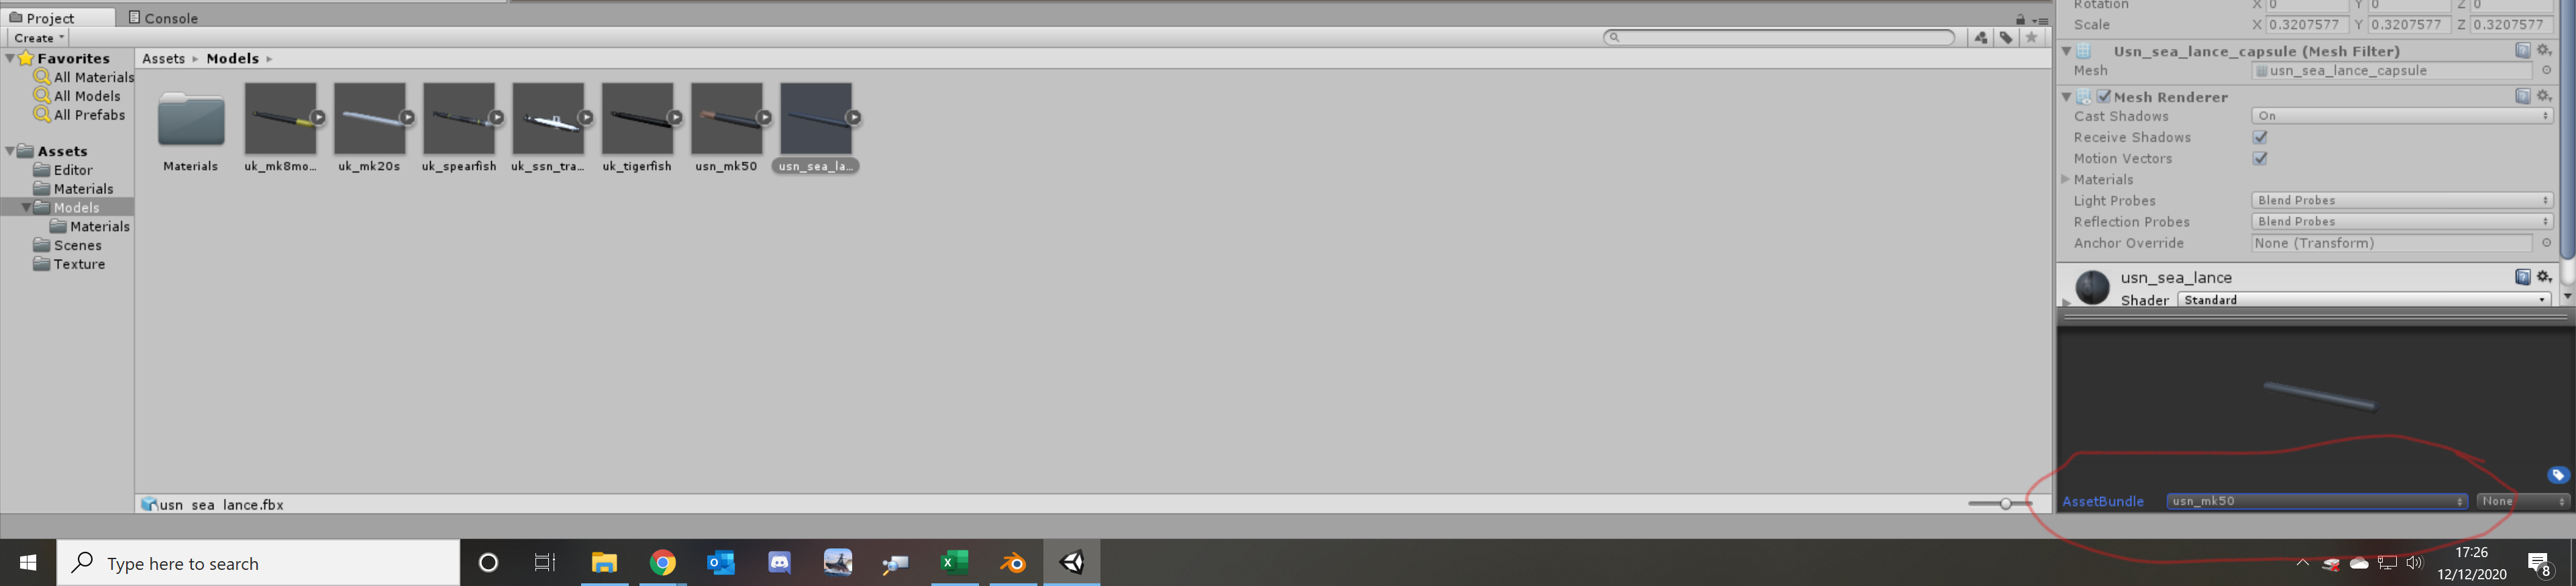
Now do the same for the texture and the material, if they aren't on the list you can't use them later.
The final step is to export the bundle, this is where it is important you changed the path in Step 0, unless you have your Cold Waters install in the same place as me!
Right click in the project window and select Build AssetBundles.
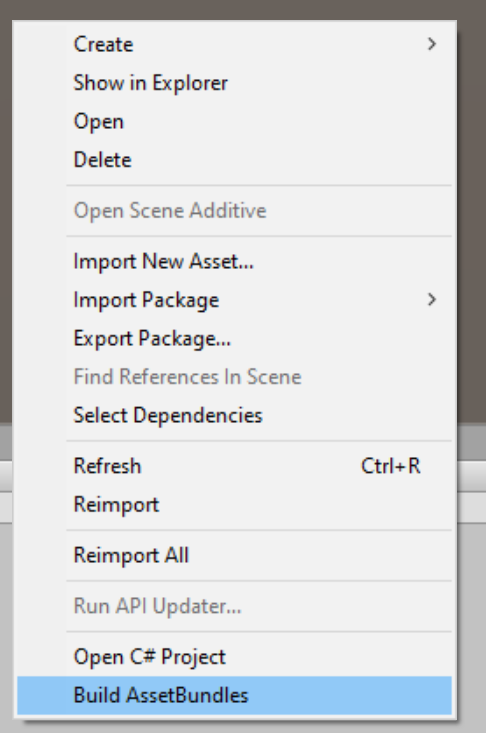
This will then show a progress bar.

And then in your bundles folder you should find your asset ready to be used!
