Mug Heat Press (Hettie) - DoESLiverpool/somebody-should GitHub Wiki
 Quick links: Usage • Troubleshooting • Maintenance
| Nickname | Make | Model | Where | Manual | Issue Tracker | Status |
|---|---|---|---|---|---|---|
| Hettie | ? | WER160 | [Alcove](/DoESLiverpool/somebody-should/wiki/Rooms#alcove) | Example manual | Tool: Mug Press (Hettie) | TBC |


See full safety information below
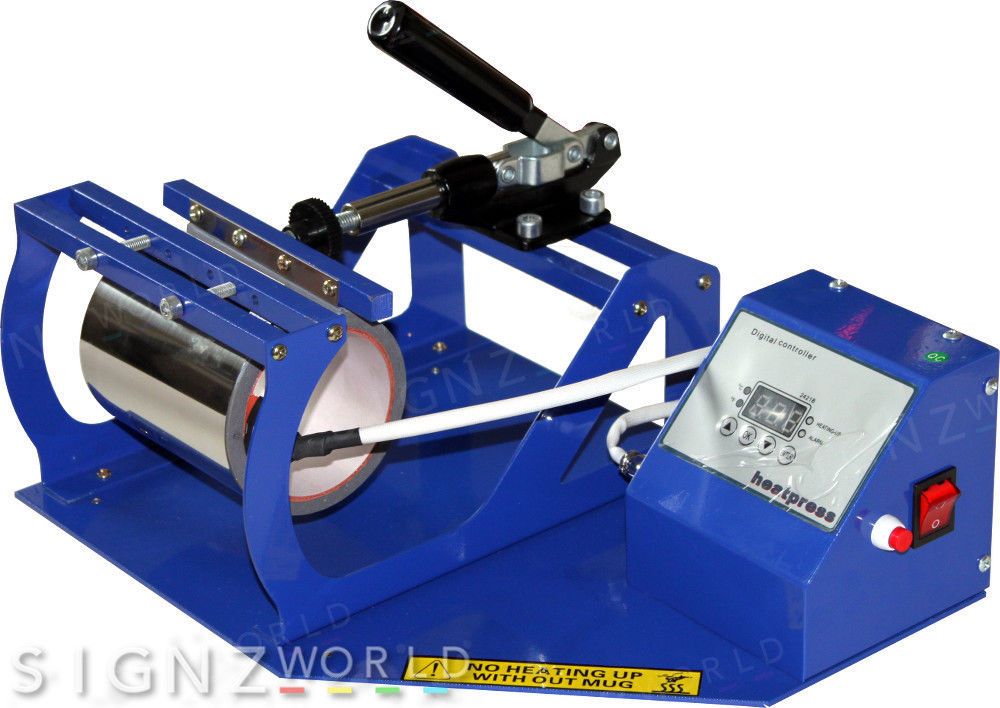
Overview
This machine imprints a transfer on to a mug. The mug needs to have straight sides and to have a special sublimation coating (it may be possible to buy attachments for other mug shapes and sizes).
How it works
You design a logo or graphic and use it to create a transfer using the sublimation printer. You then attach the transfer to the mug and put the mug into the mug press to apply heat. The transfer area is typically around 200–220mm long x 90mm high
Specifications
TO-DO
History
TO-DO
Using the machine
To use this machine, you'll need to:
- Follow safety precautions
- Create a transfer
- Apply the transfer
Let's get started...
Safety precautions
The mug and the press can get hot, so take care for yourself and others who are in the workshop.
- Workshop Safety
- The hotplates on this machine are hotter than an iron, and could cause serious burns
- The machine must always be attended while on
- Ensure the area around and inside the machine is completely clear before turning on (marked area)
- You will need to use oven gloves when removing the mug from the press
- Always leave the machine open and turned off at the wall when not in use
Step 1: Create a transfer
Use the sublimation printer to create a transfer on special paper. Instructions here: Ricoh-3110DN-Sublimation-Printer-(Bella)
MAKE SURE THE TRANSFER IS REVERSED BEFORE YOU PRINT IT !!!
[Alex] I made some DoES mugs and a couple of points came out of this which may be of use when designing transfers.
-
It's really useful to get the size of the transfer to crop out correct so it wraps around the mug neatly. Make the height the same size as the mug, and the width just the right size to wrap around from one side of the handle to the other side of the handle.
-
You can do this by experimentation, wrapping a normal piece of paper around the mug then marking and removing to measure.
-
Crop marks on your transfer are also useful to enable you to cut. Any mark at all on the transfer will end up on the mug so make sure to crop just to one side of the mark so you remove it from the transfer you are going to use.
-
I've uploaded a design here which is what I successfully used to create the mugs, and you can use this as a starting point. Note how I've put crop lines right across the edges but not right across the centre between the two designs. This makes it much easier to crop out the two designs and cut them in two without leaving black marks.
Design is here
- When cutting I found that a heavy metal ruler, a sharp stanley knife, and the green cutting board were perfect. Make sure everything is clean and blow on the paper to make sure any specs of dirt or dust are removed!

Step 2: Apply the transfer
- Make sure all surfaces are clean and free from grease.
- Attach the transfer to the mug in the position you want it and with the printed side against the mug. There is some special heat tape by the heat presses, but blue painters tape works well too, and doesn't seem to leave a sticky residue.
- You can just about see through the paper to the design on the inside. At this point it's worth checking you have the design in the place you want it to be around the mug and that it's not upside down!
- Put the mug in the heat press and clamp into position.
- Switch on the heat press and allow it to reach the correct temperature - currently set to 190C, but further experimentation may be needed.
- Press the red button on the side of the mug press. The display will now count down to zero - currently from 180s, but further experimentation may be needed.
- The mug press will beep after the countdown has completed. Release the clamp and remove the mug (using oven gloves as it will be very hot).
- Carefully remove the transfer paper.
- Put the mug in a bowl of cold water and wait until it has cooled.
- You'll find a gluey residue on the surface of the transferred image on the mug, you can simply wipe this off.
Hints & Tips
See the manual link above. We're still experimenting with settings at the moment. MDP has an instruction sheet for a similar looking mug press which may contain useful information: MDP Mug Press Manual
Minimising waste
- Avoid:
- Reduce:
- Reuse:
- Upcycle:
- Recycle:
- Disposal: For any remaining waste, please put it in the workshop bin.
- General: Waste, recycling and cleaning up
Troubleshooting
If the advice below doesn't solve the problem, please create a new issue to let us know.
Maintenance
- If the machine is broken or needs maintenance, create an issue in the issue tracker (link in Troubleshooting above)
- Label the issue:
Tool: Mug Press (Hettie)as applicable - If broken, add
Brokenlabel (this triggers various systems to flag the machine unavailable) - If maintenance required, add
Maintenancelabel (the machine is working, but needs TLC) - If parts or consumables need purchasing, add
Shoppinglabel
- Label the issue:
Supplies
- You can buy mugs from DoES at a price of £3, to include the mug itself and the sublimation transfer. Alternatively you can buy them yourself e.g. from MDP Supplies http://www.mdpsupplies.co.uk/dye_sublimation_mugs.asp - note: these mugs have a logo on the bottom. If that's important to you, then you may need to find another supplier. They also only do all-white mugs. If you want eg a black mug you need to buy one with a white window that you will sublimate onto eg for boxes of 36 this https://signzworld.co.uk/shop/36-x-full-colour-11oz-sublimation-mugs-heat-press-transfer-print-custom-design/ or http://www.subli.co.uk/shop/dye-sublimation-blanks/mugs-other-ceramic-blanks/ceramic-mugs/black-durham-style-mug-with-white-patch-case-of-36.html or for single mugs https://subliblanks.com/products/black-white-patch-sublimation-mug