Creality CR 10S 3D Printer - DoESLiverpool/somebody-should GitHub Wiki
Specification
| Default | ||
|---|---|---|
| Min. Layer Thickness | 0.1 mm (in some cases 0.05 mm) | |
| Printing Precision | ±0.1 mm | |
| Nozzle Diameters | 0.2 mm, 0.3 mm, 0.4 mm | 0.4mm |
| Filament Size | 1.75mm | |
| Printing Speed | ≤200 mm/s | |
| Compatible filaments | PLA, TPU, Wood, Copper, Rubber | |
| Standard Print Size | 300 x 300 x 400 mm |
Recommended Print Settings
These may need to change dependent on filament in use but these figures are a good start
| PLA | |
|---|---|
| Nozzle Temperature | 215 |
| Bed Temperature | 65 |
Background
AlexL bought this in on advice from JohnC as it's a keenly priced printer that can give good results.
It's a "technician's" printer in the sense that it needs some tweaking and some tender loving care to get the best out of it. It's extremely moddable so fits well with the DoES ethos.
I bought the printer via Amazon at around £360. When investigating be a little careful as there's an older version of the CR10-S which is cheaper and a newer version with dual Z-axis and a filament-out light sensor.
The printer currently in use at DoES is the 2nd Creality CR-10S we've had. The first failed after a few months with a heating error. JR investigated and it appeared the bed heating connector was under-specified for the current going through it. The solder on the connector was melting and eventually we believe the MOSFET gave out. This appears to be a problem others have had with the printer. ref: here
We need to keep an eye on this problem and if it starts to re-occur we may need to change out the MOSFET or some such. Currently the connectors at the back are at a nominal room temperature but we should keep checking these.
Hardware Build
The printer comes mostly pre-assembled in a flat pack form. The vertical chassis needs bolting to the horizontal chassis but the head is all mounted and ready to go. All in all it's a straightforward job to get it setup.
Advice: Check the chassis is all levelled out when putting it together.
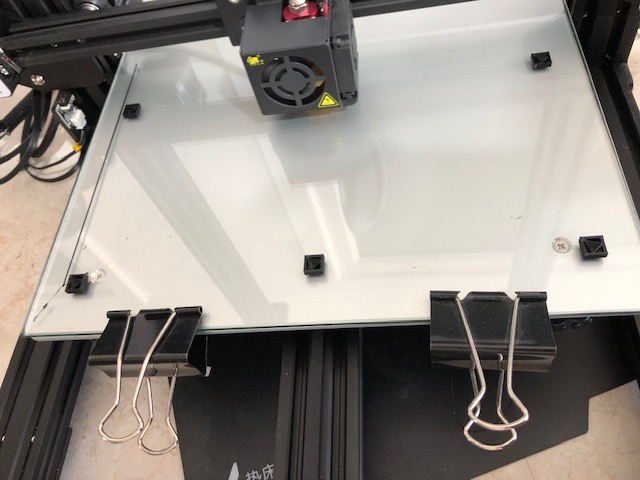
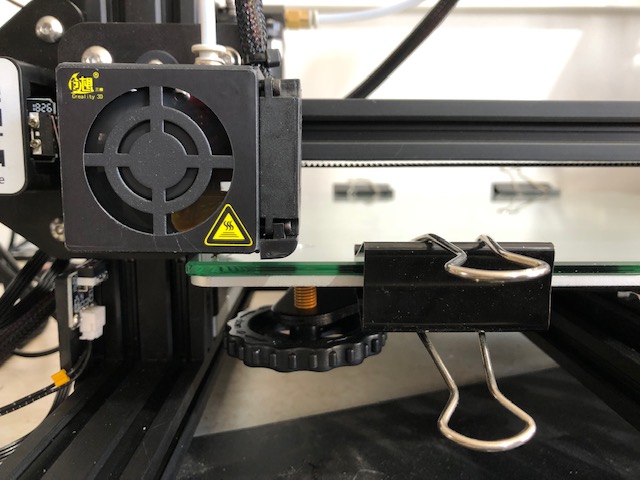
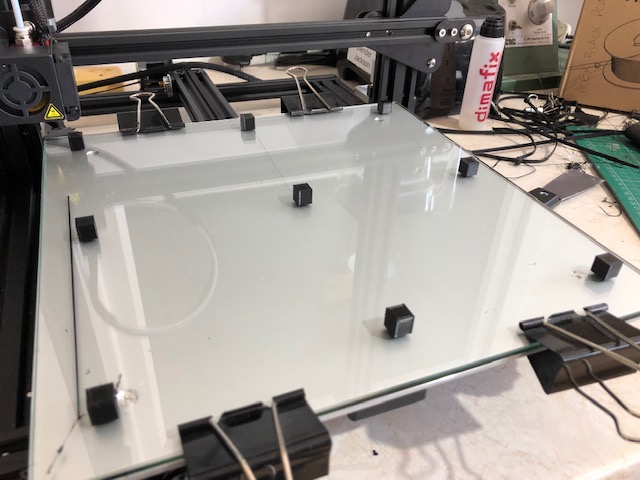
I've mounted the glass base with some large crocodile clips until I can find a better solution. These need to be kept out of the way of the print head as it moves around so are best not moved.
Software Setup
I've upgraded the standard Creality firmware to the OpenSource Marlin firmware version 1.9
This gives: "INSTALLING MARLIN 1.1.9 ON YOUR CR-10S WITH MESH BED LEVELING, THERMAL PROTECTION, BETTER MENU LAYOUT AND FINALLY POWER RESUME"
For details see here
The process is quite simple. Download an update utility XLoader, the firmware binaries, then write these from a Windows laptop via a USB CDC (serial) connection.
Setting up for a print
Cleaning the glass base
-
The advice is not to use any glue on the base.
-
Instead you can wash down the glass base with warm water. Use a soft cloth so as not to scratch the glass. Any glue left by other users melts away easily.
-
Then dry and squirt some glass cleaner on the glass.
-
Clean with paper towel until you hear the "squeak" all over the glass.
-
Then replace on the heater base and put the crocodile clips back, taking care to keep them out of the way of travel of the print head. This is an example of reasonable placement for the crocodile clips.
Bed Levelling
Physical Bed Levelling
-
Get a post-it note. We are going to put this underneath the print head at various positions around the glass base to check that we have the right distance between the head and the surface of the glass. If you can move the post it note around underneath the head freely you have too much distance. If you can't move the post it note at all you have too little distance. At the correct distance you should be ablet to move the paper around and feel some "grab" from the head.
-
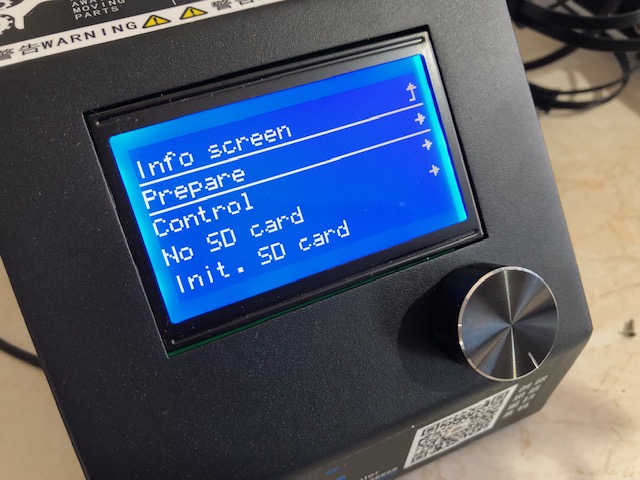
The easiest way to start this process is to power on the Creality CR-10S and press the knob on the front to bring up the menu. Then rotate the knob to move to "Prepare" and click. Then "Bed Levelling", "Level Bed", "Click to Begin"
-
The mesh bed levelling will move to each of nine positions on the bed, moving each time you click the knob. Initially we are physically levelling the bed using the wheels underneath so we only care about the four corners, each corner corresponding to a wheel.
-
Start at the front left, and rotate the wheel underneath the corner until you feel the "grab" on the post it note.
- Then click the knob to move to front right, back left, and back right repeating the operation.

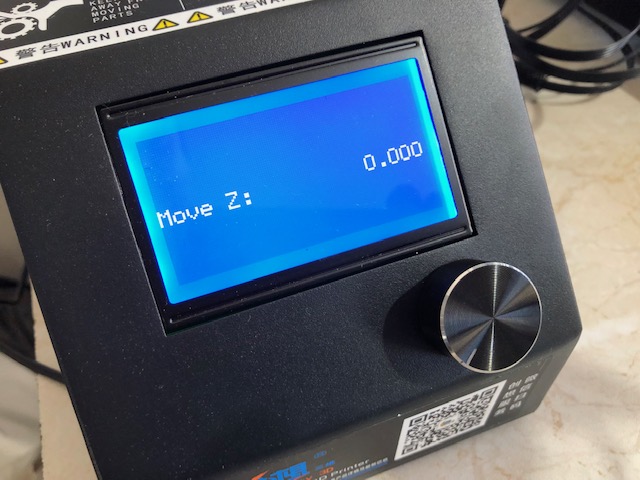
- The software gives you the option to change the vertical position but at this point you should not change this and leave this set to 0.0. You can change these "mesh" values in the "Software Mesh Levelling" step if you wish.
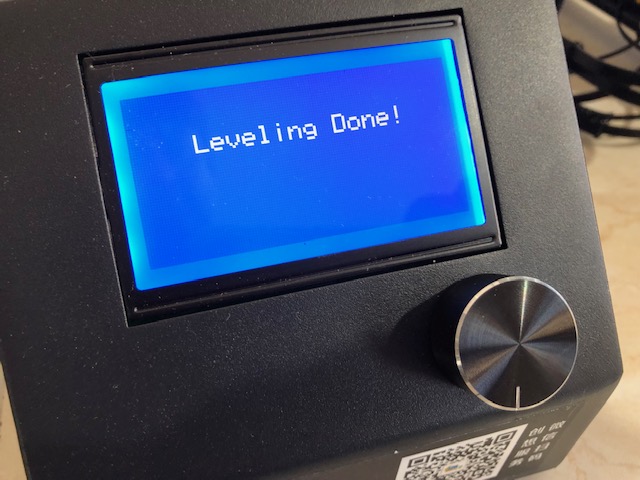
When you've been through each of the nine points the CR-10S will beep and "Levelling Done" will be displayed.
This should give you a first approximation to a level bed which may be good enough for your prints.
Software Mesh Levelling
Now that you have a first pass with the physical bed levelling you can, if you wish, configure the software mesh bed levelling. What you're doing here is telling the 3D printer firmware to modify print heights as it goes along based on where the head needs to be within the build volume.
So restart the bed levelling process as above. But this time instead of turning the wheels underneath the bed use the knob to raise or lower the head a little until you get the "grab" on your post-it note at each of the nine locations on the bed.
As it finishes it will beep to show you that the values have been stored.
Calbration Print
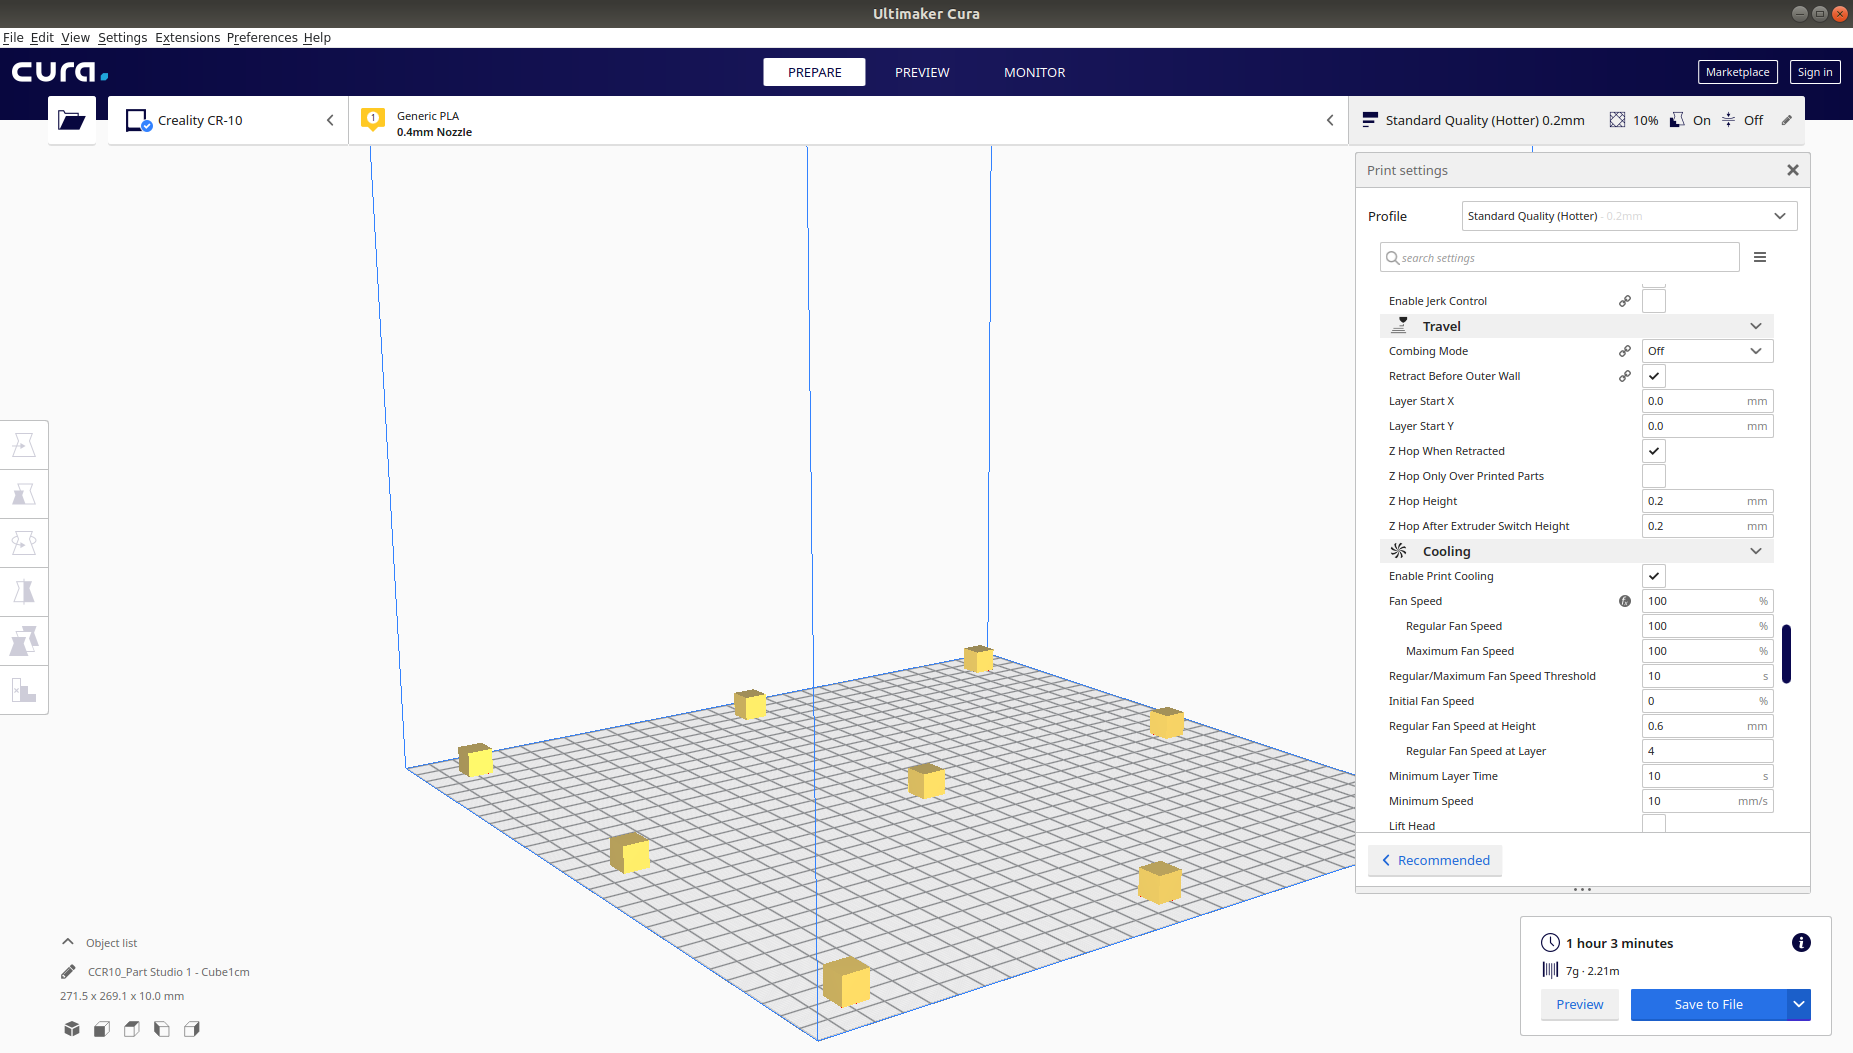
Advice from JC is to check your bed-levelling with a calibration print. An easy way to do this is to grab a 1cm cube design and then slice this in the software tool of your choice (e.g. Cura). A quick option if you think the bed is level is to print one cube in the centre of the build area. A more comprehensive option to fully check the levelling is to print a grid of 3x3 1cm cubes. This gives a very good indication of how level the bed is.
-
A 1cm cube is easy to design but there is a ready-made OnShape design you can export as STL here
-
I've placed this at 9 locations in a Creality CR-10S build volume using Cura, and sliced it for a standard quality print (0.2mm layer height, 215C nozzle temp, 60C base temp). The output gcode is in somewhere-safe here
You can load the .gcode onto a uSD card and insert this into the side of the power supply / control unit. Be careful doing this as you can LOSE THE CARD inside the box.
When you start a print you'll see the first layers going down. These should stick to the glass bed. If not you may need to clean the bed more thoroughly or you may need to improve the bed levelling.
Conversely you may have the head slightly too low in which case you won't get a good first layer laid down. This may not be a problem as subsequent layers will probably be OK but you may wish to back off the wheel underneath slightly to increase the distance to the head.
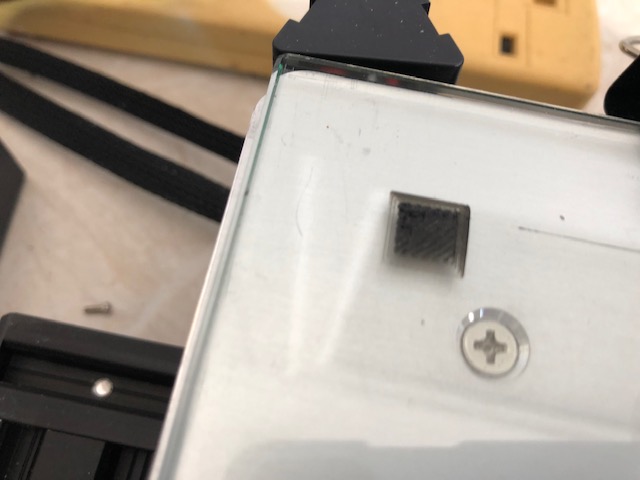
For example this is a good first layer
And this is how it looks when there isn't enough distance between the glass bed and the head
The print of the full 9 calibration cubes will take about 90 minutes and at the end of this you should see something like the following
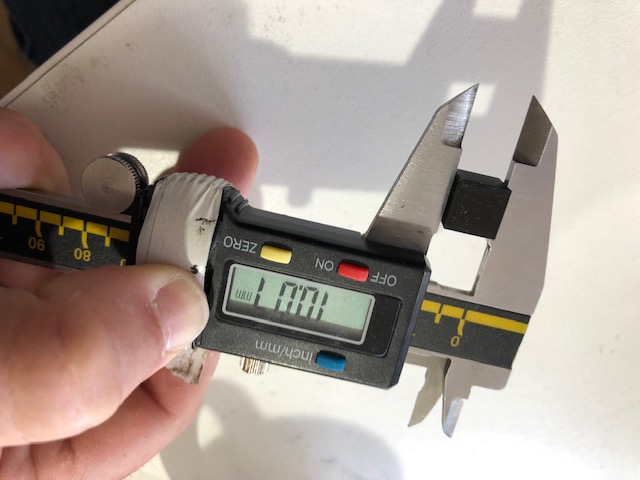
You can check the print accuracy by taking one of the cubes and measuring it with calipers
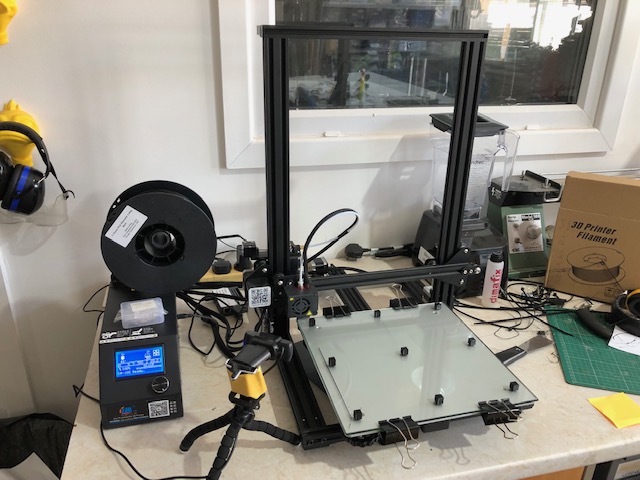
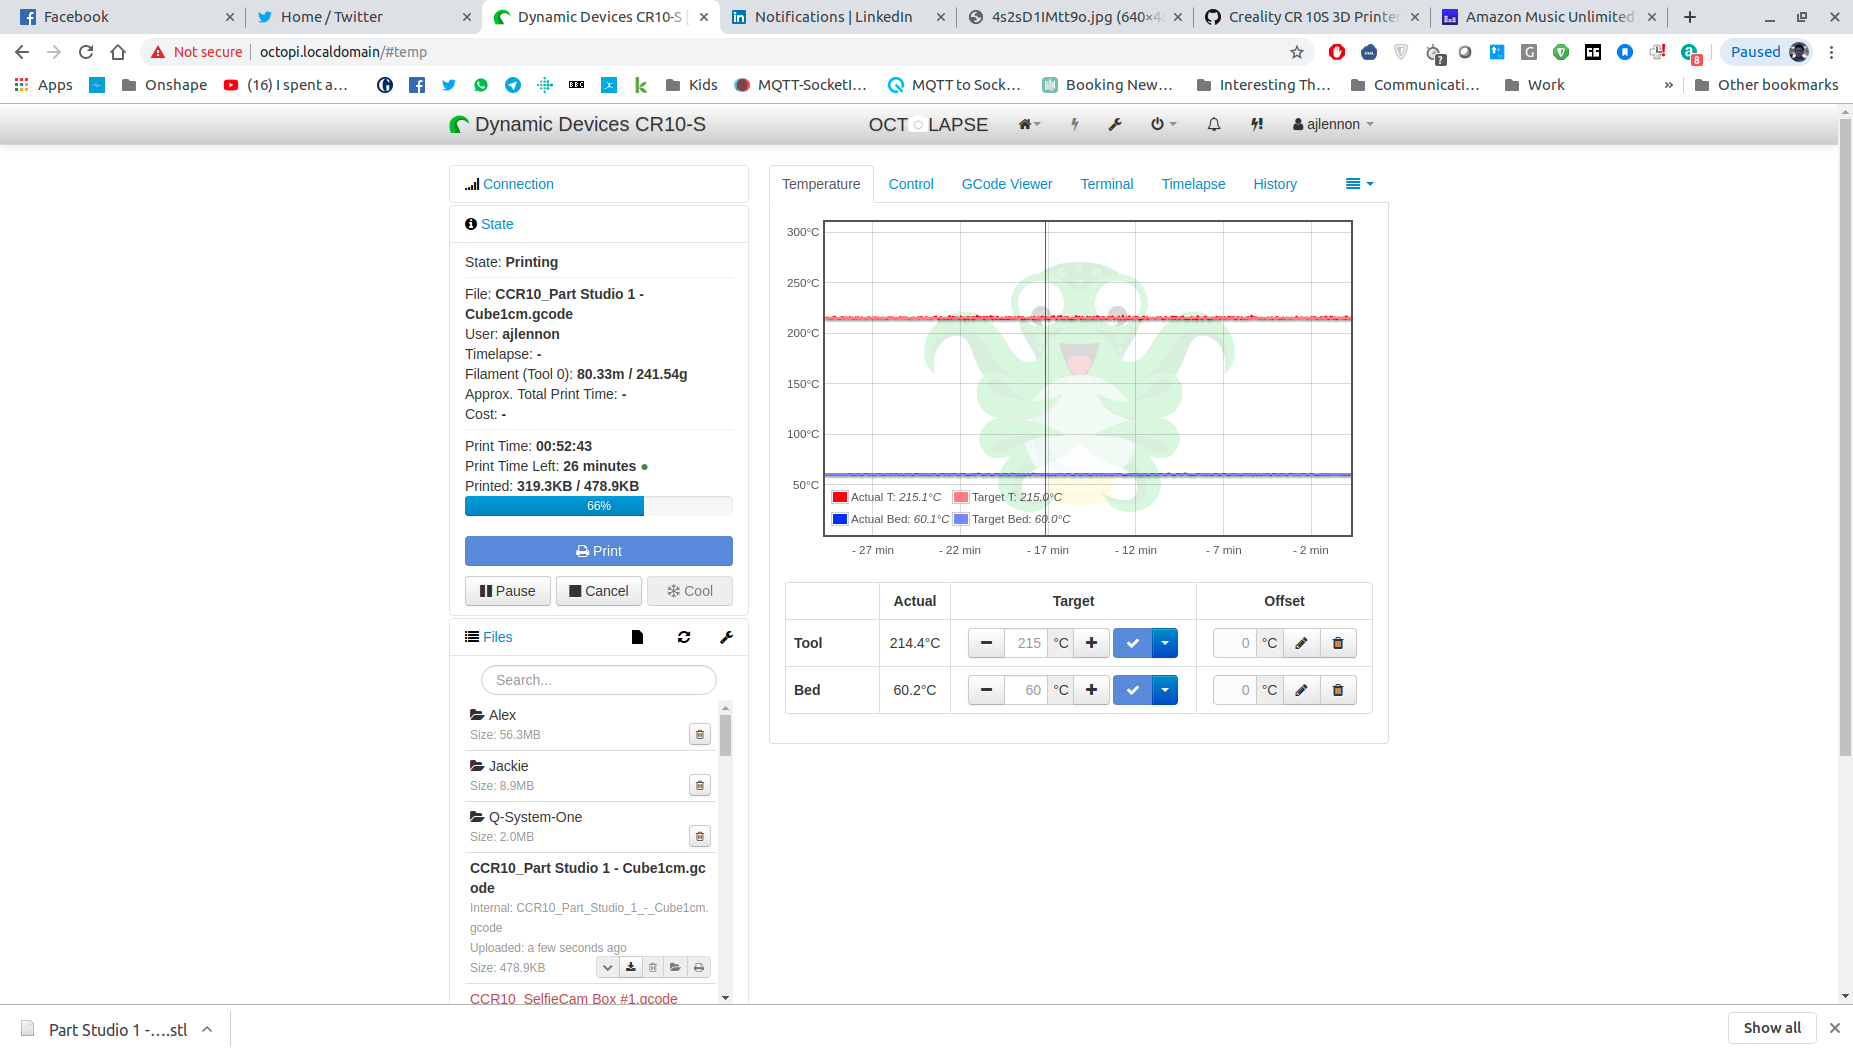
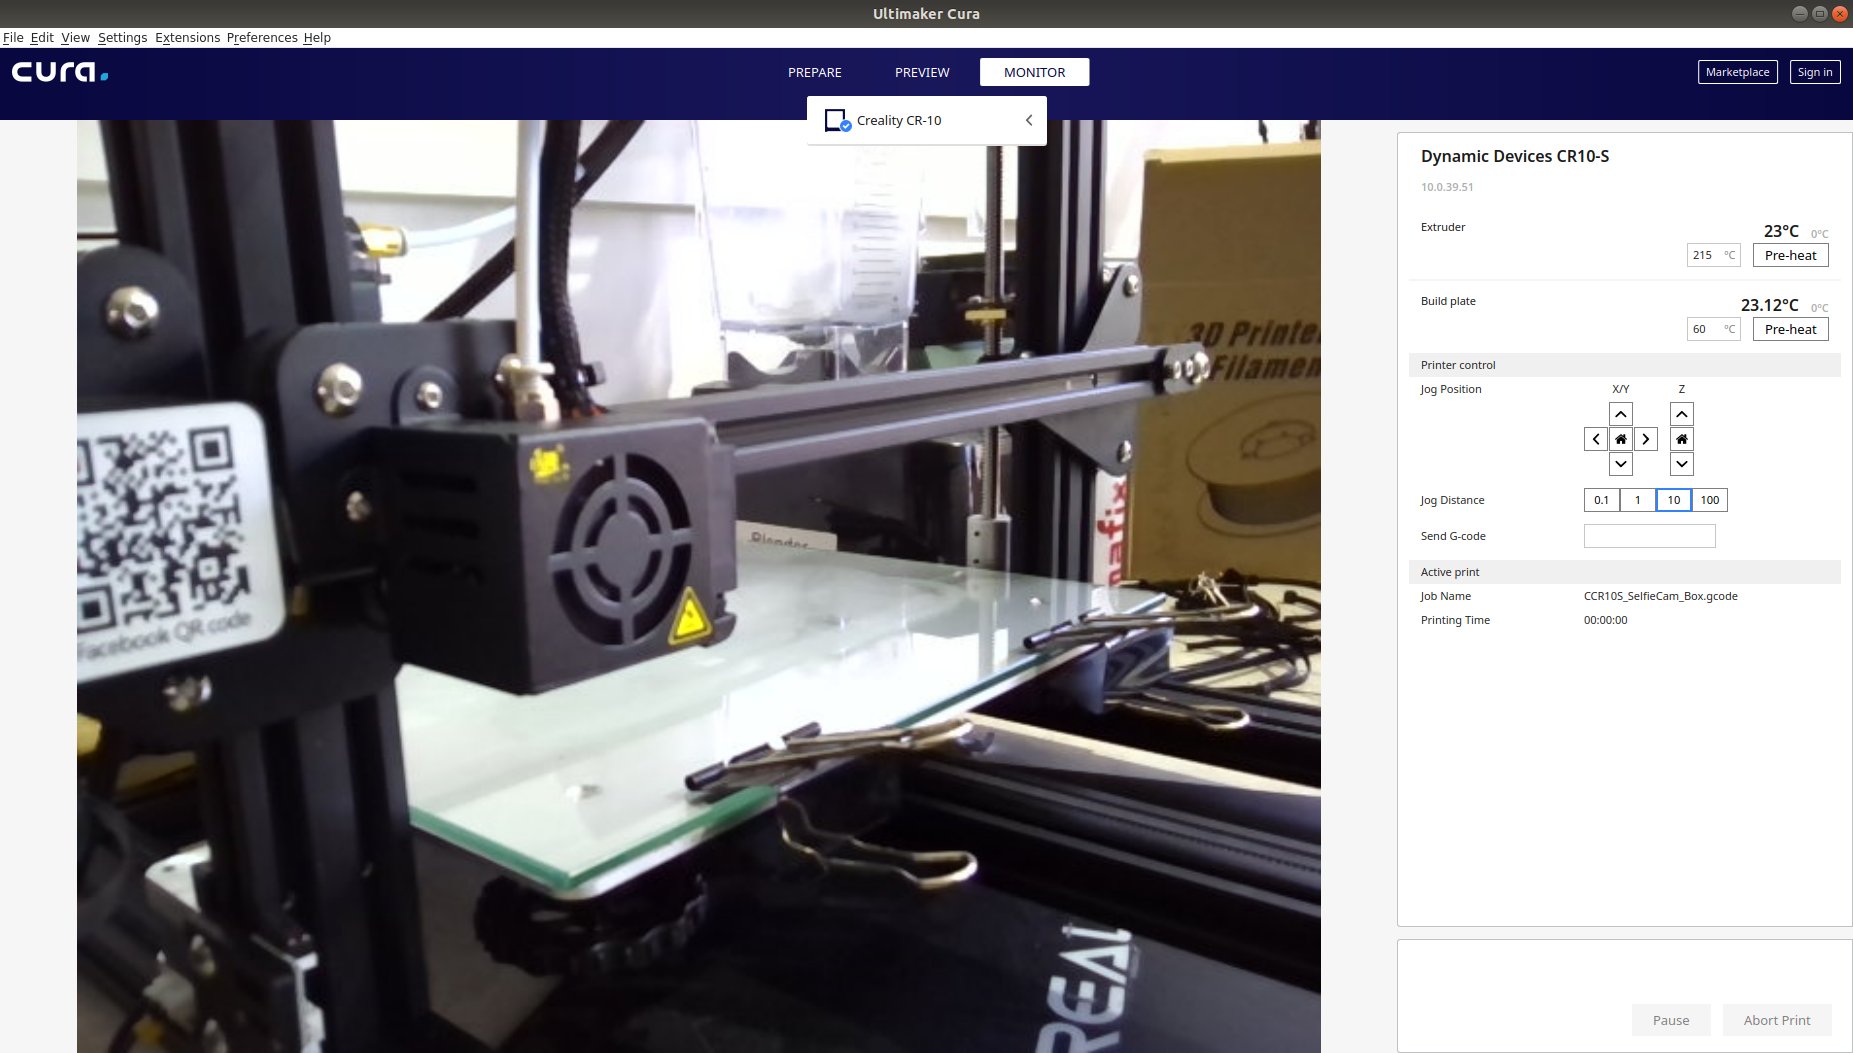
Printing with OctoPi (OctoPrint)
There is a Raspberry Pi connected to the Creality CR-10S printer via a USB CDC (serial) cable.
This allows us much greater control over the printer than would otherwise be the case.
The Raspberry Pi is running OctoPi which is a Pi specific installation of OctoPrint 3D printing software.
This is an excellent OpenSource 3D printing project. For details see here
OctoPrint has a plugin framework with a wide variety of 3rd party plugins available including a time lapse video camera, filament usage monitoring, event reporting via MQtt and more.
Octoprint runs a web interface which allows you to upload and print files, and to otherwise control the 3D printer via the network.
To access the web interface use http://10.0.50.1
As it is currently configured OctoLapse (the timelapse camera plugin) will capture a video of your print which can be see in the History tab.
[TBD - Add more details on driving OctoPi]
Slicing with Cura 4
The latest version of Cura has a specific profile for the Creality CR-10S which you should use.
Note that the default settings can probably be improved upon.
For starters you should change the nozzle temperature to 215C and the bed temperature to 60C.
There are other settings which we can probably improve including acceleration and jerk control.
There is also a Cura plugin for OctoPrint which allows you to print directly to the printer over the network and to monitor the progress of the print. For details on downloading and installing see here.
NB. You will need to get an "API key" from OctoPrint to allow you to drive it remotely. If you have any trouble with this see one of the DoES organisers or contact @embedded_iot.
[TBD - Add more details on driving Cura]
Slicing with Slic3r
[TBD]
Troubleshooting.
-
If the layers aren't adhering to the bed check if you are printing at a hot enough temperature (e.g. 215C for nozzle, 60C for bed). Then try cleaning the bed with glass cleaner and/or try levelling the bed.
-
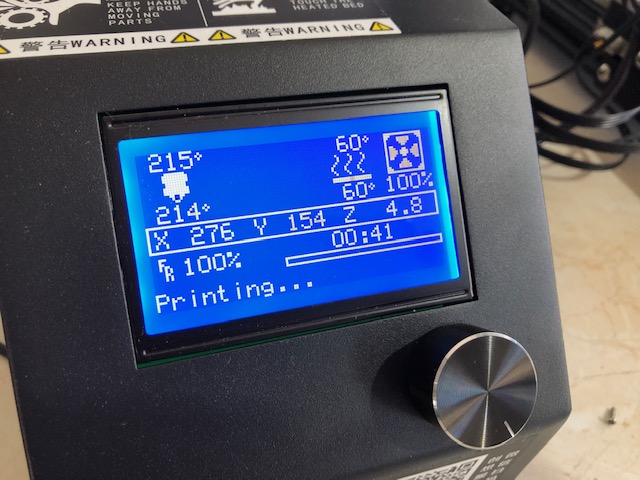
If the filament doesn't seem to be extruding correctly check you haven't inadvertently rotated the knob at the front when the printer is showing the "Info" page. If you do this it will change the feed rate from 100% which is an easy way to cause yourself problems.
See the left hand side of this image where it shows "FR" (feed rate) set to 100%