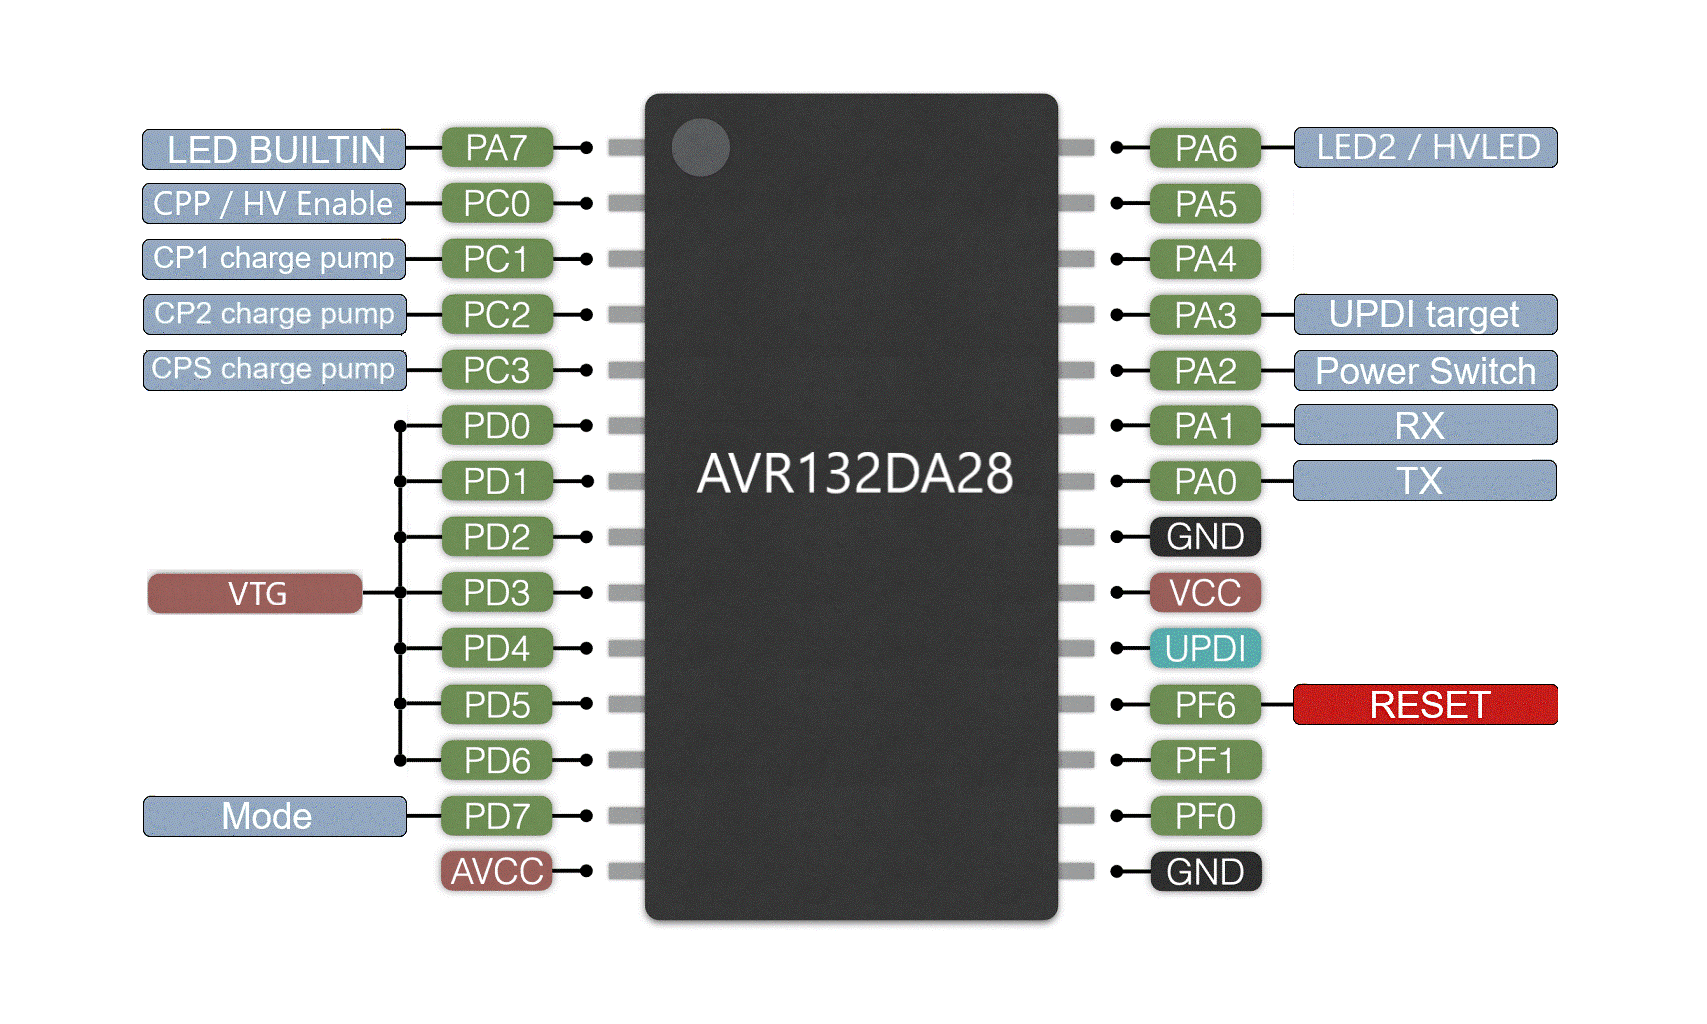
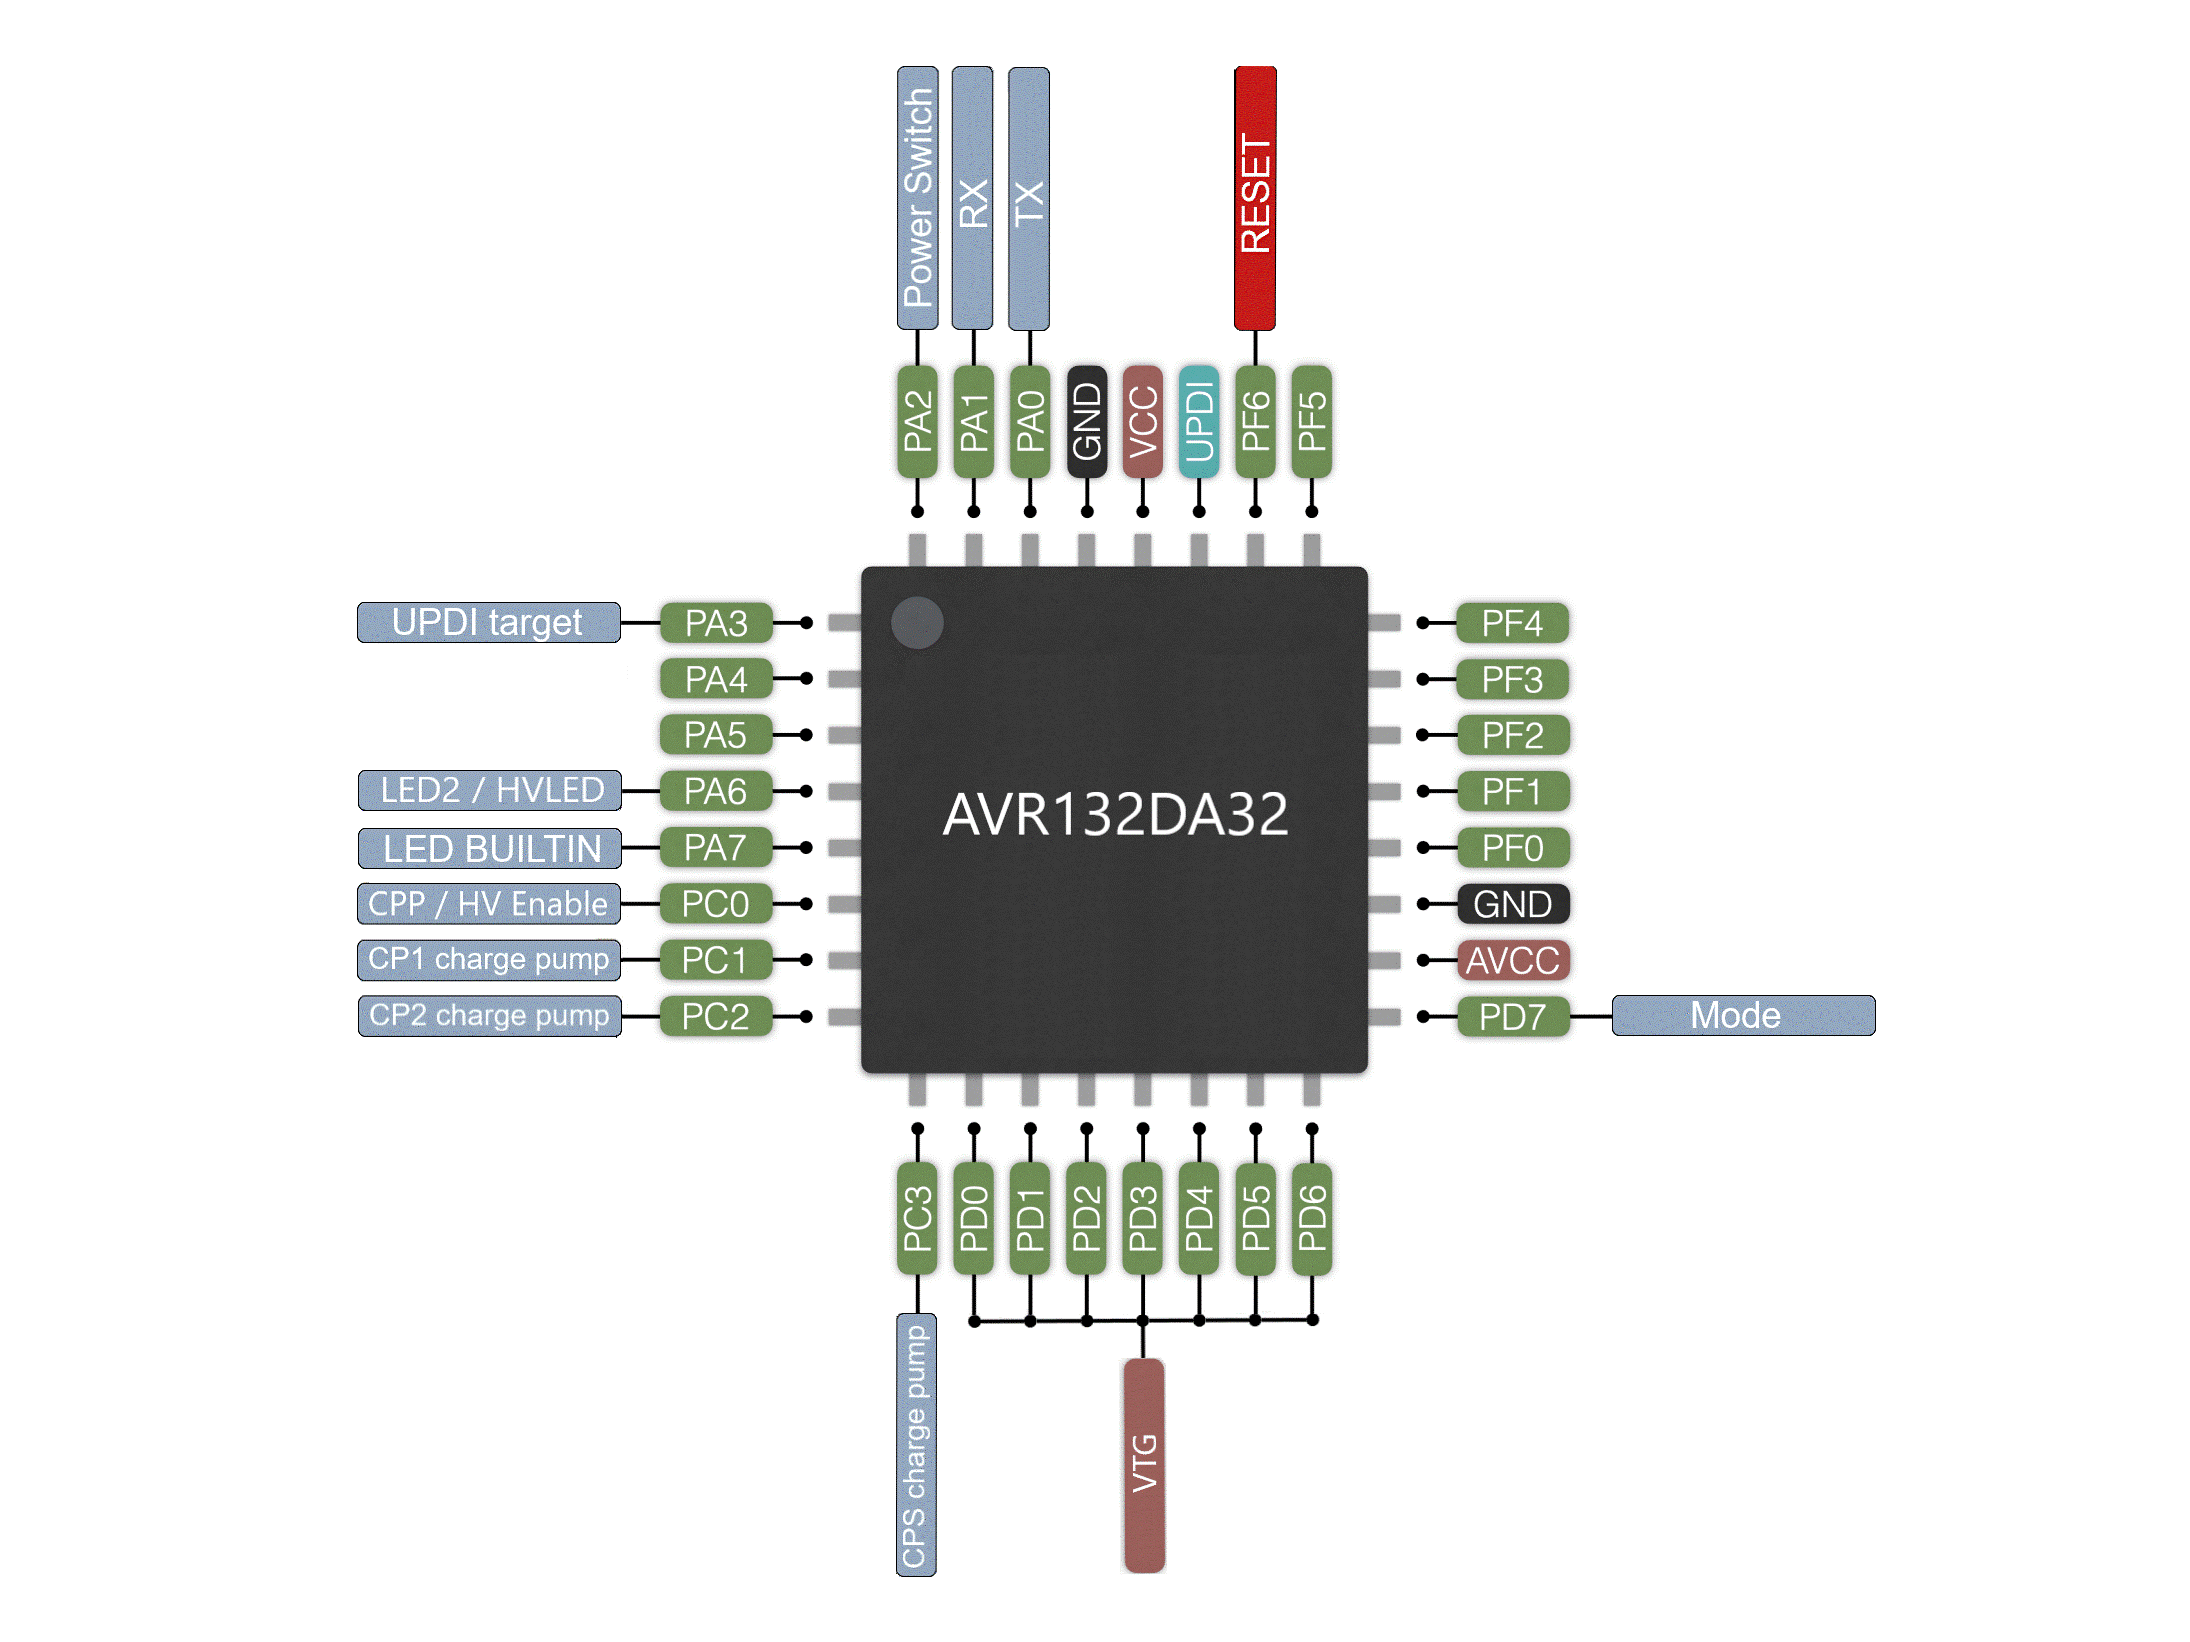
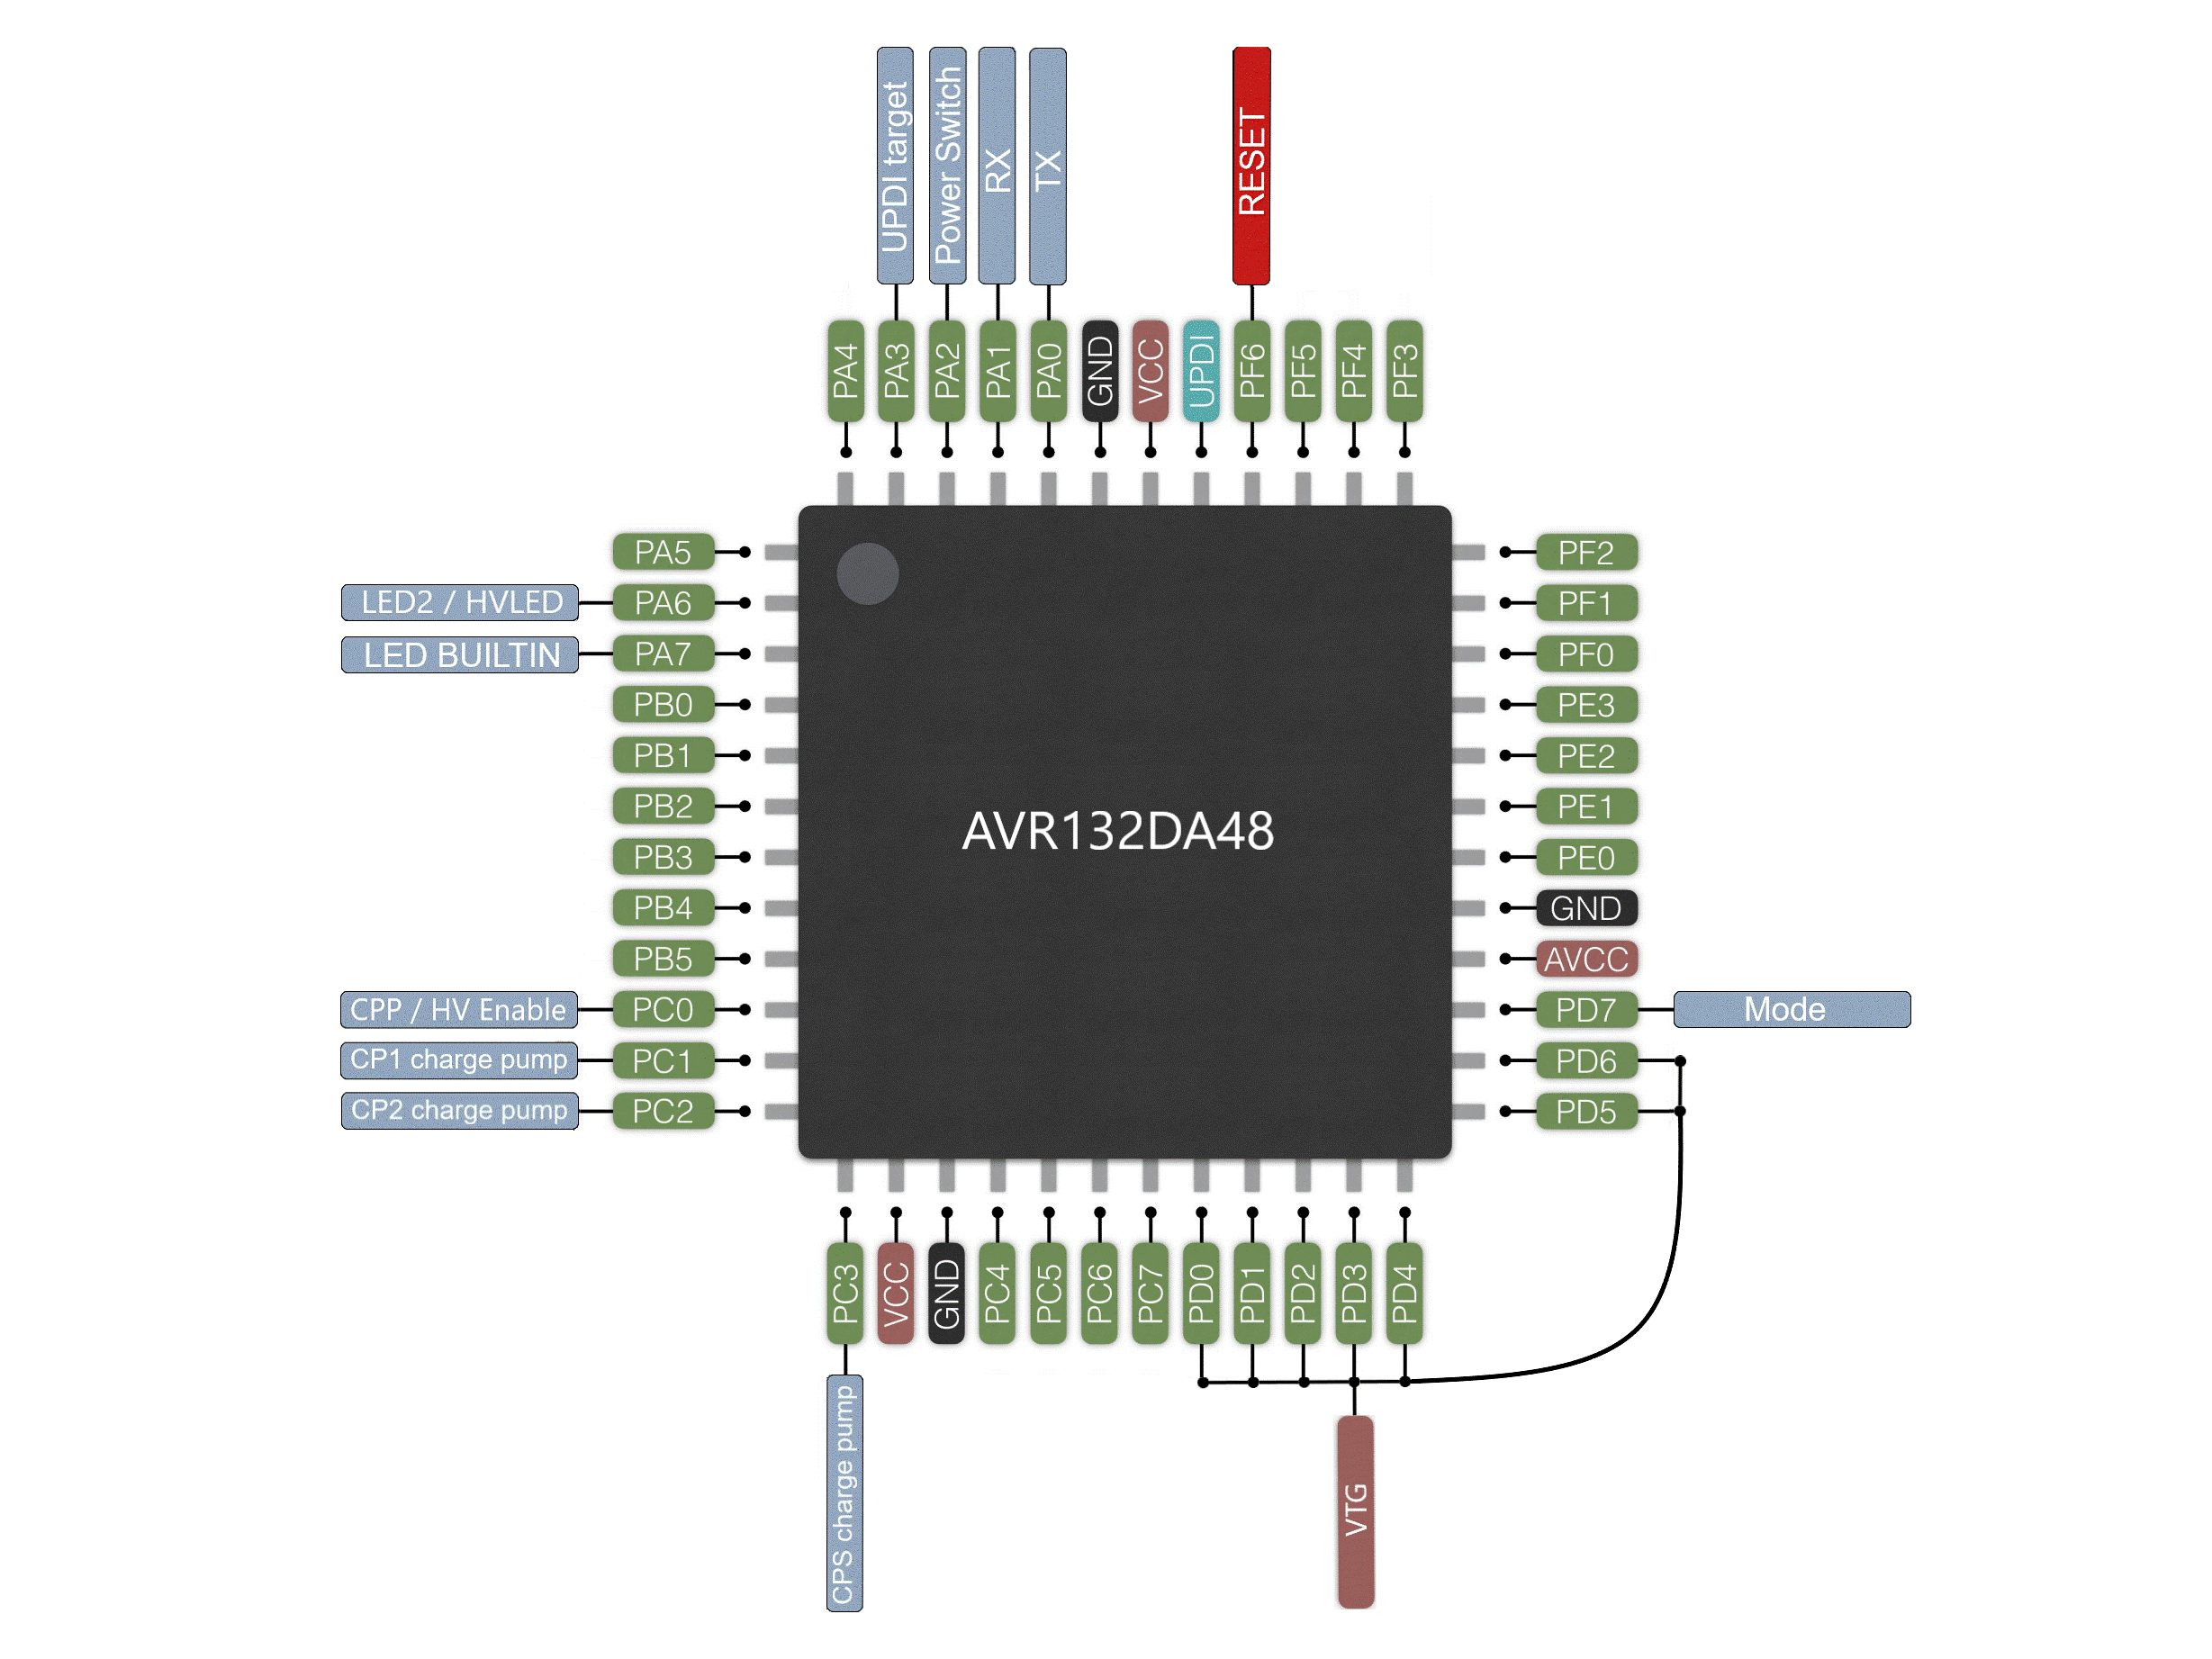
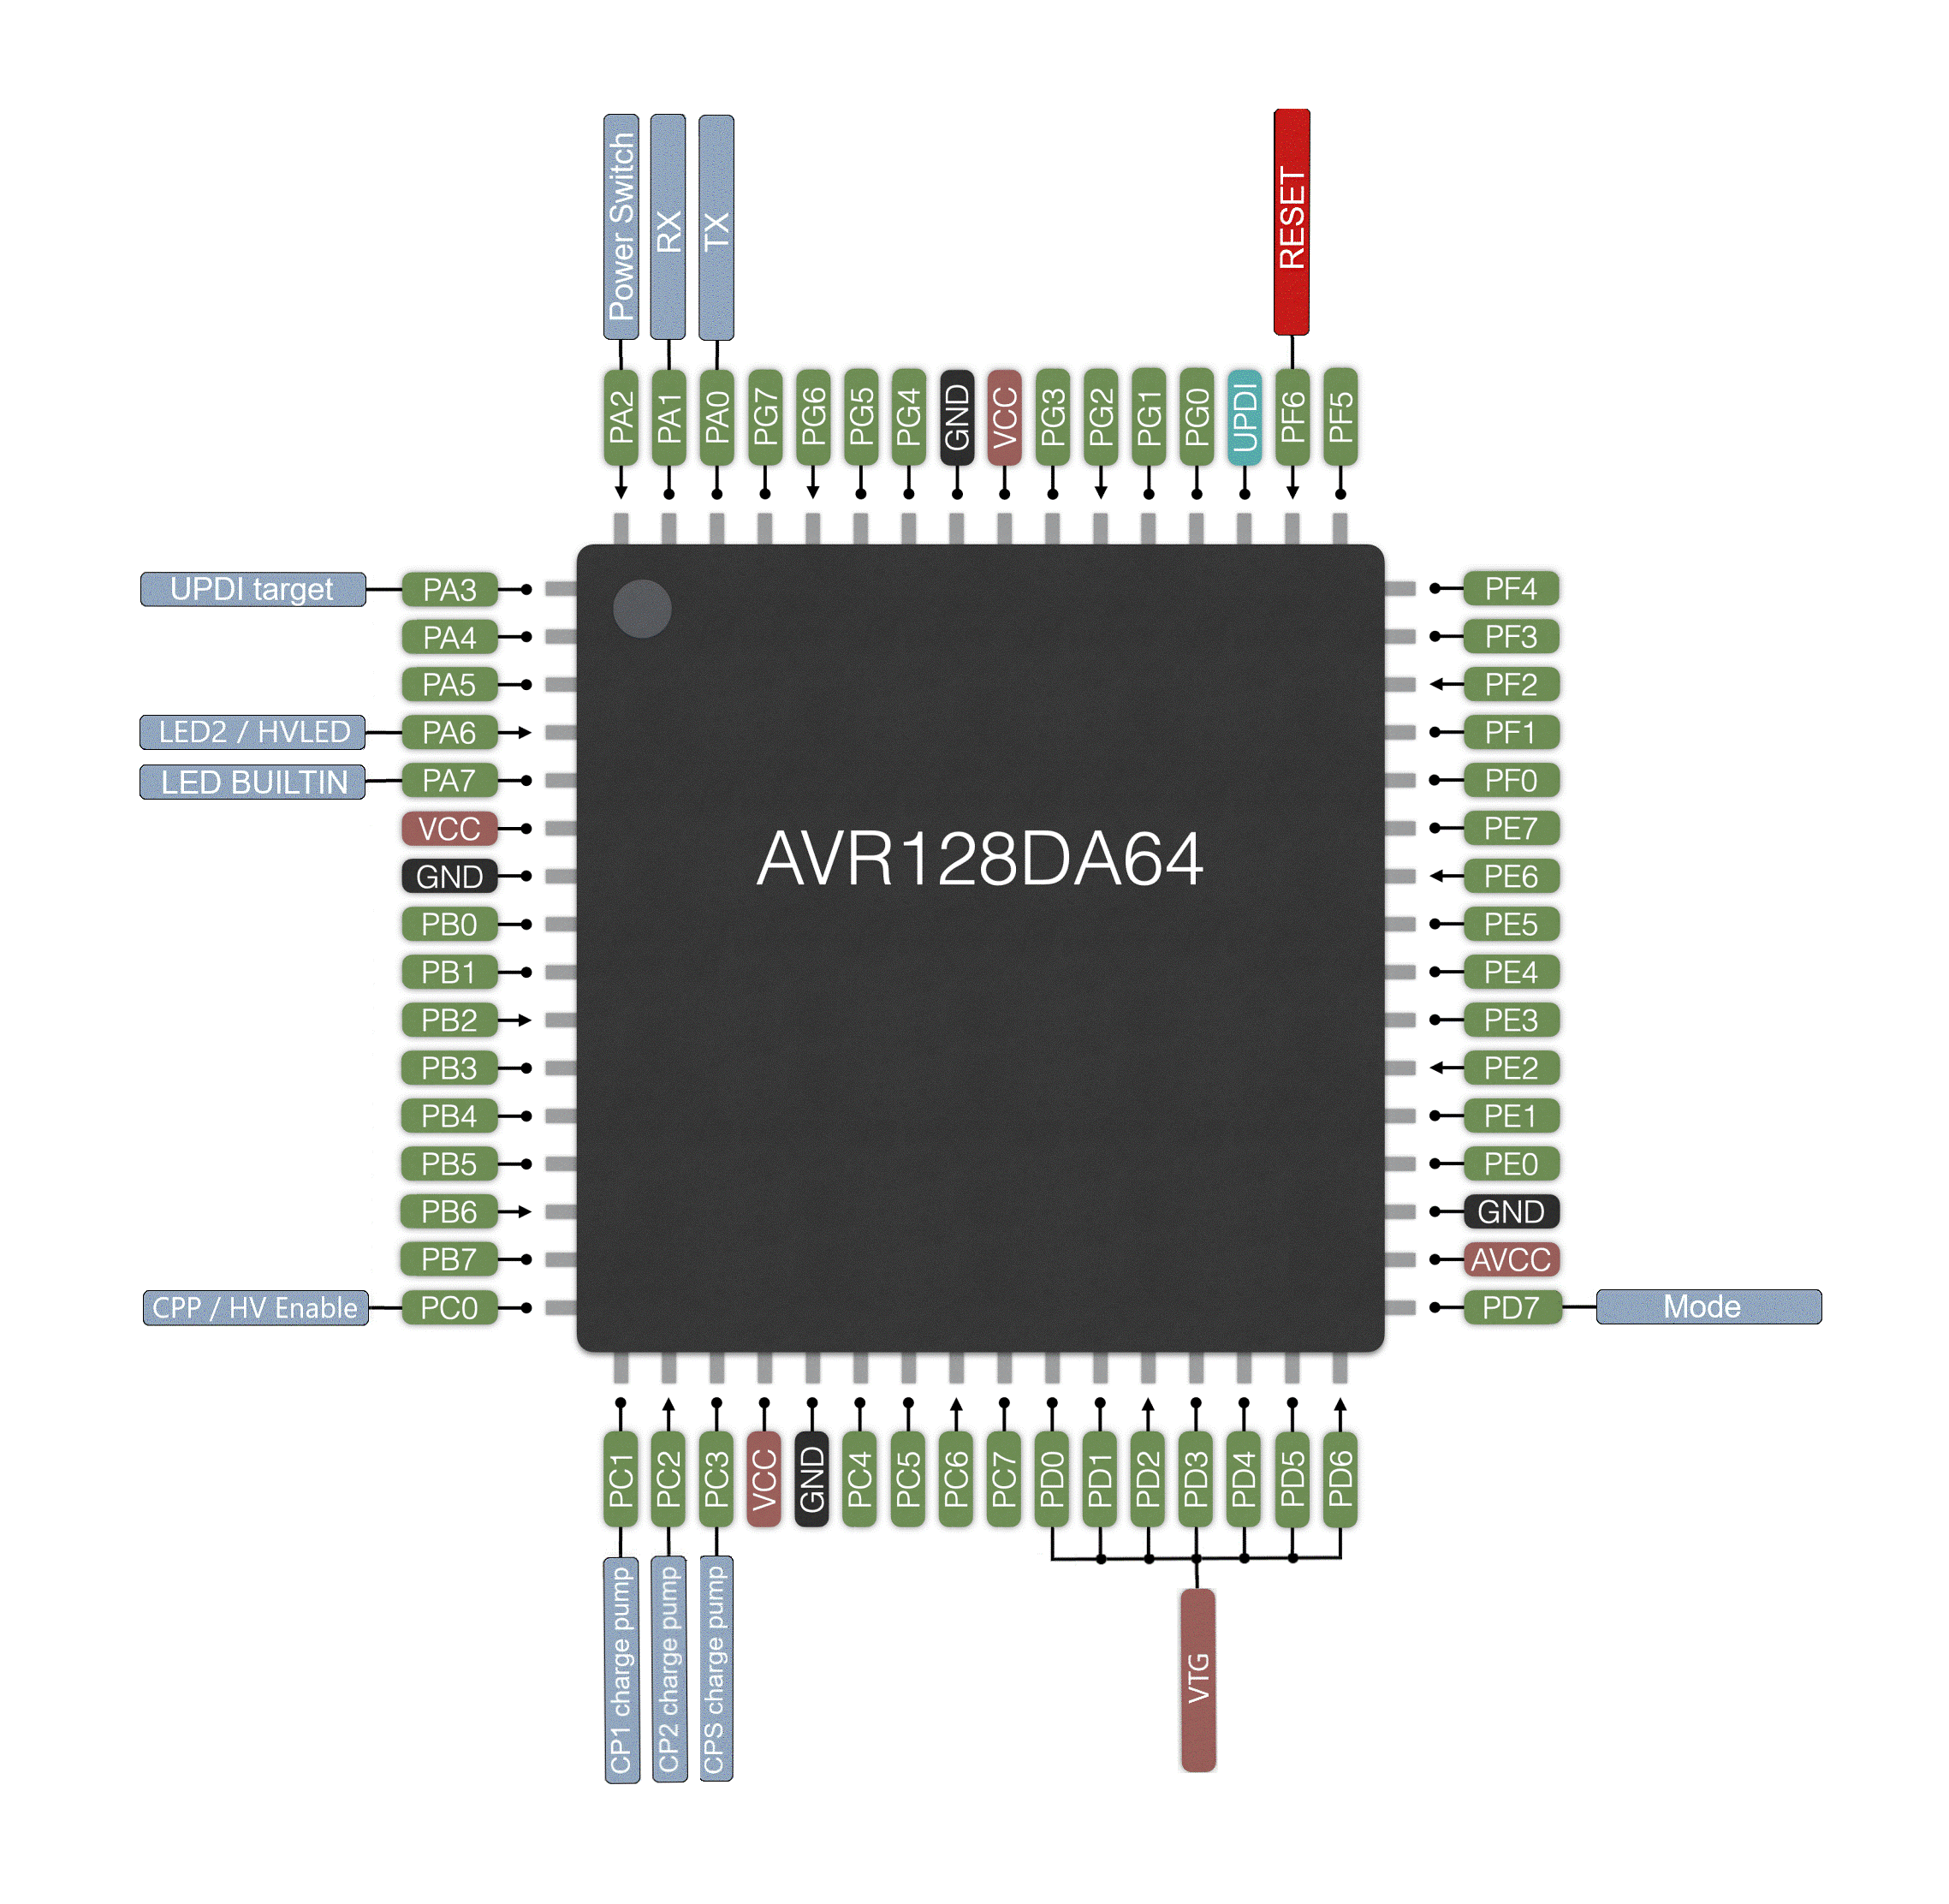
The firmware here supports using AVR132DA28, AVR132DA32, AVR132DA48 and AVR132DA64 as a HV UPDI programmer. Just use a breakout board or development board for the host MCU. If you use any 5V USB serial adapter or IC with an RTS or DTR signal, an auto reset circuit and use a bootloader option in DxCore, you'll be able to use the HV programmer like a regular Arduino board.
| Pin |
Name |
Type |
Description |
| PA0 |
TX |
Output |
Serial communication to USB serial IC |
| PA1 |
RX |
Input |
Serial communication to USB serial IC |
| PA2 |
Power Switch |
Output |
Enable for power switch controlling target power cycle, active high |
| PA3 |
UPDI target |
Bidirectional |
Target UPDI programming |
| PA6 |
LED2/HVLED |
Output |
Used to indicate NVM version or UPDI enable 12V pulse |
| PA7 |
LED BUILTIN |
Output |
Active during programming and pulses upon release of reset |
| PC0 |
CPP/HV Enable |
Output |
Charge pump power, normally low, high during HV UPDI enable pulse |
| PC1 |
CP1 charge pump |
Output |
Charge pump Clock 1, active during UPDI enable |
| PC2 |
CP2 charge pump |
Output |
Charge pump Clock 2, active during UPDI enable |
| PC3 |
CPS charge pump |
Output |
Charge pump shutdown, normally high, low during UPDI enable pulse |
| PD0-PD5 |
VTG |
Output |
Provides target power and power cycle |
| PD6 |
VTG |
Input |
Senses target voltage for overload detection, ADC |
| PD7 |
Mode |
Input |
Mode selection, ADC |
| PF6 |
RESET |
Input |
Reset input, pullup enabled, active low |