VS Integration with GitHub AS19 - DigiBP/digibp.github.io GitHub Wiki
This tutorial will demonstrate how project artifacts can be pushed to a GitHub repository directly from Visual Studio Code.
Contents
- Pre-requisites - Visual Studio Code, Git, GitHub account
- 1. Cloning a remote GitHub repository
- 2. Committing changes to the remote repository
- 3. Synchronizing the repository
- 4. Managing and collaborating changes to the repository
Pre-requisites - Visual Studio Code, Git, GitHub account
Please install Visual Studio Code, Git and register to GitHub before following this tutorial.
After you have installed Git, it is important to configure your Github username and email address for commitments. In this way, Visual Code Studio will allow you to upload local repository changes to Github.
Set global username/email:
-
Open Git command line (Git Bash)
-
Set user name: type the following command: git config --global user.name "YOUR_GITHUB_USERNAME"
-
Set user email: type the following command: git config --global user.email "YOUR_@EMAIL_ADDRESS"
1. Cloning a remote GitHub repository
In order to work on your local machine, you need to clone an existing GitHub repository, specifically the team repository that will be used for the final DigiBP project.
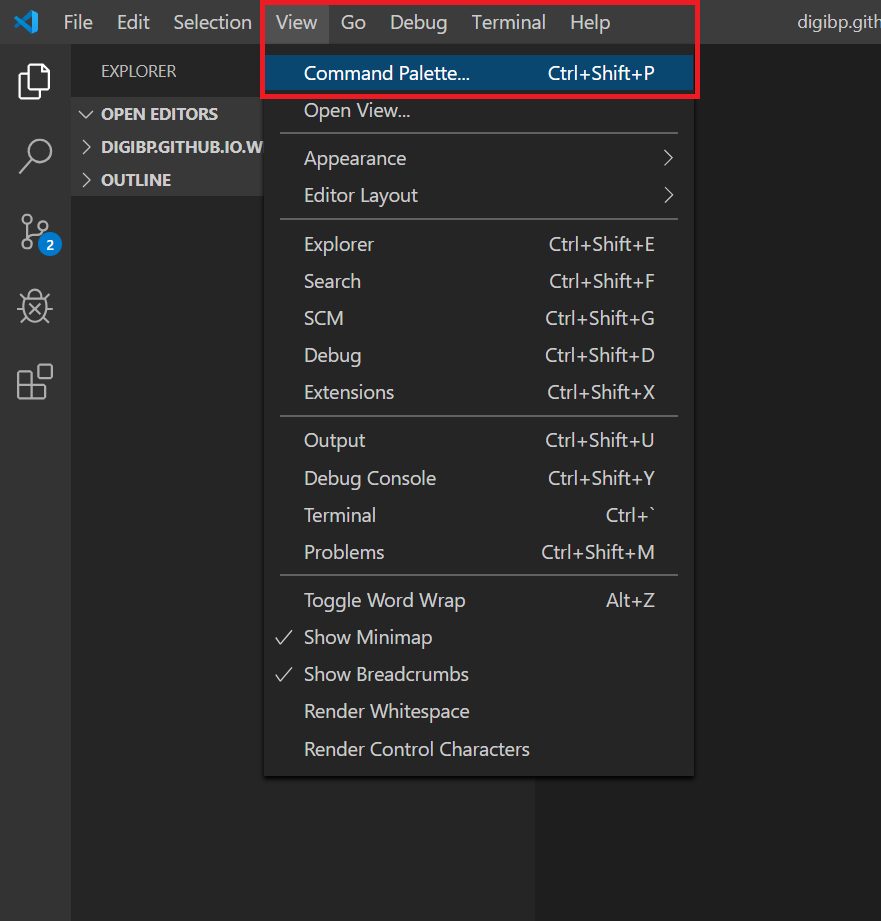
Click on the View Menu and select Command Palette...
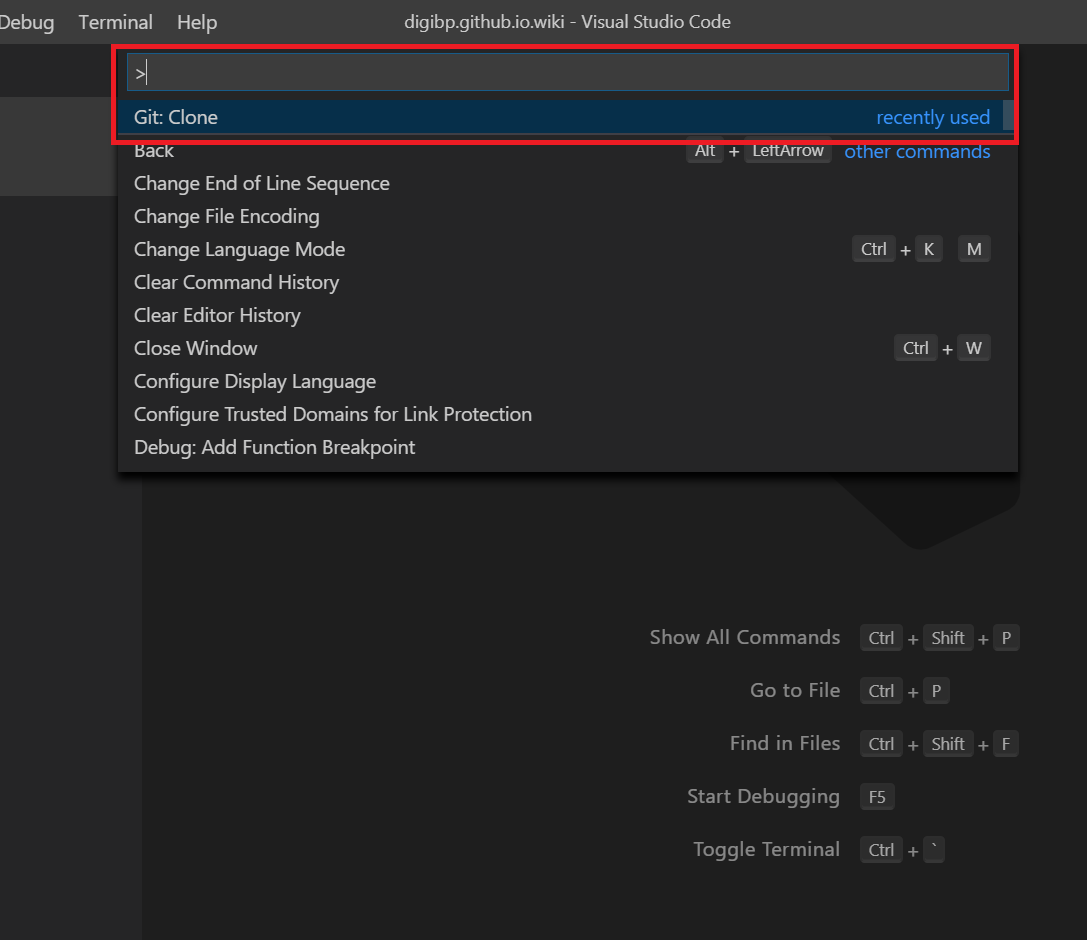
Type Git:Clone in the textbox that opens.
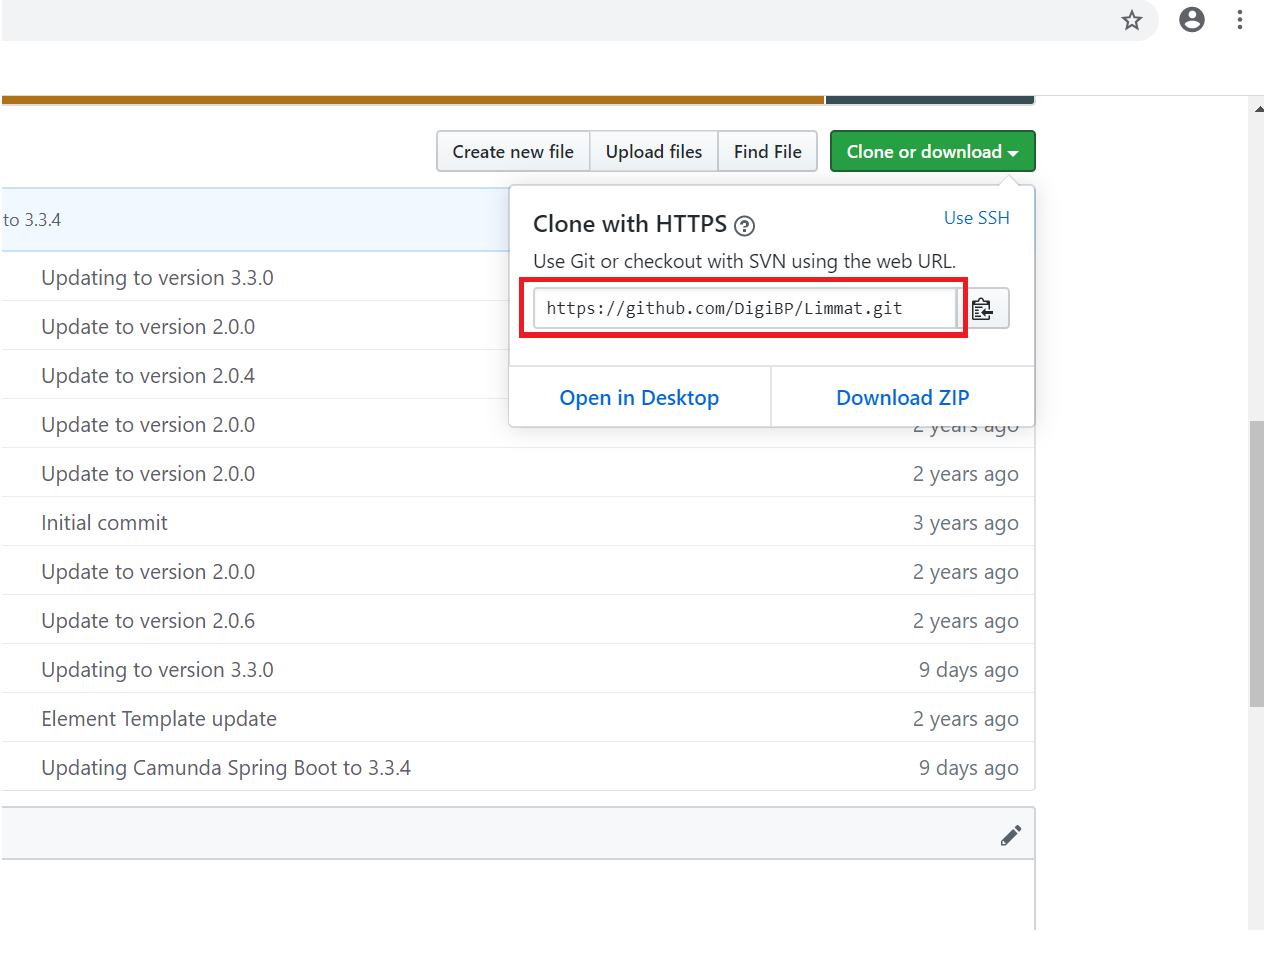
Copy the URL from the GitHub repository of your team.
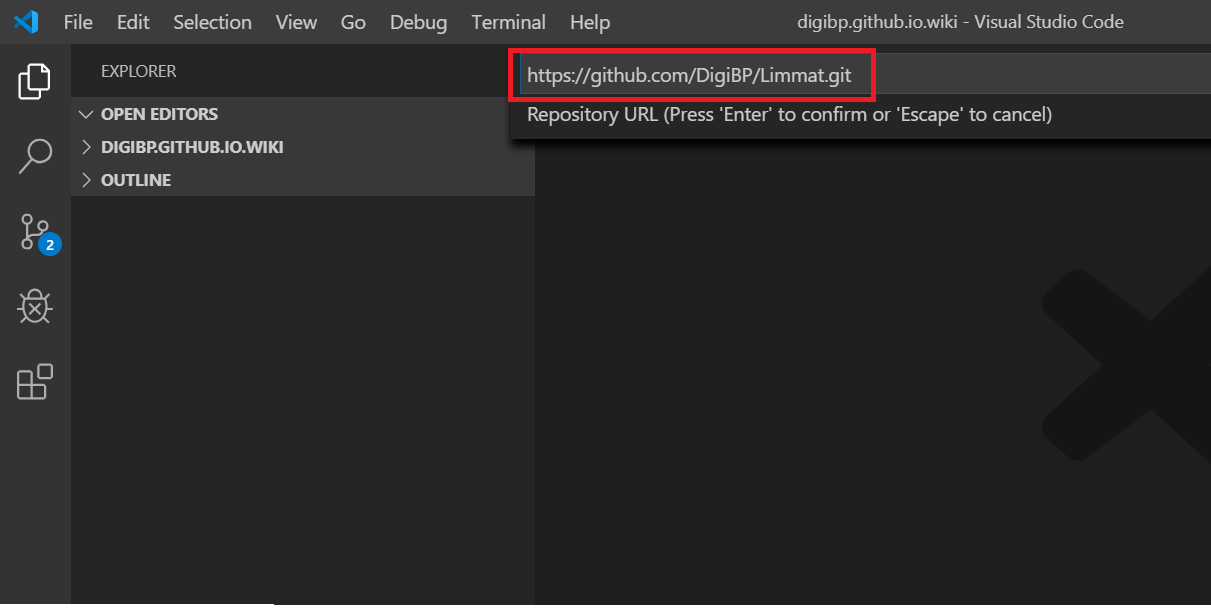
Paste it in VS as shown below:
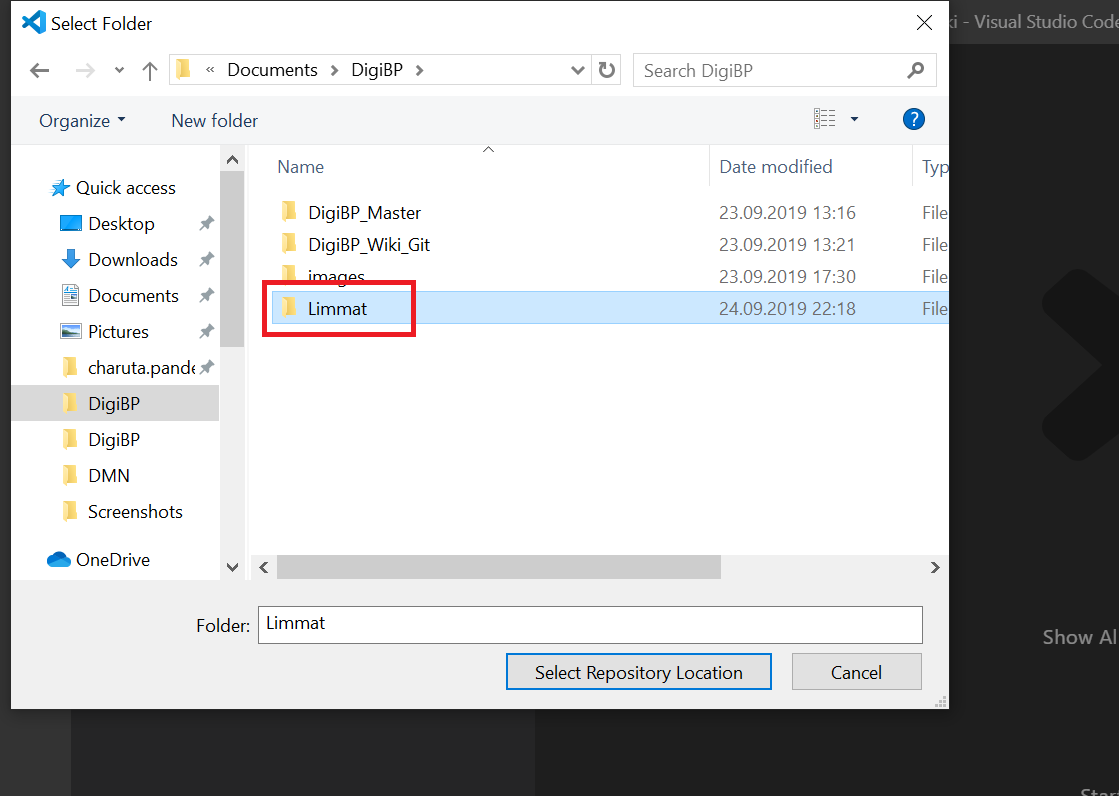
Select a local folder where the repository will be cloned. The local folder should be created in advance.
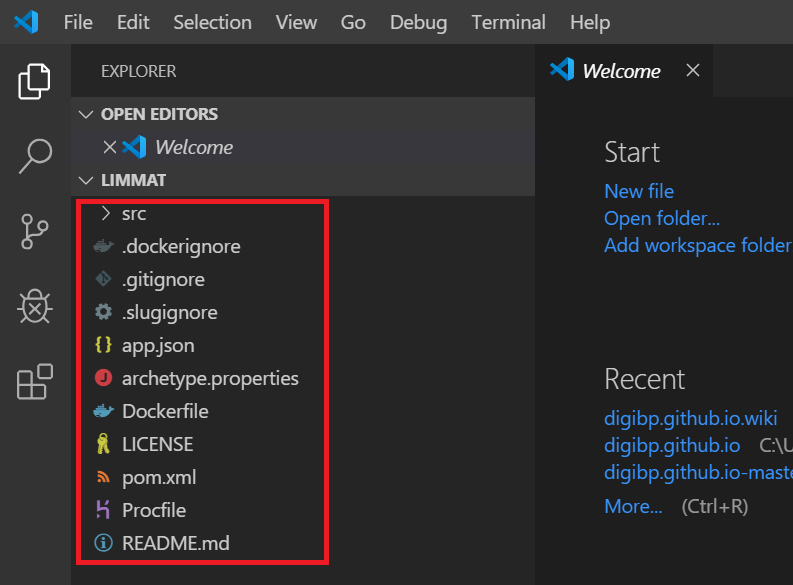
The folder structure of your repository will be displayed in VS.
2. Committing changes to the remote repository
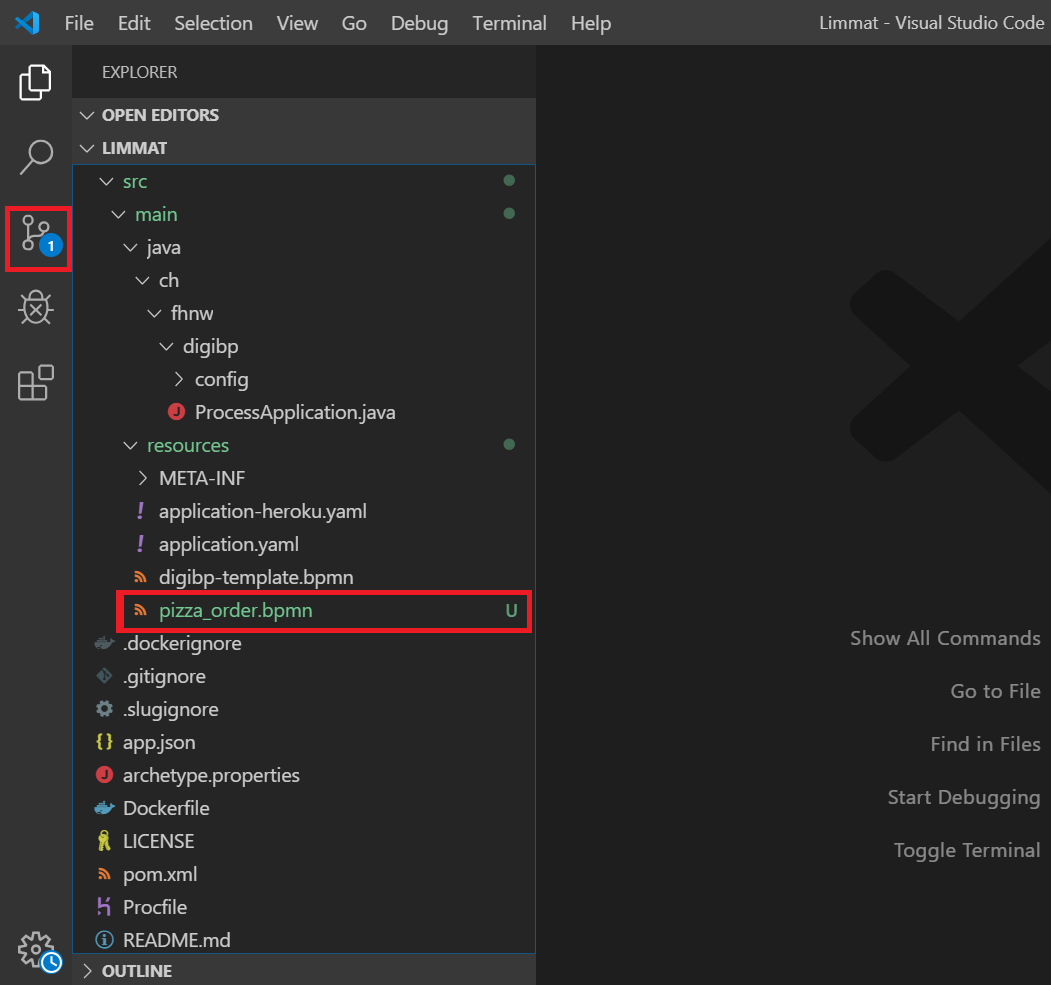
Add a file to one of the folders, for example, the pizza_order.bpmn model to the resources folder. VS displays this file with an indicator "U" and a number 1 as shown in the image below, indicating that one file has been added/modified in the local repository.
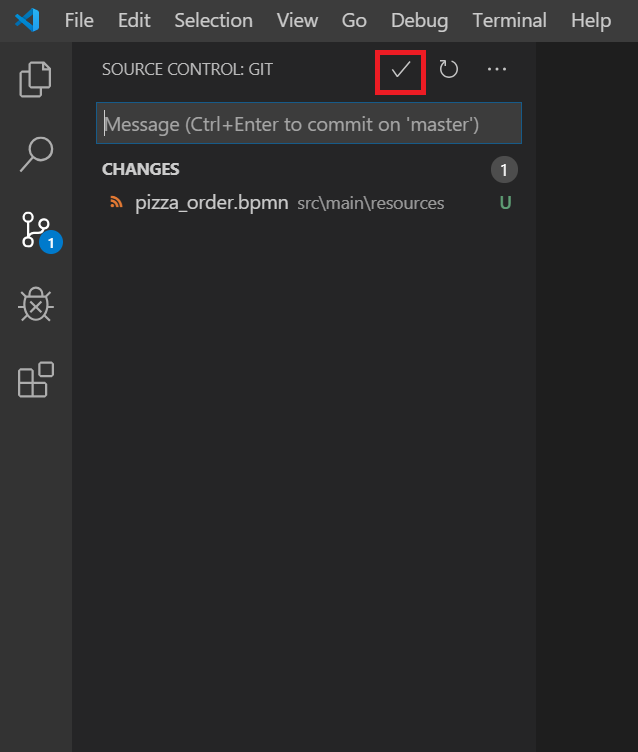
Click on the Fork icon on the left to go to the Source Control View. Then click on the tick sign as highlighted in the image below.
Click Yes for staging the file and enter a commit message. The commit message should be a meaningful text that summarizes the change to the repository.
3. Synchronizing the repository
Click on synchronize changes icon at the bottom left and click OK for pushing the changes to GitHub repository - please refer to the image below.
If you are not logged in to GitHub, a notification to enter GitHub userid and password will appear.
Step 2 and 3 are both required in order to successfully push a change to the GitHub repository.
4. Managing and collaborating changes to the repository
The team members can pull changes from the repository by synchronizing as described above.
a. View Difference
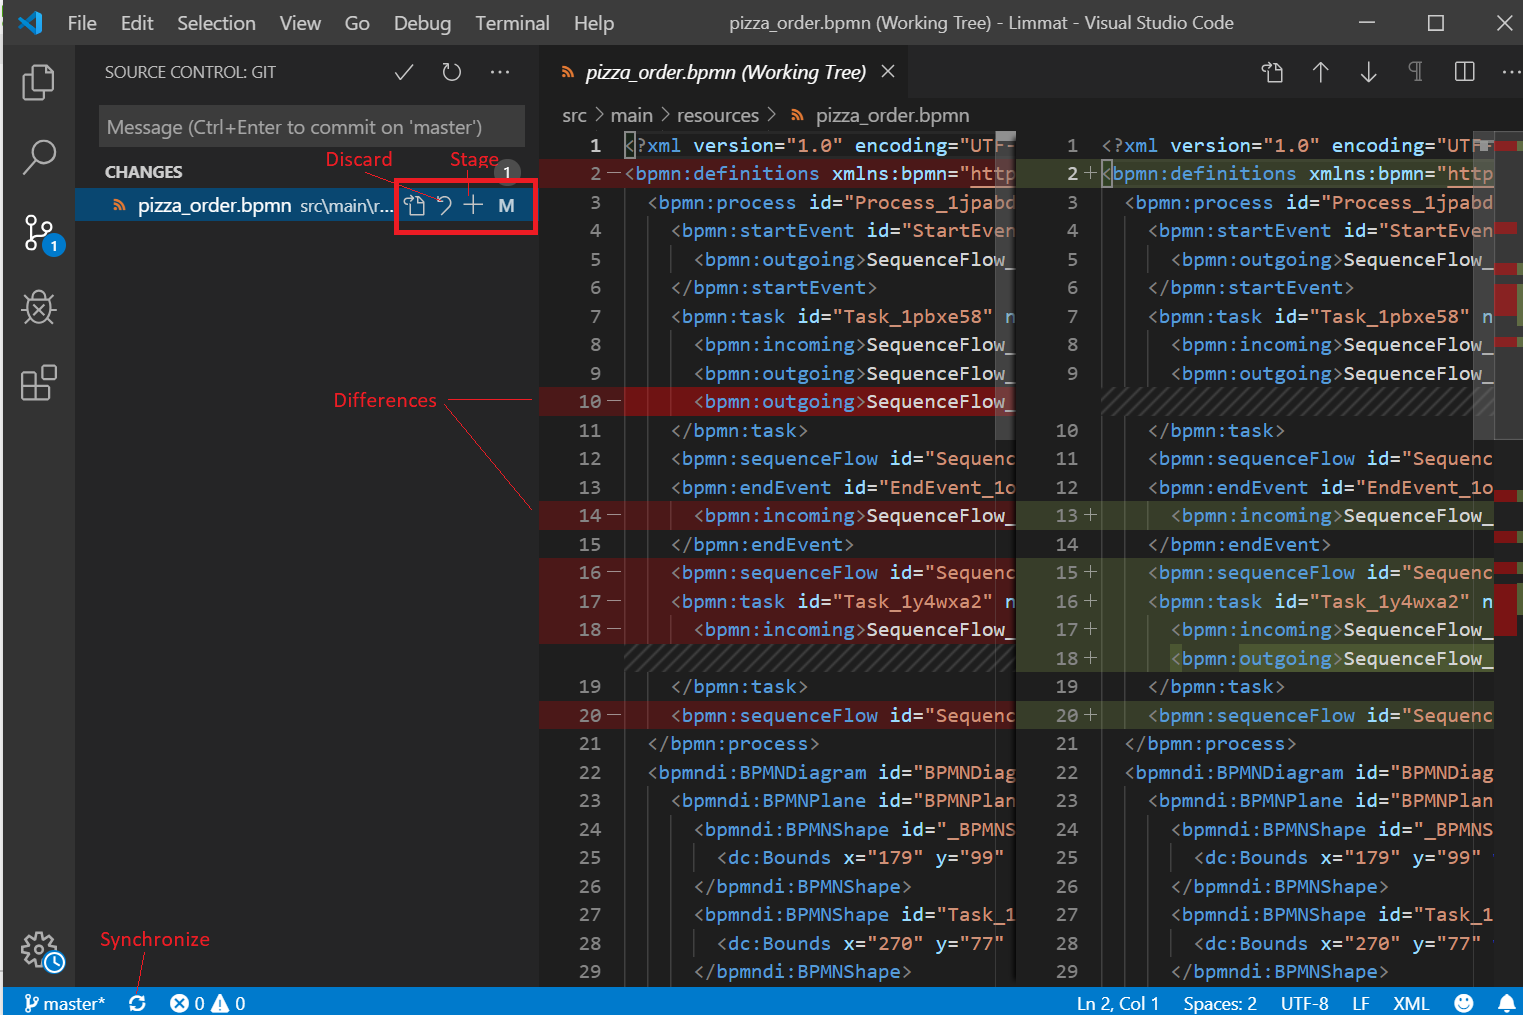
In the Source Control view, if clicked on the changed file, you can see the difference as compared to the version in the GitHub repository.
b. Staging
Staging enables committing selected files. Unstaged files do not get committed to GitHub and can be continued to edit. To stage a file, click on the '+' icon next to the file. Refer to the image above.
c. Discard changes
In cases of conflict, the changes to the local file can be discarded by clicking on the discard icon as shown in the image above.
d. View changes by other team members
The changes made by other team members can be pulled by synchronizing the repository. To view the history of changes, an additional extension 'GitHub History' (see instructions) needs to be installed.
e. Resolve Conflicts
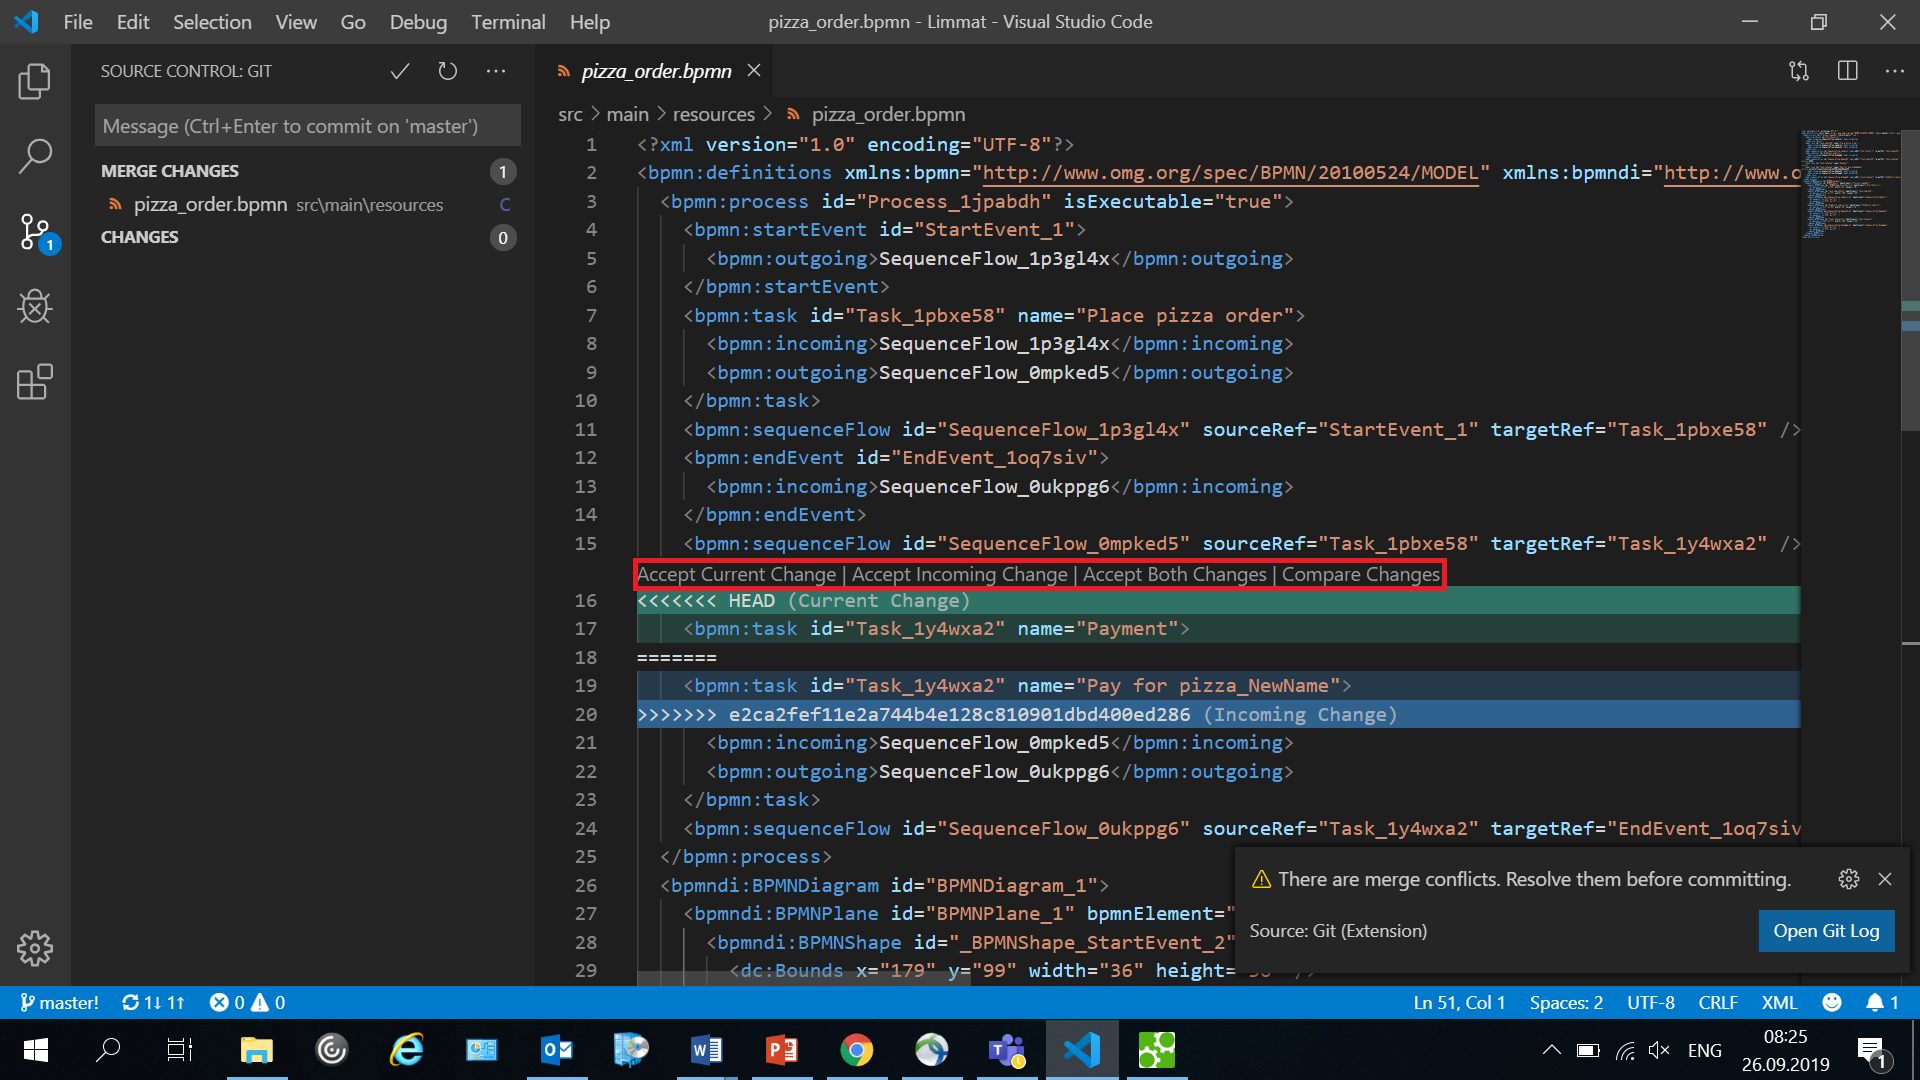
While working in collaboration, a very likely scenario is to face conflicts while modifying the same file. If multiple members commit changes to the same file, Git identifies it as a conflict. Visual Studio code provides the possibility of resolving conflicts by either accepting current (local) changes, accepting the incoming changes (by other members) or accept both changes (if the changes are not interfering with each other). The following image illustrates this behavior:
