Service Integration SS21 - DigiBP/digibp.github.io GitHub Wiki
This hands-on contains two usecases for the service integration that can be realized with Camunda. Each usecase starts with the creation and testing of the API requests with the help of Postman.
- Please install Postman before running this tutorial.
- Understanding of REST APIs is required.
- This tutorial uses classroom instance of Heroku, please use your respective tenant ids, login and passwords provided to you.
It is strongly recommended, to engineer and test a REST API service integration before integrating it into an executable process or case model. Therefore, this guide illustrates how the engineering and testing can be done using the Postman API development environment.
In this usecase we model a simple process that will display the menu of Mario's Pizzeria.
First we are going to create and test an HTTP GET request using Postman.
-
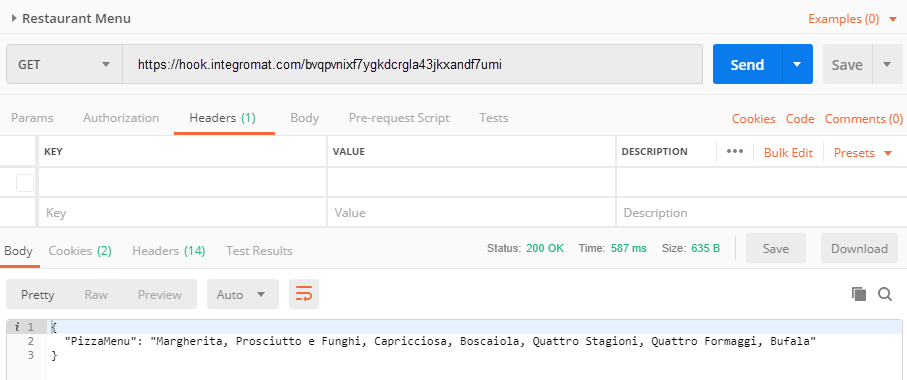
Open Postman (see the figure below).
-
Select Method:
GET. Next, copy the URL endpoint:https://hook.integromat.com/bvqpvnixf7ygkdcrgla43jkxandf7umiand paste it in the Enter request URL (next to the GET method). -
Click on the Send button to test the GET request.
In case of successful response, the following message will be returned:
• Code: 200 OK • Sample Body:
{
    "PizzaMenu": "Margherita, Prosciutto e Funghi, Capricciosa, Boscaiola, Quattro Stagioni, Quattro Formaggi, Bufala"
}
All the available Pizza from the Menu will appear in the form of a JSON object at the bottom of Postman (see the following figure).
In case of unsuccessful response, the following message will be returned:
• Code: 404 UNAUTHORIZED
Now that the HTTP GET request works, we are ready to implement the service integration using the Camunda Modeller.
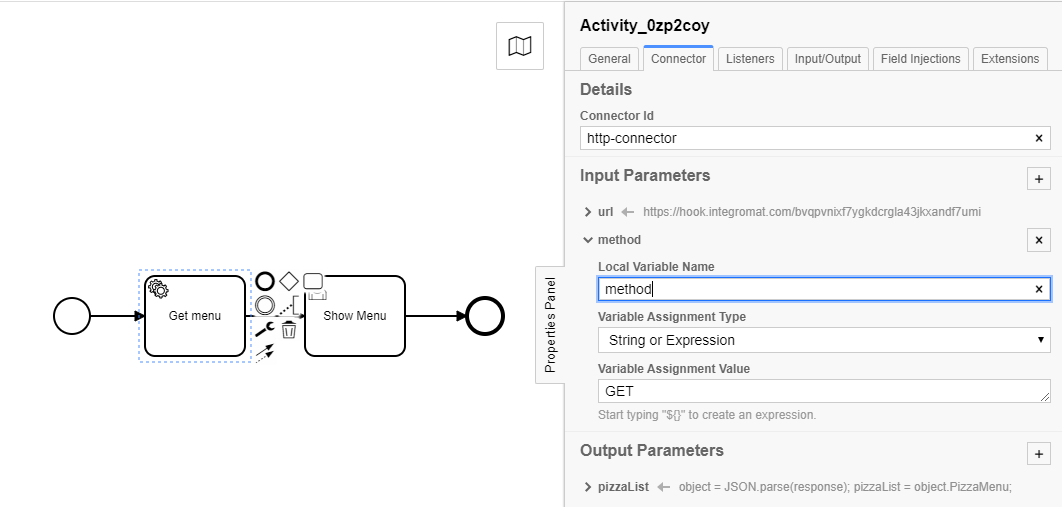
Open the Camunda Modeller and create the process model as follows:
Select "Get menu" and select "Connector" from the General tab in the panel properties (see right-hand side of the figure below).
Select Connector tab and enter http-connector (copy and paste) in the Connector Id textbox. Add method as input parameter with type Text and Value GET (see in the figure below).
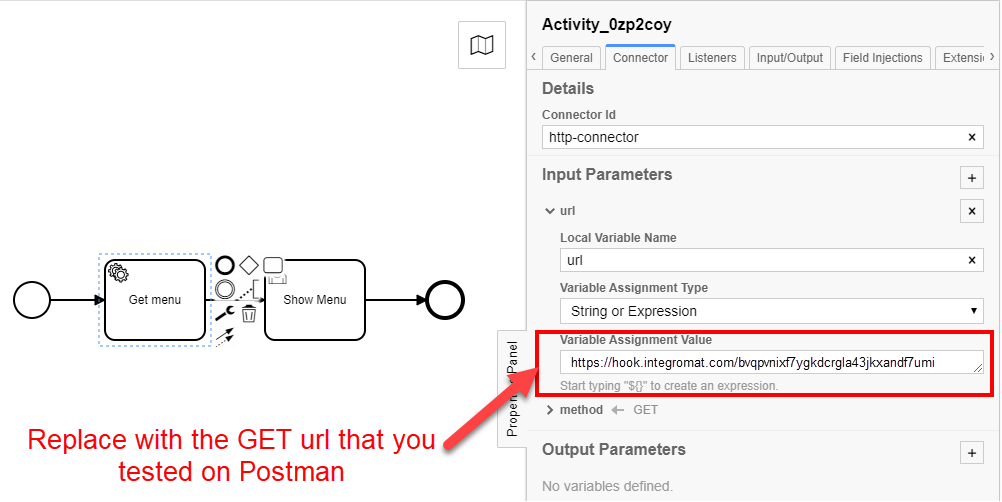
Add the url input parameter (see bottom-right corner of the figure below). The URL should refer to the endpoint you tested in Postman for the GET request: https://hook.integromat.com/bvqpvnixf7ygkdcrgla43jkxandf7umi. This could be different from the one displayed in the image.
Please note that all parameters (also called variables) are case-sensitive.
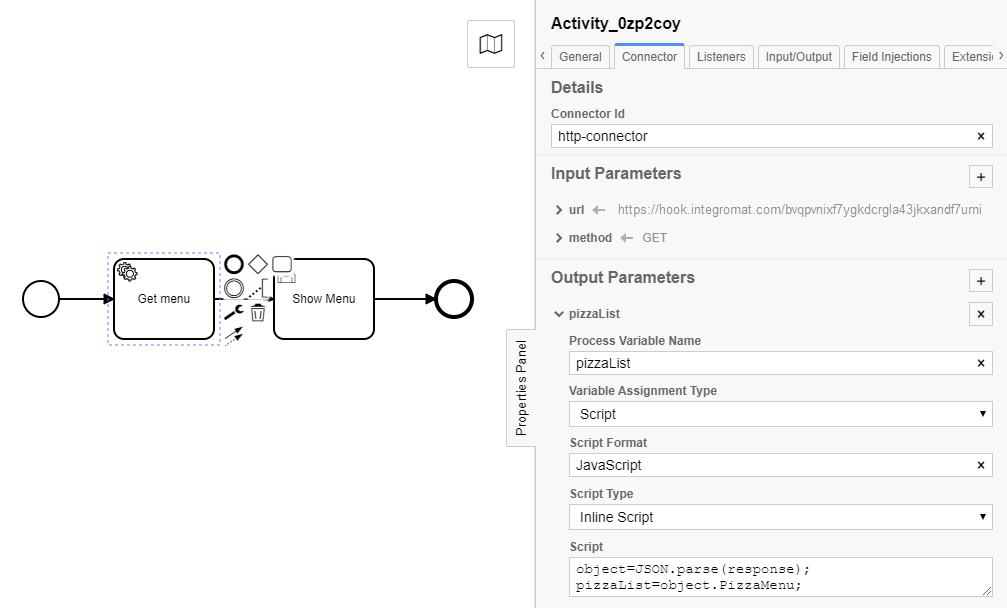
Add the output parameter pizzaList of type Script and Script Format JavaScript. This output parameter needs to be transformed into a JSON object, which is done by the script (see bottom-right corner of the figure below).
Copy and paste the following code into the Script area.
object=JSON.parse(response);
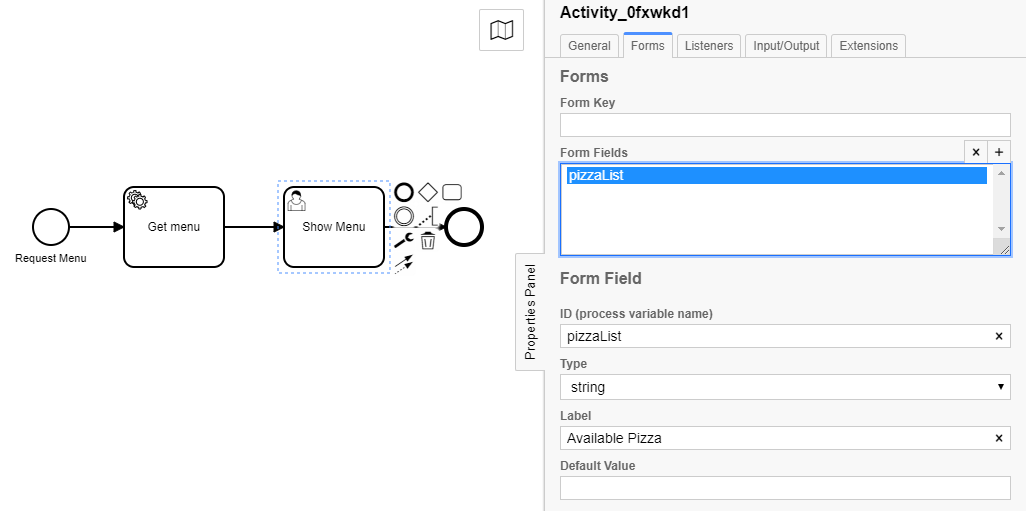
pizzaList=object.PizzaMenu;Select "Show Menu" and add the form field pizzaList. This form field will be populated with the available pizza from the Menu once the process runs.
Now we are ready to deploy the process and test if it works as expected. For that, we are going to use the FHNW DigiBP classroom instantiation.
- Enter deployment name and your Tenant ID.
- Enter the deployment endpoint (copy&paste):
https://digibp.herokuapp.com/engine-rest - Go to the DigiBP classroom instantiation welcome and landing page: https://digibp.herokuapp.com
- If it works, you can yell!!! Else, go back to step 1.
In this usecase a new pizza can be added to the menu of Mario's Pizzeria.
First we are going to create and test an HTTP POST request using Postman.
-
Open Postman (see the figure below).
-
Select Method:
POST. Next, copy the URL endpoint:https://hook.integromat.com/ys6lpnwgk0dus9fedfkiycc8ietgksfjand paste it in the Enter request URL (next to the POST method). -
Fill in the Headers with
- KEY:
Content-Type - VALUE:
application/json
- Click on the "Body" tab, choose the radio option "raw" and paste the following JSON object in the dedicated section (see the figure below).
{
    "name": "Napoletana"
}- Click on the Send button to test the POST call
In case of successful response, the following message will be returned:
• Code: 200 OK • Sample Body:
{
    "PizzaMenu": "Margherita, Prosciutto e Funghi, Capricciosa, Boscaiola, Quattro Stagioni, Quattro Formaggi, Bufala, Napoletana"
}
Notice that pizza Napoletana has been added to the list of pizza. You can also try with another pizza name, and you will see that the PizzaMenu now has the the other name but no more Napoletana. This is because our service is not smart enough to remember the previously added pizza name :) We will make it smarter in the next session!
Congrats!!! You made it!!! Proceed to Create Add Pizza Process Model.
In case of unsuccessful response, the following message will be returned:
• Code: 404 UNAUTHORIZED
Try again. You can make it!!!
Now that the HTTP POST request works, we are ready to implement the service integration using the Camunda Modeller.
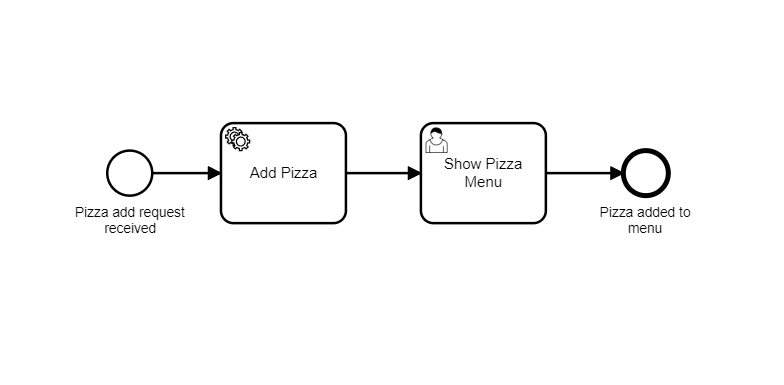
Open the Camunda Modeller and create the process model as follows:
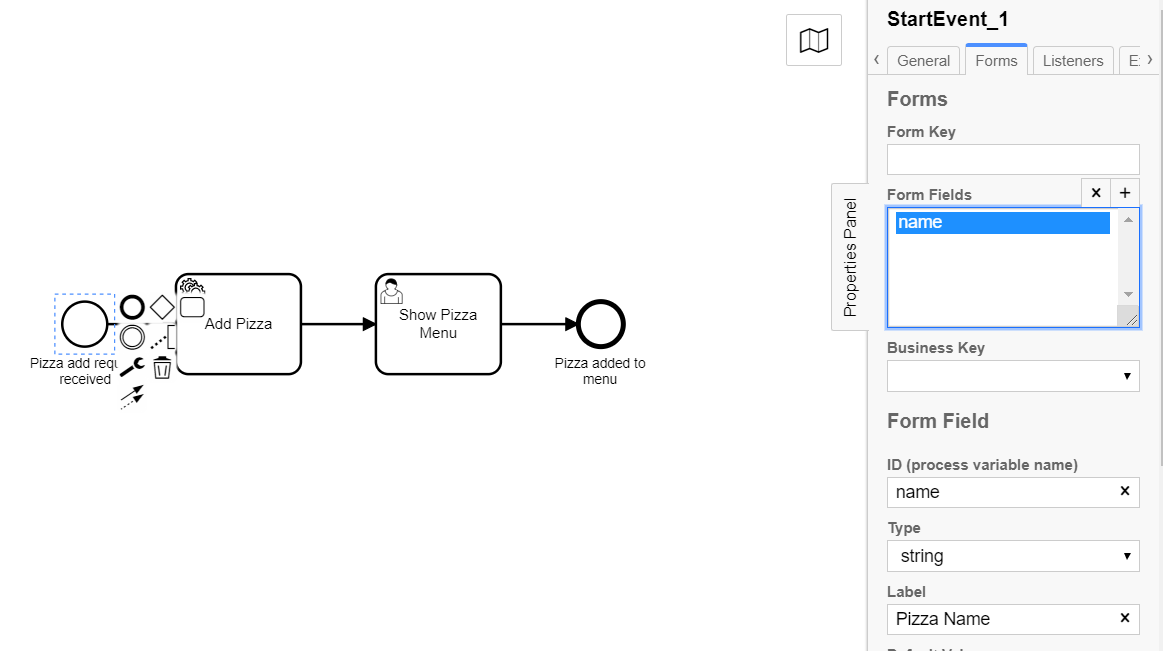
Select the start event and create a new form field name (see the following figure).
The variable name will hold the name of the pizza that you would like to add.
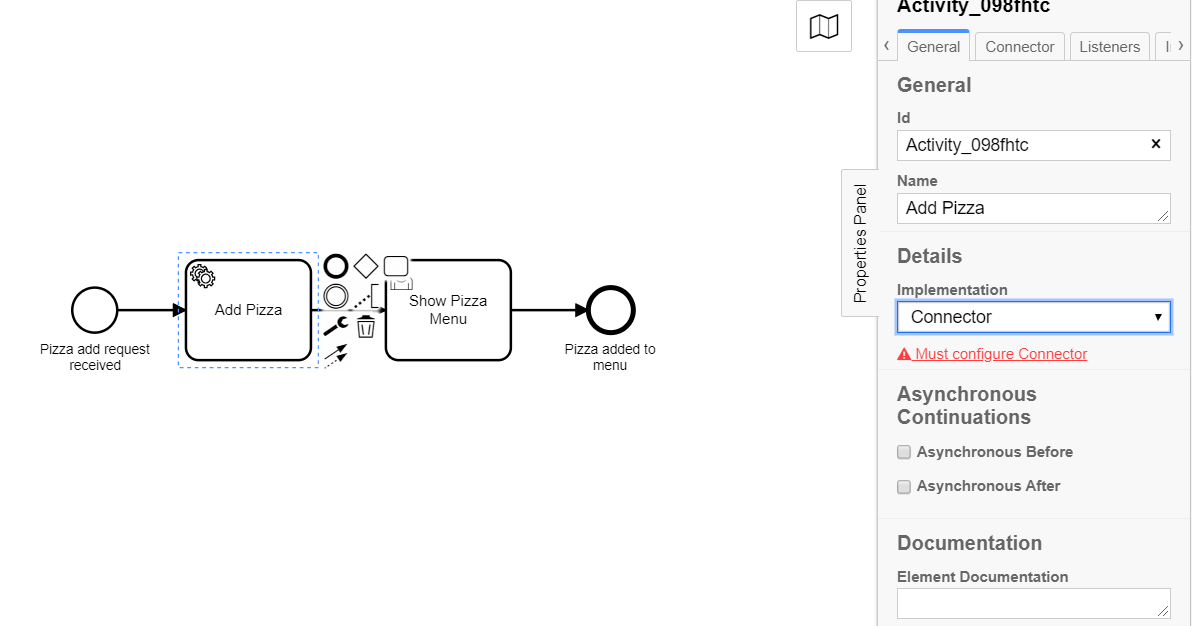
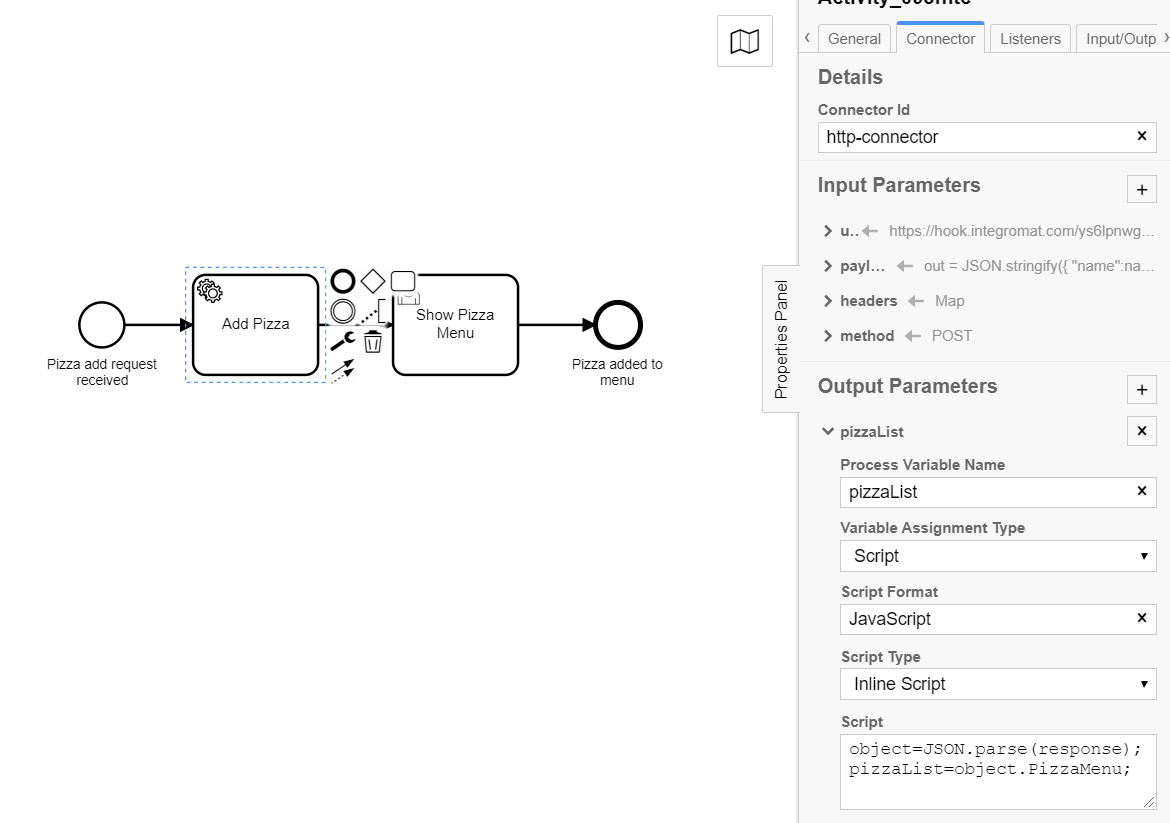
Select Add Pizza task and select Connector from the General tab in the panel properties (see right-hand side of the figure below). As done previously, enter http-connector in the Connector Id.
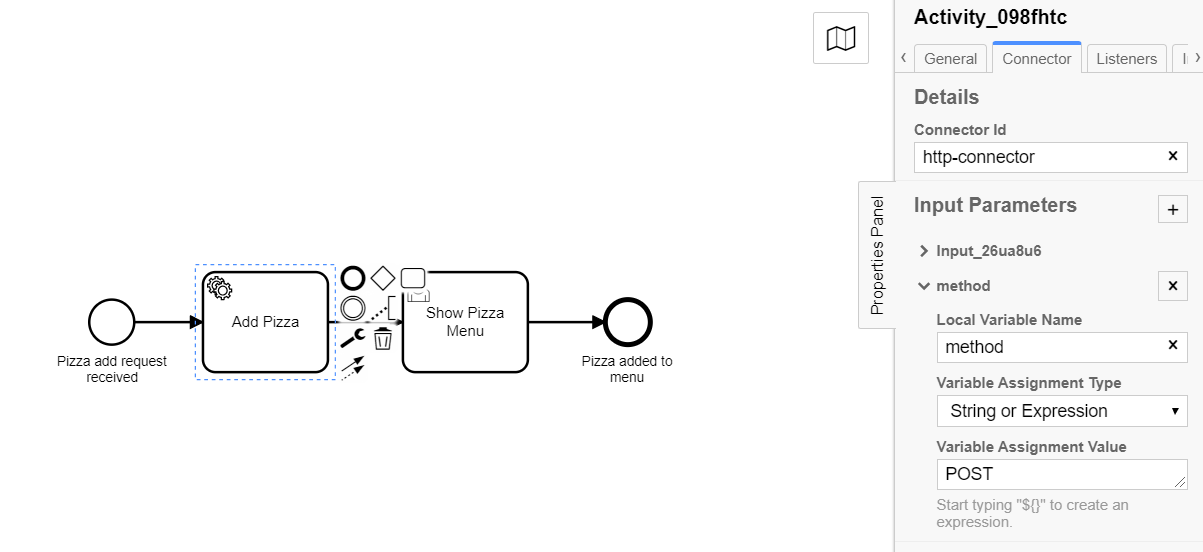
Select Add Pizza task and add method as input parameter and its value POST (see the following figure).
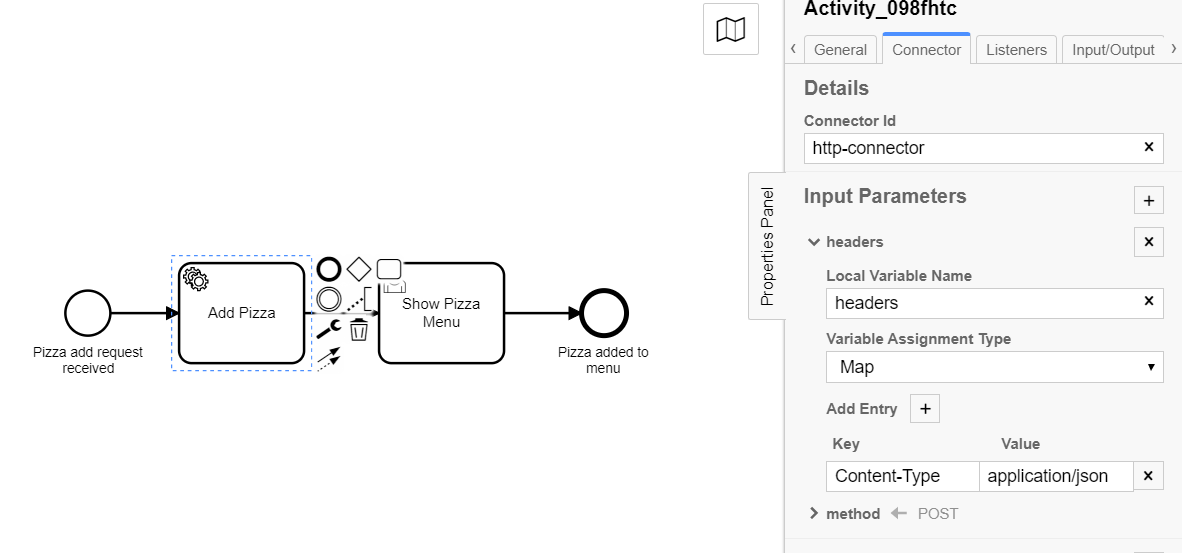
Add headers as input parameter of type Map. Add a Key Content-Type with Value application/json (see the following figure).
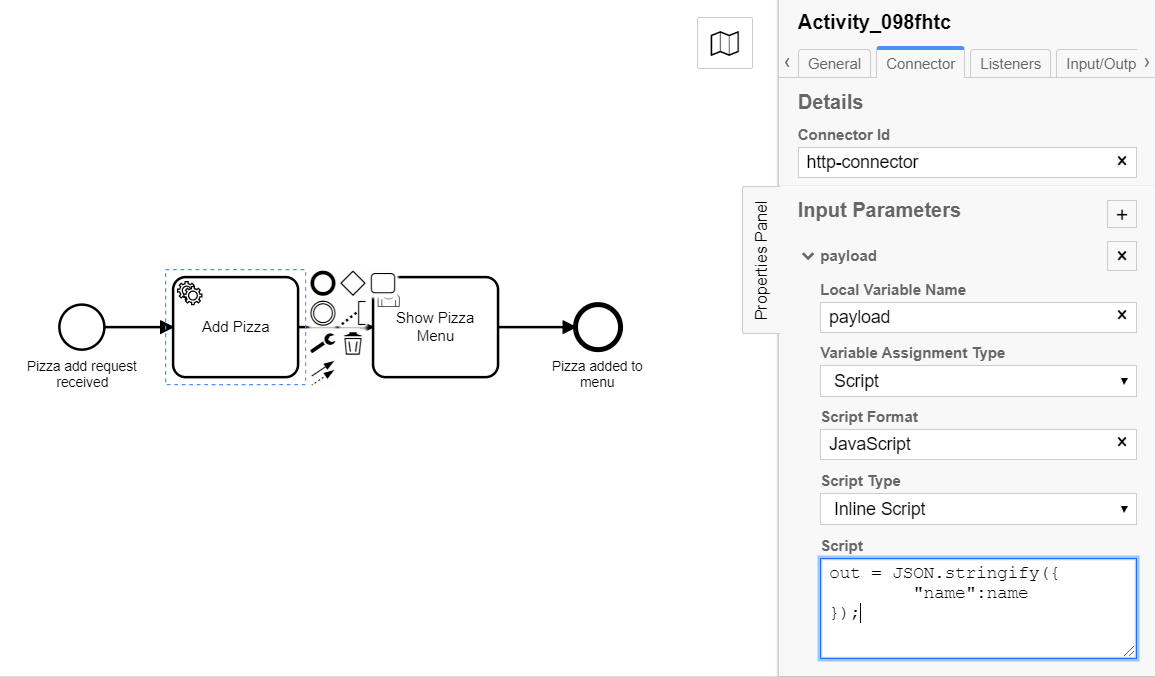
Add payload as input parameter. Choose the type Script and enter Script Format as JavaScript. Copy and paste the following code snippet into the Script area (see the figure below).
out = JSON.stringify({
	"name":name
});
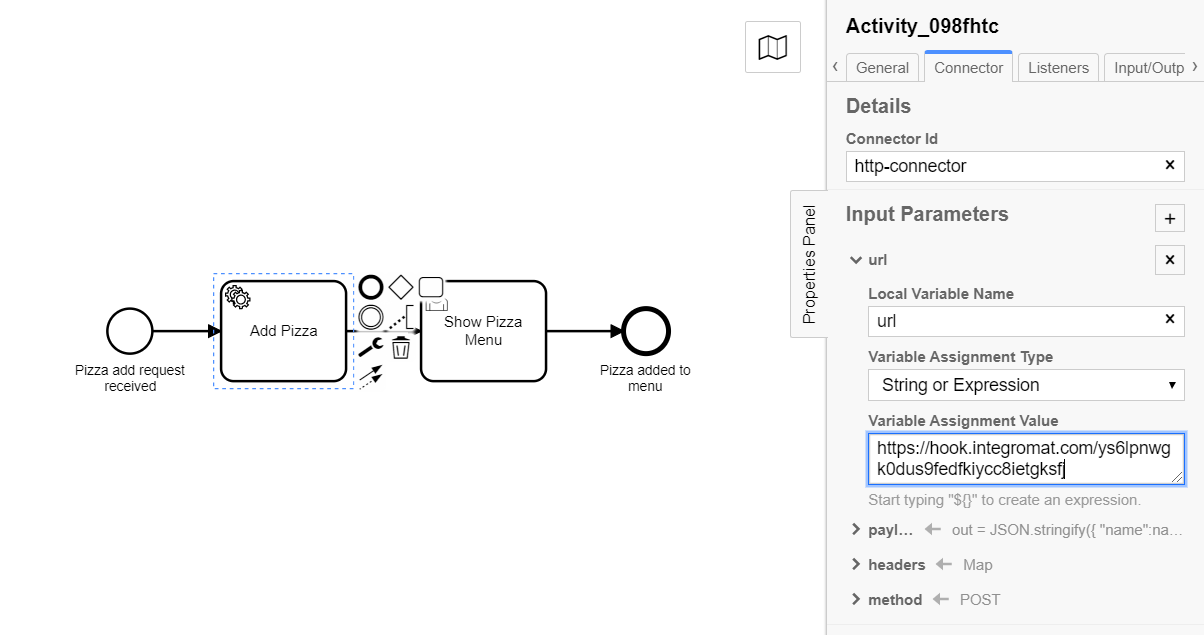
Add url as input parameter (see the following figure). The url should be the POST url that you tested using Postman.
Add the output parameter pizzaList. This output paramenter needs to be transformed into a JSON object, which is done by the script (see bottom-right corner of the figure below).
Copy and paste the following code into the Script area.
object=JSON.parse(response);
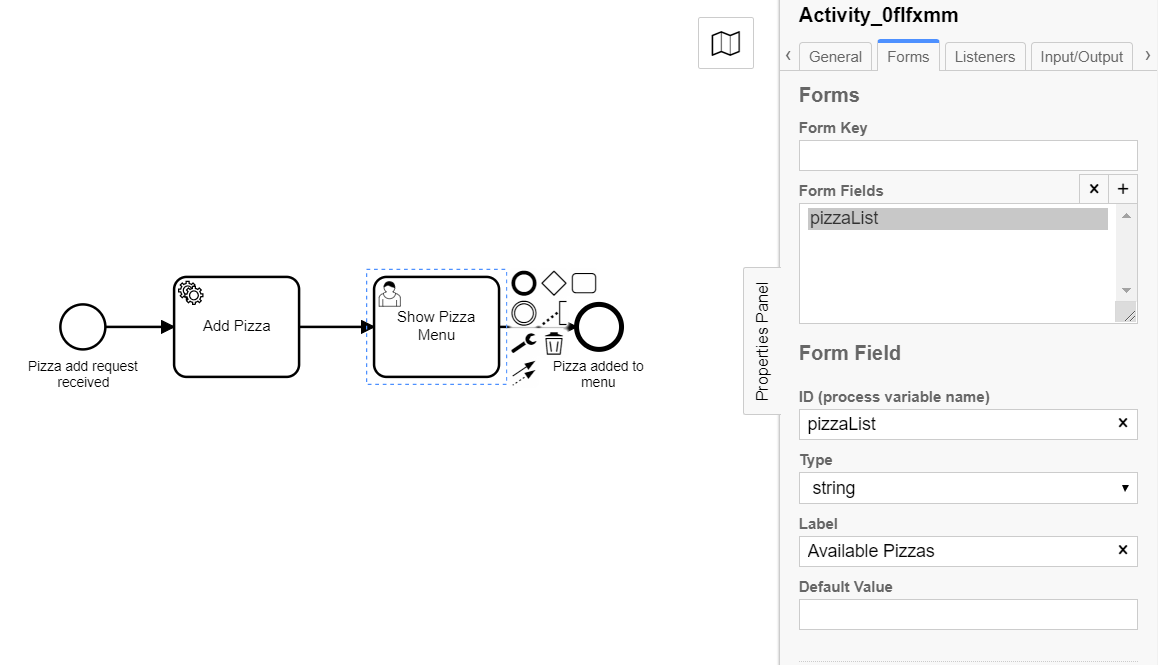
pizzaList=object.PizzaMenu;Select "Show Pizza Menu" and add the form field pizzaList. This form field will be populated with the available pizza from the Menu once the process runs.
Now we are ready to deploy the process and test if it works as expected. For that, we are going to use the FHNW DigiBP classroom instantiation.
- Enter deployment name and your Tenant ID.
- Enter the deployment endpoint (copy&paste):
https://digibp.herokuapp.com/engine-rest - Go to the DigiBP classroom instantiation welcome and landing page: https://digibp.herokuapp.com
- If it works, you can yell and dance!!! Else, go back to step 1.
1 API Debugging and Testing

