Service Integration Integromat - DigiBP/digibp.github.io GitHub Wiki
This hands-on reuses the two usecases that were demonstrated in the (service-integration) session. Each usecase starts with the creation and test of the API requests with the help of Postman.
This guide relies on the previously configured settings, such as the Camunda Modeler, a running instantiation of the
digibp-camunda-templateon Heroku, Postman and the knowledge gained in the Service Integration guide.
Contents:
- Pre-requisite - Integromat, Google account
- 1. Get Pizza Menu Service
- 2. Add Pizza Service
Pre-requisite - Integromat and Google account
Please register to Integromat and create a Google account before running this tutorial.
1. Get Pizza Menu Service
We are going to reuse the simple process that displays the menu of Mario's Pizzeria. However, instead of connecting to the putsreq API, we are now going to create our own API.
a. Data Structure/Database
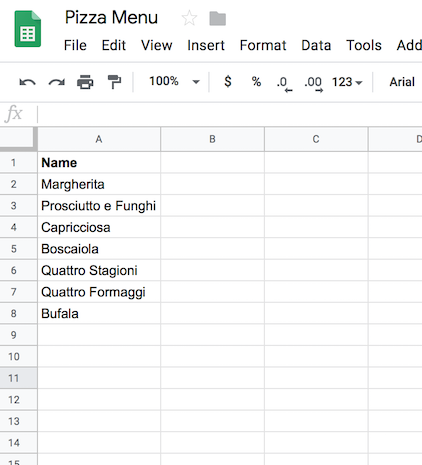
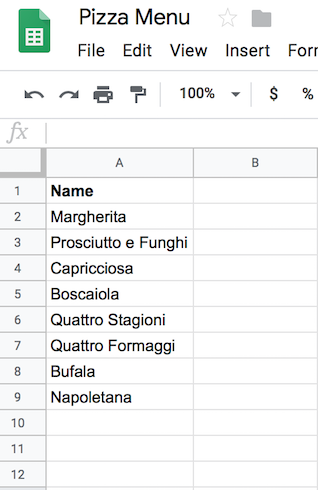
Before starting with the API, we need to create our "database" to store the names of pizzas available in Mario's pizzeria. Please create a new Google sheet Pizza Menu and create a very simple data structure with just one column "Name" and add data as shown in the figure below.
Please note that similar data should be stored in the same column. You can extend the data structure by adding more columns like Price, Toppings etc.
b. Create Get Pizza Service API in Integromat
The next task is to create an API that reads the data from the Pizza Menu Google sheet.
Step 1: Sign In and Create New Scenario
-
Sign in to Integromat.
-
Click on Create new Scenario button (see the figure below).
- You will land on a page that displays a collection of services that can be integrated in your scenario.
Step 2: Add Webhook for GET
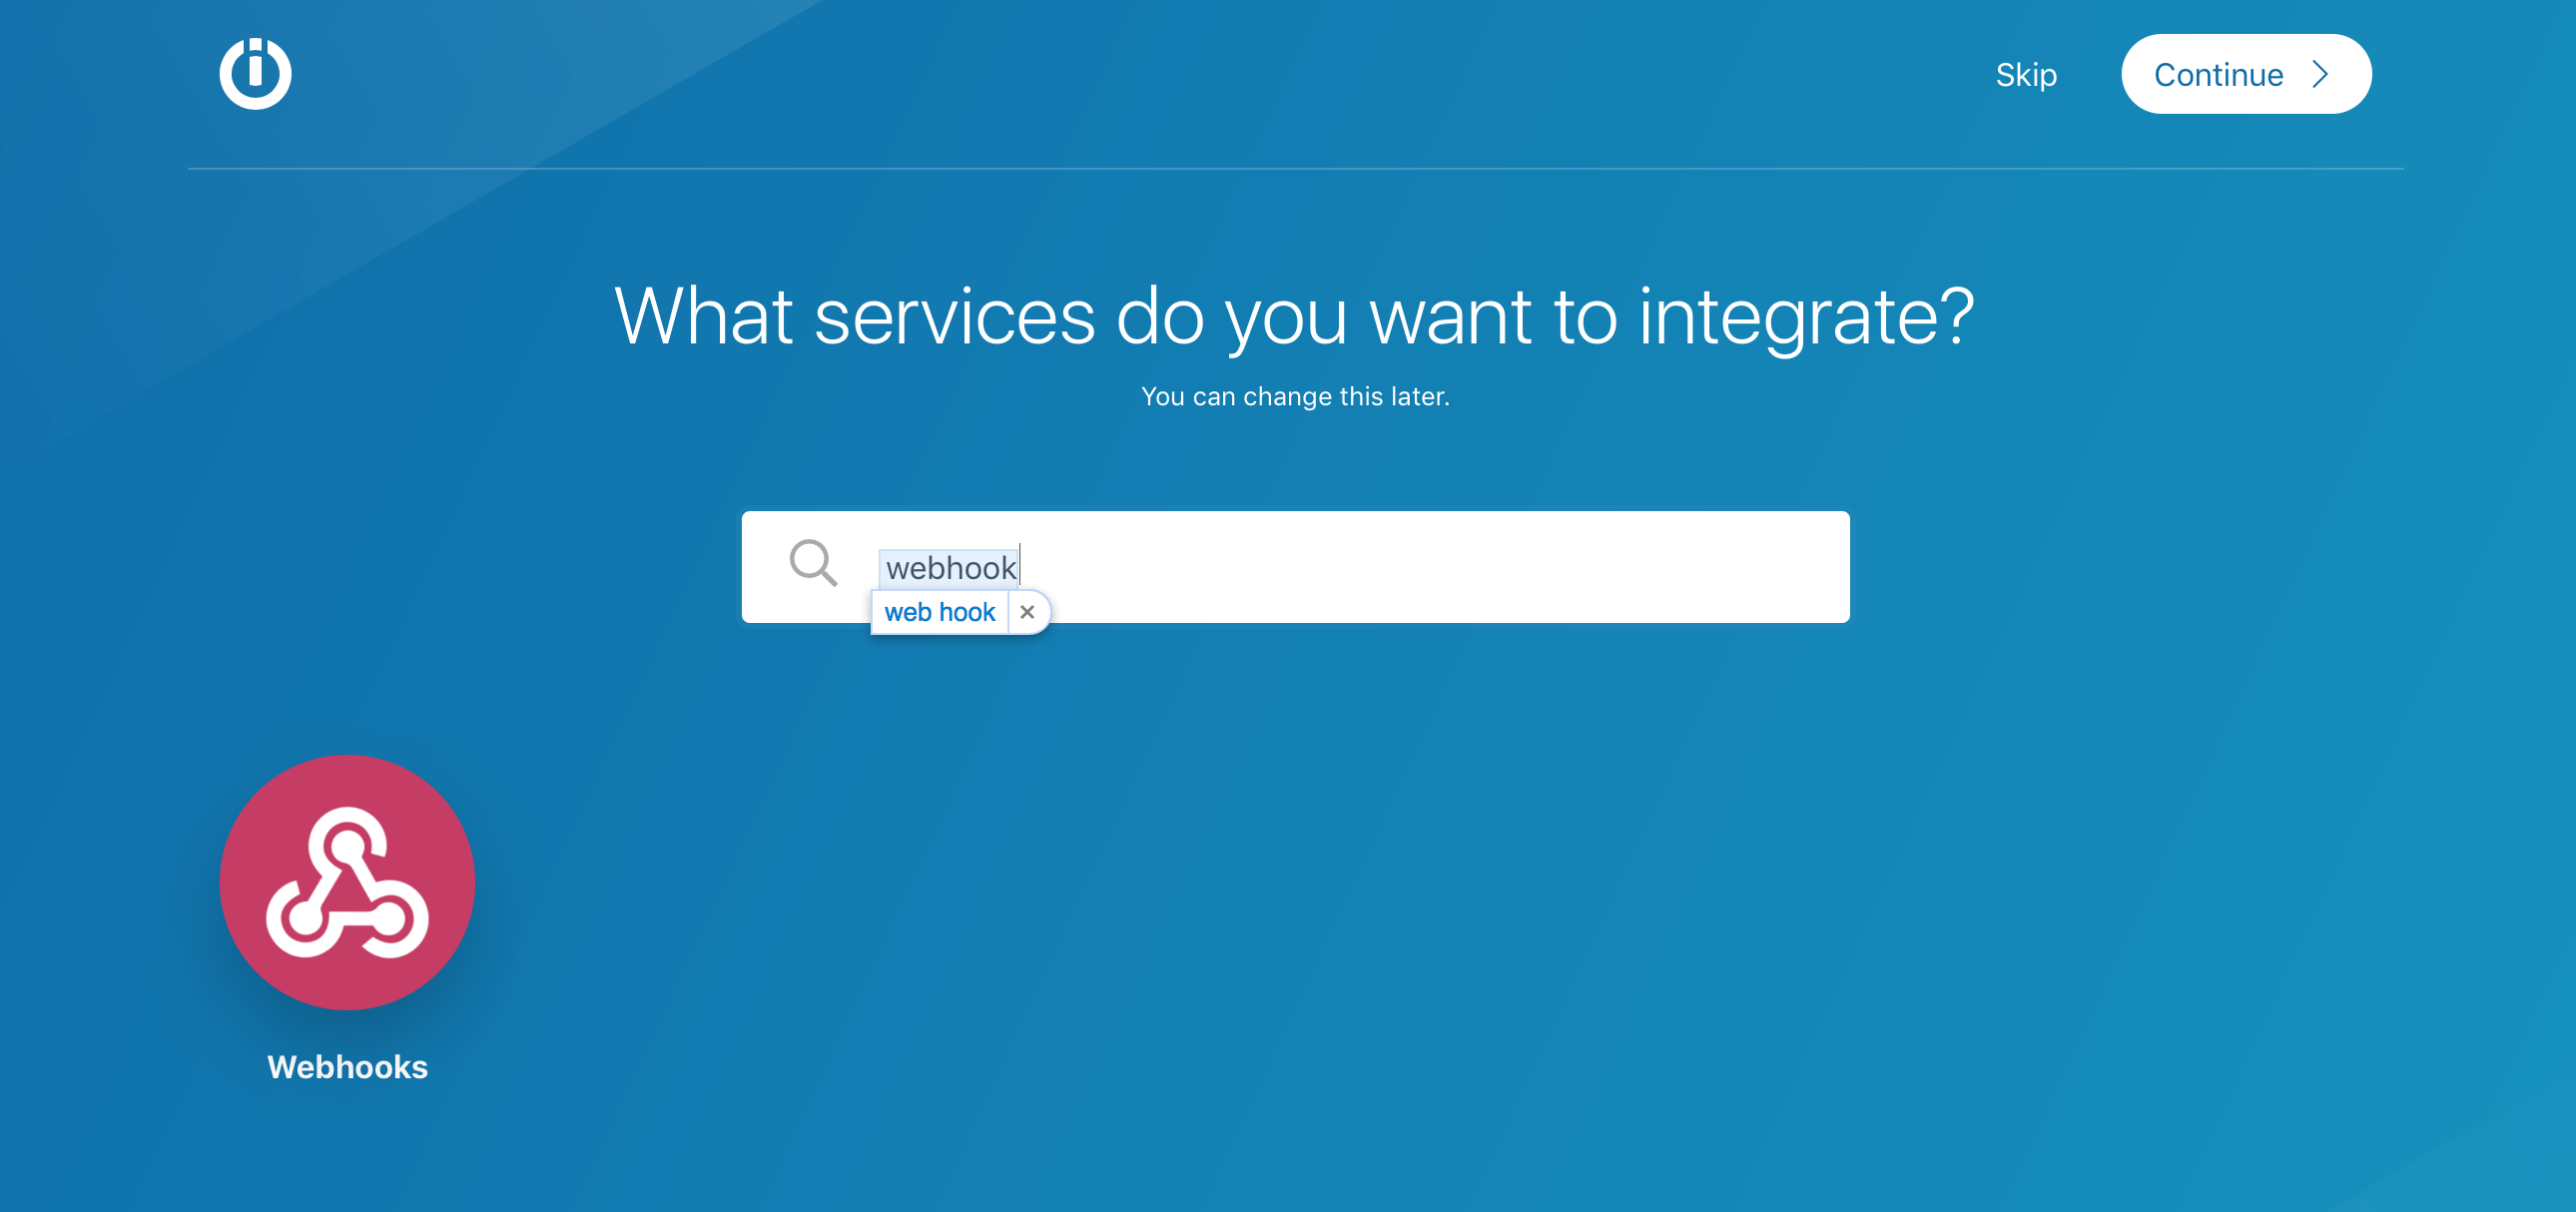
- The first service we need is the Webhook. Search for Webhooks (see figure below), click on the Webhooks icon and then click on Continue button.
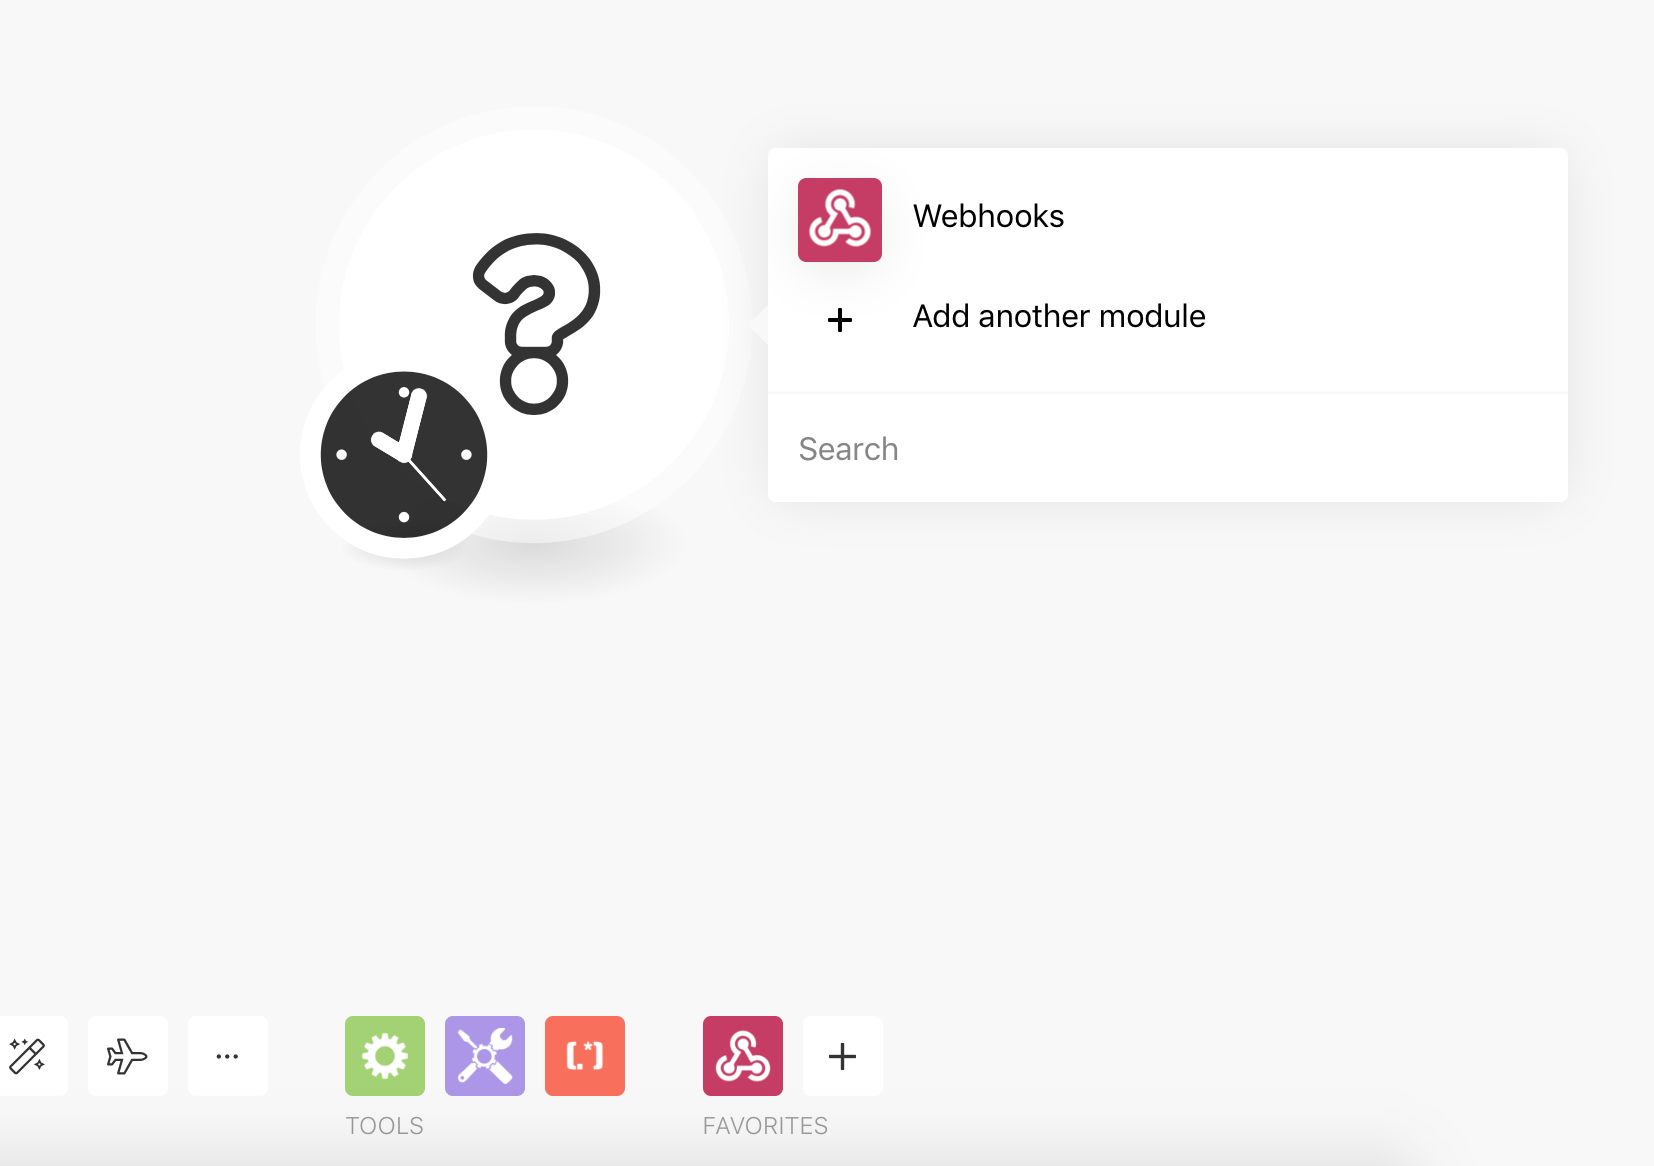
- Click on the blank service icon with a "?" and select Webhooks from the popup that appears.
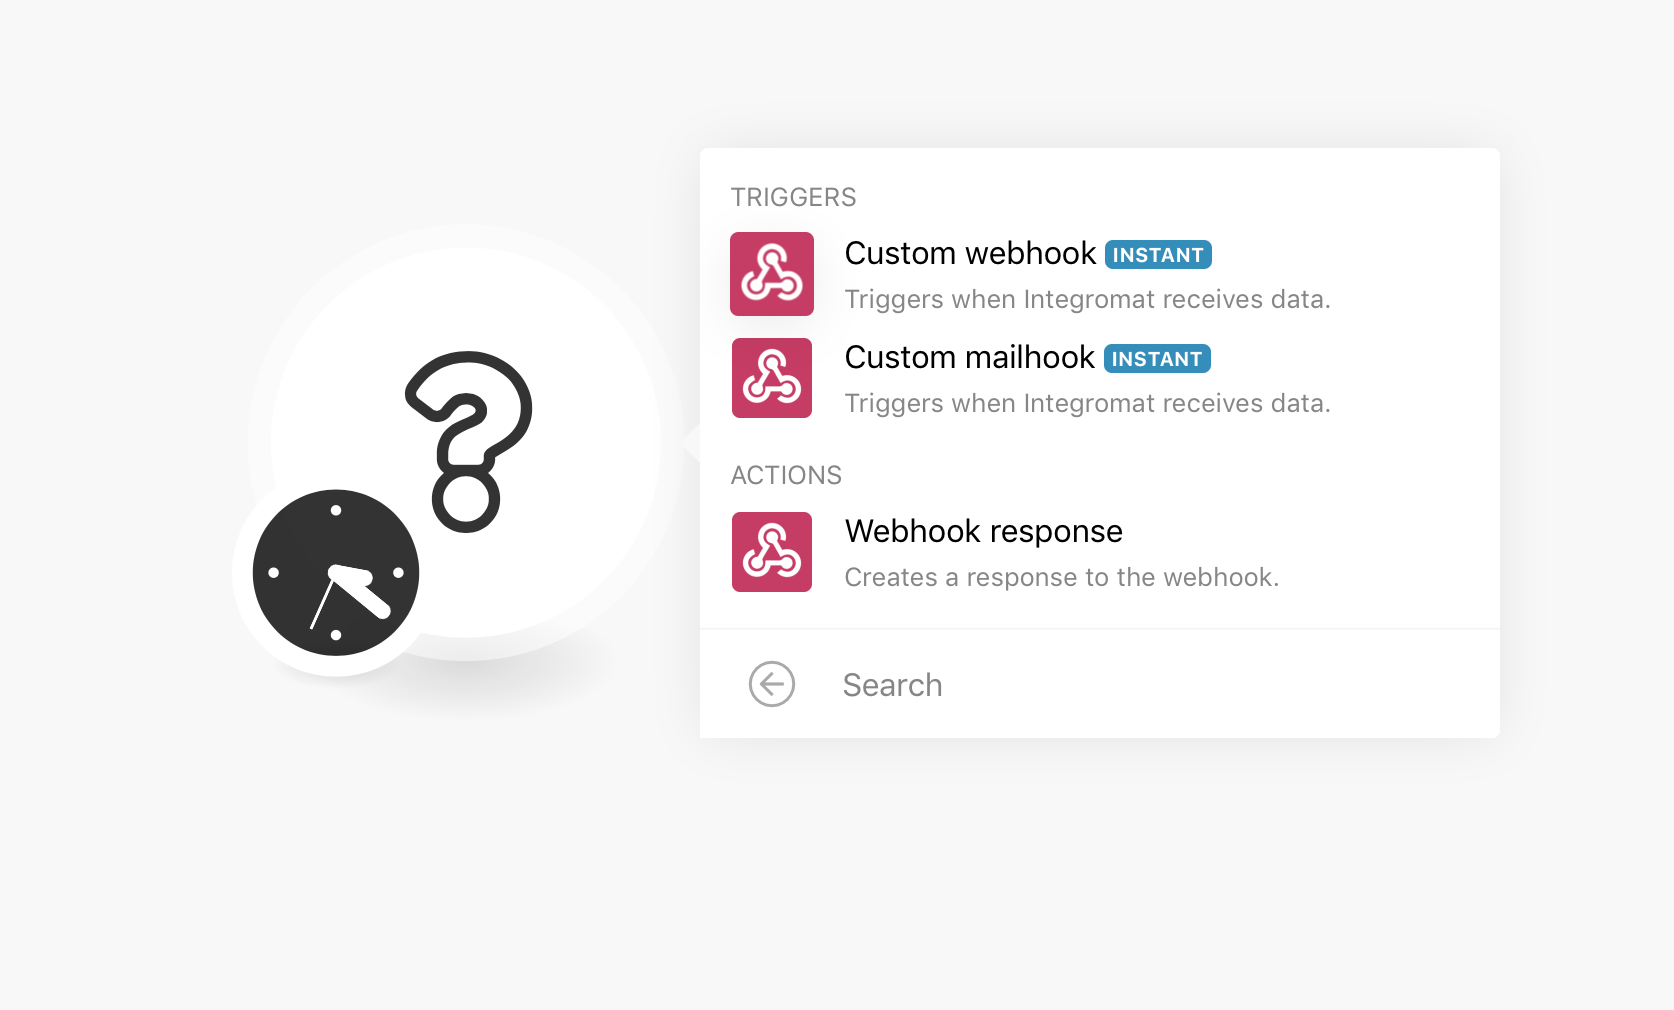
- Choose Custom webhook from the available options.
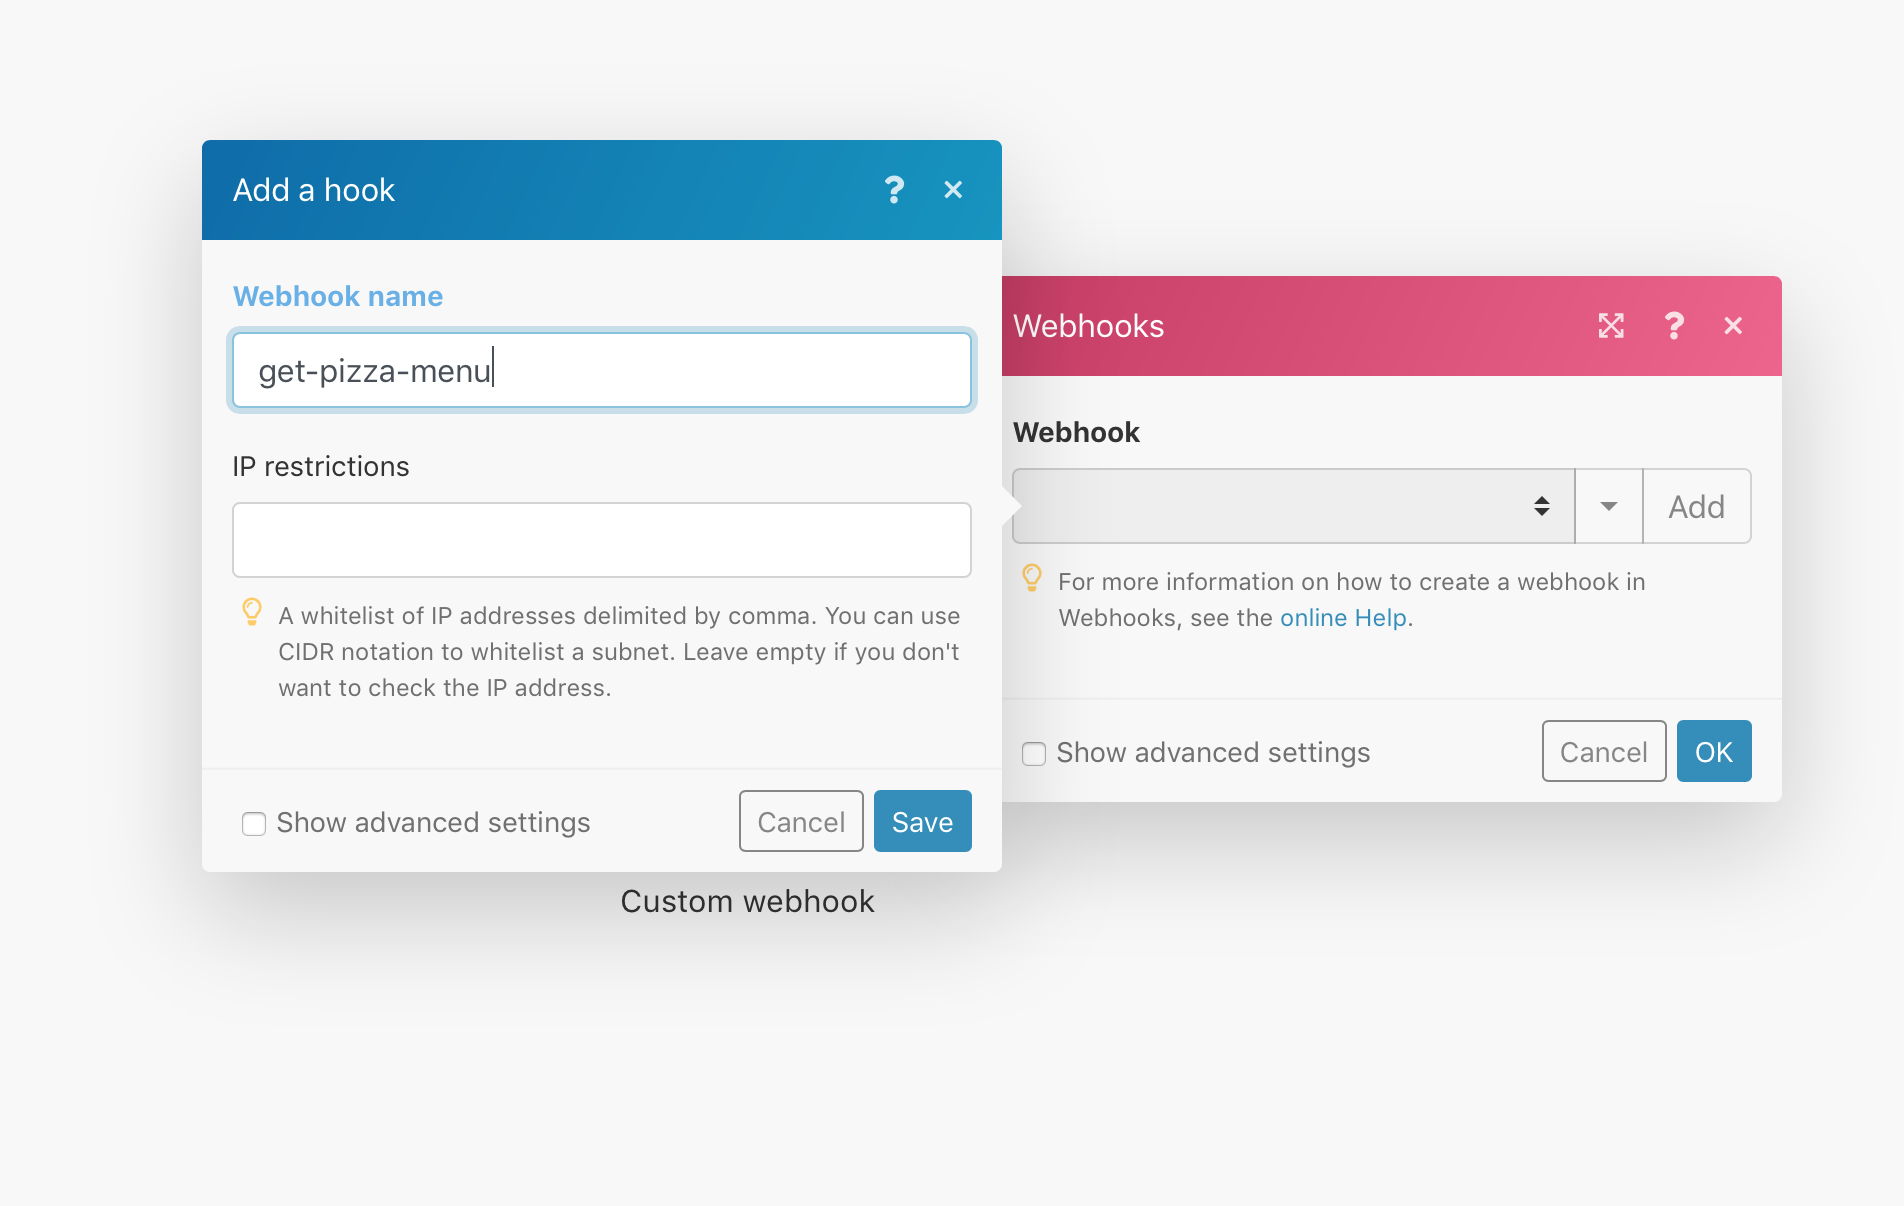
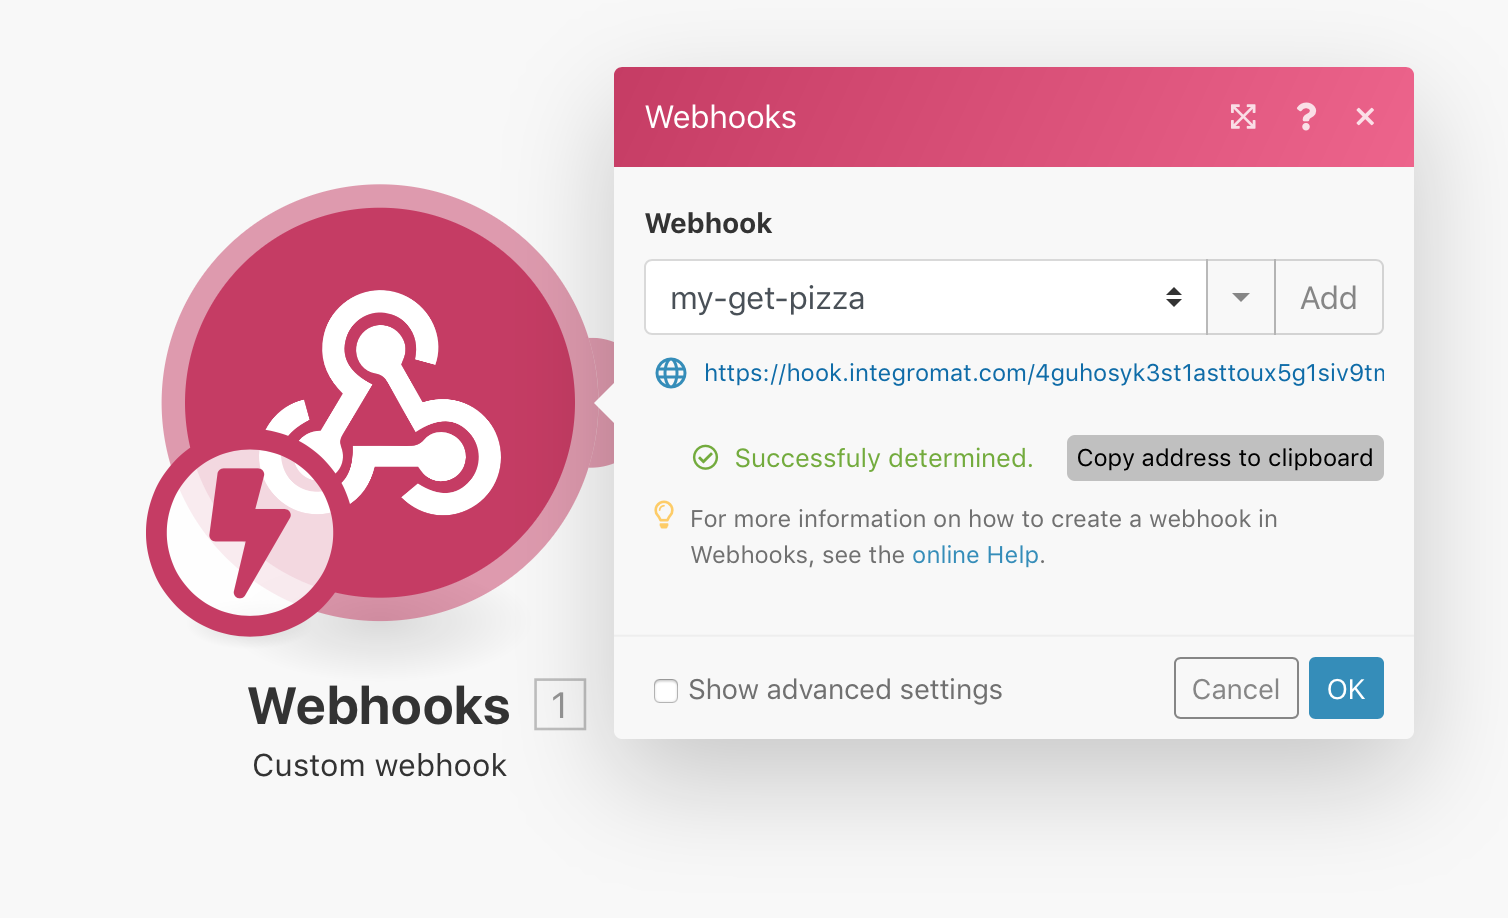
- Next, click on the Add button and add the webhook details as shown in the figure below. Click Save.
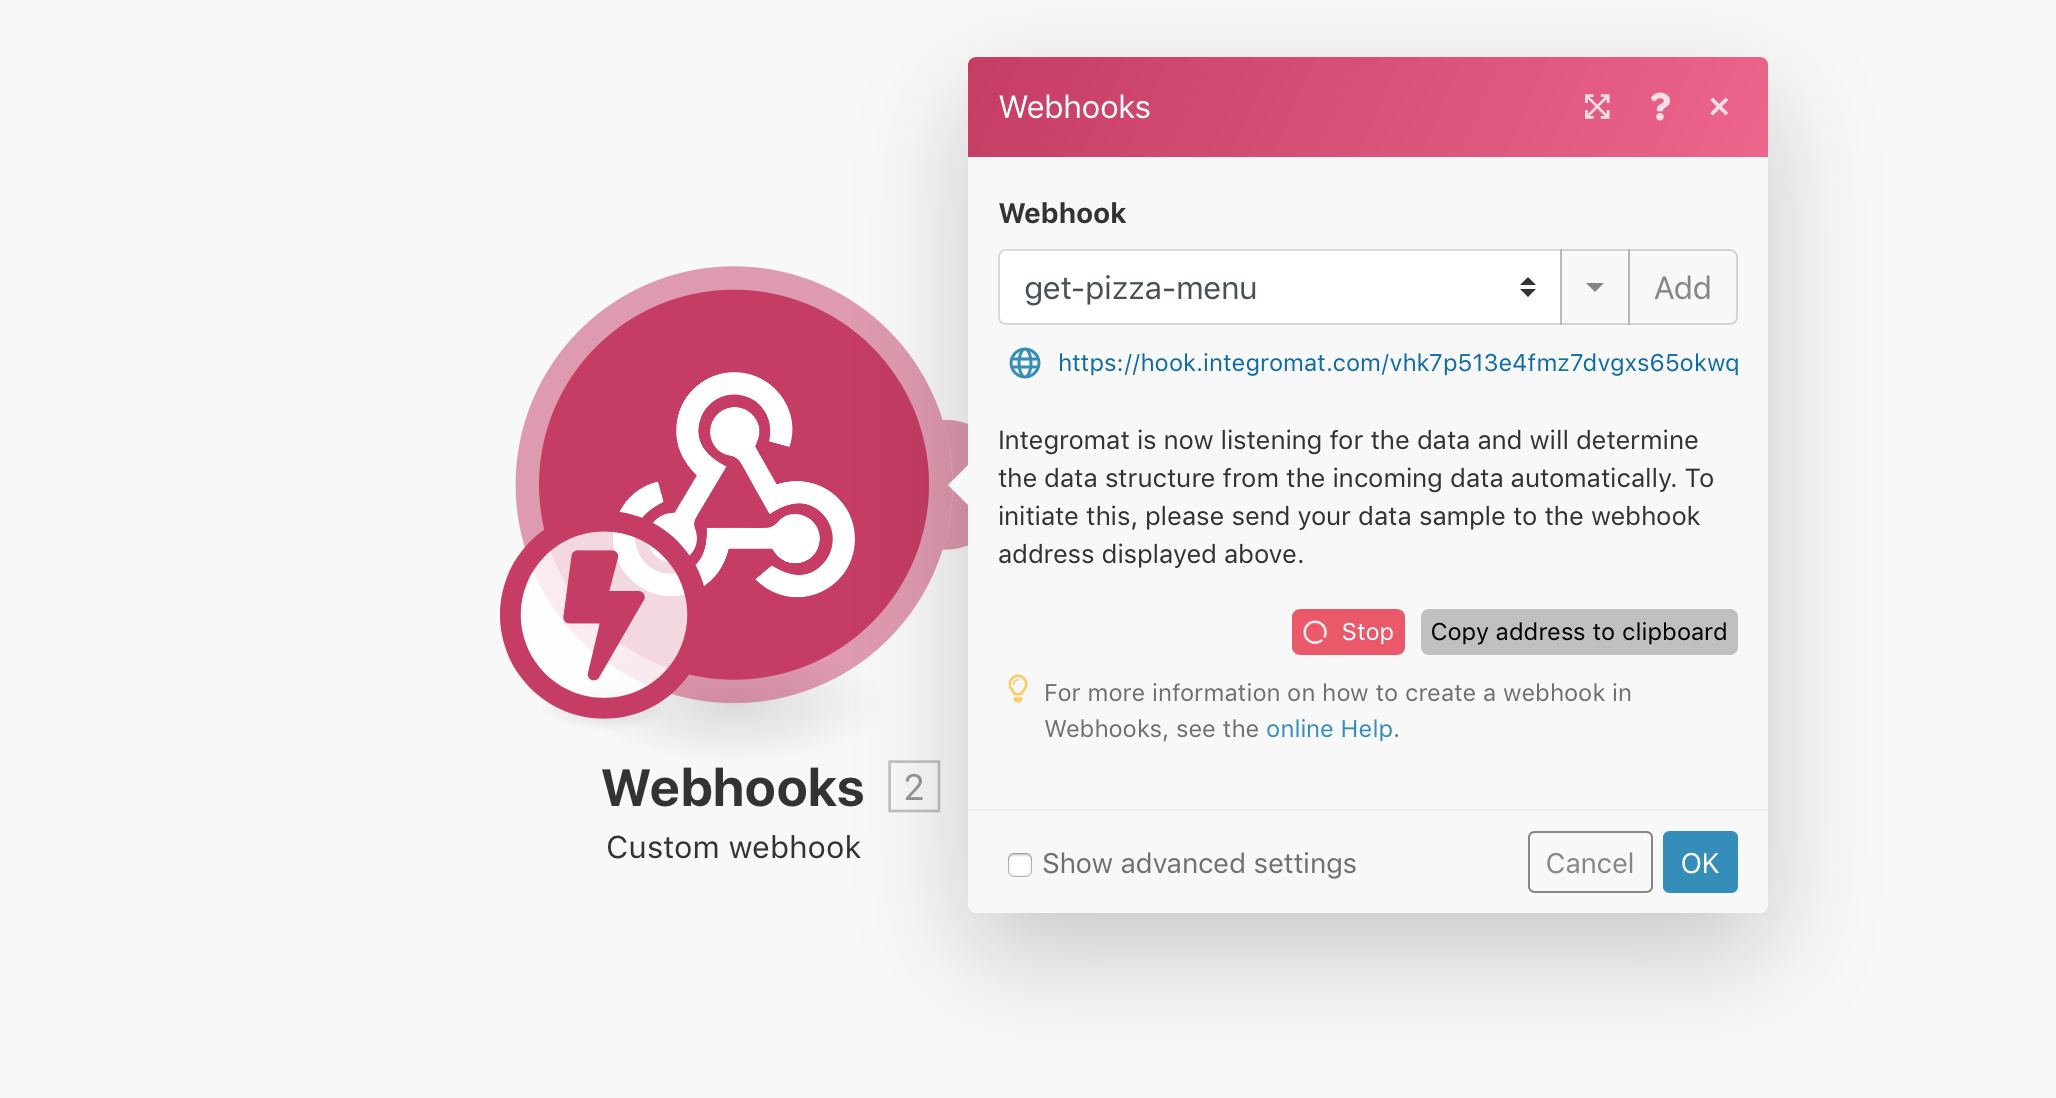
- You will now see a URL generated by Integromat - this is the endpoint to which we will connect from the Camunda model. Click OK.
Please note that every webhook has a unique URL. You should use the one from your webhook by clicking on Copy address to clipboard button, and not the one shown in the image below.
Step 3: Add Google Sheets Select Rows
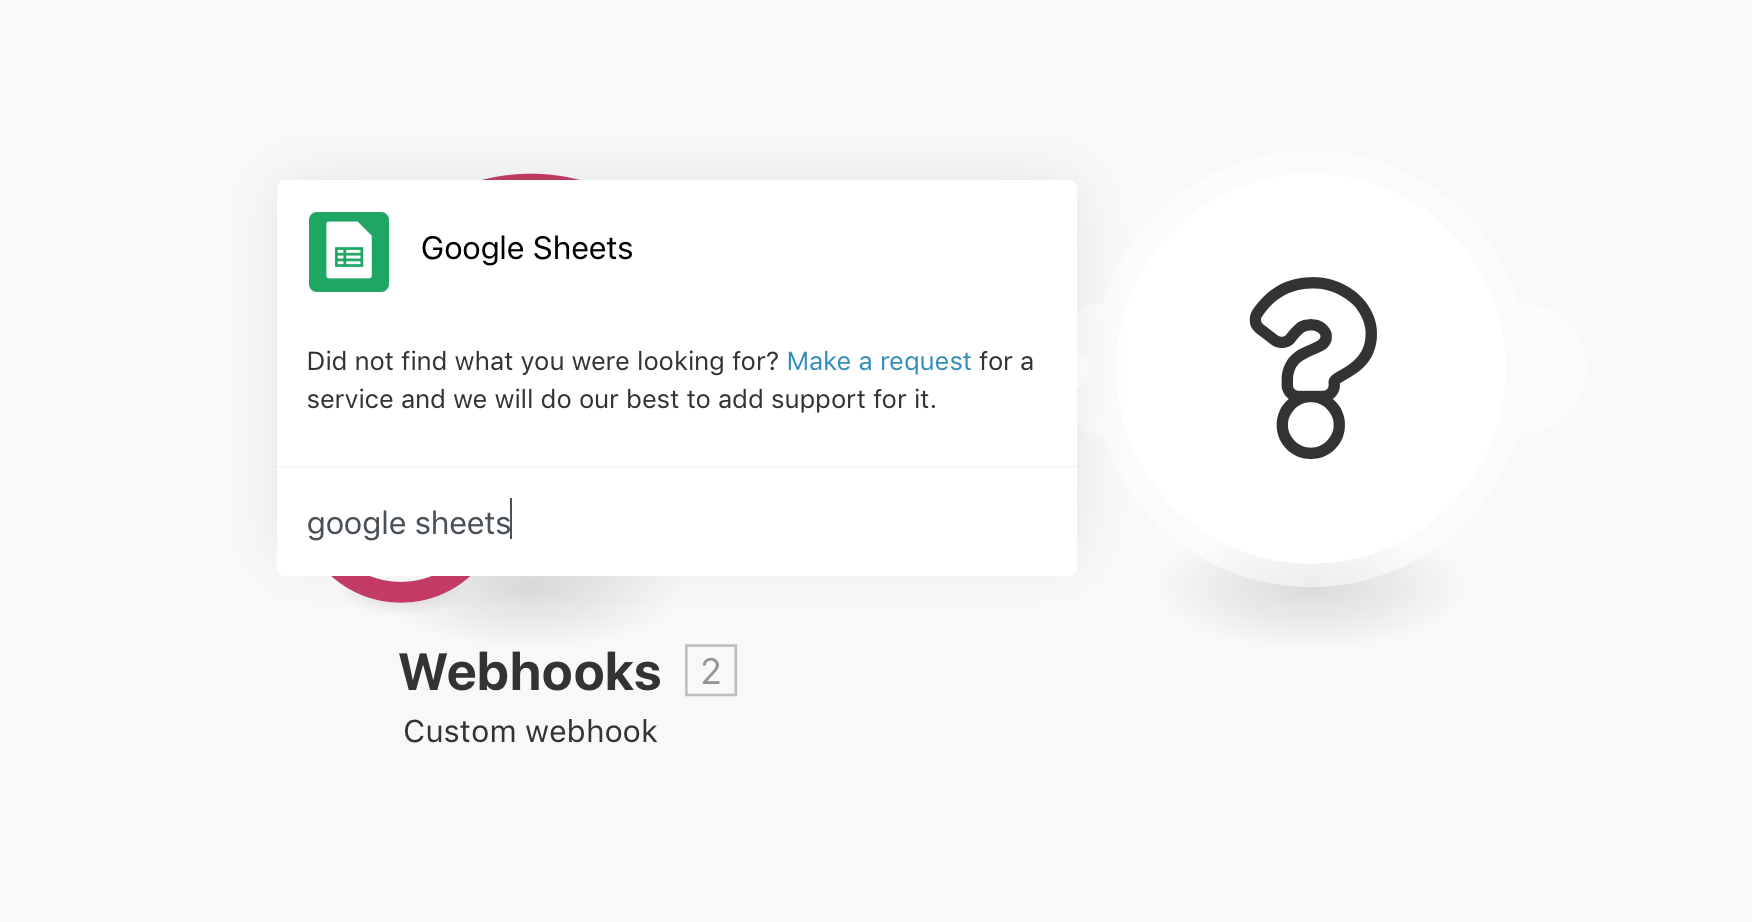
- Click on Add another module (+ symbol), search for and select Google sheets.
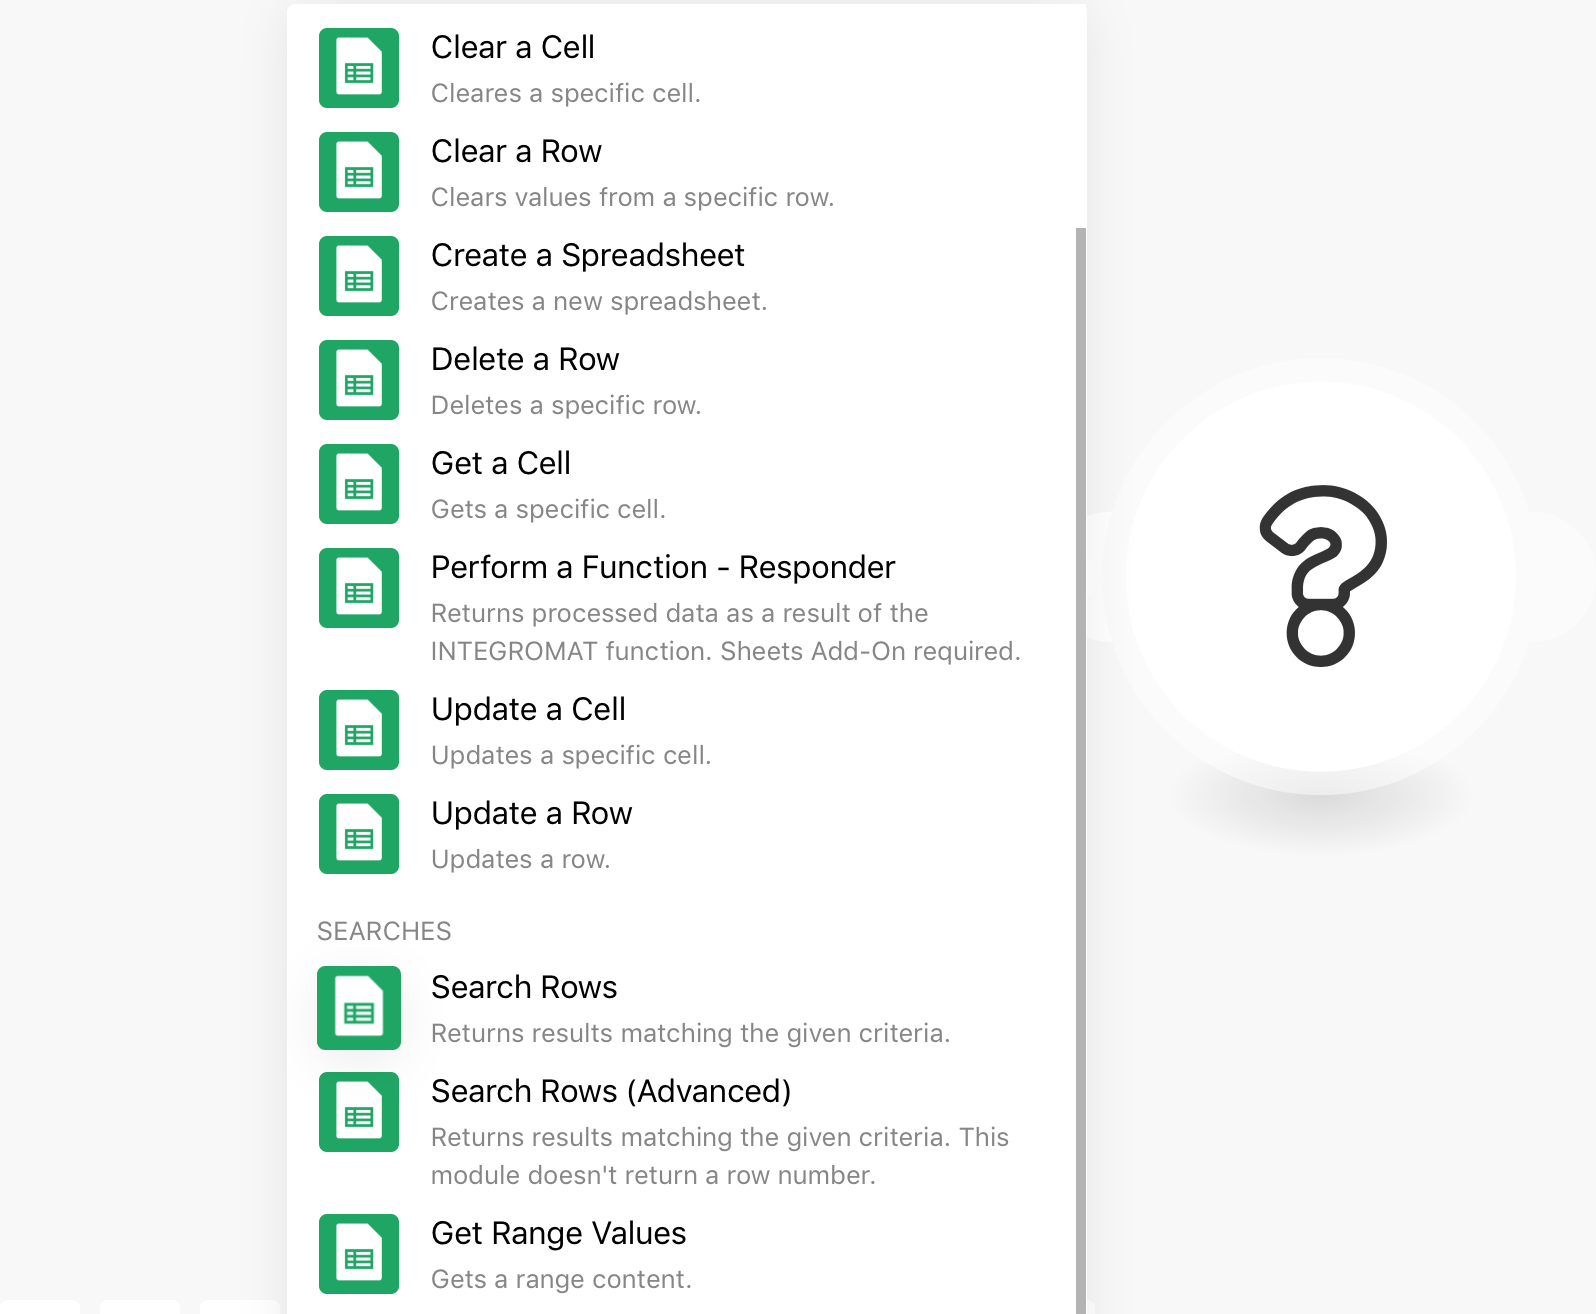
- As we want to read the contents of the Pizza Menu sheet, choose the action Search Rows.
-
Click on Add and create a new connection "read-pizza-menu" and click Continue. You will be redirected to the google sign-in page asking you to trust Integromat. Click on Allow button.
-
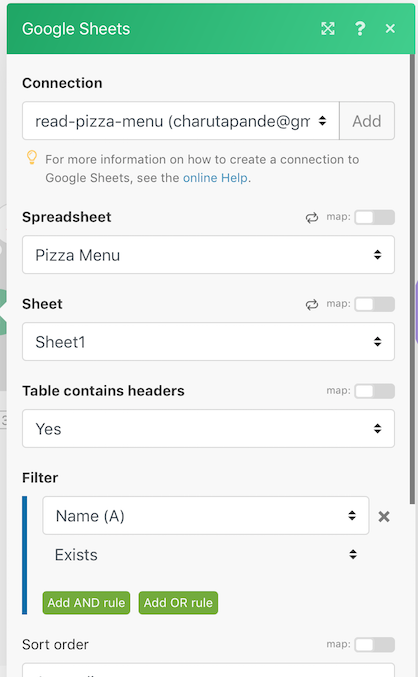
Back in Integromat, choose the spreadsheet Pizza Menu and the sheet Sheet1. Add Filter to check that the column Name exists. Scroll down and set the Maximum number of returned rows to 50.
Step 4: Add Tools - Text Aggregator and Set Variable
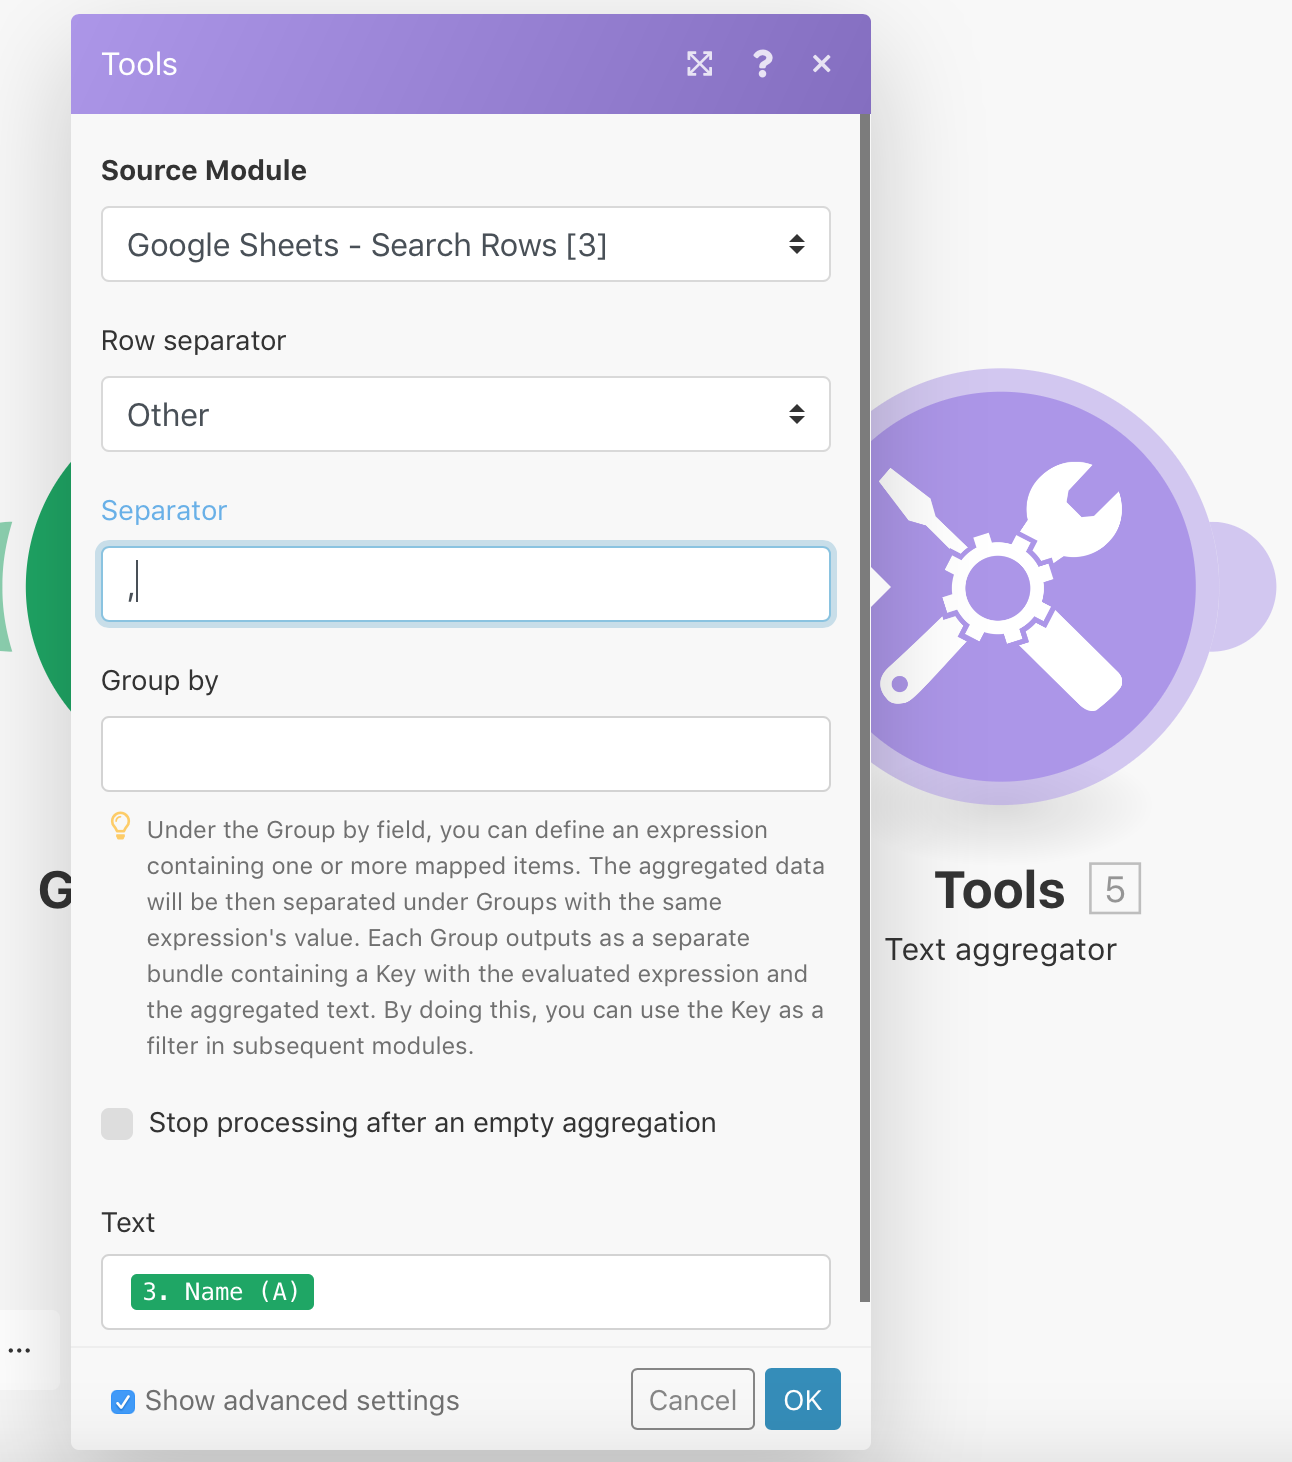
- Next, add a new module by searching Tools and selecting the Text Aggregator. Click on Show advanced settings and add details as shown in the figure below. This will create a comma-separated list of the pizza names.
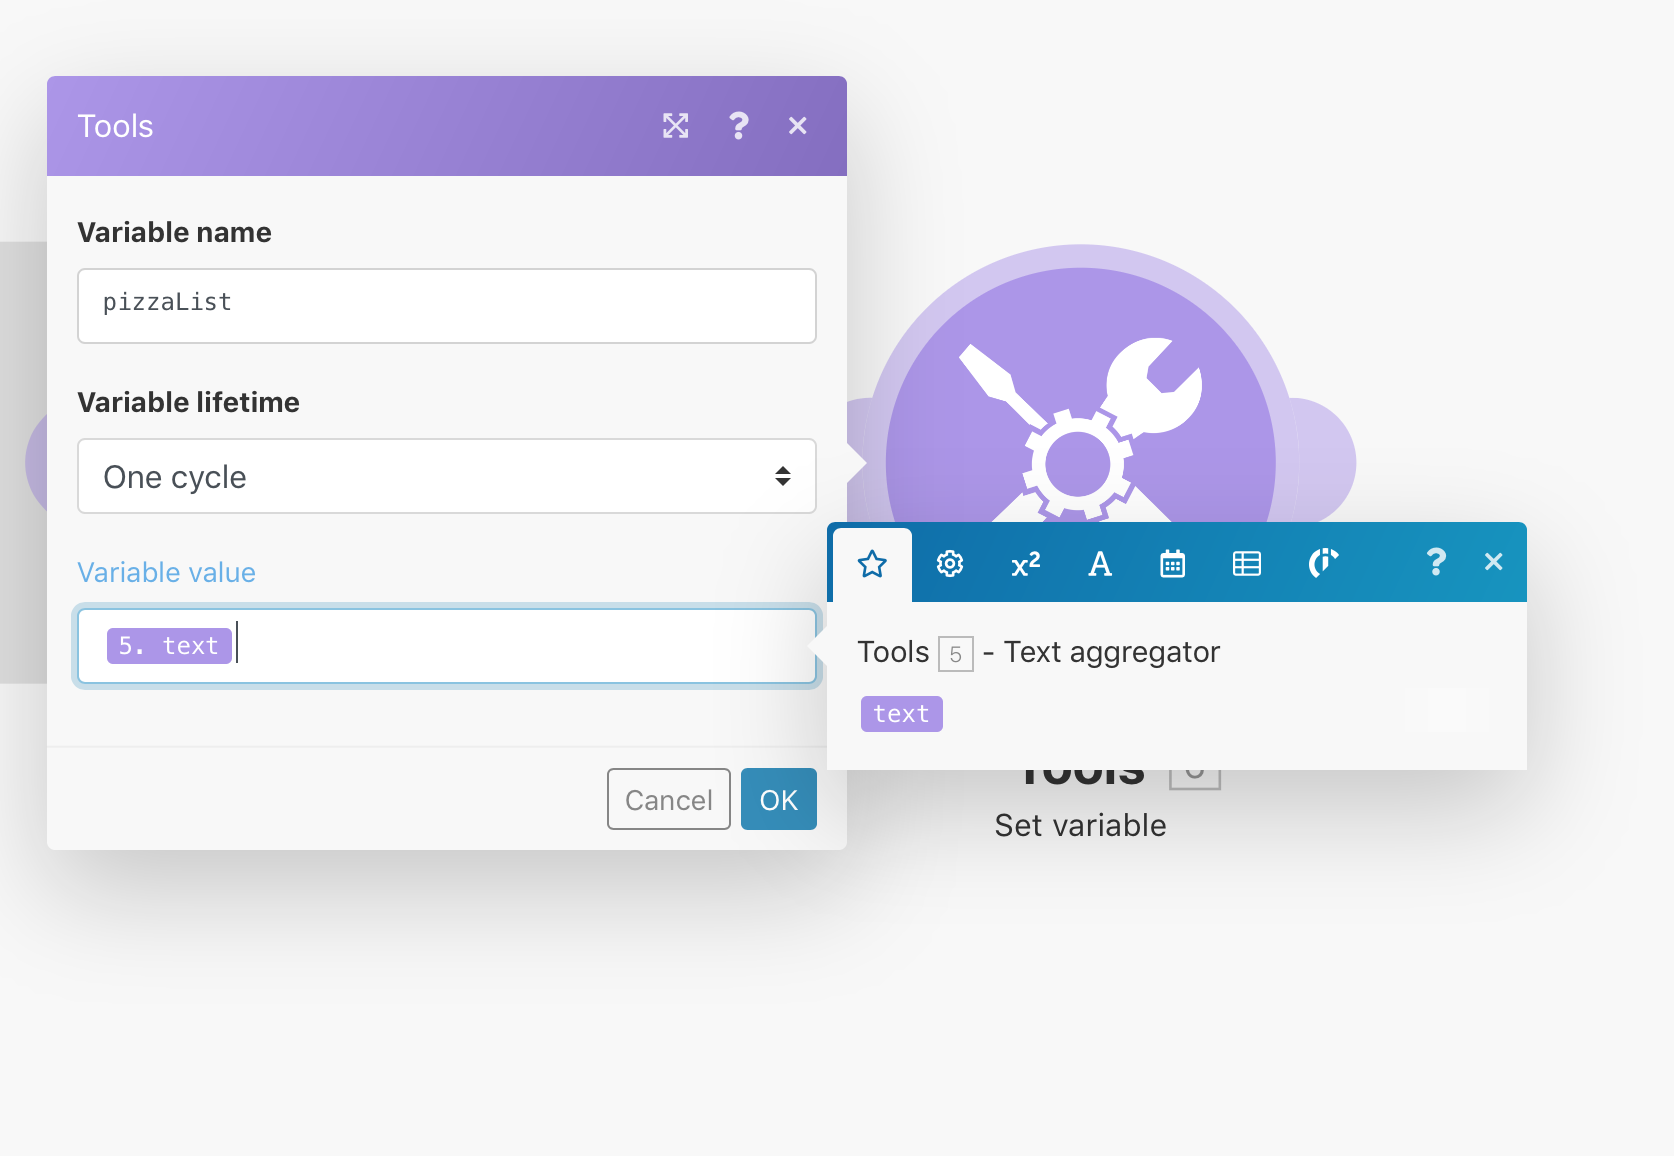
- Add another module by searching Tools and selecting Set Variable. Create a new variable called pizzaList and assign the comma-separated pizza names created in the previous step (see figure below).
Step 5: Add Webhook response
-
Finally, add the last module for the response. Click on Add another module, choose Webhooks and select Webhook response.
-
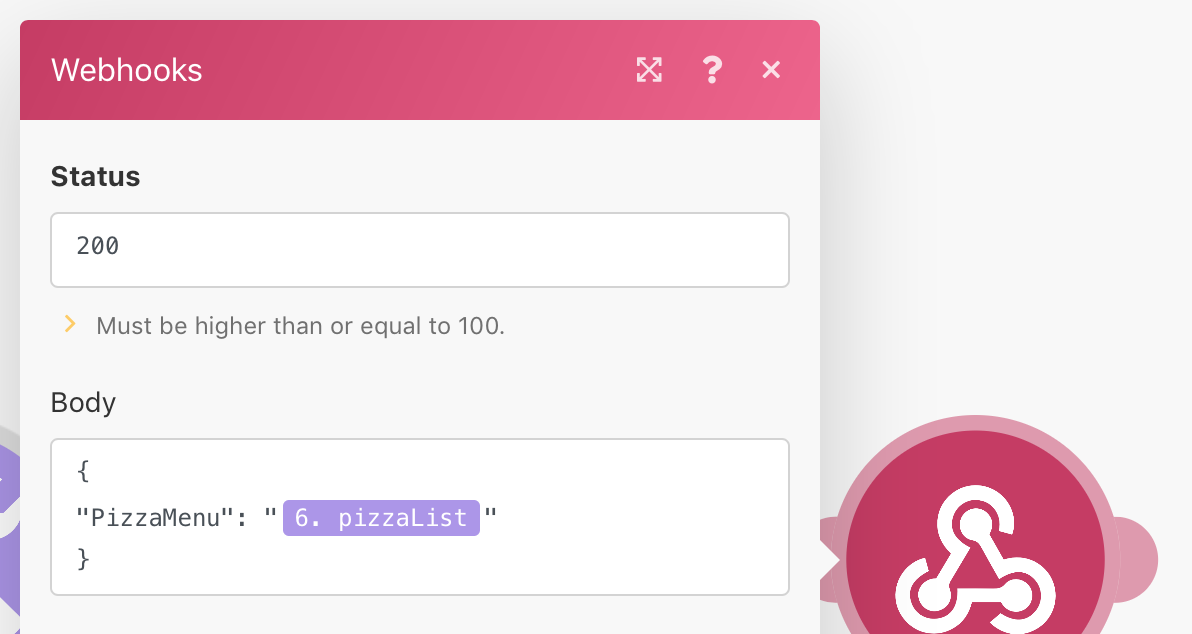
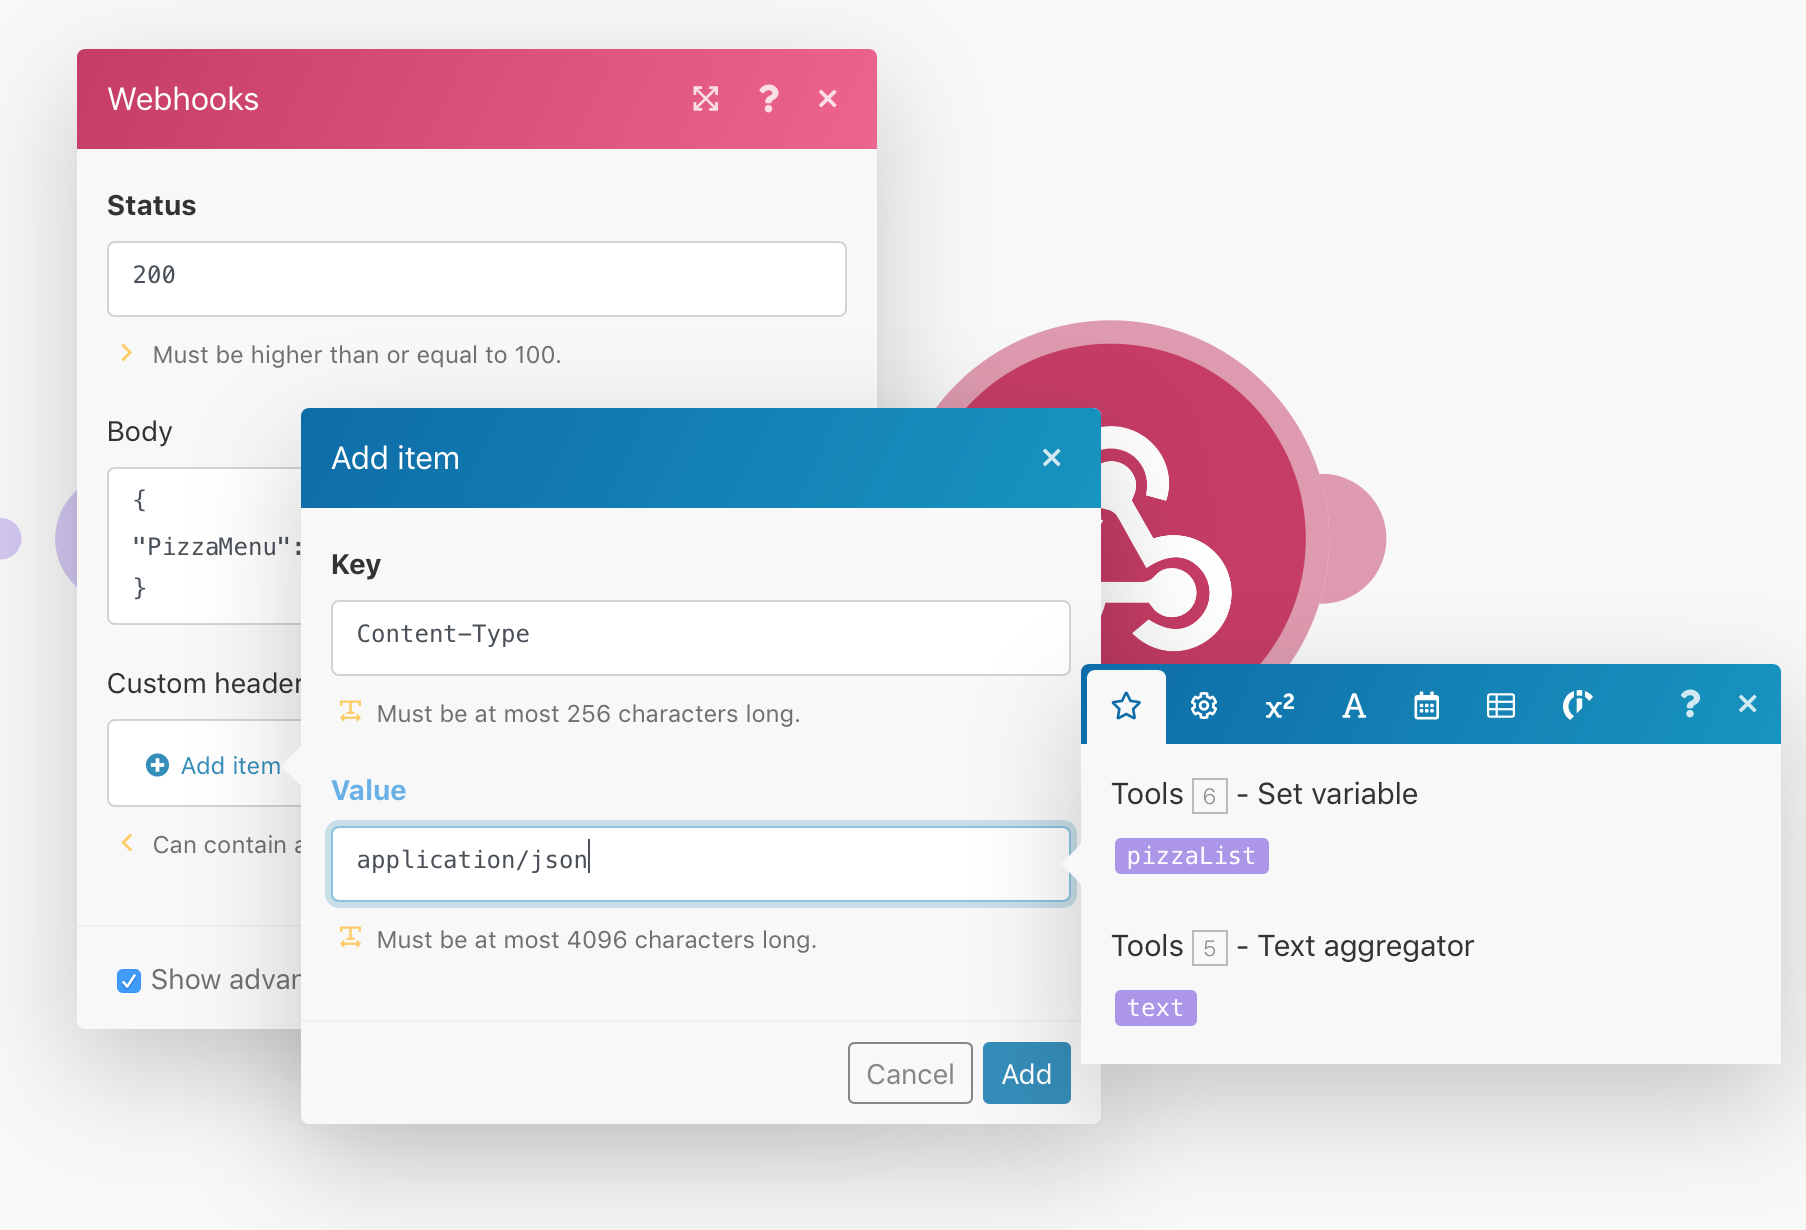
In the Body, write the json response as shown in the figure. Drag the variable pizzaList.
- Click on Show advanced settings checkbox and the Add Item inside Custome Headers. Enter Key as Content-Type and Value as application/json.
- Set Scheduling to ON and Run Scenario Immediately and save the scenario.
The next step is to test your scenario using Postman.
c. Test the HTTP GET request with Postman
-
Open Postman.
-
Select Method:
GET. Next, copy the URL from the Webhook and paste it in the Enter request URL (next to the GET method). -
Click on the Send button to test the GET request.
In case of successful response, the following message will be returned:
• Code: 200 OK • Sample Body:
{
    "PizzaMenu": "Margherita,Prosciutto e Funghi,Capricciosa,Boscaiola,Quattro Stagioni,Quattro Formaggi,Bufala"
}
In case of unsuccessful response, an appropriate error message will be returned by Integromat.
d. Integrate API in the "Get Pizza Menu Process Model"
Now that the HTTP GET request works, we are ready to implement the service integration using the Camunda Modeller.
Step 1: Process Model
You can reuse the process model created in the Service Integration hands-on.
Step 2: Replace the URL input parameter
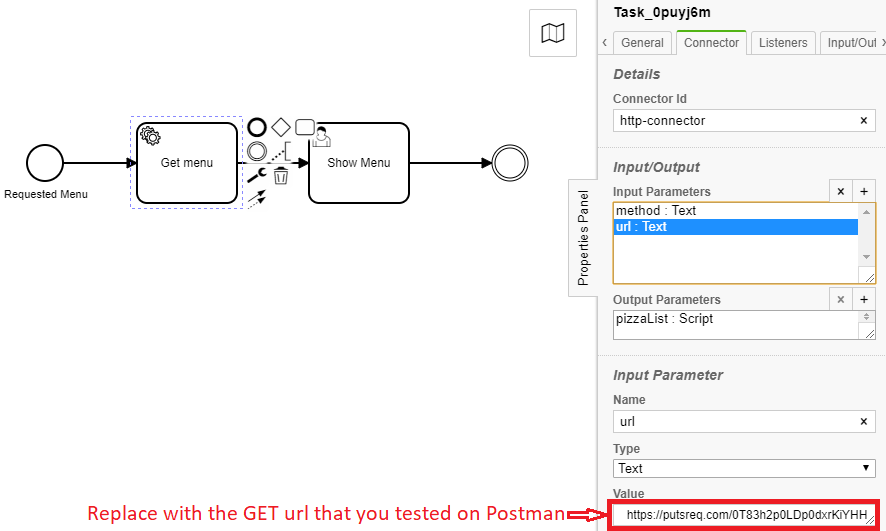
The URL should now point to the Webhook endpoint created in Integromat.
Step 3: Deployment
Deploy the process to the FHNW DigiBP classroom instantiation.
- Enter deployment name and your Tenant ID.
- Enter the deployment endpoint (copy&paste):
https://digibp.herokuapp.com/engine-rest/deployment/create - Go to the DigiBP classroom instantiation welcome and landing page: https://digibp.herokuapp.com
2. Add Pizza Service
As in the previous session, we add a new pizza to the menu of Mario's Pizzeria.
First we are going to create the API using Integromat.
a. Create Add Pizza Service API in Integromat
Step 1: Add Webhook for POST
-
Create a new Scenario and add a Webhook by following steps 1 through 6 of Get Pizza Service API in Integromat. However, add a new webhook name add-pizza-menu. Save and schedule the scenario to execute immediately.
-
This step is important to determine the data structure of the payload and should preferrably be carried out before adding other modules. Click on Re-determine data structure button. While the webhook is waiting, copy the address to the clipboard and paste it in Postman as described below.
-
Open Postman.
-
Select Method:
POST. Next, paste it in the Enter request URL (next to the POST method). -
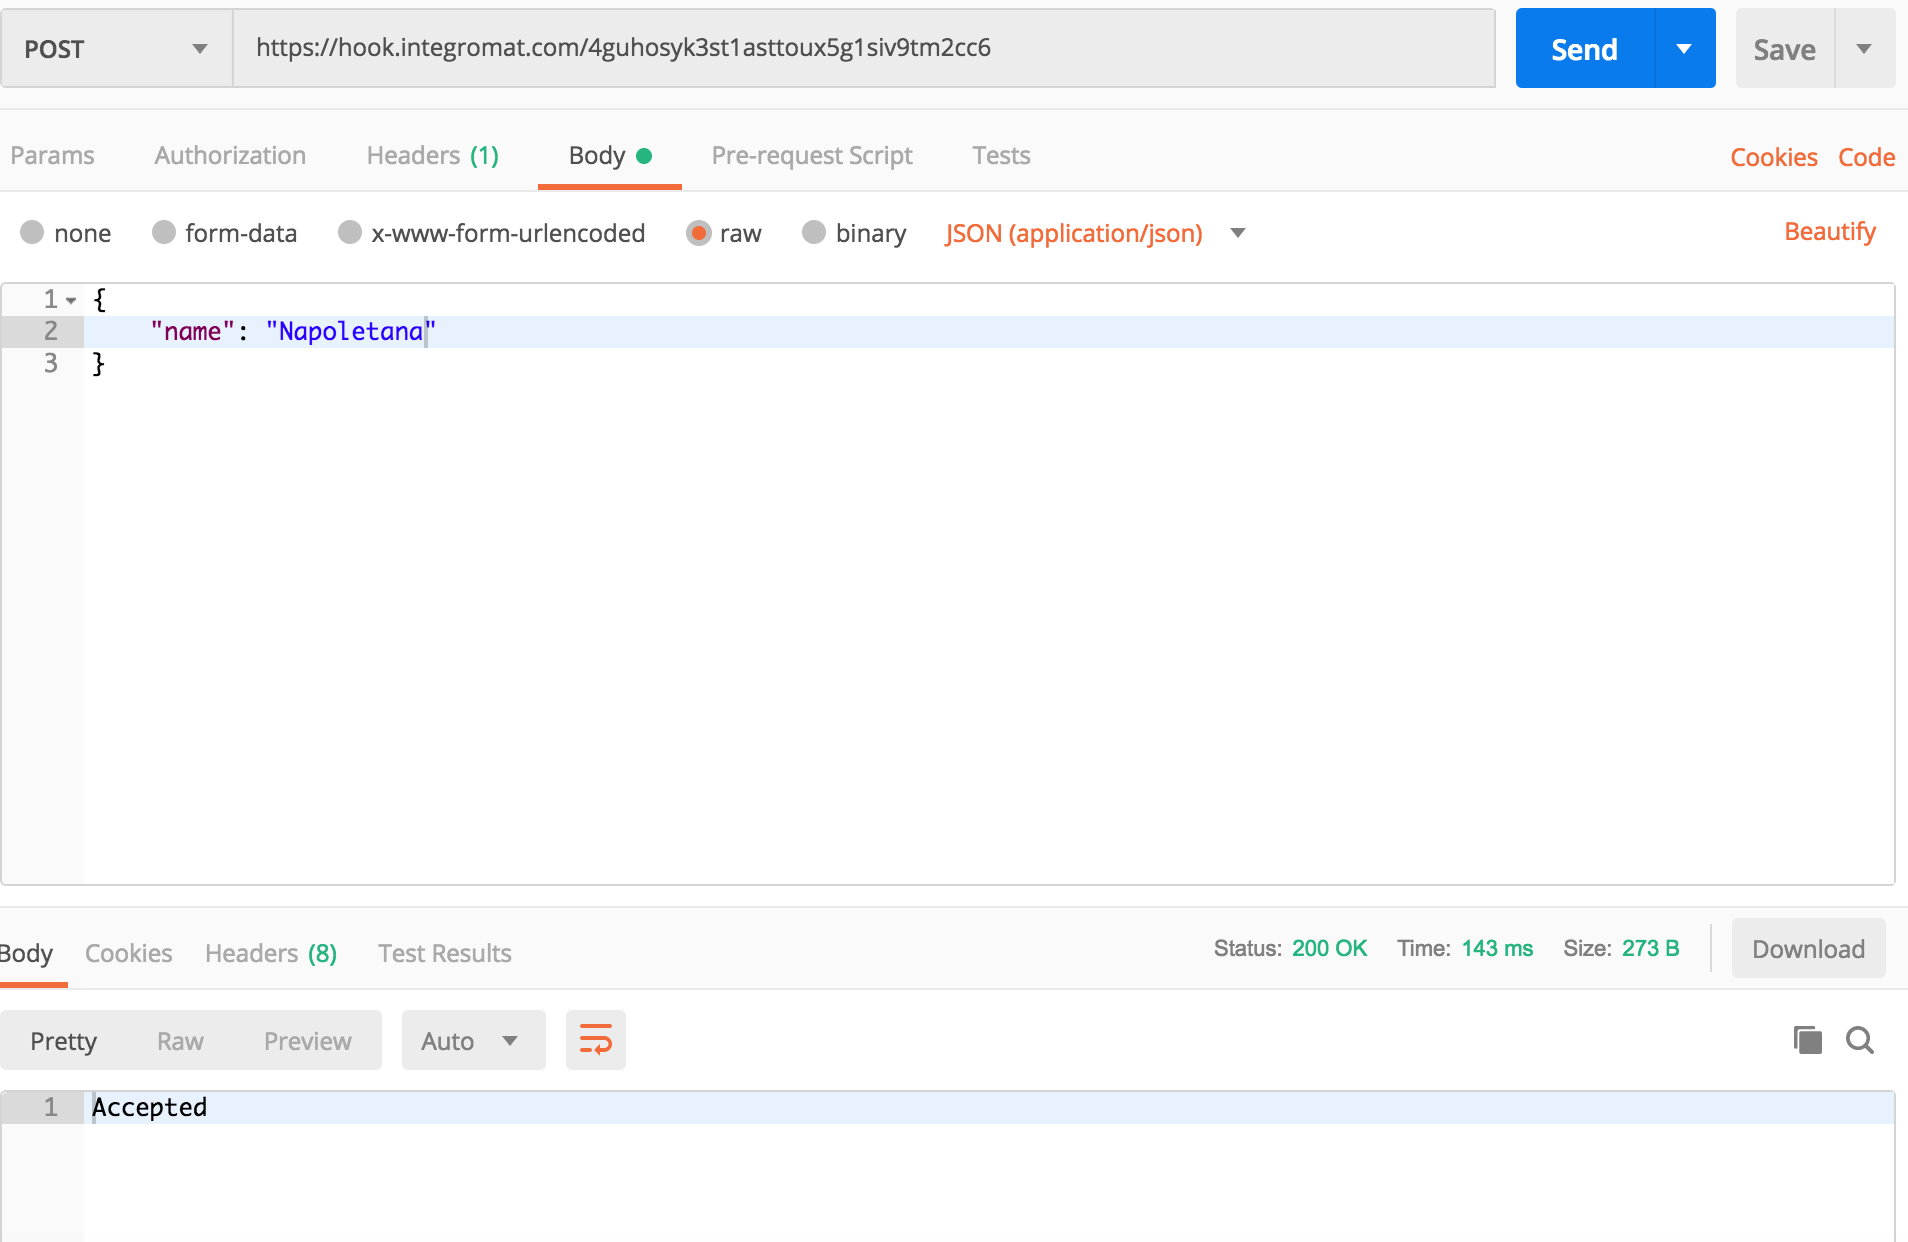
Fill in the Headers with
- KEY:
Content-Type - VALUE:
application/json
- Click on the "Body" tab and paste the following Json object in the dedicated section (see the figure below).
{
    "name": "Napoletana"
}
- Click on the Send button to test the POST call.
In case of successful response, the following message will be returned:
• Accepted
In case of unsuccessful response, an appropriate error message will be returned by Integromat.
- After a successful call from Postman, the Webhook should determine the data structure successfully (see figure below).
Step 2: Add Google sheets Add Row
-
Next add the Google sheets module and connect to Pizza Menu sheet as done previously. However, this time select the action Add Row as we would like to add a new pizza name to the menu list.
-
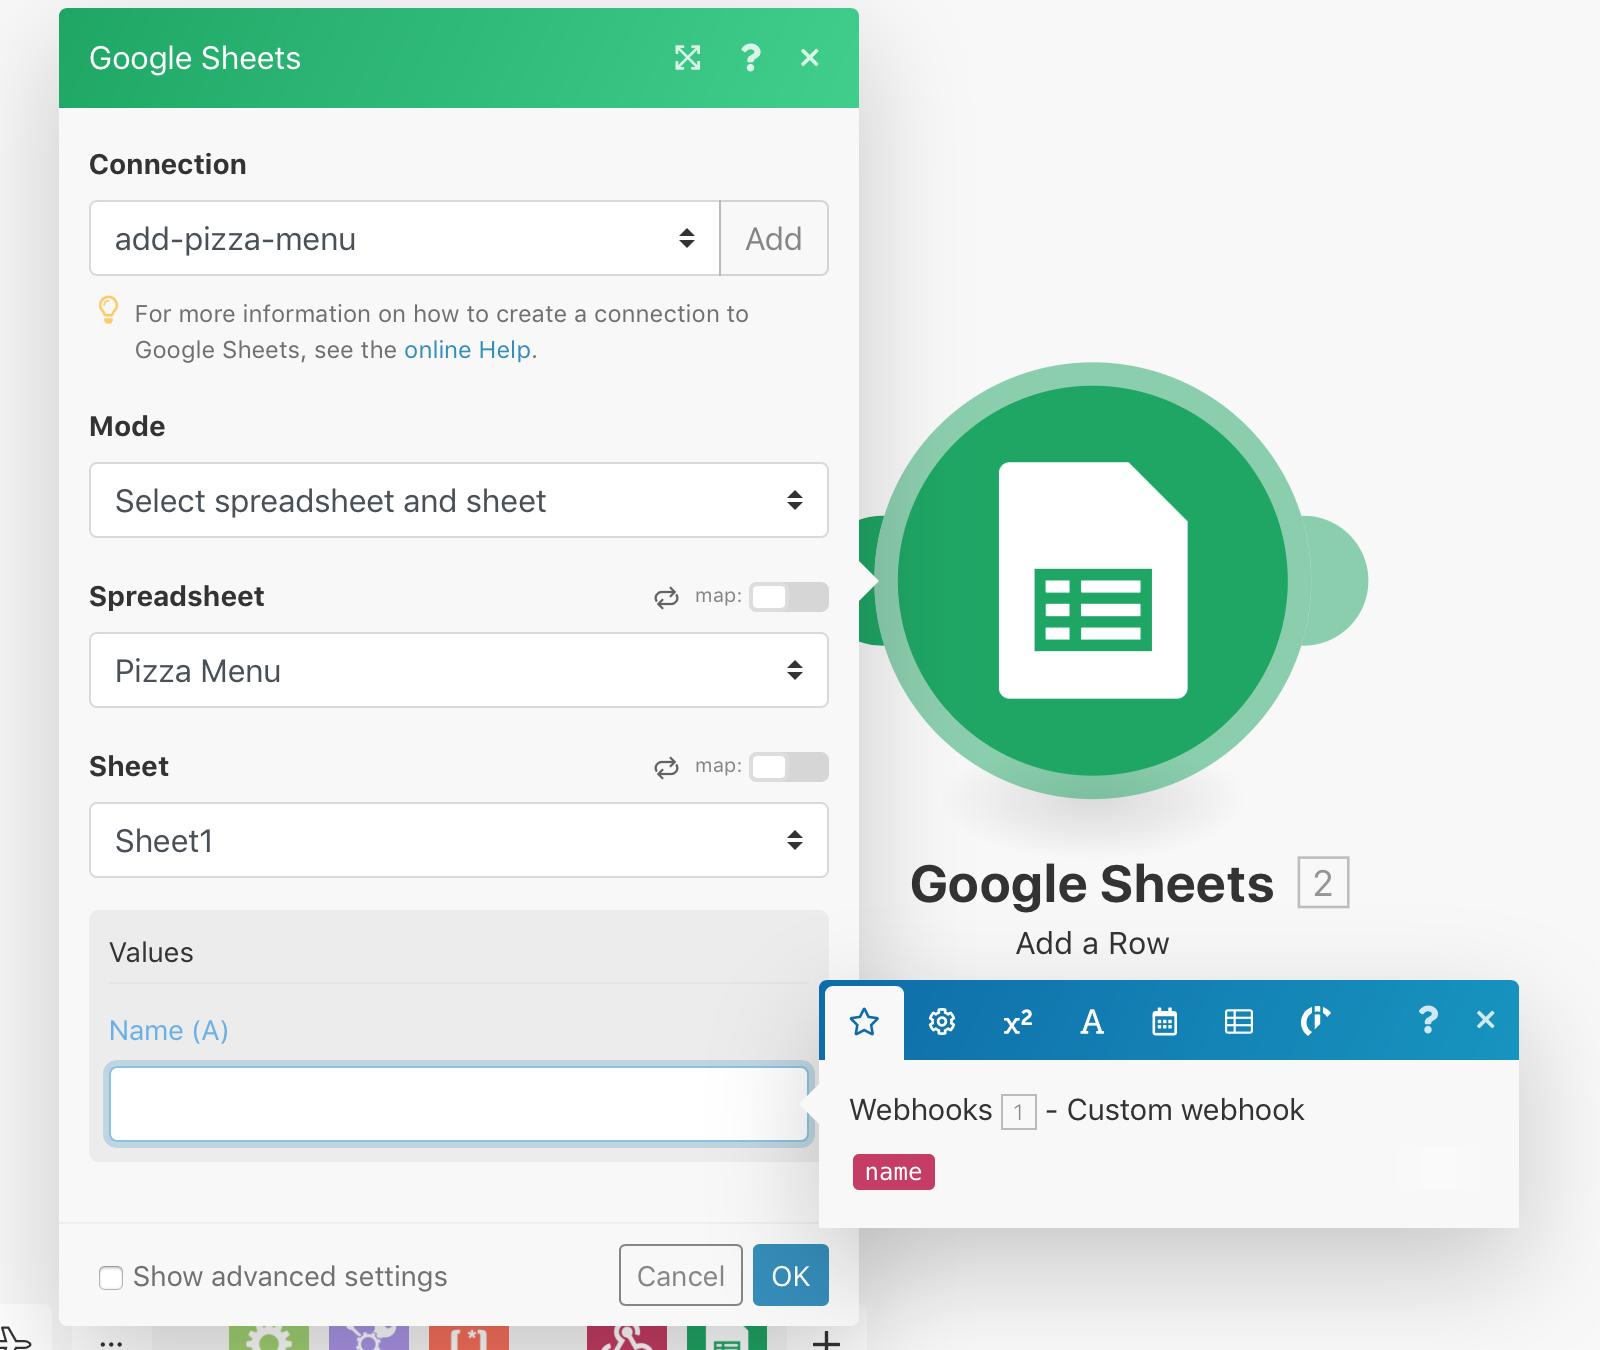
Add a new connection add-pizza-menu and connect to Google sheets by allowing access to Integromat. Choose spreadsheet Pizza Menu and Sheet1. In the values, choose the variable "name" as determined by the webhook as a result of the successful POST request.
- Schedule the scenario to run immediately and save.
b. Test the HTTP POST request with Postman
Re-run the same request from Postman as before. This time, after successful response the Pizza Menu sheet should get updated with the new pizza name.
c. Create the "Add Pizza Process Model"
Now we are ready to integrate the API in the process model.
Open the Camunda Modeller and create the process model as follows:
Step 1: Form Field
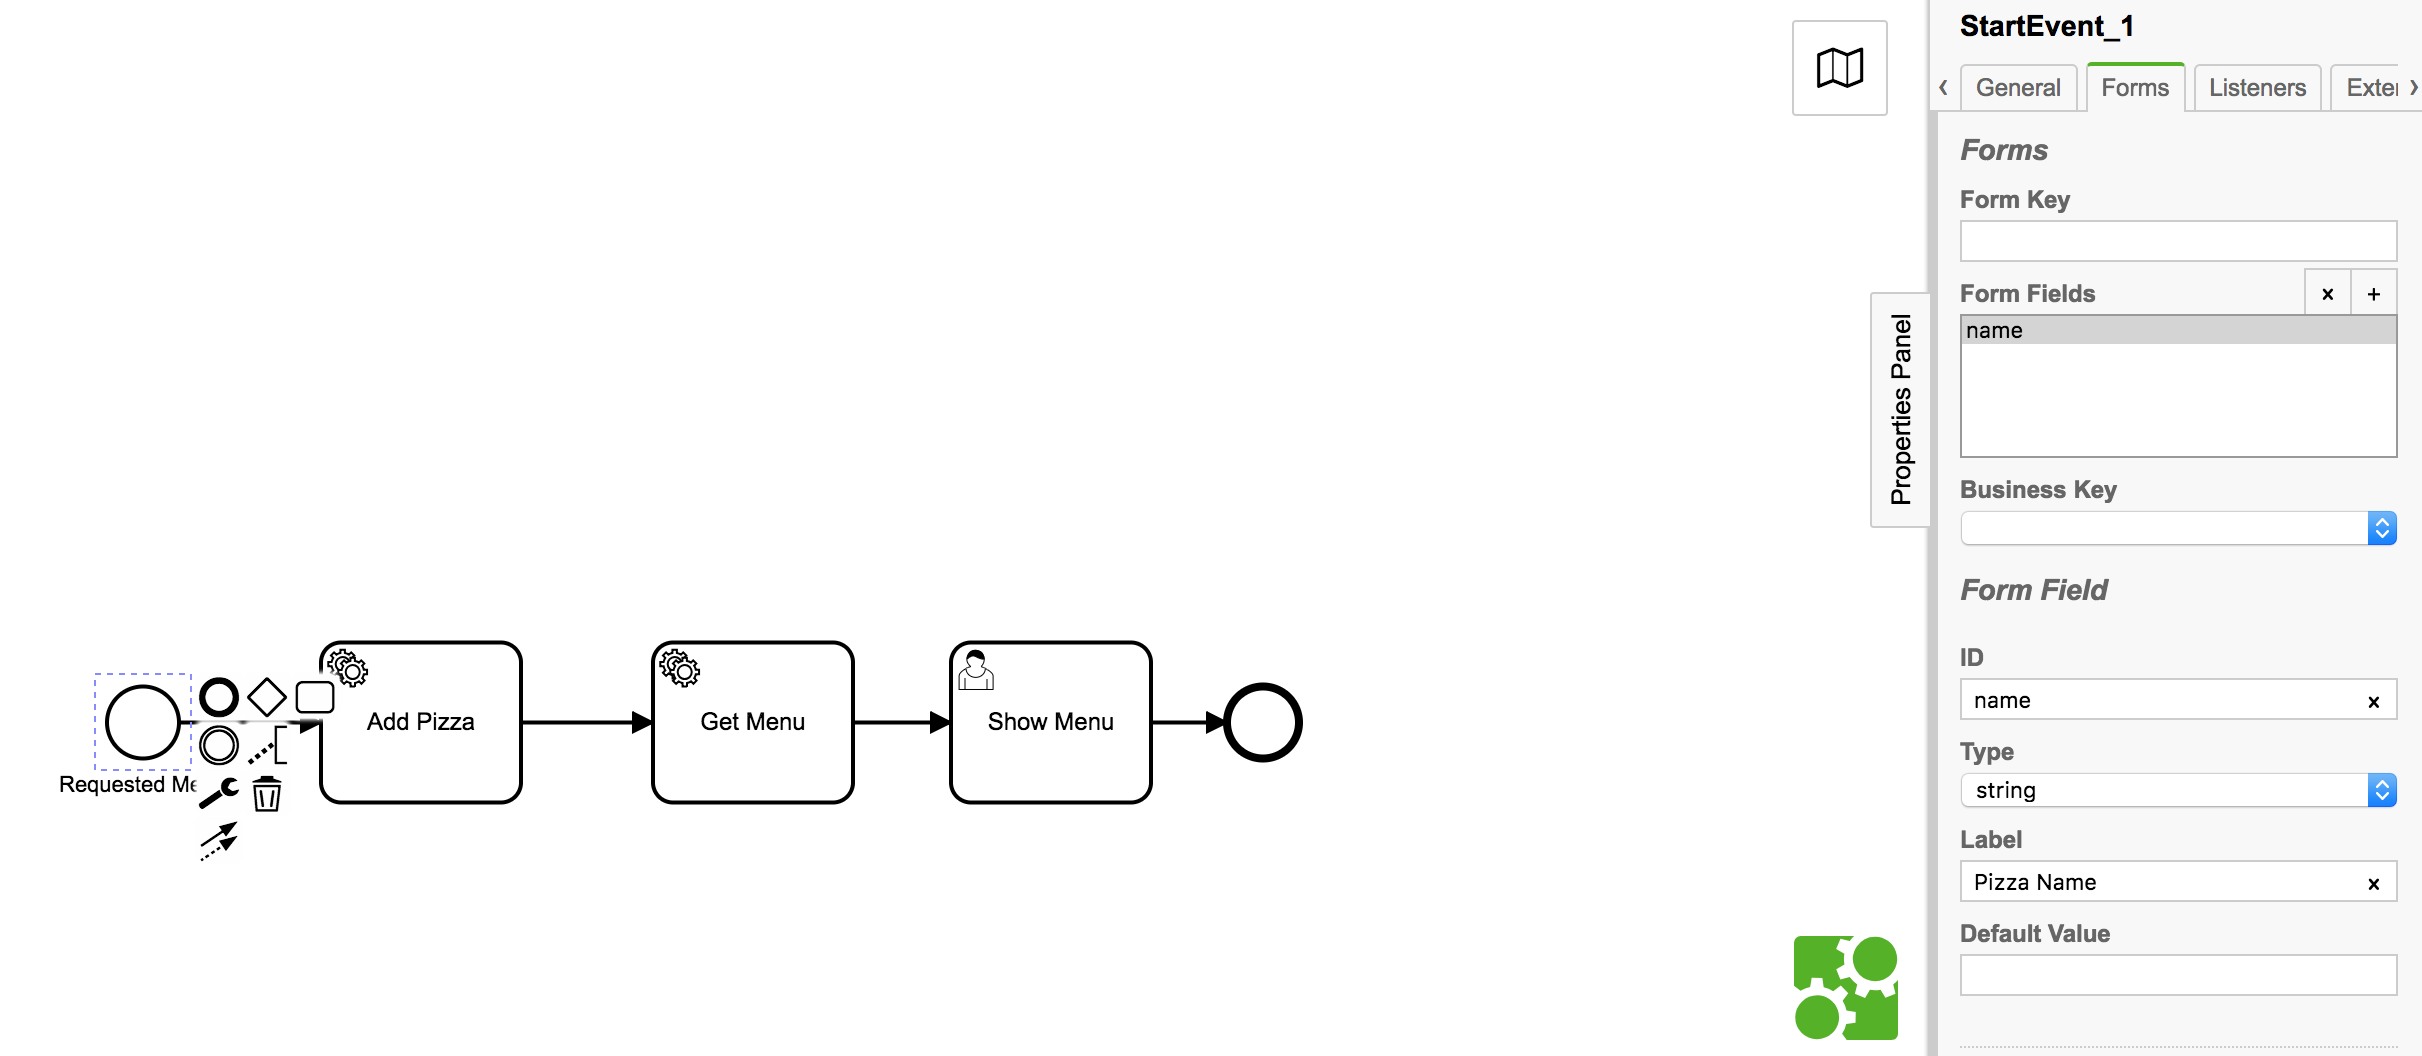
Select the start event and create a new form field name.
Step 2: HTTP Connector
Select Add Pizza task and select Connector from the General tab in the panel properties.
Step 3: Input Parameter
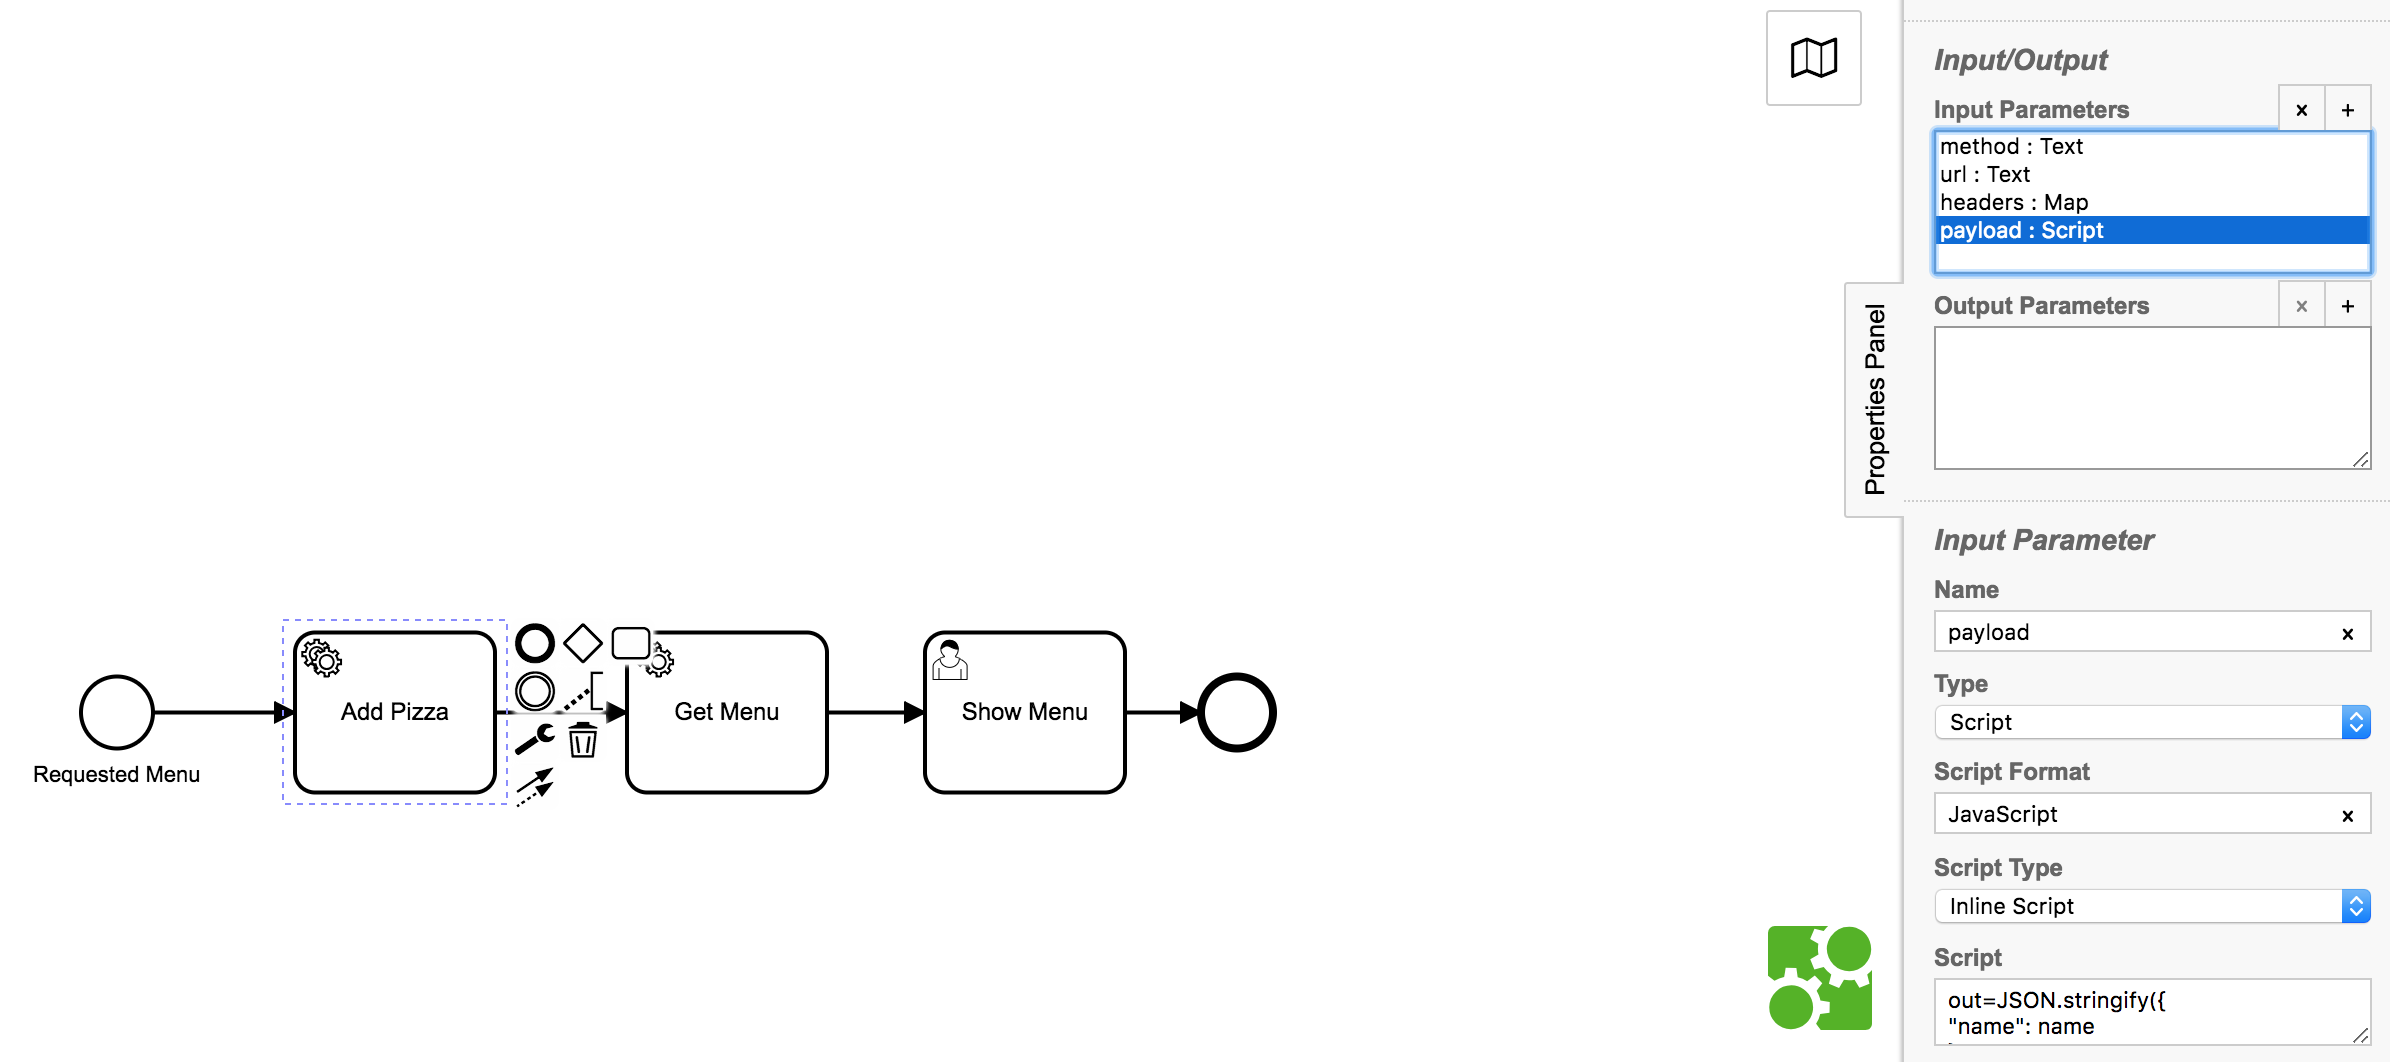
Select Add Pizza task and add the method POST as input parameter.
Add headers as input parameter as Map with key Content-Type and value application/json.
Add payload as input parameter as type Script and JavaScript as the Script format. Add the following code in the Script section:
out = JSON.stringify({
    "name": name
});
Add url as input parameter with value copied from the Add Pizza Service webhook endpoint.
Step 4: Get Menu and Show Menu
These tasks are exactly similar to those used in the Get Pizza Menu Process Model.
Step 5: Deployment
Deploy the model on the FHNW DigiBP classroom instantiation.
- Enter deployment name and your Tenant ID.
- Enter the deployment endpoint (copy&paste):
https://digibp.herokuapp.com/engine-rest/deployment/create - Go to the DigiBP classroom instantiation welcome and landing page: https://digibp.herokuapp.com
