Hands On Decision Automation - DigiBP/digibp.github.io GitHub Wiki
This hands-on shows you how to create a DMN DRD with two DMN tables and integrate it into a BPMN workflow. Finally, forms are created that provide the decision-making data.
In the example described below, different dishes are to be prepared depending on the days of the week with different number of guests and the season.
Contents:
- 1. DRD Dish
- 2. Decision Table Guests
- 3. Decision Table Dish
- 4. Business Rule Task
- 5. Camunda Forms
- 6. Optional Decision Table with FEEL
1. DRD Dish
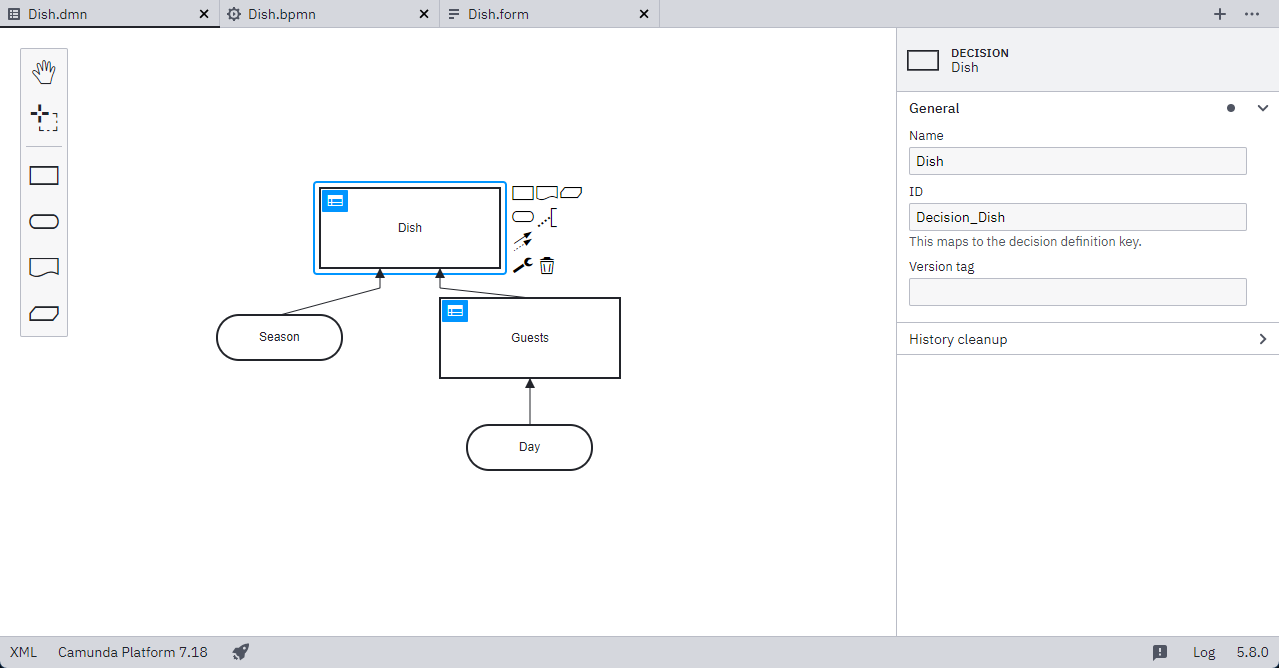
First, a DRD with two decision tables is created, and two input data are visualized. The final decision will be the “dish”, which will be made based on the season and the number of guests. The “guests” decision table is the input to dish and receives day as input.
2. Decision Table Guests
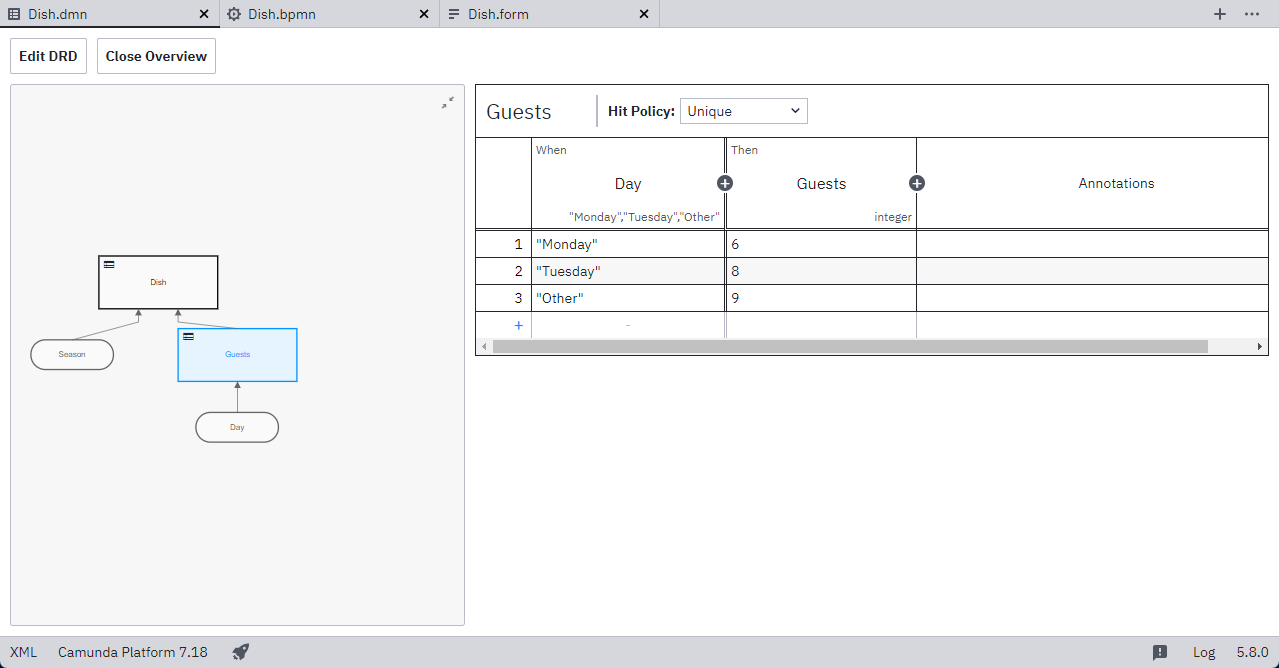
The next step is to create the decision table “guests”, which prepares the decision and data input for “dish”. Make sure that the expressions are consistent. Define the input expression “day” and the output expression “guests”.
3. Decision Table Dish
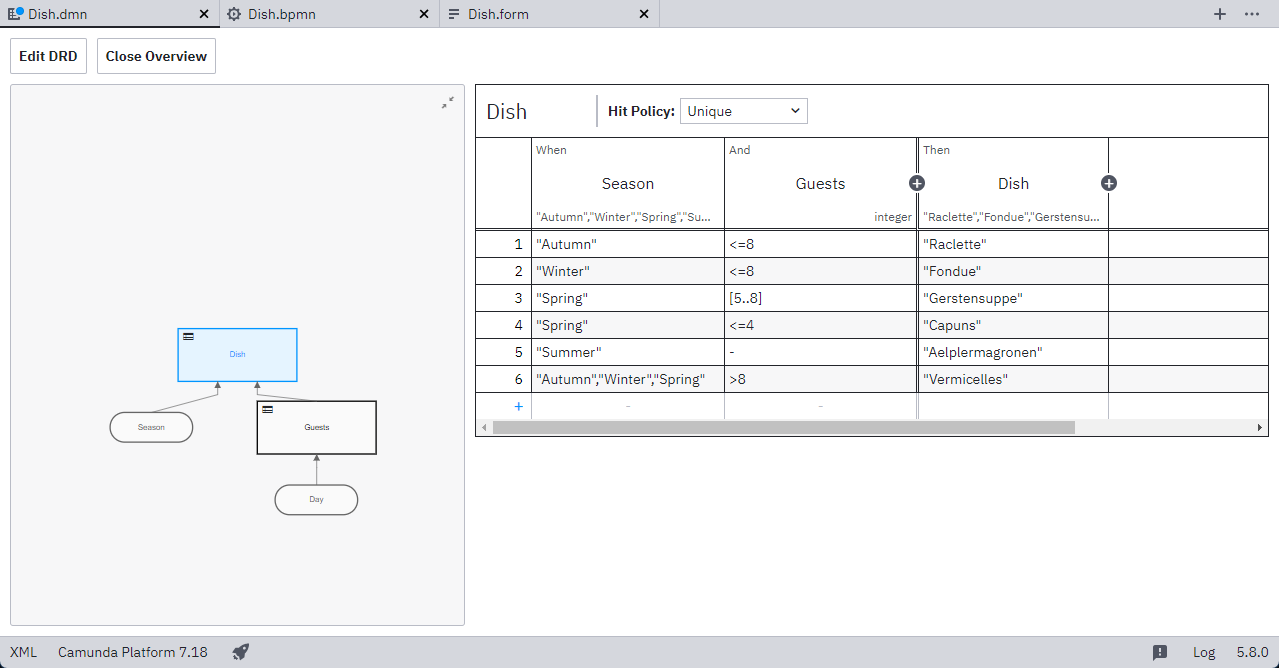
Now it's about creating the decision table “dish”, which delivers the final decision. Make sure that the expressions are consistent. Define the input expressions “season” and “guests”, and the output expression “dish”.
4. Business Rule Task
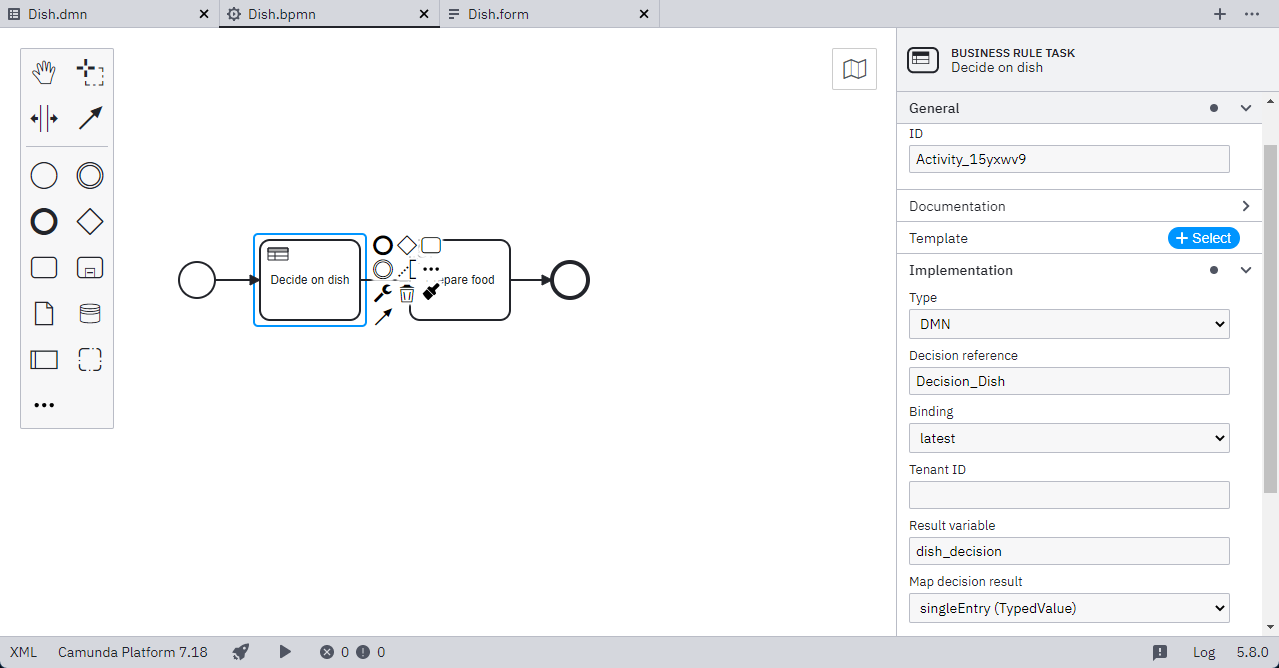
Now we will switch to a BPMN model where we create a business rule task and connect it to the “dish” decision table. Here it is important to specify the “Decision Reference” or the “ID” of the decision table (Decision_Dish). In addition, a result variable must be specified as a “single result”.
5. Camunda Forms
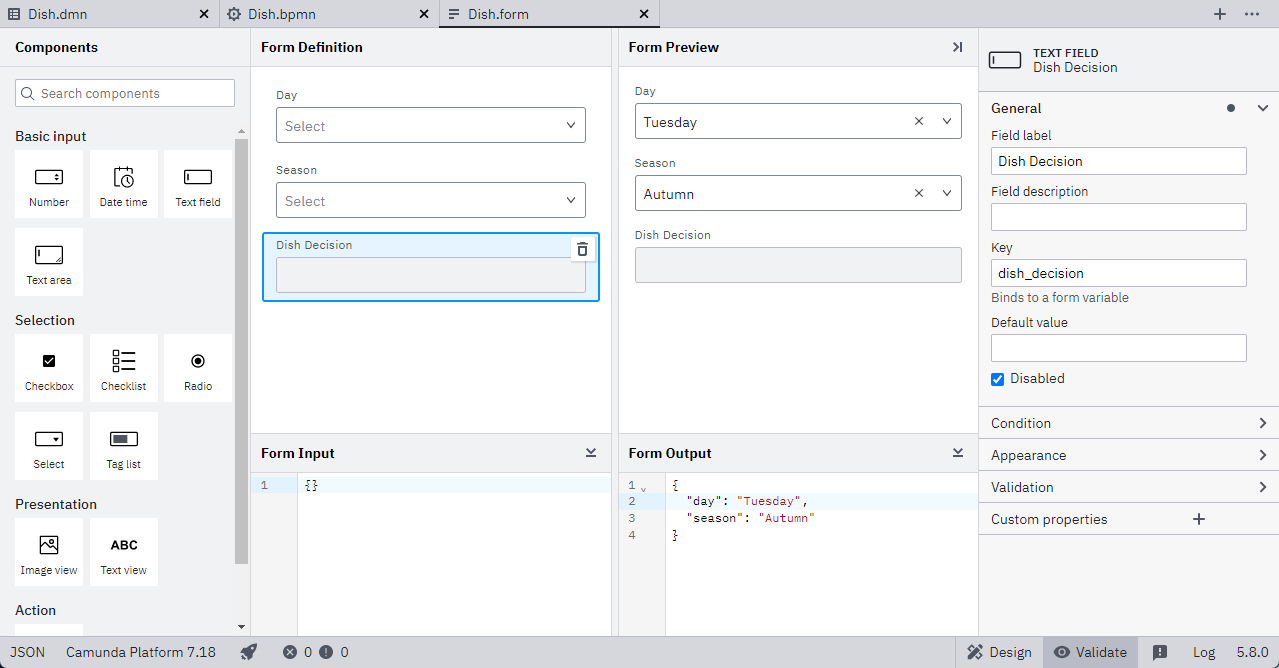
Finally, it is a matter of creating a Camunda form. Here, you need to be consistent with the variable definition in the DMN model or result variable. Define a form at the start event and at a user task. It is crucial that you specify the “Form Reference” and the “deployment” binding. Finally, you can deploy the BPMN model with the Camunda form and the DMN.
6. Optional Decision Table with FEEL
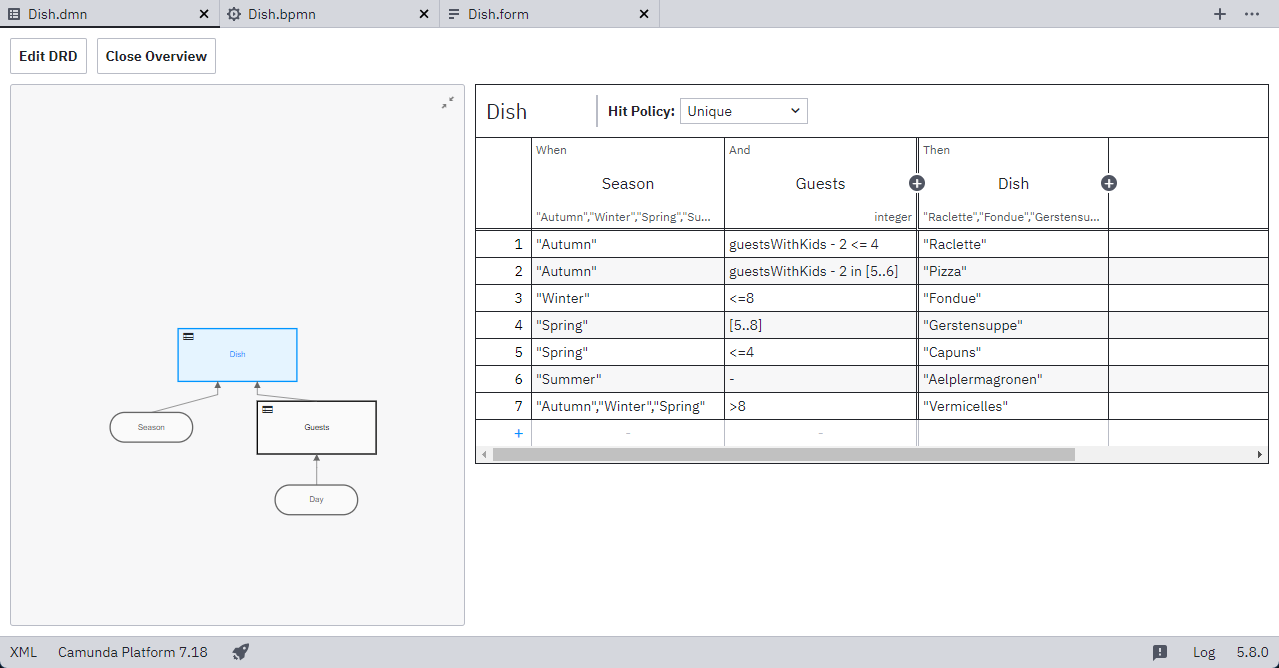
This optional last step shows how FEEL and an “input variable” (guestsWithKids) can be used in cells to define more complex rules.
