SEC 480 Milestone 4 - DefiantCoder/Tech-Journals GitHub Wiki
Acitve Directory LDAPs SSO Provider
ADCS Installation & Cert Authority
- First navigate to powershell on dc1 and input the following commands to get LDAPS running
Install-WindowsFeature Adcs-Cert-Authority -IncludeManagementTools
Install-AdcsCertificationAuthority -CAType EnterpriseRootCa -CryptoProviderName "RSA#Microsoft Software Key Storage Provider" -KeyLength 2048 -HashAlgorithmName SHA1
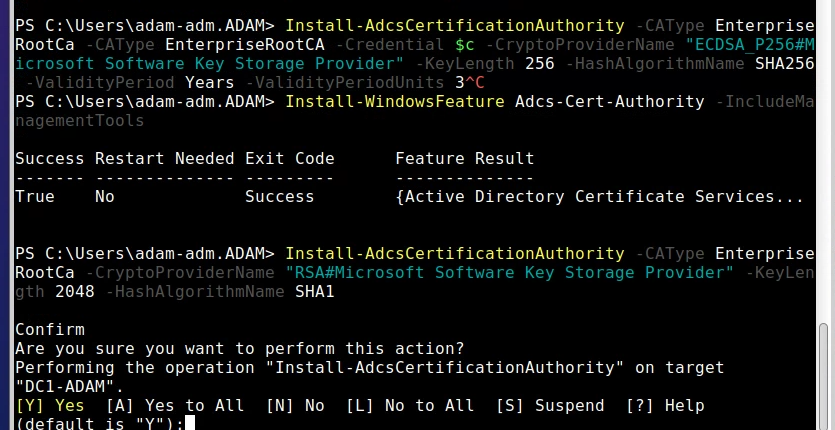
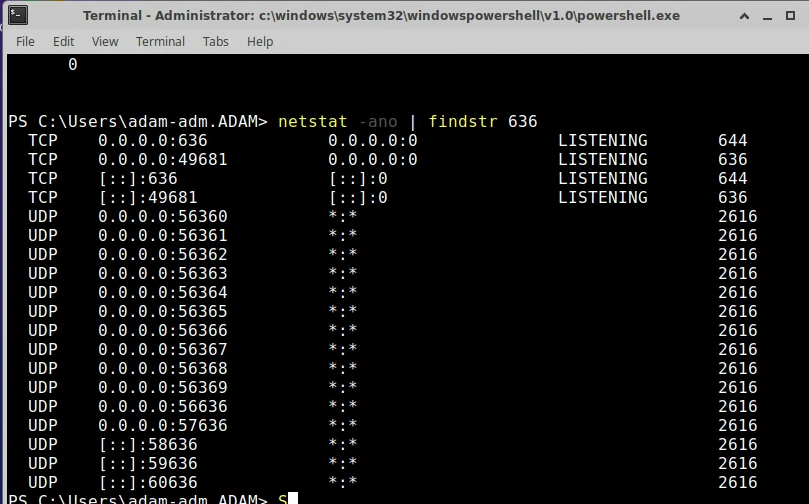
- Once that is done check to see that you have Listeners
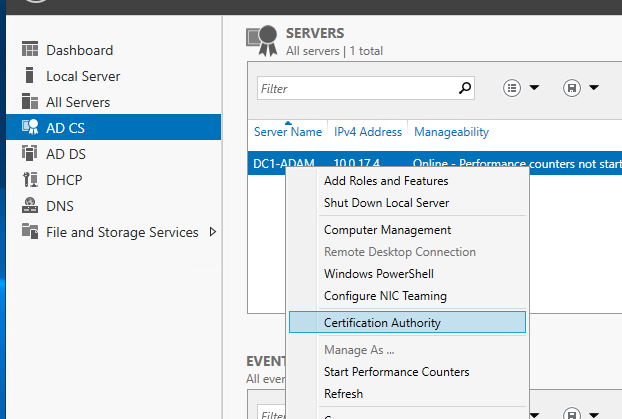
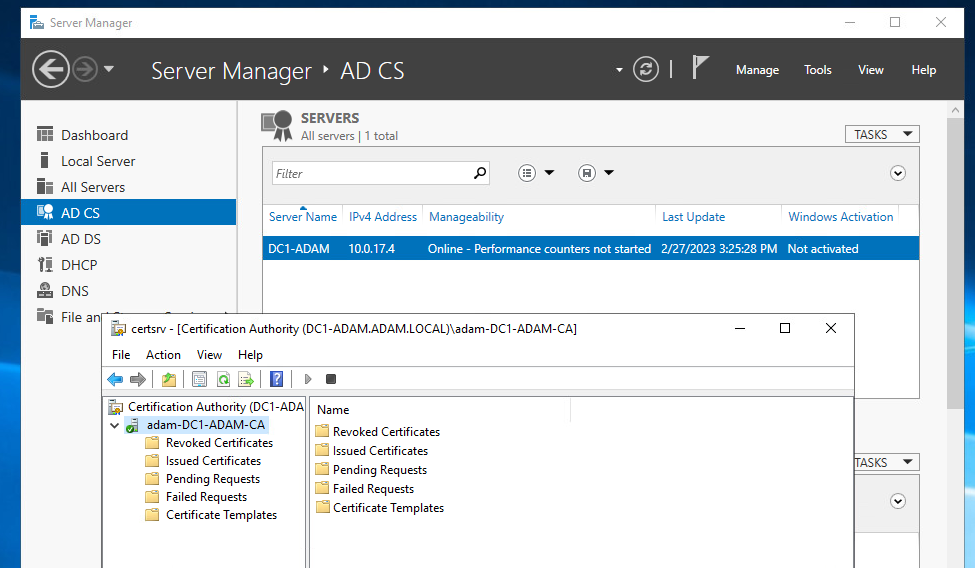
- Following this Navigate to ADCS in the Server Manager where you will right click and navigate to your Certificate Authority to check for success
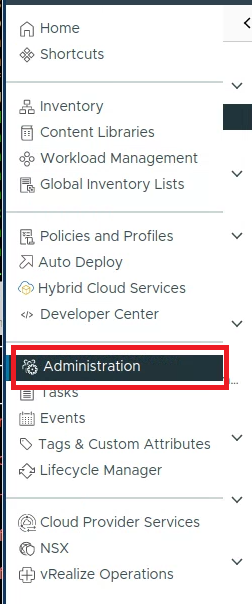
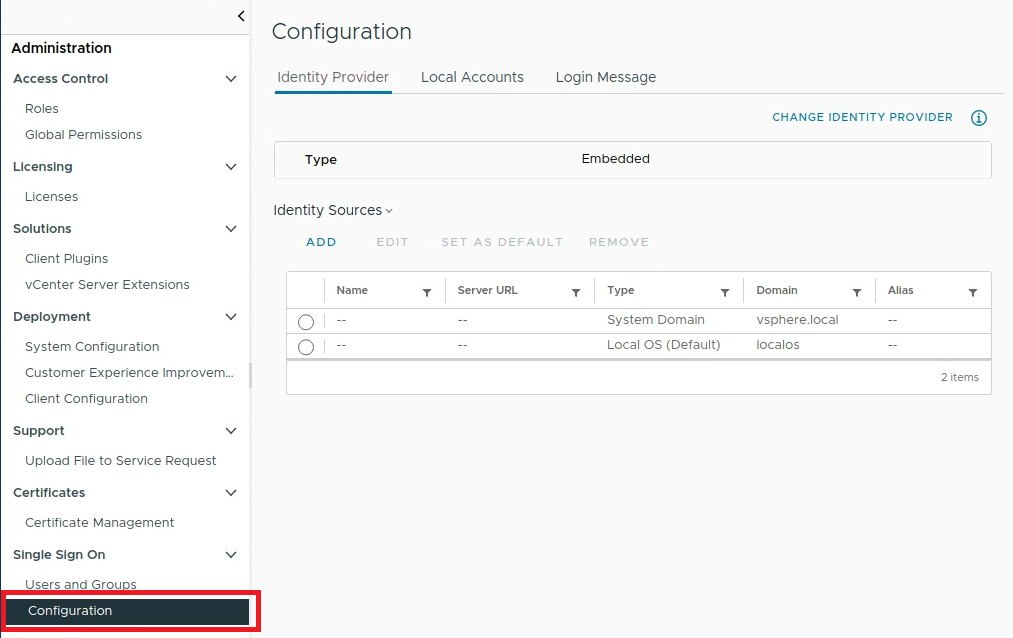
vCenter AD Domain Join/ Integration
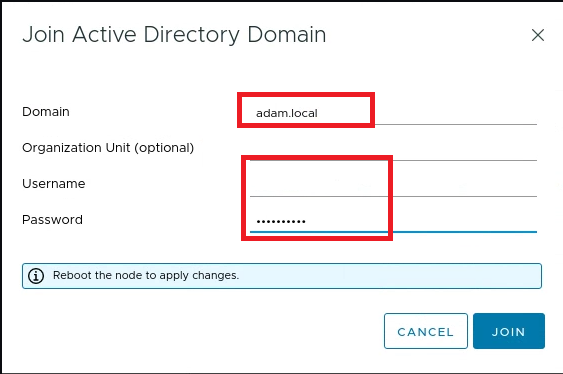
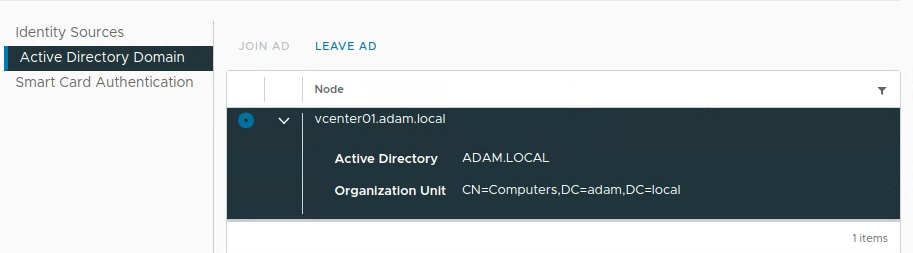
Navigate to the Setting Bar > Administration > Configuration > Active Directory Domain > Join AD

- Input your dc1 domain admin & passwd and join
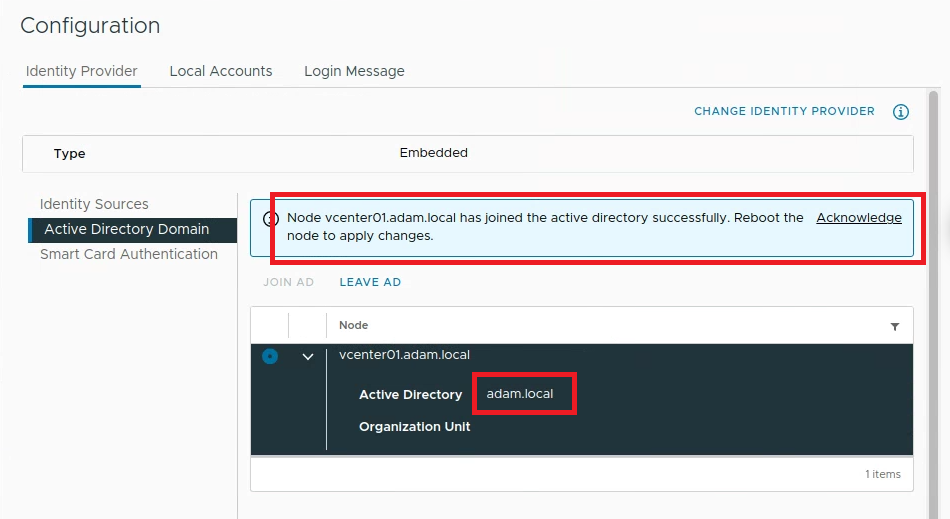
Reboot vCenter
- To reboot vCenter navigate to
Settings > System Configuration (under Deployment)select your vcenter node and select reboot
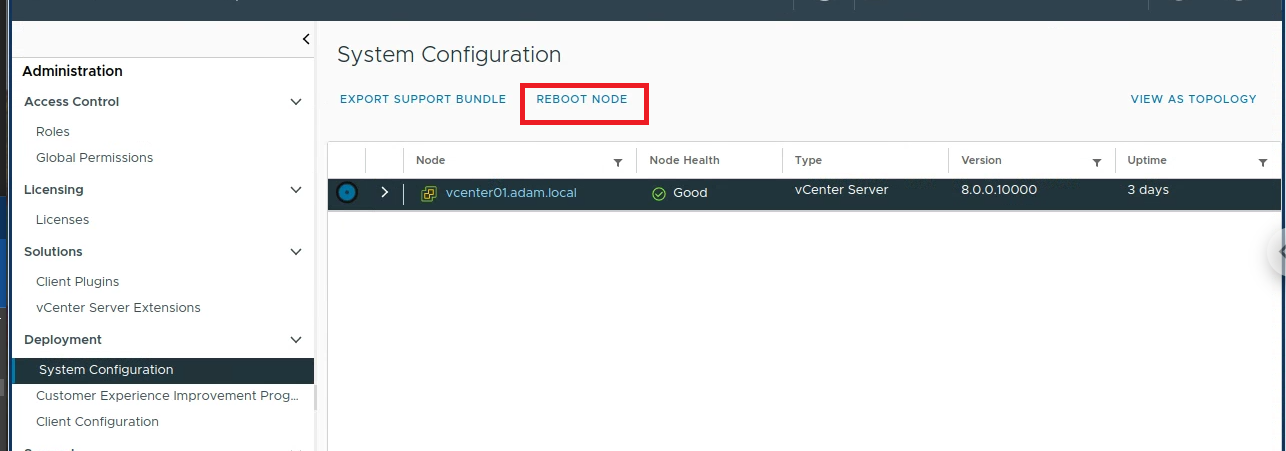
- A successful reboot should look like the image below
-
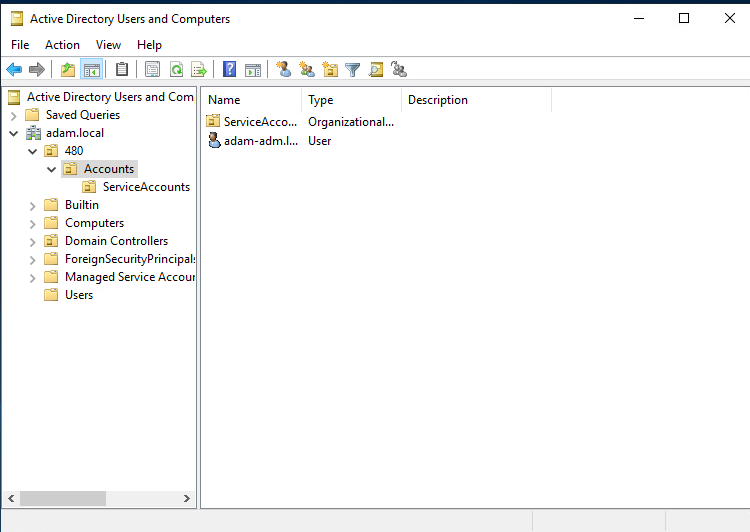
Navigate to server manager on dc1 then go to
AD DS > (right click) Active Directory Users and Computers > (right click) adam.local > new > Organizational Unit& name the OU 480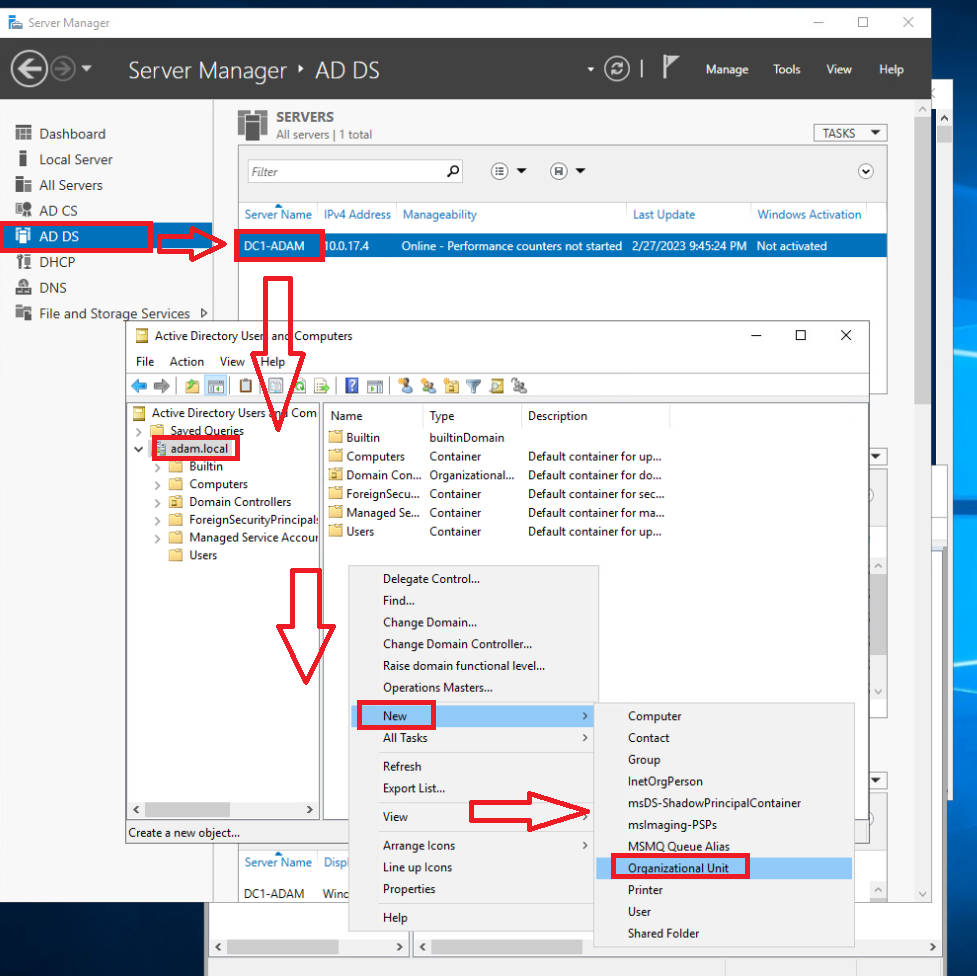
-
Make two more nested OU's as shown below inside 480

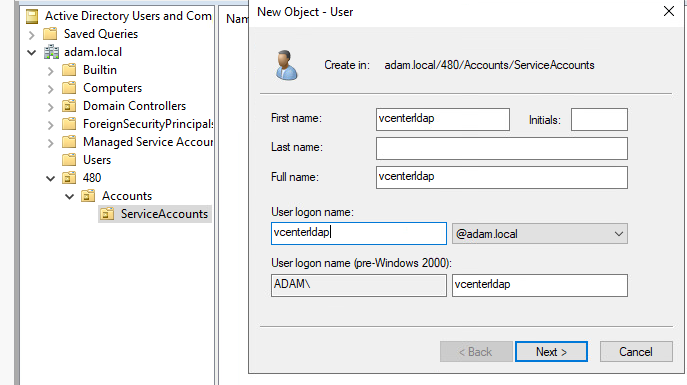
- In your
ServiceAccountsOU create a new user calledvcenterldap- Add a description as shown below for your new
vcenterldapuser
- Add a description as shown below for your new
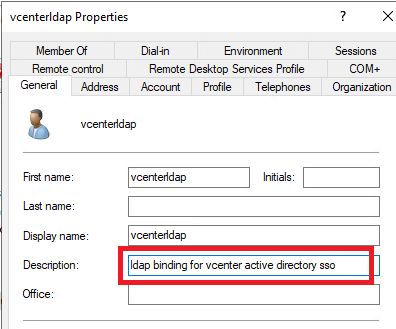
openssl s_client -connect dc1-adam:636 -showcerts
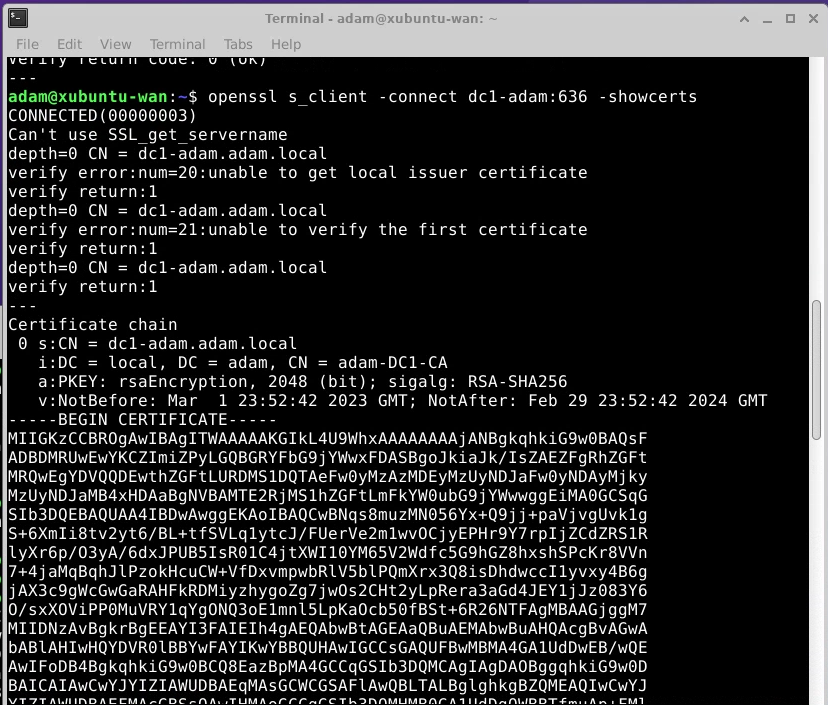
-
Copy the certificate and past it into a file called cert.pem
-
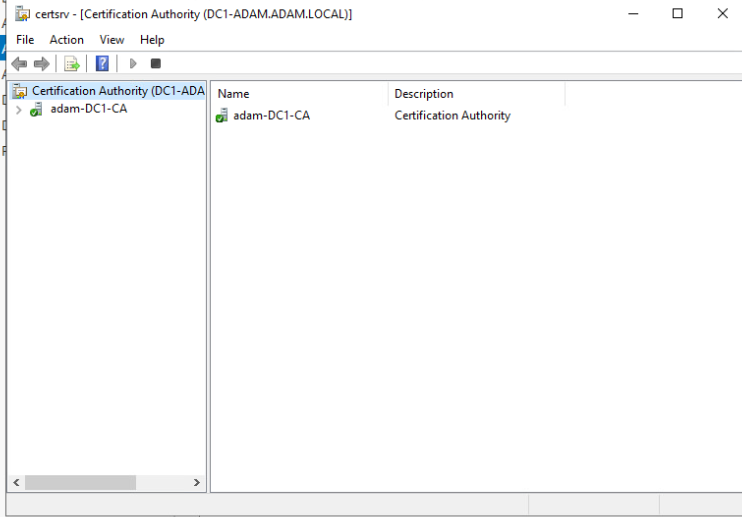
The final result in
dc1 > Certificate Authorityshould look as shown
Moving Users to new OU
- select your domain admin and choose the move option to nest the user in
480 > Accounts
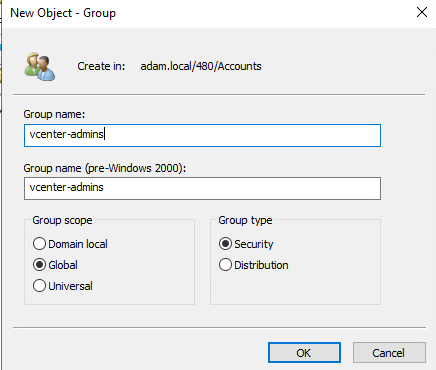
- Once that is complete add a new group into the 480 > Accounts OU called vcenter-admins and add your domain admin to this group
- Make sure to add your Domain Admin to this group which can be done through the users properties or the groups properties
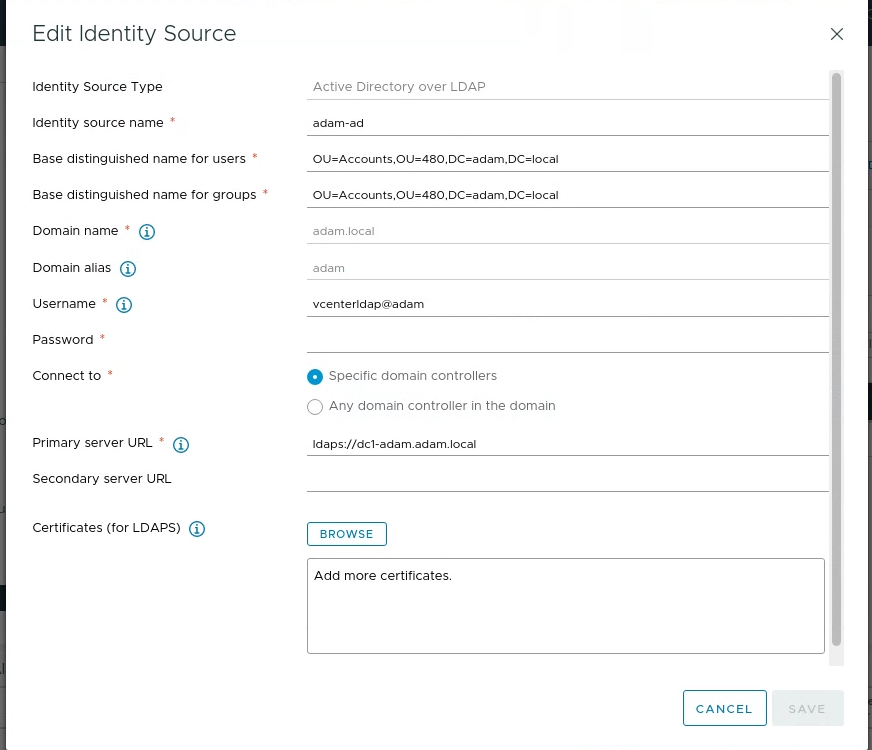
Secondary SSO provider Configuration
Navigate to Settings > Administration > Configuration and Add and input as shown
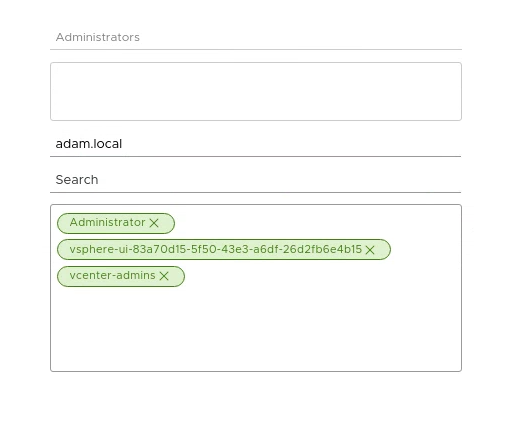
- Next navigate to
Users & Groups > Groups > Adminsand add members and configure the user as follows
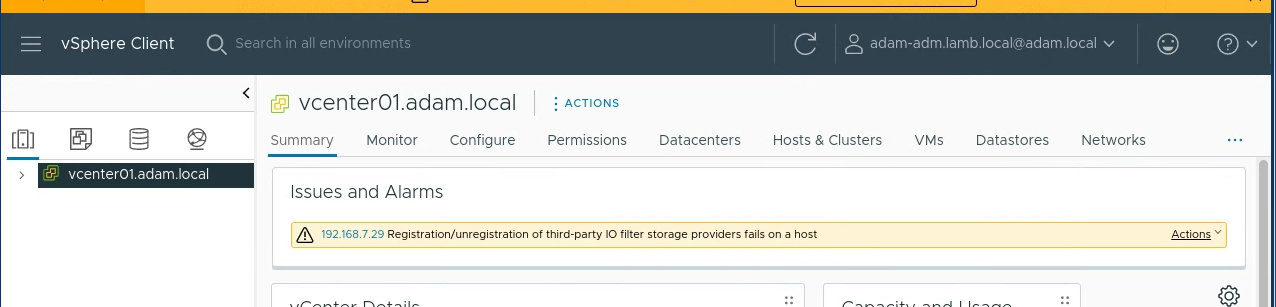
- Log out of vSphere and then login as your Domain User
Milestone 4.2: Powershell, PowerCLI and Our First Clone
Xubuntu dependencies for powercli and ansible
Ansible
sudo apt install sshpass python3-paramiko git
sudo apt-add-repository ppa:ansible/ansible
sudo apt update
sudo apt install ansible
ansible --version

cat >> ~/.ansible.cfg << EOF
[defaults]
host_key_checking = false
EOF
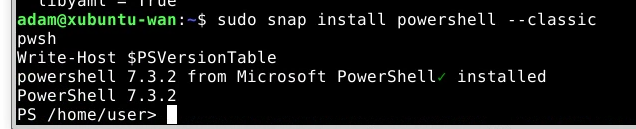
PowerCLI & Powershell Install
sudo snap install powershell --classic
pwsh
Write-Host $PSVersionTable
Install-Module VMware.PowerCLI -Scope CurrentUser
Get-Module VMware.PowerCLI -ListAvailable
Set-PowerCLIConfiguration -InvalidCertificateAction Ignore
Set-PowerCLIConfiguration -Scope User -ParticipateInCEIP $false
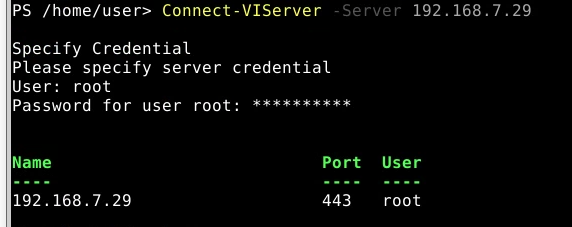
- Test Connectivity With either method
Connect-VIServer -Server 192.168.7.29
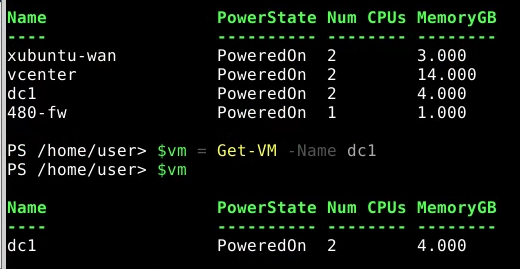
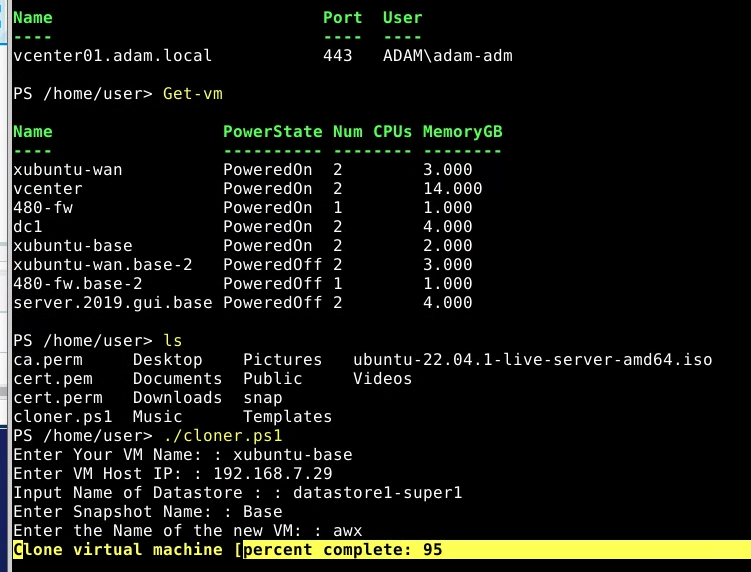
Get-VM
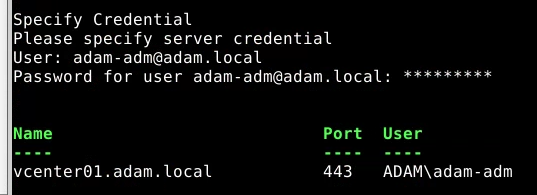
$vcenter="vcenter.adam.local"
Connect-VIServer -Server $vcenter
Get-VM
$vm = Get-VM -Name dc1
$vm
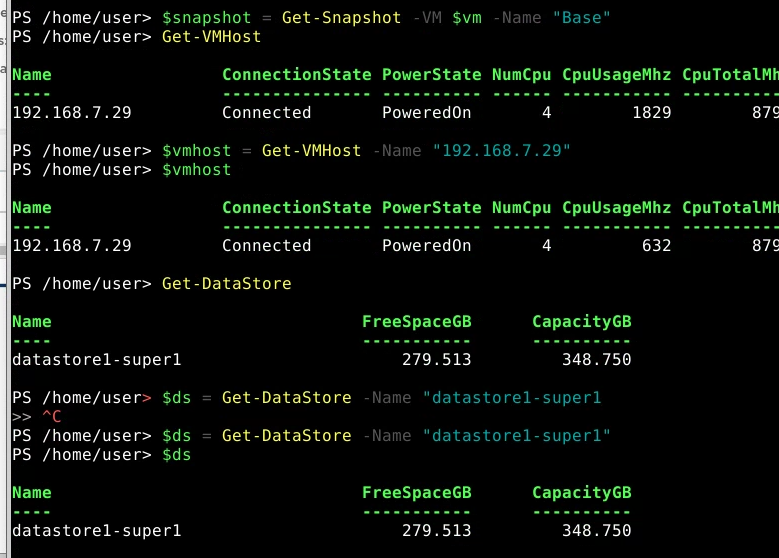
Make a Base Snapshot from VM using CLI & make Standalone VM
$snapshot = Get-Snapshot -VM $vm -Name "Base"
Get-VMHost
$vmhost = Get-VMHost -Name "192.168.7.29"
$vmhost
Get-DataStore
$ds = Get-DataStore -Name "datastore1-super1"
$ds
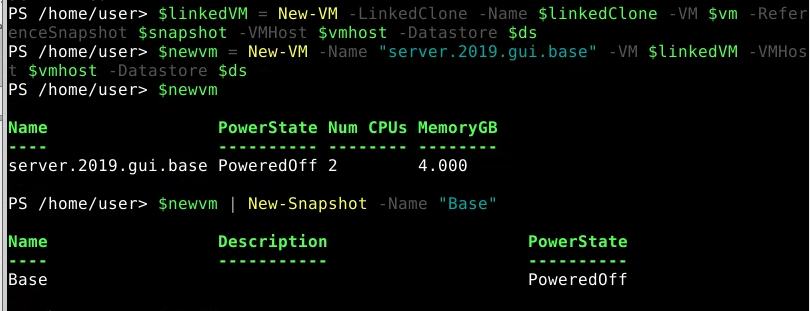
- Creates Linked Clone
$linkedClone = "{0}.linked" -f $vm.name
$linkedClone
$linkedVM = New-VM -LinkedClone -Name $linkedClone -VM $vm -ReferenceSnapshot $snapshot -VMHost $vmhost -Datastore $ds

- Creates New Independent vm from the Linked Clone
$newvm = New-VM -Name "server.2019.gui.base" -VM $linkedVM -VMHost $vmhost -Datastore $ds
$newvm
$newvm | New-Snapshot -Name "Base"
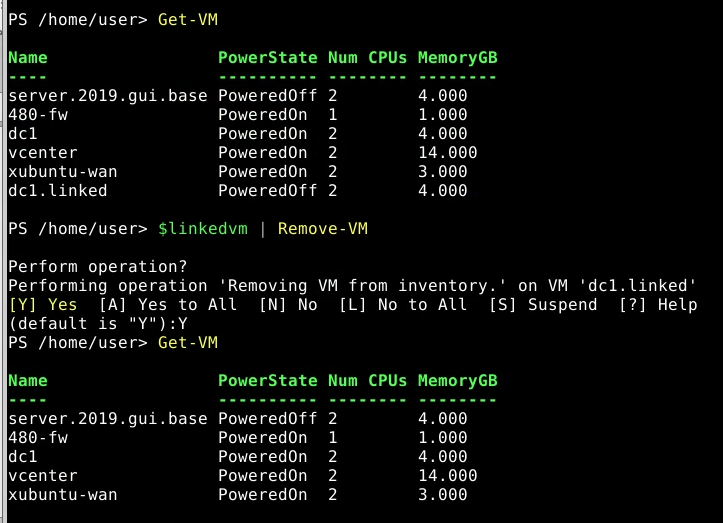
Get-VM
$linkedvm | Remove-VM
Get-VM
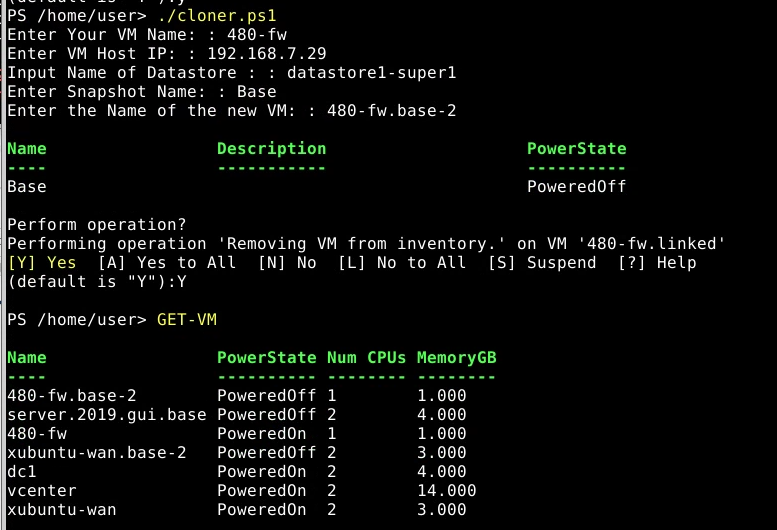
- Cloner.ps1 in action
Milestone 4.3 Ubuntu Server Base VN & Linked Clone
-
In vSphere
-
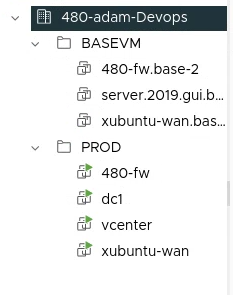
In your 480-Devops create two VM & Template Folders
PROD&BASEVM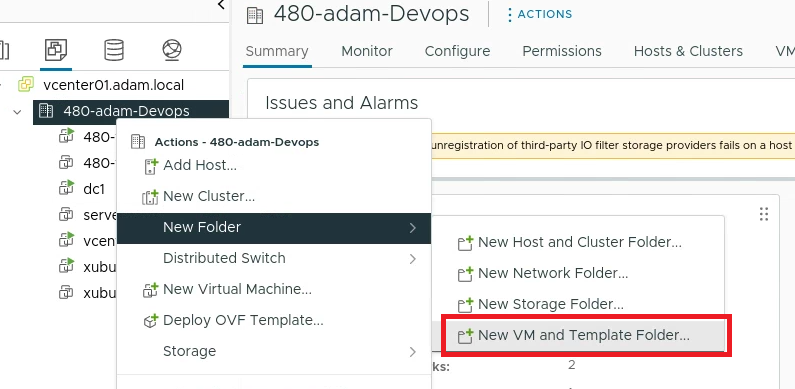
-
Organize your VM's as shown
Create Ubuntu Server
https://greenmountaincyber.com/docs/topics/vmware/base-vms/ubuntu-server/
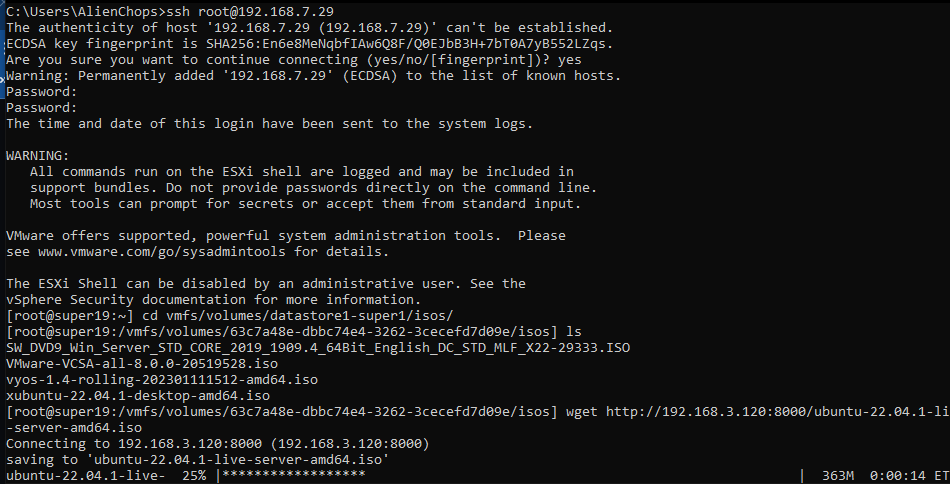
Download ISO
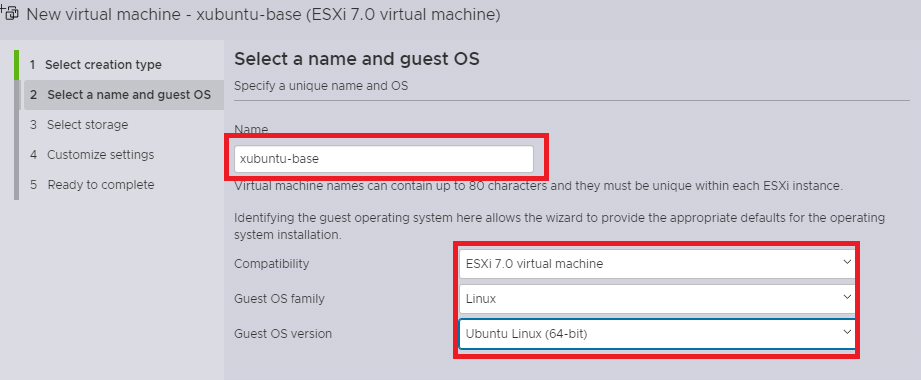
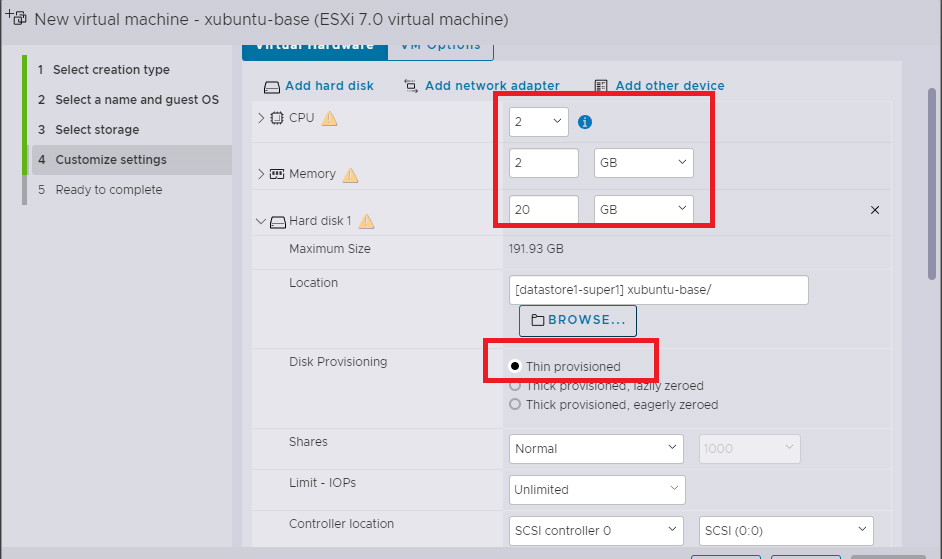
Create Xubuntu base
- virtual machines > Create VM
- Configure as shown
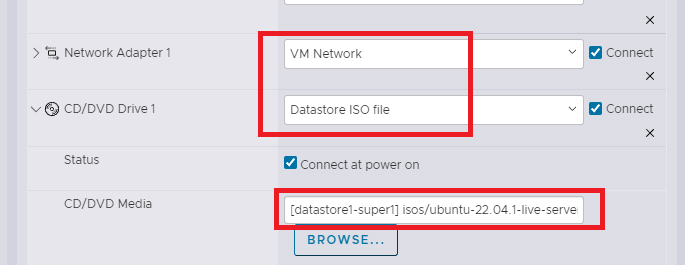
-
Power on your xubuntu server and launch it
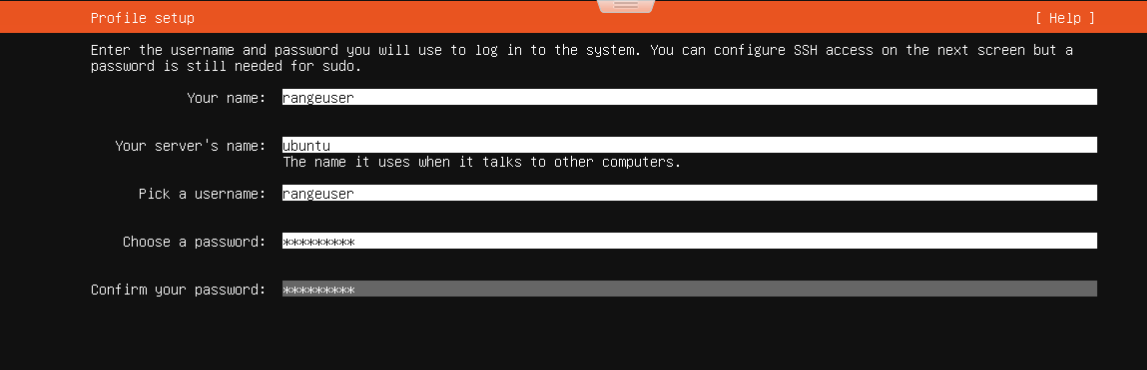
- Choose defaults for setup
-
Creat a rangeuser
- install OpenSSH
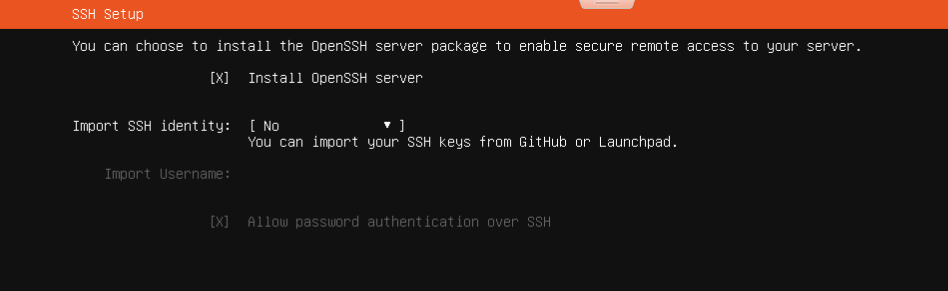
- Reboot once install is complete
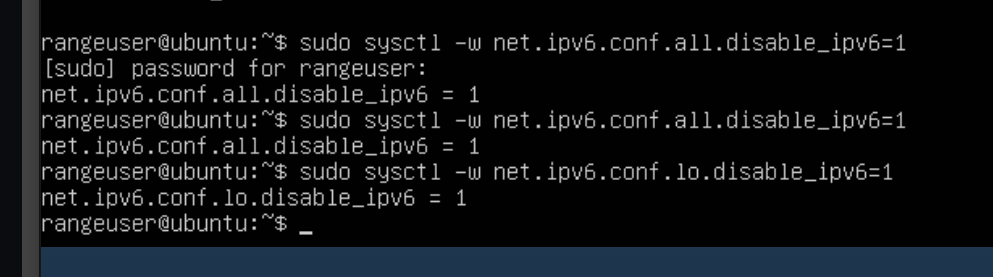
- Once you are in make sure to disable IPv6 using the following
sudo sysctl -w net.ipv6.conf.all.disable_ipv6=1
sudo sysctl -w net.ipv6.conf.default.disable_ipv6=1
sudo sysctl -w net.ipv6.conf.lo.disable_ipv6=1
- Next Run the following script
sudo -i
wget https://raw.githubusercontent.com/gmcyber/RangeControl/main/src/scripts/base-vms/ubuntu-server.sh

chmod +x ./ubuntu-server.sh
sudo ./ubuntu-server.sh
-
Restart your host and remove the iso from the cd port, Take a snapshot, and move the vm to the base folder
-
On xubuntu-wan
pwsh
$vcenter="vcenter.adam.local"
Connect-VIServer -server $vcenter
Get-VM
use * ./cloner.ps1 to create awx from your xubuntu-base
- Set awx to 480-WAN
Get-NetworkAdapter awx

Reflection:
I ran into a huge difficulty trying to add the second SSO which I now know to be due to a misnamed cert file .perm instead of .pem which caused hours of struggle for a very simple issue. Shout out to Reed Simon for helping me realize the issue. This lab took me 10+ hours and was frustrating for me but we did learn some very cool things especially on cloning vms.