SEC 480 Milestone 2 - DefiantCoder/Tech-Journals GitHub Wiki
SysPrep
- First we will download the iso onto the server by ssh ing into your server
ssh root@super19

cd /vmfs/volumes/datastore1-super1/iso
wget http://192.168.3.120:8000/SW_DVD9_Win_Server_STD_CORE_2019_1909.4_64Bit_English_DC_STD_MLF_X22-29333.ISO
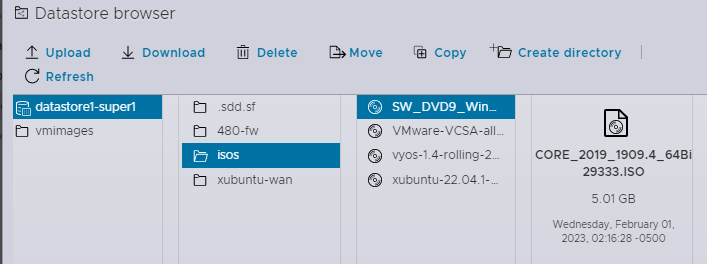
- You should see the iso here
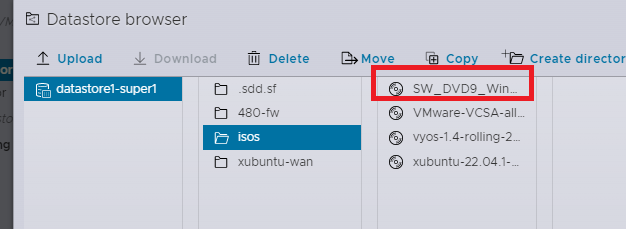
- Using the iso we will create a new image and configure as follows
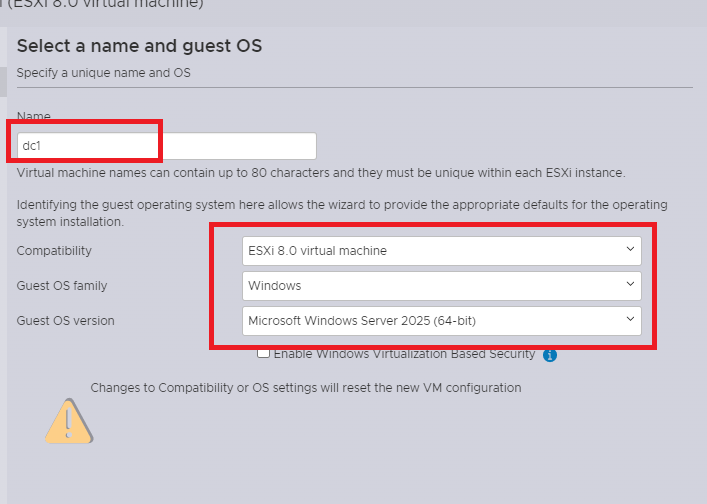
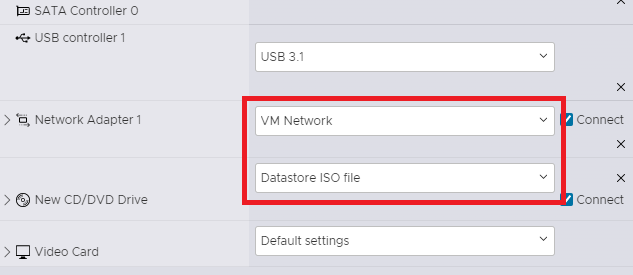
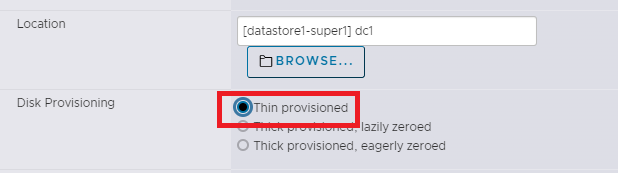
-
When you boot up make sure to press
any keyto launch from cd -
make sure to choose the following during setup
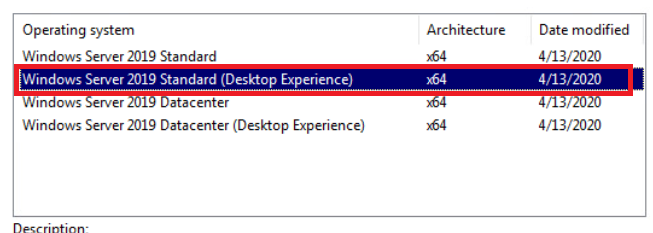
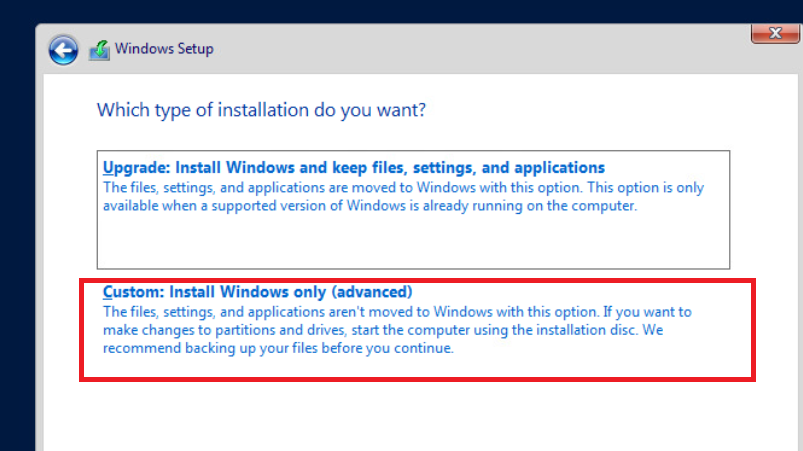
-
once setup is finished use the command
Ctl + Shift + F3to enter Audit mode -
From powershell enter
sconfig- Press 5 to edit updates and choose
Mfor manual - Press 9 to edit date & time and change timzone to ETC -5
- Press 6 and Apply all updates
- you many need to run this multiple times
- Press 5 to edit updates and choose
-
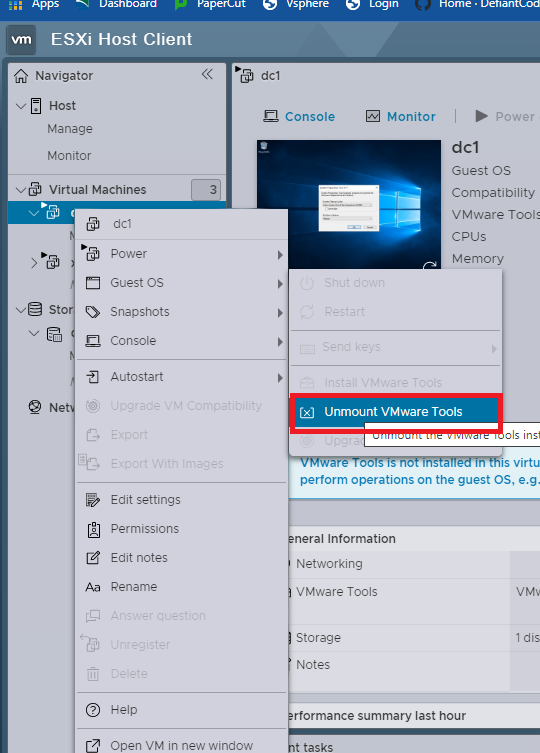
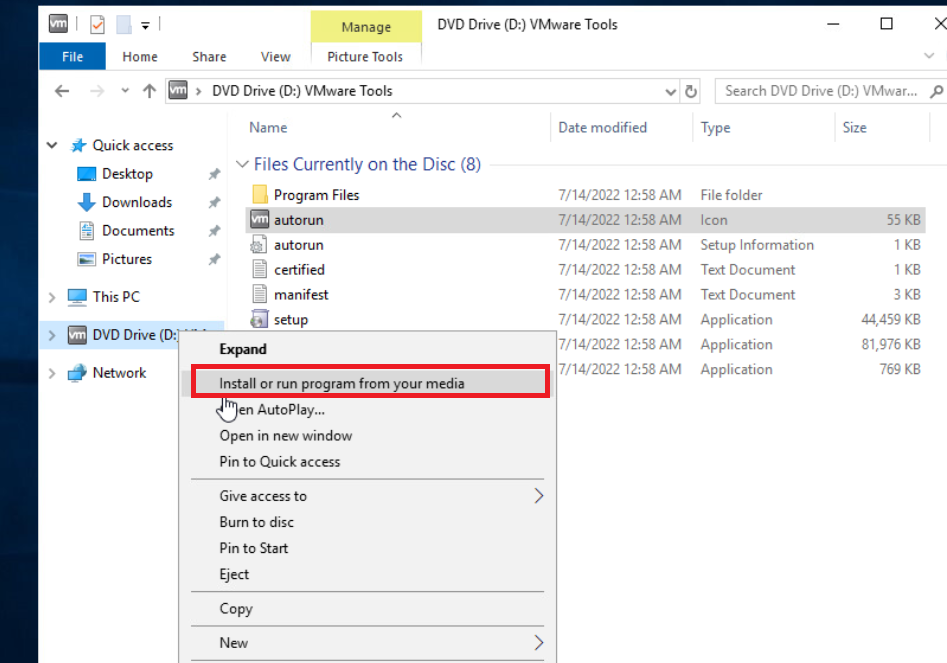
Next on dc1 you will install vmware tools and run setup
*After that setup is complete we will install Open ssh through the following
https://tinyurl.com/480sysprep
wget https://tinyurl.com/480sysprep -OutFile windows-prep.ps1
notepad .\windows-prep.ps1
- You will need to uncomment and comment as shown below
Add-WindowsCapability -Online -Name OpenSSH.Server~~~~0.0.1.0
Start-Service sshd
# a good time to complete via remote ssh
Set-Service -Name sshd -StartupType 'Automatic'
Set-ItemProperty "HKLM:\Software\Microsoft\Powershell\1\ShellIds" -Name ConsolePrompting -Value $true
New-ItemProperty -Path HKLM:\SOFTWARE\OpenSSH -Name DefaultShell -Value "C:\Windows\System32\WindowsPowerShell\v1.0\powershell.exe" -PropertyType String -Force
Write-Host "Create a deployer user: Enter Password"
$pw = Read-Host -AsSecureString
New-LocalUser -Name deployer -Password $pw -AccountNeverExpires -PasswordNeverExpires:$true
Add-LocalGroupMember -Group Administrators -Member deployer
Write-Host "Pull down unattend.xml and then sysprep the box"
wget https://raw.githubusercontent.com/gmcyber/RangeControl/main/src/scripts/base-vms/windows/unattend.xml -Outfile C:\Unattend.xml
C:\Windows\System32\Sysprep\sysprep.exe /oobe /generalize /unattend:C:\unattend.xml
#Write-Host "Set Power to High Performance"
#powercfg -setactive 8c5e7fda-e8bf-4a96-9a85-a6e23a8c635c
- Save the file and then run the following commands
Unblock-File .\windows-prep.ps1
Set-ExecutionPolicy RemoteSigned
.\windows-prep.ps1
DC1 Configuration

ADDS Setup
- Using a Powershell instance run as Administrator execute the following lines
Install-WindowsFeature AD-Domain-Services -IncludeManagementTools

Install-ADDSForest -DomainName adam.local -InstallDNS

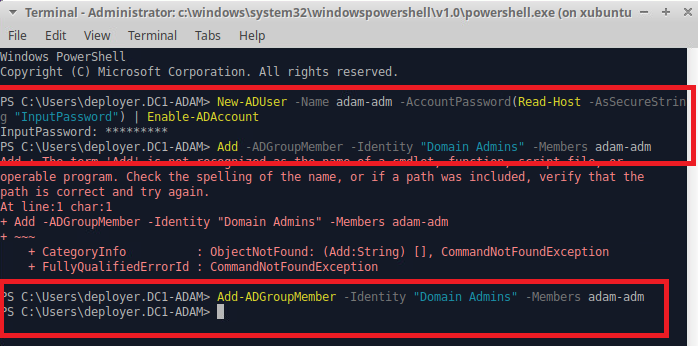
New-ADUser -Name adam-adm -AccountPassword(Read-Host -AsSecureString "InputPassword") | Enable-ADAccount
Add-ADGroupMember -Identity "Domain Admins" -Members adam-adm.lamb.local
Reverse Zone & PTR creation
Add-DnsServerPrimaryZone -NetworkId 10.0.17.0/24 -ReplicationScope Domain

Add-DnsServerResourceRecordA -Name vcenter01 -IPv4Address 10.0.17.3 -ZoneName adam.local
Add-DNSServerResourceRecordPTR -ZoneName 17.0.10.in-addr.arpa -Name vcenter01 -PTRDomainName vcenter01.cyber.local

Add-DnsServerResourceRecordA -Name 480-fw -IPv4Address 10.0.17.2 -ZoneName adam.local
Add-DNSServerResourceRecordPTR -ZoneName 17.0.10.in-addr.arpa -Name 480-fw -PTRDomainName 480-fw.cyber.local

Add-DnsServerResourceRecordA -Name xubuntu-wan -IPv4Address 10.0.17.100 -ZoneName adam.local
Add-DNSServerResourceRecordPTR -ZoneName 17.0.10.in-addr.arpa -Name xubuntu-wan -PTRDomainName xubuntu-wan.cyber.local

Add-DNSServerResourceRecordPTR -ZoneName 17.0.10.in-addr.arpa -Name dc1 -PTRDomainName dc1.cyber.local
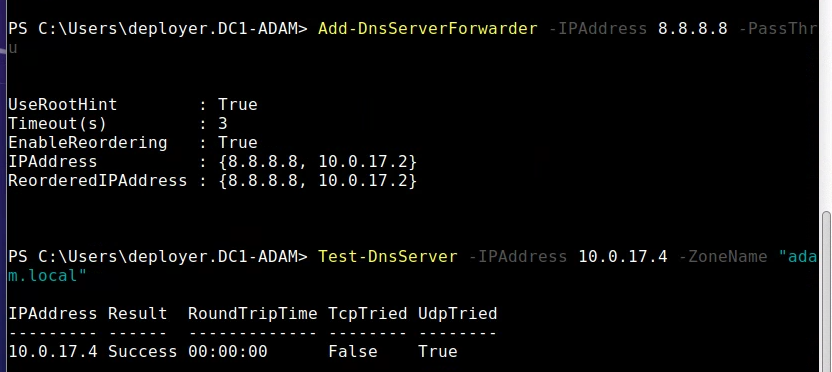
Add-DnsServerForwarder -IPAddress 8.8.8.8 -PassThru
Test-DnsServer -IPAddress 10.0.17.4 -ZoneName "adam.local"
Enable RDP via Powershell
Set-ItemProperty -Path 'HKLM:\System\CurrentControlSet\Control\Terminal Server'-name "fDenyTSConnections" -Value 0
Enable-NetFirewallRule -DisplayGroup "Remote Desktop"
DHCP Installation and Setup
- Switch to your
Install-WindowsFeature DHCP -IncludeManagementTools
netsh dhcp add securitygroups
Restart-Service dhcpserver
Add-DHCPServerv4Scope -Name “Scope” -StartRange 10.0.17.101 -EndRange 10.0.17.150 -SubnetMask 255.255.255.0 -State Active
Set-DHCPServerv4OptionValue -ScopeID 10.0.17.0 -DnsDomain adam.local -DnsServer 10.0.17.4 -Router 10.0.17.2
Add-DhcpServerInDC -DnsName adam.local -IPAddress 10.0.17.4
Restart-Service dhcpserver
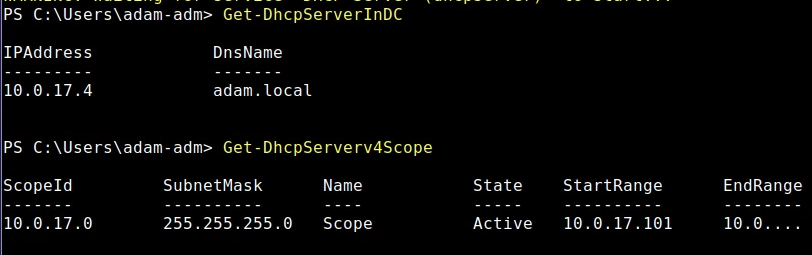
Get-DhcpServerv4Scope
Get-DhcpServerInDC
Demo Commands
# On xubuntu-wan
ip a
nslookup adam.local
ping -c 1 480-fw
nslookup 10.0.17.3
nslookup dc1-adam
- dc1
# on dc1
ssh [email protected]
whoami
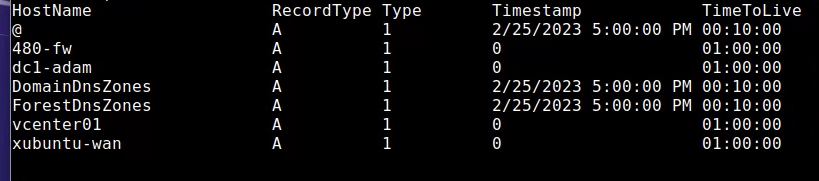
Get-DnsServerResourceRecord -ZoneName adam.local -RRType A | Format-Table
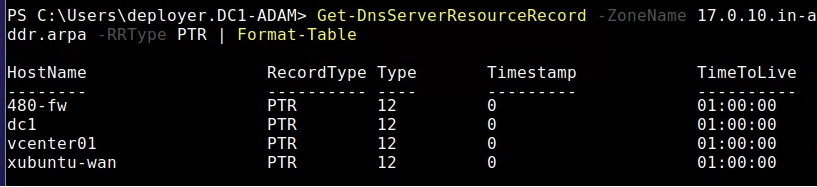
Get-DnsServerResourceRecord -ZoneName 17.0.10.in-addr.arpa -RRType PTR | Format-Table
Get-DhcpServerv4Scope