SEC 480 Milestone 1 - DefiantCoder/Tech-Journals GitHub Wiki
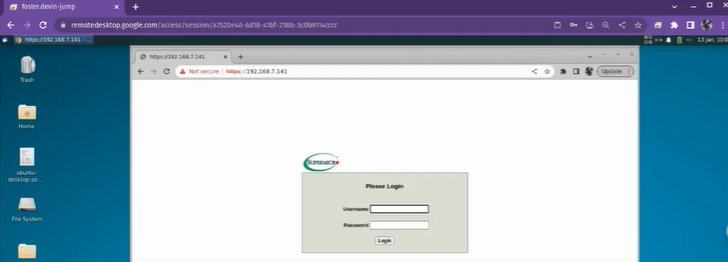
Using the ip address for your server (192.168.7.29 in my case) use the login: ADMIN and the PWD password on the server
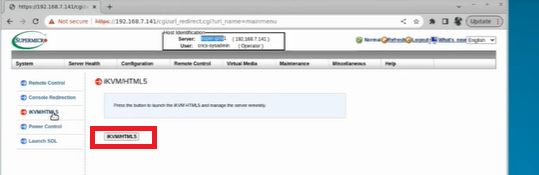
From here go to Remote Control > IKVVM/HTML5 and launch the console
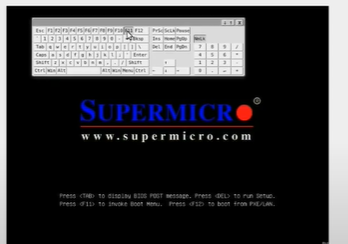
During the boot press F11 on the second SuperMicro screen to enter boot setup
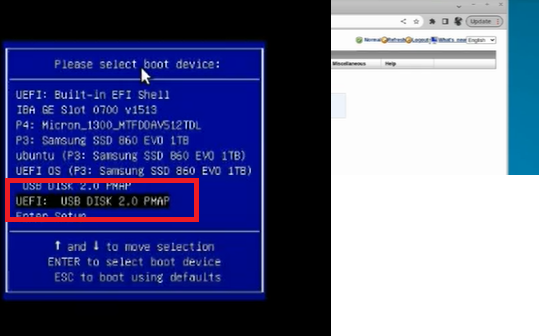
select the UEFI boot device
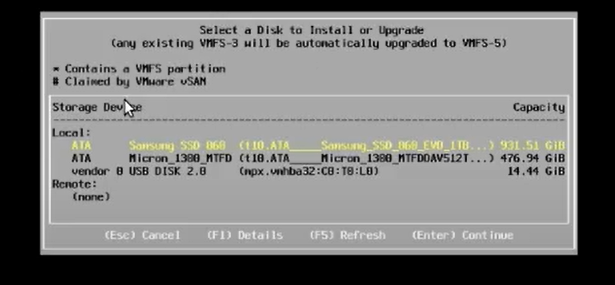
Once you reach the following screen select the first hard drive for the setup, you will have to confirm
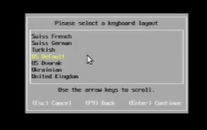
select your preferred language
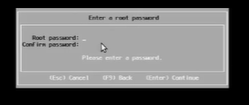
At this point you need to set your root password and make sure to record it for future use
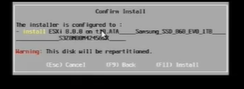
Make sure to confirm the install, once this is complete you will reboot the server
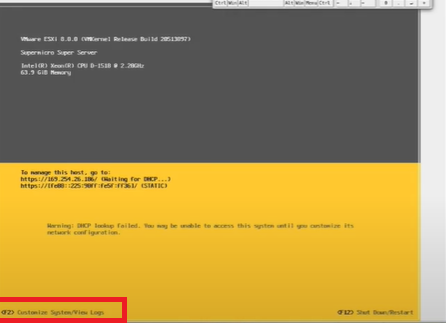
from here press F2 to customize your settings, you will need to login using root and your password
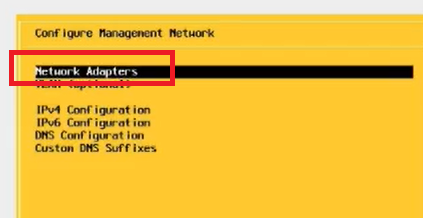
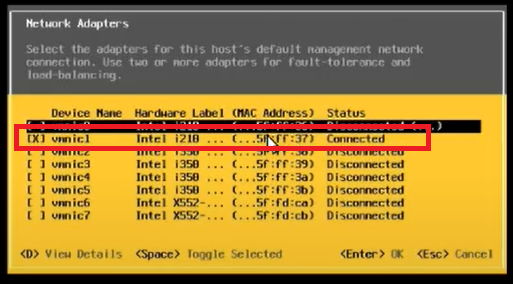
select network adapters and from there unselect the first option and select the second option that states connected, exit and save the config
- At this point set your IP address to your number plus 10 (192.168.7.29) with a mask of /24 and a gateway of 192.168.7.250 set the name to super19.cyber.local
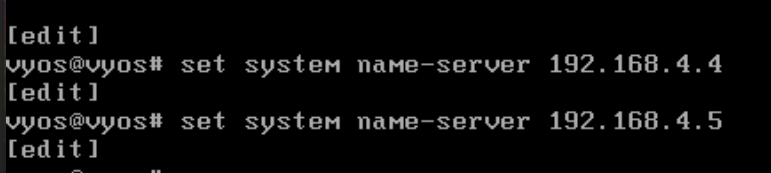
- in DNS Configuration set the primary to 192.168.4.4 and the secondary to 192.168.4.5 and under Custom DNS suffixes set it to cyber.local

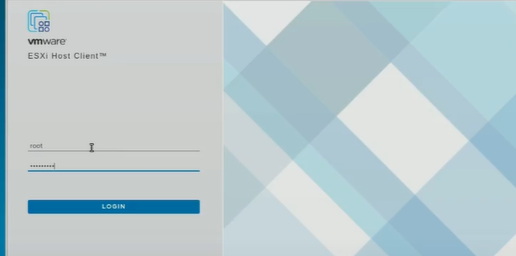
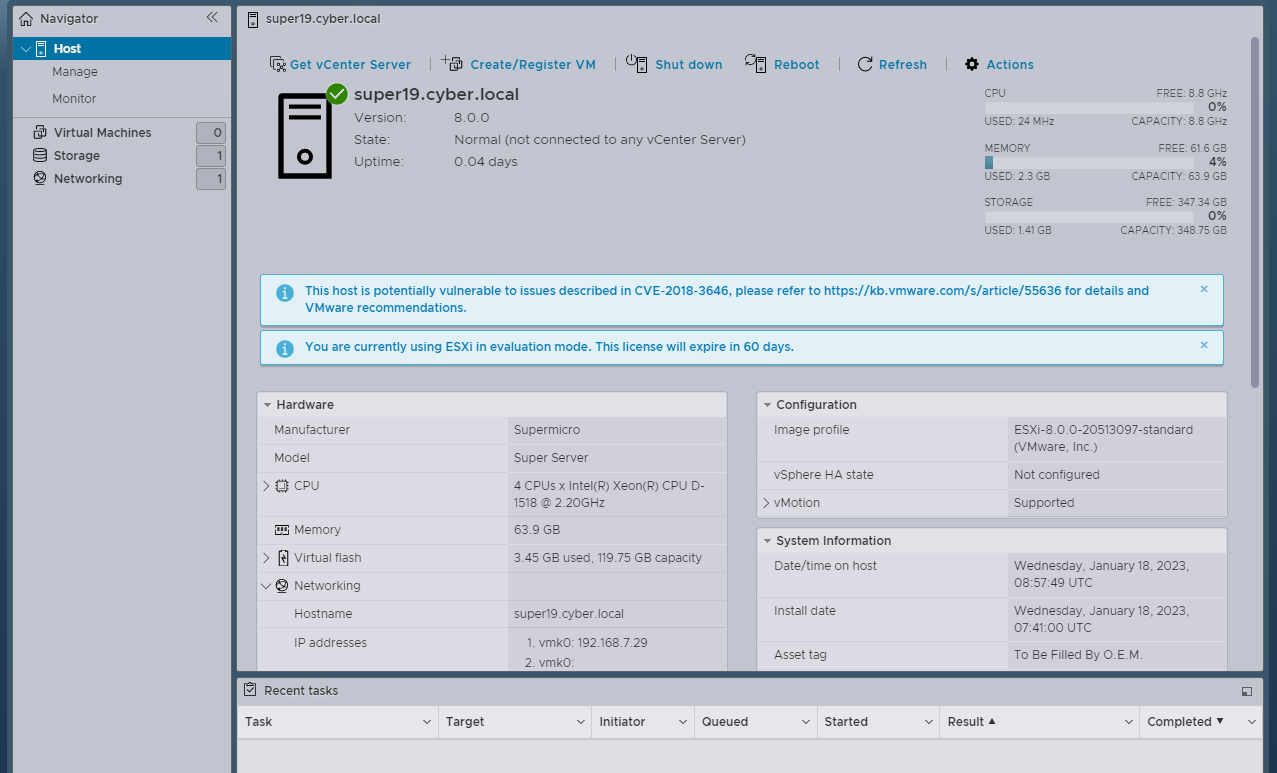
once that is saved go to your IP address and login using root and your password

From here you have successfully setup ESXi
- First rename the data store to
datastore1-super1 - In
Datastore browseradd a new directory calledisoswhich will house the isos - Next enable secure ssh from
Host > Services > Secure Shell (SSH)
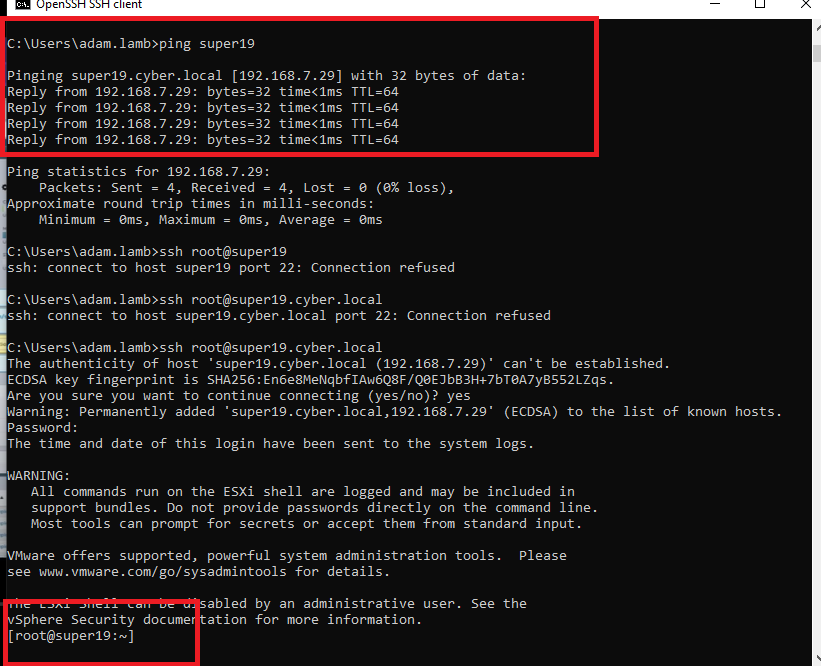
- test ping super19 and once that is successful you can ssh into your root@super19
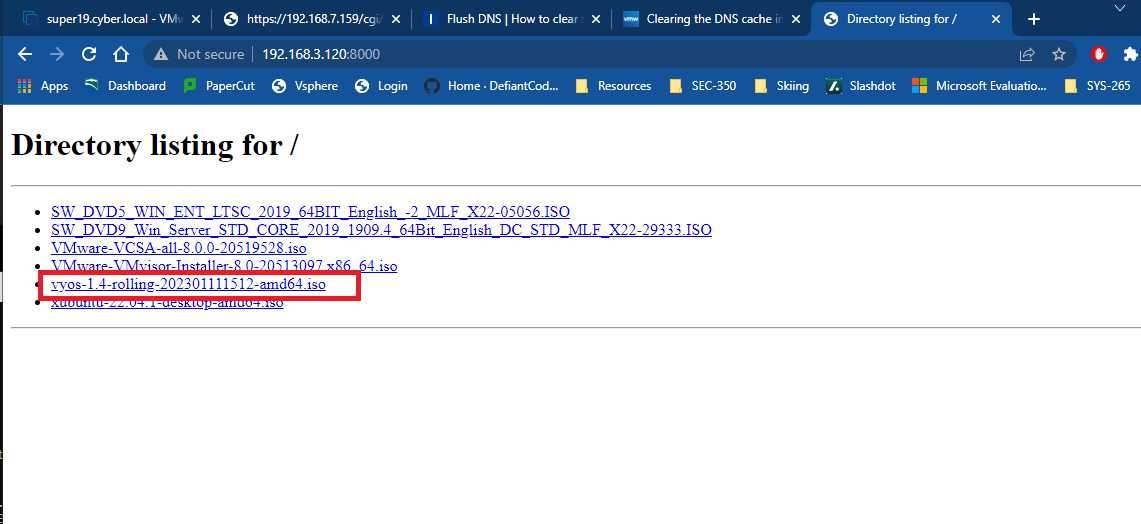
Go to this site and copy the link address of the highlighted link. From here run
wget http://192.168.3.120:8000/vyos-1.4-rolling-202301111512-amd64.iso
repeat the process for the xubuntu iso and for the VCSA iso
# you need to be in the correct directory to install the isos
cd /vmfs/volumes/datastore1-super1/iso
wget http://192.168.3.120:8000/xubuntu-22.04.1-desktop-amd64.iso

wget http://192.168.3.120:8000/VMware-VCSA-all-8.0.0-20519528.iso
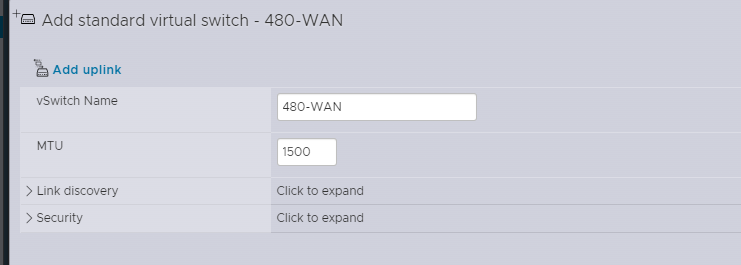
From this point navigate to Networking > Virtual Switches > Add standard switch with the following settings
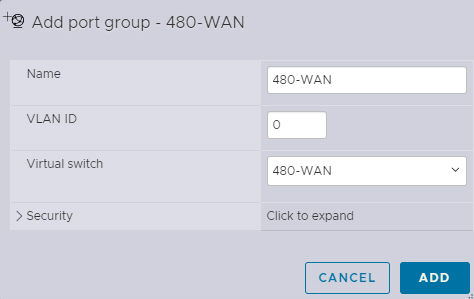
Navigate to Port groups > add port group and configure as follows
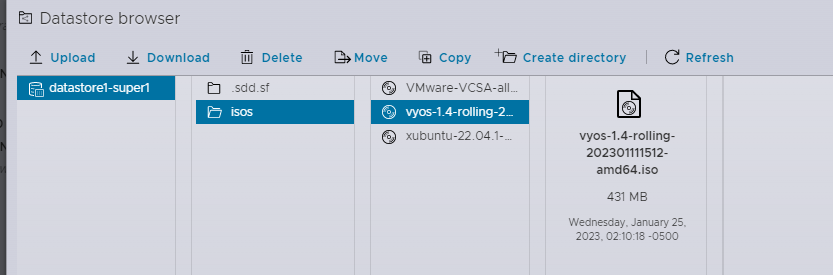
Navigate to datastore1-super1 > Datastore browser > isos to make sure the vyos iso is installed
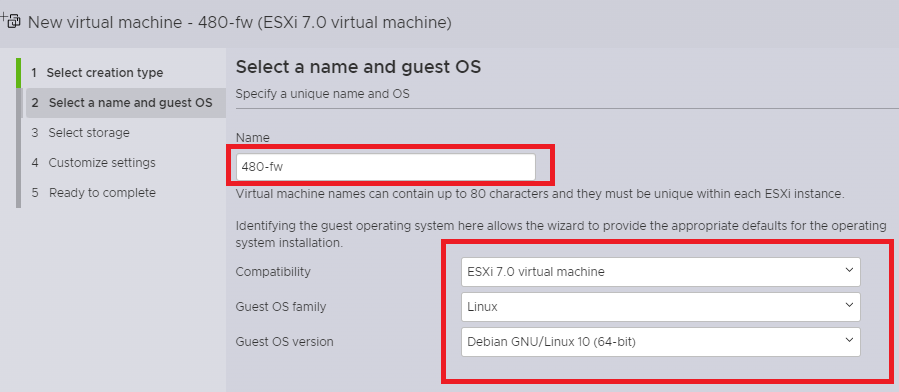
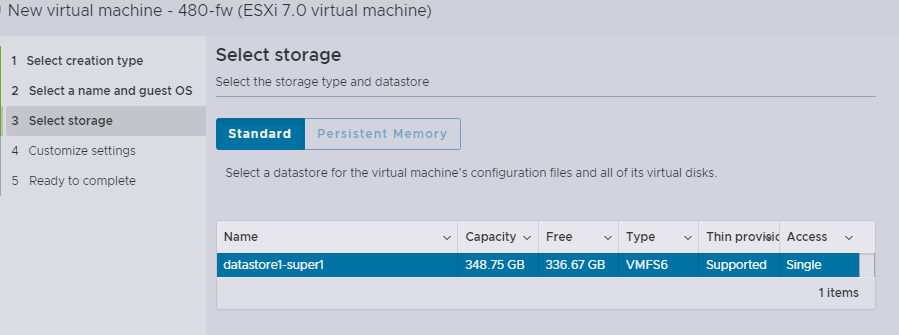
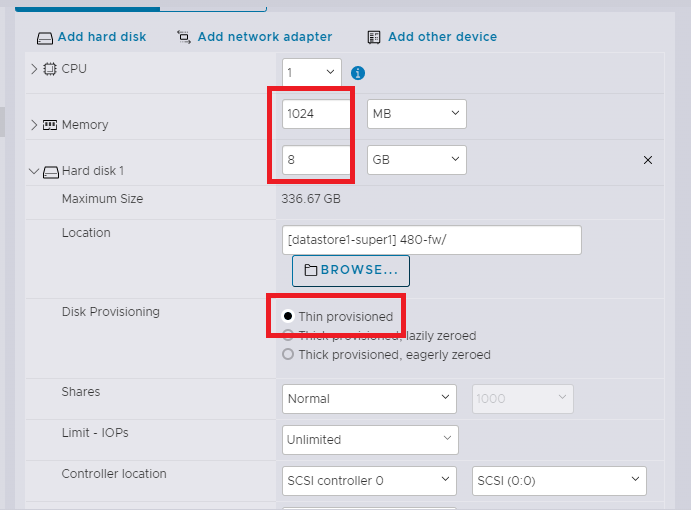
From here we will create a VM through Virtual Machines > Create/ Register VM
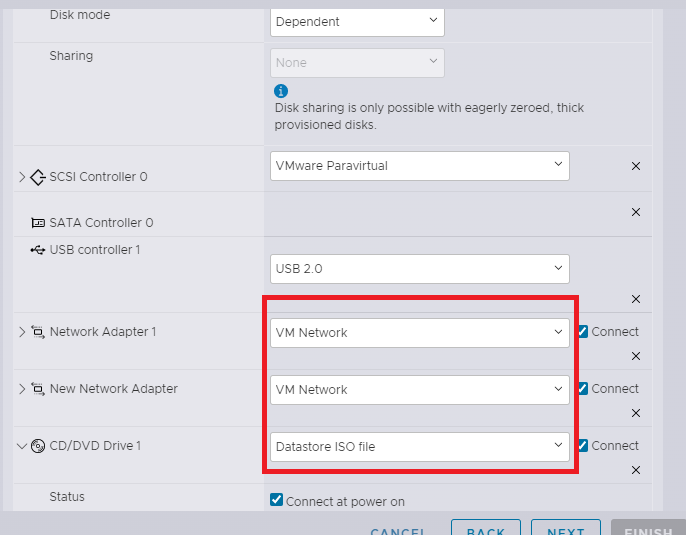
add a network adapter and configure as shown
navigate to Virtual Machines > 480-fw and power on the VM
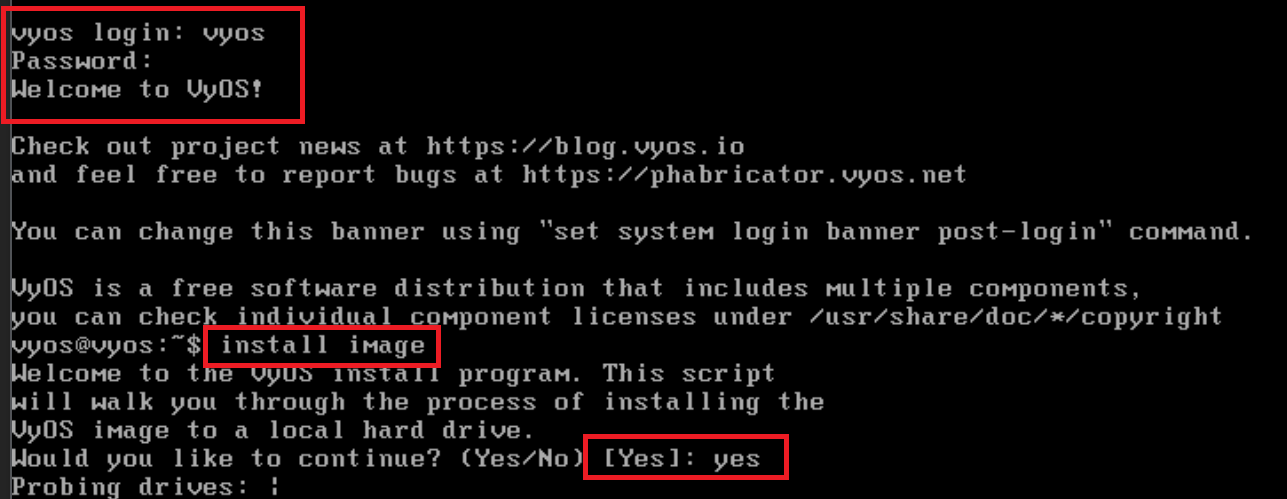
Login through the default credentials and install the image
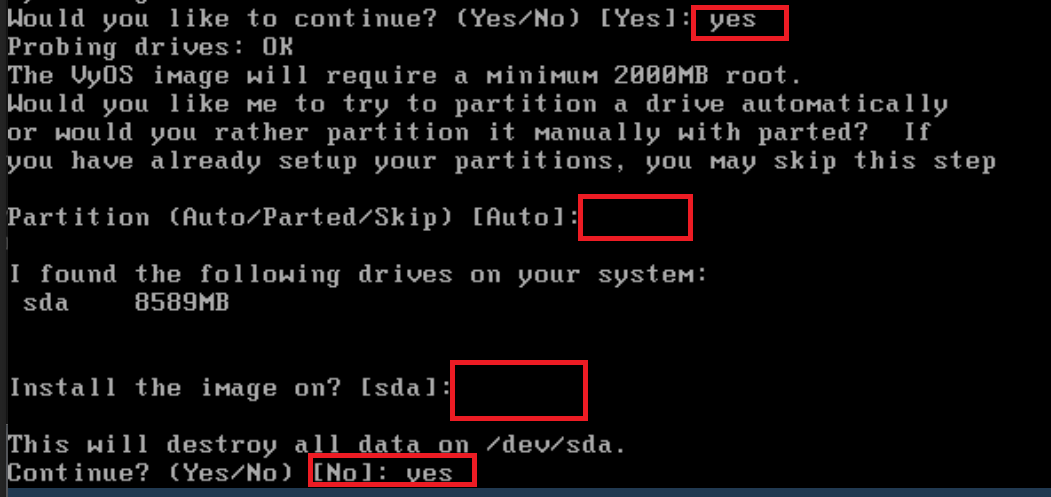
hit enter for each question unless stated otherwise
- add a password & hit enter for [sda]
- Now reboot and log it
run the following commands to format the iso for general use
configure
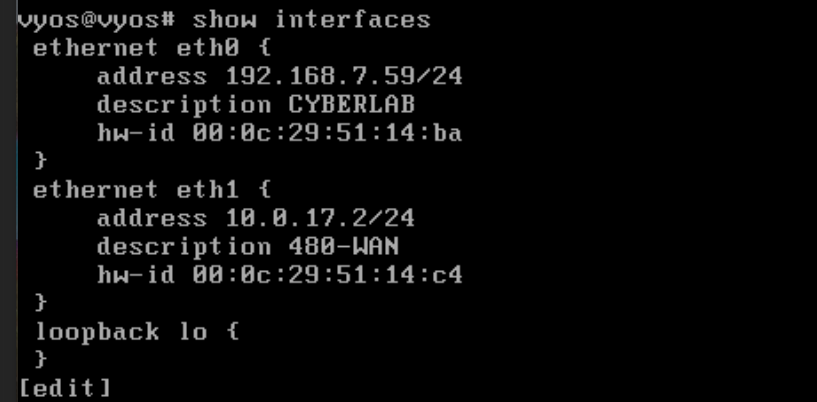
show interfaces
delete interfaces ethernet eth0 hw-id
delete interfaces ethernet eth1 hw-id
commit
save
show interfaces
set eth0
set interfaces ethernet eth0 address dhcp
set service ssh listen-address 0.0.0.0
commit
save

exit
poweroff
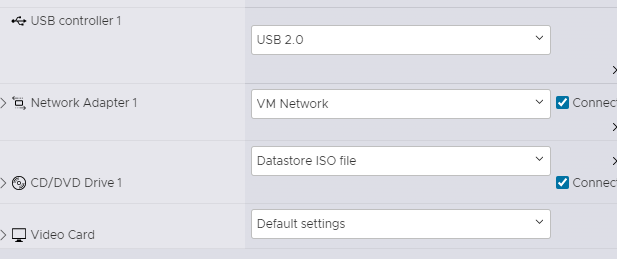
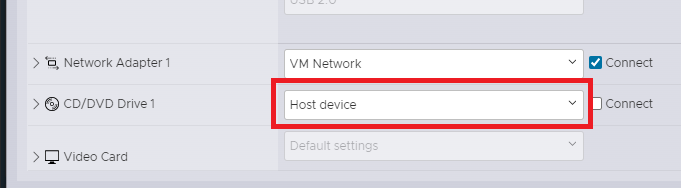
navigate to Virtual Machines > 480-fw > Edit settings and change the following
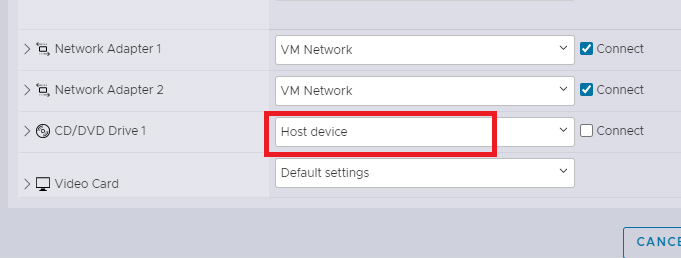
right click on 480-fw and take a snapshot called base3
power on 480-fw and right-click to edit settings and change the following
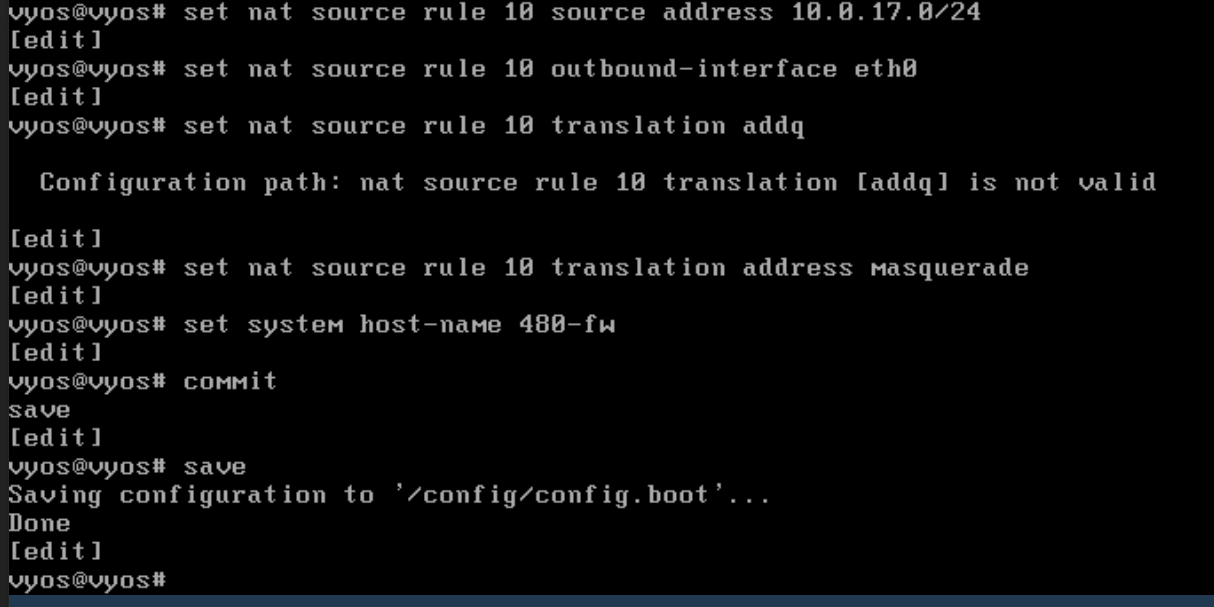
set your eth0 ip
delete interfaces ethernet eth0 address dhcp
#192.168.7.59
set interfaces etherneteth0 address <your ip>
commit
save
test ping the default gateway
ping 192.168.7.250
set protocols static route 0.0.0.0/0 next-hop 192.168.7.250
set interfaces ethernet eth0 description CYBERLAB

set interfaces ethernet eth1 description 480-WAN
set interfaces ethernet eth1 address 10.0.17.2/24
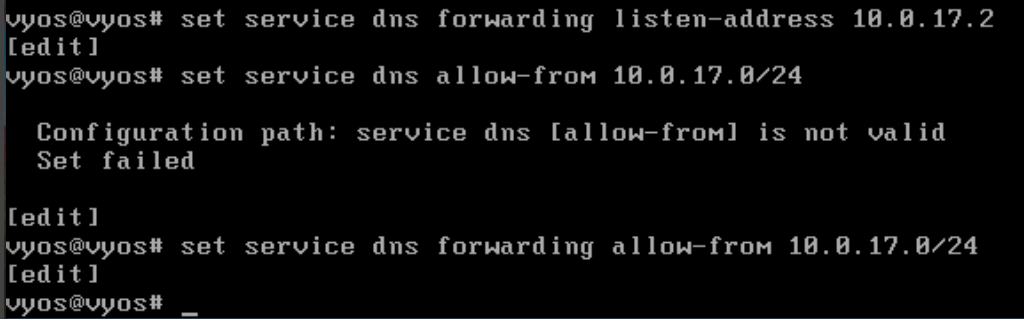
- At this point ping
google.comto test for successful DNS resolution
- Create the xubuntu vm Virtual Machines > Create VM
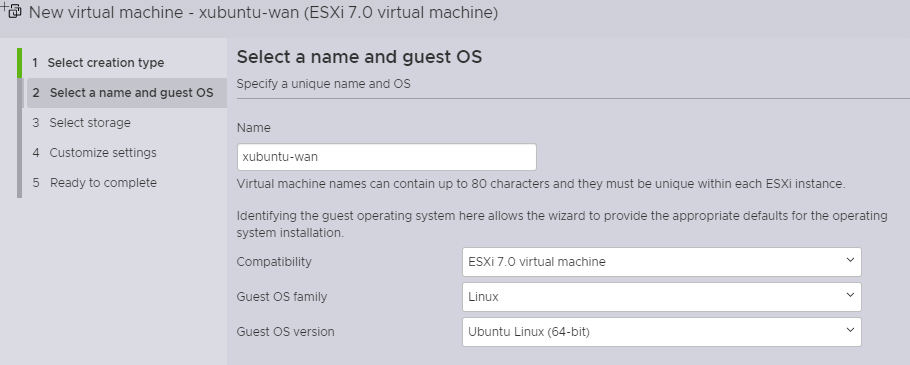
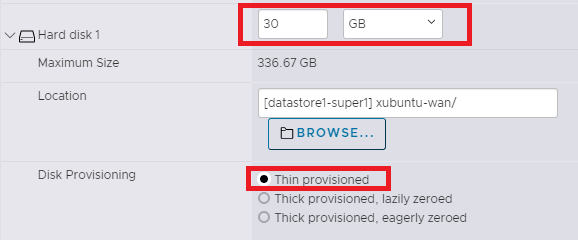
- Select the xubuntu iso
-
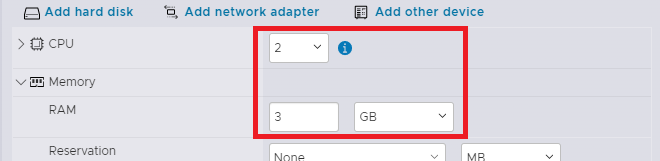
Do minimal setup for xubuntu
-
after the setup run the following script found here to make your VM image more ready for generic use.
https://raw.githubusercontent.com/gmcyber/RangeControl/main/src/scripts/base-vms/ubuntu-desktop.sh
#!/bin/sh
#script to prepare ubuntu desktop vm for linked cloning
apt-get update
apt-get upgrade
#chrome remote desktop
wget https://dl.google.com/linux/direct/google-chrome-stable_current_amd64.deb
sudo apt install --assume-yes ./google-chrome-stable_current_amd64.deb

wget https://dl.google.com/linux/direct/chrome-remote-desktop_current_amd64.deb
sudo apt install --assume-yes ./chrome-remote-desktop_current_amd64.deb

#open ssh
apt-get install -y open-vm-tools-desktop openssh-server
cat /dev/null > /var/log/wtmp
cat /dev/null > /var/log/lastlog
rm -rf /tmp/*
rm -rf /var/tmp/*
rm -f /etc/ssh/ssh_host*
rm -f /etc/udev/rules.d/70-persistent-net.rules
cat <<EOL | sudo tee /etc/rc.local
#!/bin/sh -e
test -f /etc/ssh/ssh_host_dsa_key || dpkg-reconfigure openssh-server
exit 0
EOL
echo xubuntu > /etc/hostname
apt-get clean
chmod +x /etc/rc.local
systemctl stop apt-daily-upgrade.timer
systemctl disable apt-daily-upgrade.timer
systemctl stop apt-daily.timer
systemctl disable apt-daily.timer
sudo apt autoremove -y
#truncate the machine id to avoid duplicate dhcp
echo > /etc/machine-id
- Next remove the CD from the xubuntu vm and refresh the vm
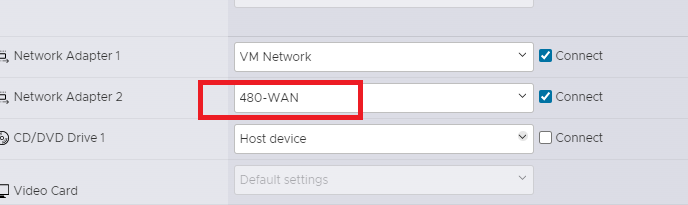
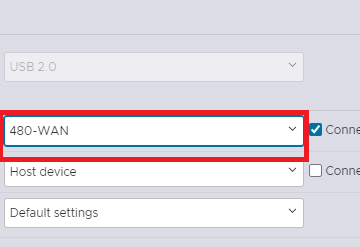
- From here take a snapshot called xubuntu base and then change the network adapter to
480-WAN
- Add a new sudo user called user then login as that account to delete champuser
sudo adduser user
sudo usermod -aG sudo user
sudo killall -u champuser
sudo userdel champuser
# or you can force delete with
sudo userdel -f username
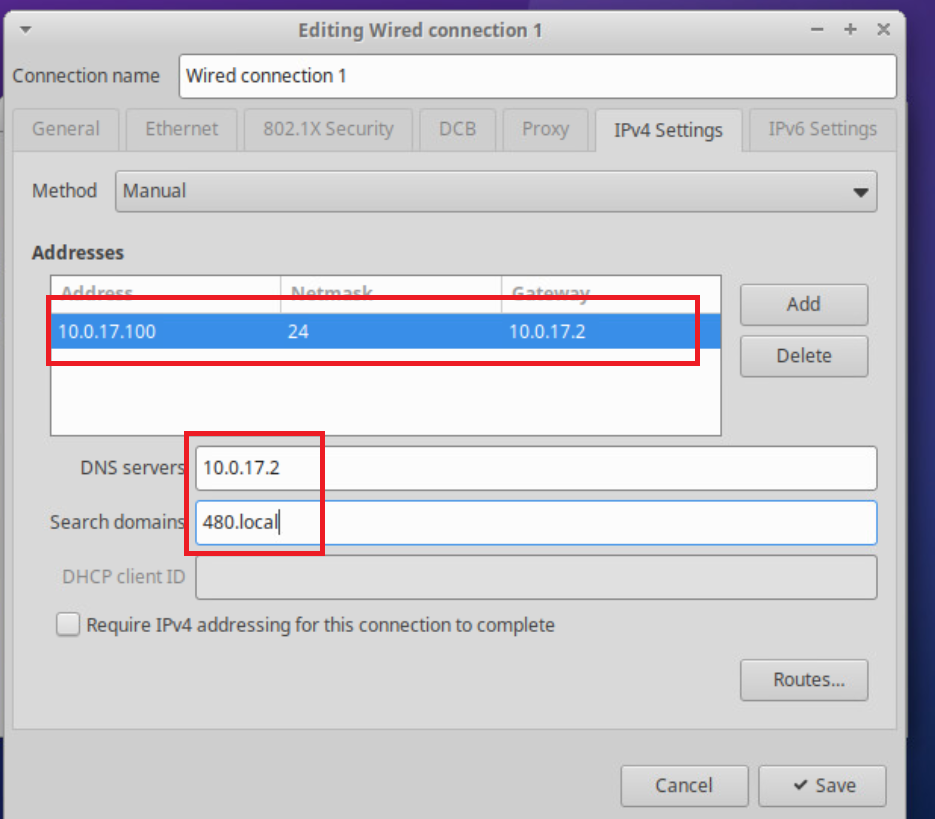
- From here we will edit the IPv4 settings to enable internet connection and will be set as follows
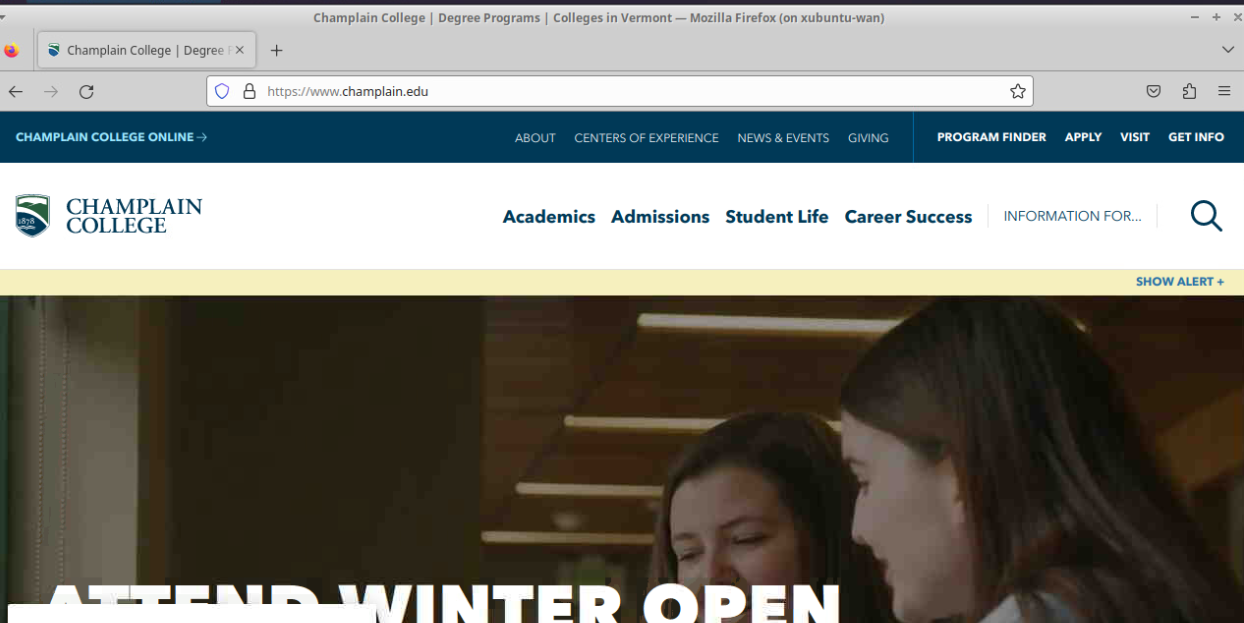
- Finally we will test for the requirements of milestone 1
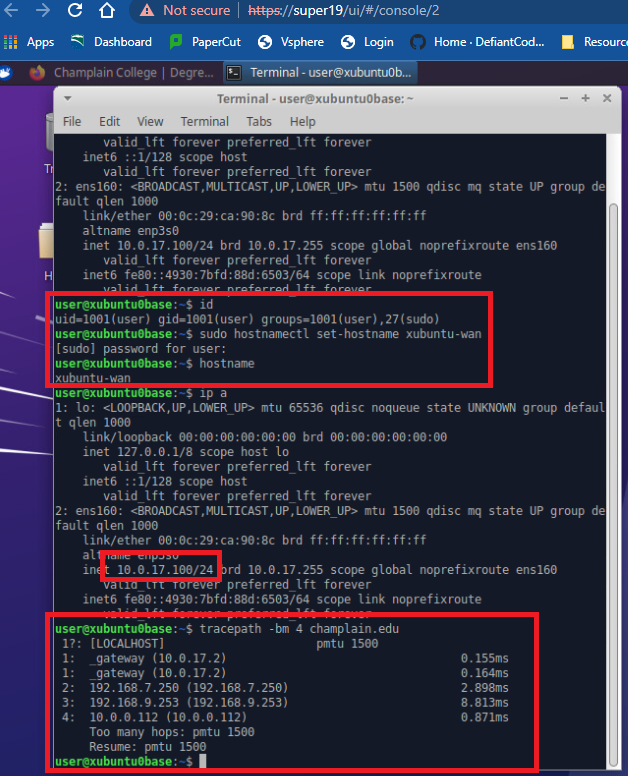
Reflection: I ran into an issue with pinging super19 and this was due to the pathway not being set. After Devin reset it I was able to ping super19.cyber.local and finally super19