6. Putting the TCD Faceplates Together - CircuitSetup/Time-Circuits-Display GitHub Wiki
The display faceplates mount to the front of the display enclosures.
Assembling the TCD Faceplates
What You'll Need
- Display Faceplates
- X-Acto knife or sharp scissors
- TCD Stickers
- Faceplate Gels
- Thin double-sided tape
- 3 mm or 1/8" drill bit
- Cordless drill
TCD Stickers
- Very carefully cut along the white lines surrounding the words so the white border is not left on the sticker. It helps to use a straightedge if you are using an X-Acto knife.
- Carefully peel the backing off the sticker and align it over its corresponding display, starting with one corner. This can be easier if you use the X-Acto knife to separate the backing from the sticker, then use the knife to help position it on the faceplate.
- Repeat for each of the 3 displays.
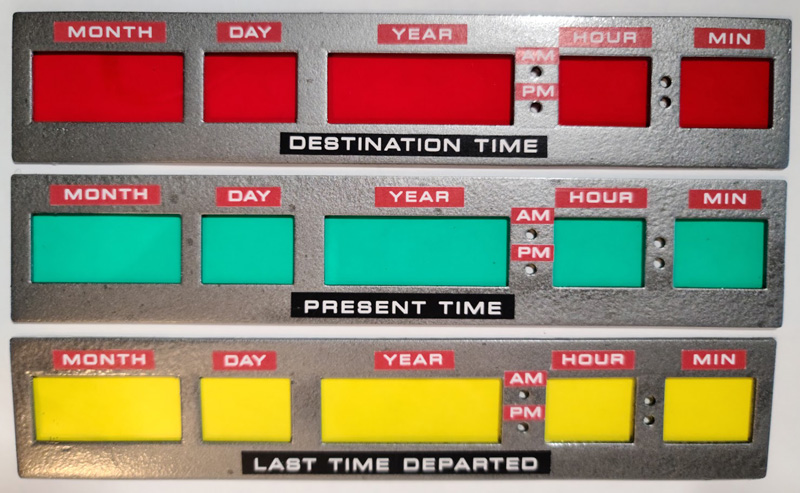
Note that the size of the stickers is slightly different for each display, just as seen in the first Back to the Future movie. They are arranged in display order on the included sticker sheet: the 1st row is Destination Time, the 2nd row is Present Time, and the 3rd row is Last Time Departed.
Faceplate Gels
- Red = Destination Time
- Green = Present Time
- Yellow = Last Time Departed
- Peel the protective plastic off both sides of the gels.
- Turn over the faceplates and apply a strip of double-sided tape to the top and bottom.
- Center the gel on the faceplate and press firmly to secure it.
- Repeat for each faceplate.
Cutting Holes for AM/PM and Hour/Min LEDs
- Get out your 3 mm or 1/8" drill bit and cordless drill.
- From the front of the faceplate, carefully drill a hole in the gel so each of the 4 LEDs can poke through. If you nick the faceplate opening a little, that is okay.
Securing Faceplates to the Enclosures
- Use the double-sided tape again and put a strip on the top and bottom of the gels.
- Line up the LED holes.
- Press firmly to secure the faceplates to the enclosures.
- Repeat for each faceplate/enclosure.