How to open the Processing Unit - CatGenius/catgenius GitHub Wiki
Introduction
I thought it was pretty straight forward, but most beta testers have gotten themselves into trouble opening up the processing unit (PU) by disassembling it far beyond what's strictly needed, making it harder to reassemble it back together.
The opening
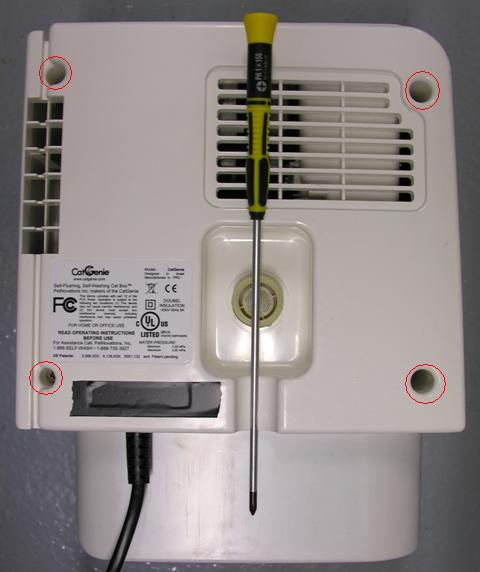
The PU opens quite easily. There are no warranty void seals or any other indicators of unauthorized opening. No exotic tools are required, just a screw driver that not everybody has laying around: A Philips head screwdriver, size PH1, with a shaft at least 150mm long. Thick plastic insulation on a safety screwdriver can make the shaft too thick to fit the holes.
Note: Some newer models models may have holographic seals over one of the holes, to detect tampering. There are several tricks to remove these without damaging, one involves WD40, but a detailed description is outside the scope of this project.
Take the PU from the base and disconnect the water hose at the end of the PU. The PU housing is constructed from three shells. The front shell, holding the GenieEyes cat sensor and the control panel. The rear shell, has air intake holes in it and a hole for the water intake. And the bottom shell, containing the cogs for the bowl, the scooper, the water sensor. etc. Put the PU on a towel in front of you with the front shell facing down and the bottom shell facing towards you. Be careful not the push the unit down too hard as this may push in the cat sensor face plate into the front shell, because this is only glued into place using hot melt glue.
The internals
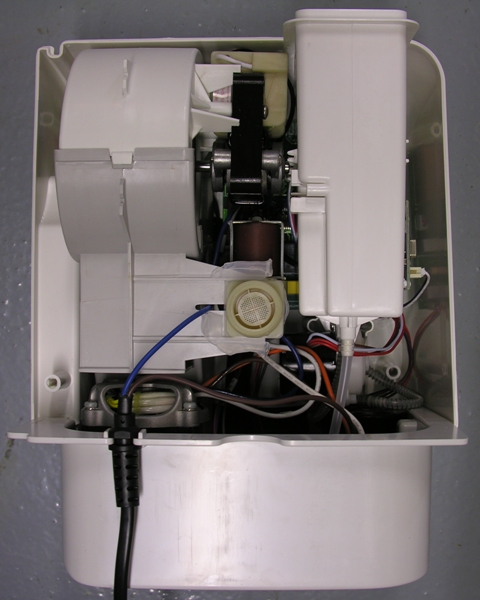
After the rear shell has been removed, the internals of the PU will be exposed.
https://raw.githubusercontent.com/CatGenius/catgenius/master/documentation/wiki/PU_rear_-_opened.JPG
Take a good look at the routing of the hoses coming from the cartridge holder. Especially the one armored with a steel spring, visible at the bottom right of the photo above. It doesn't need to be put back exactly this way, but knowing how it is routed originally will help avoiding folds when putting back the cartridge holder when reassembling the PU.
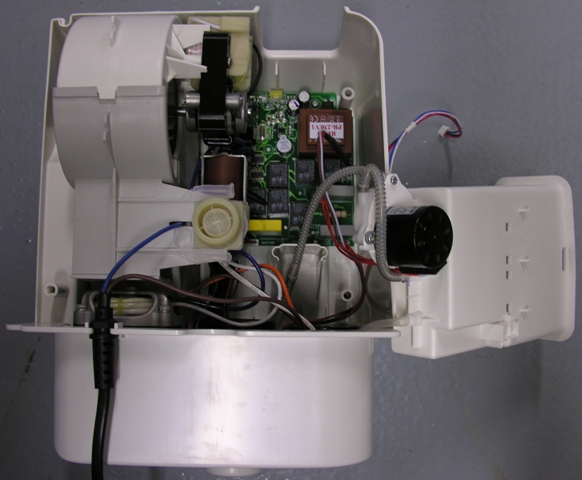
Now carefully lift the cartridge holder and put it next to the PU on the right hand side. The RFID reader leads may be disconnected at the controller board end.
The dosage pump does not need to be disconnected. Not electrically and for sure not the hoses. The non-armored hose, which purpose it is to drain spilled cleaning fluid in the cartridge holder into the bowl, might be a bit tense. You may want to support the cartridge holder by putting something under it, relieving the strain on this hose. It will not disconnect easily by itself and I never needed to support it, but better safe than sorry.
There is no need to disassemble the PU any further. Doing so would unnecessarily complicate reassembling it. Having it in this position allows you to both install the programming cable (see How to program) and the serial port (see How to install a serial port).
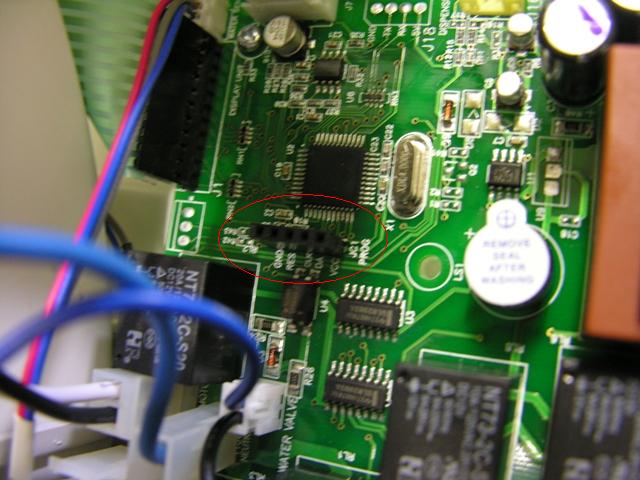
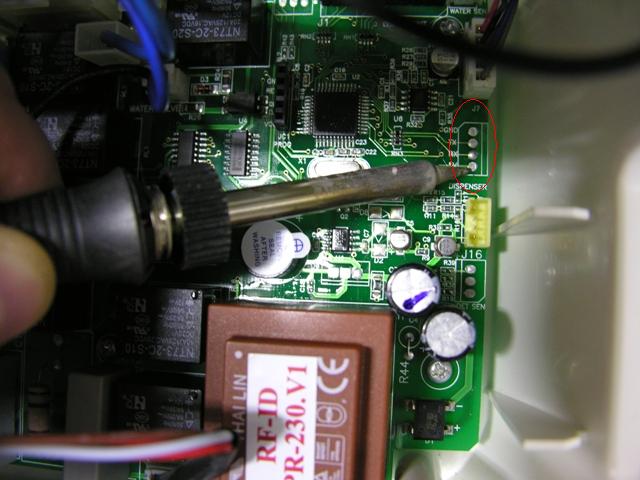
The programming cable can be installed without any soldering to connector JC1, circled in red:
With anything you do, be very careful with the flexifoil to the control panel, connected to J1. It is very delicate and any uncareful handling can damage it permanently. Unlike regular flexifoils, this one is made from plain cheap plastic, making it melt at the slightest touch of a soldering iron. Be very careful to avoid this.
With a little bit of skill and decent tools, the serial port can be installed on J18 as well:
https://raw.githubusercontent.com/CatGenius/catgenius/master/documentation/wiki/PU_serial_port.JPG
Use soldering wick to open the holes and mount a 4-pin header from the top side.
The closing
Before closing the box, first put back the cartridge holder. Don't forget to reconnect the lead coming from the RFID tag reader back to connector J16. It will fit only one way. When putting back the cartridge holder, make sure the hoses en up below the resting strut in the front shell at the bottom of the holder. Avoid tight bends, avoid the hoses being close to the struts for the screws and avoid the spring like armory to make contact with anything electrical.