In Depth Guide to Bringing Custom Models and Textures into PAC3 (2019 Revised) - CapsAdmin/pac3 GitHub Wiki
Guide by Ameno, originally made in 2014
Edited March 7th 2016 to update the method with how Dropbox works now, and to remove info about the recently/soon to be defunct Copy website.
Edited December 2018 to change a few things around relating to gma extraction and to add general pointers for bodygrouped models and dropbox links.
(I am attempting to adapt this guide from a thread I made on a phpBB forum)
So I've noticed within the last year that plenty of people don't get the concept of importing custom models into Garry's Mod through PAC.
This results in people using workshop models that only they have on their client, causing most other people to see Half-Life 2 water cans (the default ERROR model in PAC).
So this is a descriptive guide on how I import OBJ's and textures into PAC3 for everyone to see.
Before you read, here's a couple things you should not expect to be able to do after following this guide:
- Import entire ragdolls and bonemerge them to your body. When you convert a model to an OBJ, all the bones vanish. The reason you see some people using full on bodies is because we cut the models up limb by limb in a modeling program, and export each one, one at a time as a separate model. We then spend time lining up each body part to every corresponding bone on the player model. An example of this is the Canti/Kanti PAC I made:
.jpg)
- Import models that have multiple textures. As you know, you can only apply ONE texture to a model with PAC. A common example of this is importing a model that consists of metal and then glass. Usually the glass would be a different texture, so if you applied the metal texture, it would look really off. You CAN do this flawlessly if you use a modeling program to cut up the polygons based on the material they're using, and export them each as their own model (Like cutting the windows out of a vehicle model).
So here's how you start:
STEP 1
GET VTFEDIT: You use VTF Edit to convert textures/materials to JPG's. This is a must, or else your model won't have a texture.
STEP 2
GET CRAFTY: Crafty is a multi-purpose program. In this case, you will be using it to open Model files for Garry's Mod, and turn them into OBJ's, which is EXTREMELY easy.
STEP 3 (Skip step if you don't want something from a Workshop addon)
This is for if you plan on using models and materials from your WORKSHOP addons. You don't need this if you find your models and materials elsewhere. When you subscribe to a workshop addon, launch your game, and go through the mounting process on the main menu, it will appear in your Addons (steamapps\common\GarrysMod\garrysmod\addons) folder as a .gma file. This is basically a .zip or .rar archive, except it's a special Garry's Mod specific format that requires an extractor to open and extract it. If you want to extract a gma, in Windows, try to open the gma, and tell it to use the program gmad.exe in steamapps\common\GarrysMod\bin. If you run a .gma through gmad.exe, it will extract into addons under the same name as the .gma. Should contain the models and materials.
STEP 5- TURNING YOUR MODELS INTO OBJ'S AND TEXTURES/MATERIALS INTO JPG'S.:
Next. Find the model you want (models folder with the .mdl file and etc, if you were using Step 4, find where you extracted the model to). In this case, I want Hoxton's mask:

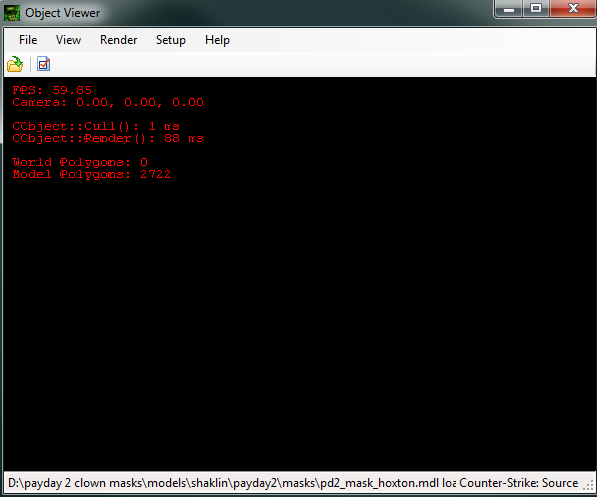
You want to open the .mdl file. It should have a green icon over it like mine does in that screenshot. If it doesn't you want to right click it, and open with program -> Crafty.
Once you open the model with Crafty, it should look like this:
As a sidenote, if the model isn't what you expected, it could be a heavily bodygrouped model. As an example, let's say you have some character model, you open it, and it only appears as a floating head or a body without a head, it's because the model was compiled with bodygroups. I will not cover bodygroup extraction in this guide, but what you need to know is you need a source modeling toolkit/program called crowbar, and you need to decompile the model, you will get .smd files, you convert the smd's into obj's. In a lot of cases though, they lose textures and I personally never figured out how to remap textures
If you click and drag around and use WASD on the black box, it's like using the PAC camera. You can get a view of the model. Using this method, the model WILL NOT have any textures. So you will have to hope it's the right model. Next, you click on File -> Export. Choose where you want to export the model, and save the file type as an OBJ file. Name it whatever you want, in this case, I will name this Hoxton Mask.

Now you want to find the texture for your model. There is really no way of telling which texture is the one you want if the person who made the model didn't name it descriptively. Go to the materials folder of whatever directory your model is in/extracted workshop addon. In this case, my models were in payday 2 clown masks\models\shaklin\payday2\masks, and my textures are in payday 2 clown masks\materials\models\shaklin\payday2\masks.
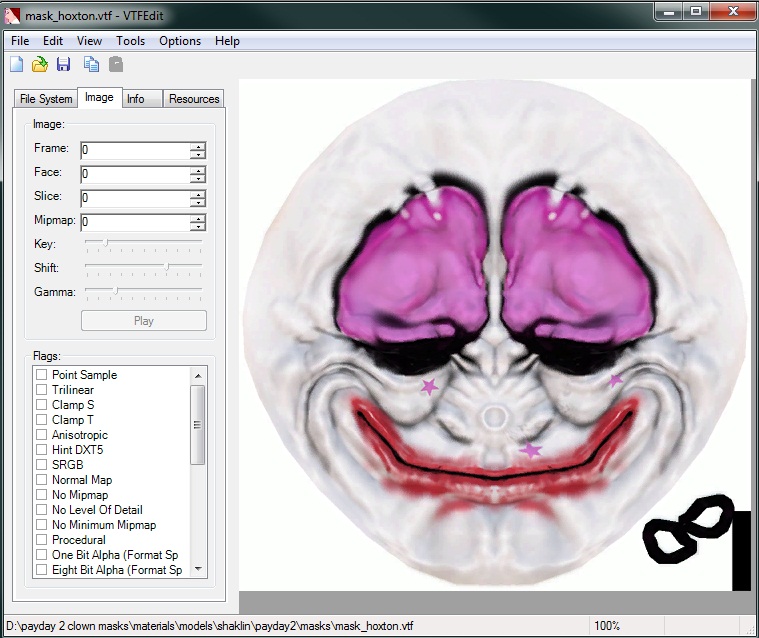
I want Hoxton's mask material, so I will now open it in VTFEdit. You want to find a .vtf file to open the texture with. .vmt files contain extra info for the Source engine to tell it extra parameters to use with the model, and isn't completely necessary all the time.
- NOTE: SOMETIMES THERE WILL BE MULTIPLE TEXTURES LIKE YOU SEE HERE. IN THIS CASE, THESE ARE SPECULAR AND NORMAL MAP VERSIONS OF THE TEXTURES, AND THEY WILL LOOK VERY WEIRD AND MISCOLORED. OPEN ALL THE TEXTURES YOU HAVE UNTIL YOU GET ONE THAT YOU THINK LOOKS RIGHT. In my case, it was mask_hoxton.vtf
Here's what it looks like after I open it:
Now what you want to do is click File -> Export and choose where you want to export the texture/material to. In this case, I will put it in the same folder as the OBJ, and leave the name the same as what was already there. You want to save this as JPEG FILE.

STEP 6:
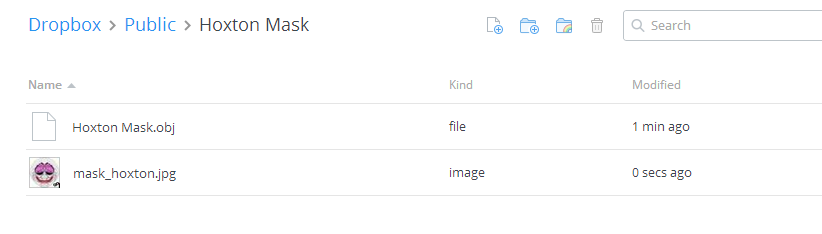
Now that you have your model and material/texture as an OBJ and JPEG file, you want to put these on a website so you can stream them in PAC. The thing almost everyone uses is Dropbox. Make a Dropbox account if you don't have one: Dropbox.com. Next, you want to open Dropbox and make a new folder. Then you upload the OBJ and JPEG into that folder. If you want to stay organized like how I try to, make a folder INSIDE the folder you just made. In this case, I am going to make a folder called Hoxton Mask. Now, when you're in the folder you want, upload the OBJ and the JPEG file to this folder.
This section may be slightly old or off, the gist of it is you need the direct public links to texture, and a direct (dl) or www. link to the obj on Dropbox
Alright, so let's say you want to use the OBJ in PAC. Click on the listing for the OBJ you want in dropbox (In this case, it's the Headless Horsemann's head) and click on  the Share button on the right
- For this screenshot and the next couple, I have updated it in 2016. I am using a different model as an example here.
A popup should now appear:
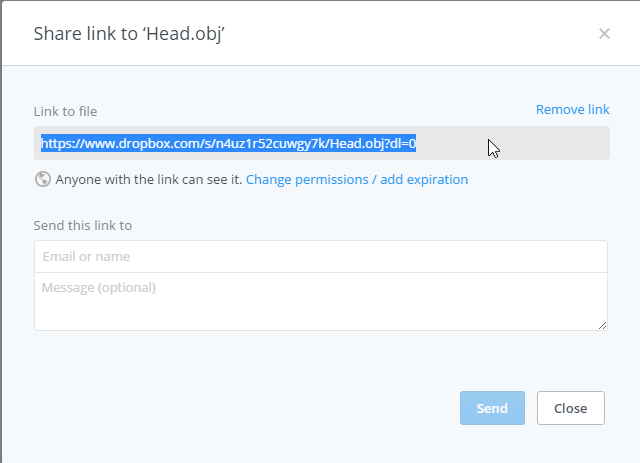
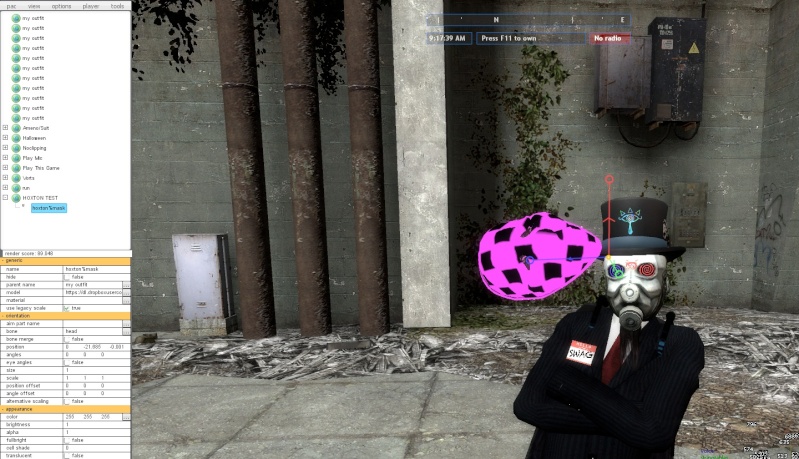
Copy the URL at the top that ends with dl=0. Go into PAC, make a model part, and paste that URL you copied from Dropbox into the model field. Depending on how large the model is, it will eventually load up but you will notice it's missing textures.
Go back to Dropbox, find the JPEG of the texture you wanted, Copy the link for that, it will look like this: https://www.dropbox.com/s/a29cbkl0o4b784/my_texture.jpg?dl=0. In order to make it work, all you have to do is change the www. to dl. just like this https://dl.dropbox.com/s/a29cbkl0o4b784/my_texture.jpg?dl=0
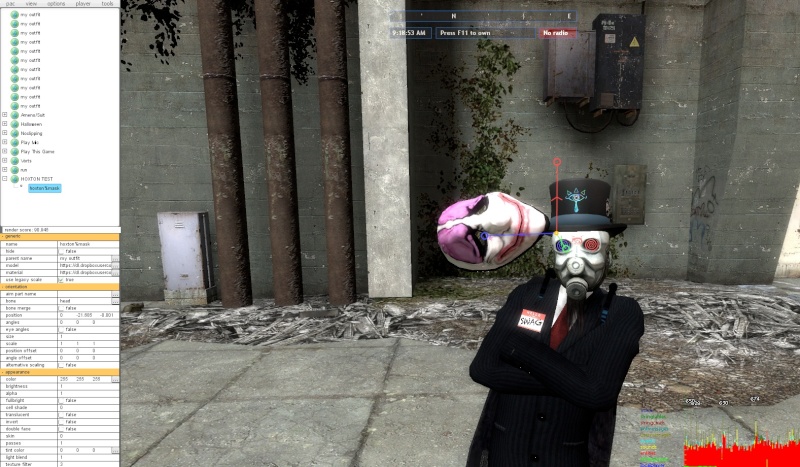
go back to the model in PAC, and paste the texture URL with dl. instead of www. in the Material field for that model. Give it a moment, and the texture should finally load up.
After notes:
-
If you apply the texture, and you notice it looks extremely blocky/pixelated, change the "Texture Filter" field on that model in PAC to 2. 2 will smooth out the texture and make it look nicer. Every other number does nothing.
-
Sometimes a texture will load up completely black, or another player will say they see a black texture, while you or another say it's loading up fine. It's different for every player, and it happens a lot more often if the JPG isn't exactly 1024x1024 in size. You can also try 512x512 or even 256x256 dimensions if you're still having problems. Texture quality may look worse...
-
If a model just simply doesn't show up, or it's all broken and mangled looking, it's either too large in filesize, or it just won't work. Happened to me a couple times. (Try not use an OBJ larger than 2MB. I have had it happen to me on a 1.5MB model once.)
That's it for this guide. If you're having any problems with the programs, you should probably search somewhere else for help getting them started. If you need me to be more descriptive about something, I will try to add it to this post. I hope you understand this is the reason why people never answer you when you ask how to do this. It's a lengthy but easy process that just has too many steps to explain without a guide and proper knowledge.