Creating an HTML Tutor Interface - CMUCTAT/CTAT GitHub Wiki
This page is the first of several showing how build a CTAT tutor for a very simple math operation. These pages illustrate the different features available to you for building example-tracing tutors. We will follow the steps used to design an ITS (only focusing on 2-7 for this procedure):
- learning objectives, CTA, interface design
- create tutor interface
- record problem-solving behavior
- generalize behavior graph
- annotate behavior graph
- generate isomorphic problems
- deploy in LMS
- pilot test, polish, deploy for real, gather data, use to improve
It is recommended to follow the demo tutorial in parallel with performing all the steps simultaneously.
For the demo, we will create a tutor for a simple Math Challenge where you can select from a dropdown whether you want to add or subtract. After selecting the operation, the learner can write any two numbers and perform the operation on them.
We will begin from the 2nd step (create tutor interface) by creating the HTML interface in the HTML editor. You have 3 different tutor interface options when you are designing, but we will only cover interfaces designed through the CTAT HTML editor in this course (if you have prior HTML/CSS skills feel free to explore the other 2 options):
- Drag-and-drop interface building - the CTAT HTML editor lets you build an interface without coding, but the resulting interface is somewhat limited
- HTML5/CSS/Javascript by hand - requires prior knowledge of web development, but allows for custom components
- External problem-solving environment or simulator - needs to be integrated using custom programming
Drag-and-drop interface building
You can take a look at the HTML editor video here before you begin reading about the interface components below: InterfaceComponentsOverview.m4v(This video was created using the old version of CTAT so the CTAT website will look different but all the components shown are available in the new version)
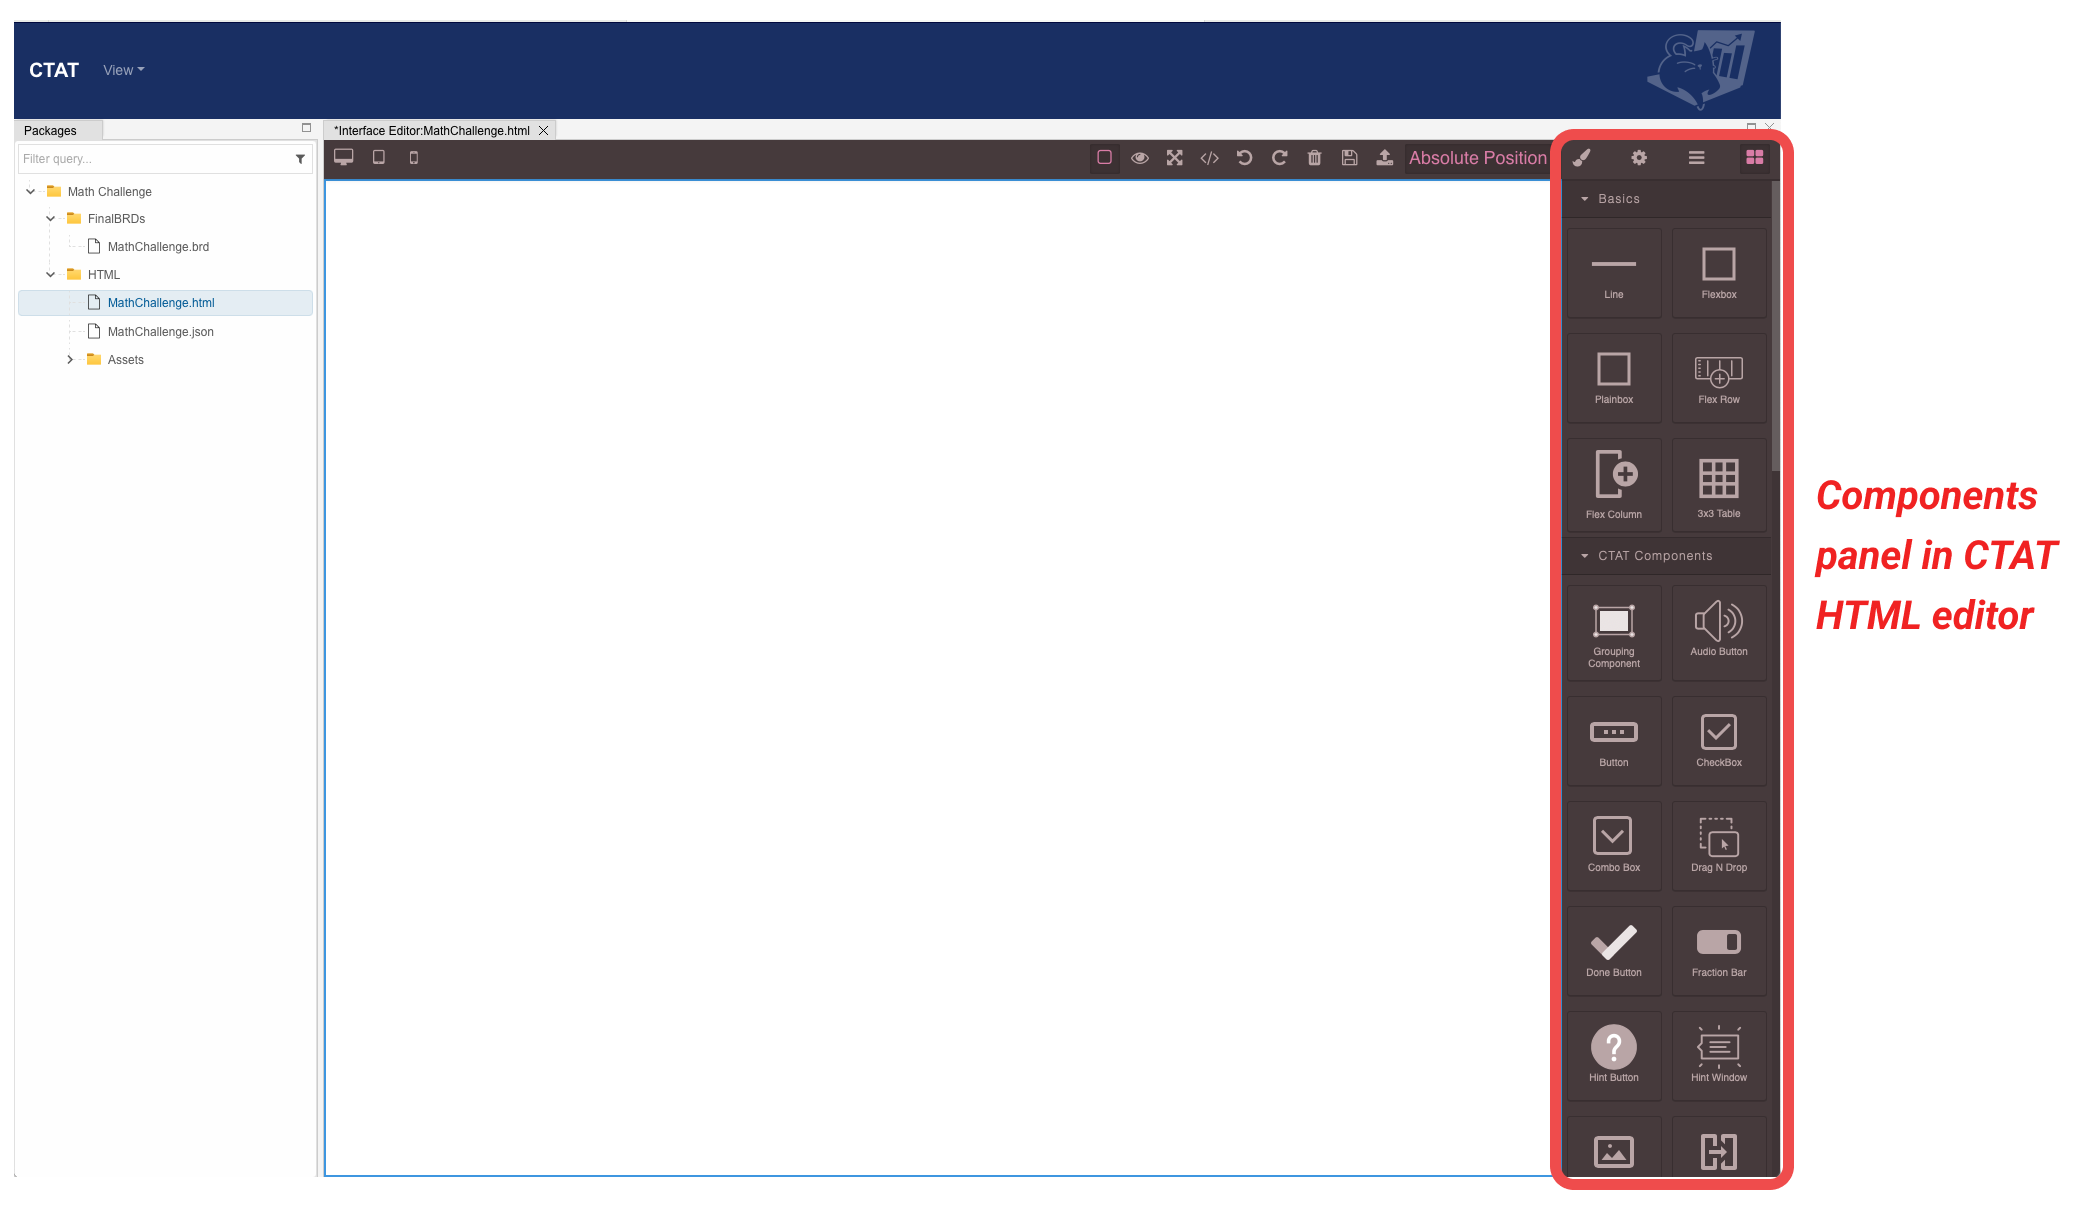
CTAT HTML editor: You start from an empty canvas with space for creating a general problem layout using drag and drop. You should make yourself familiar with all the components available to you in the left side panel so you can think of what is possible in the CTAT HTML Editor: CTAT HTML Component Overview
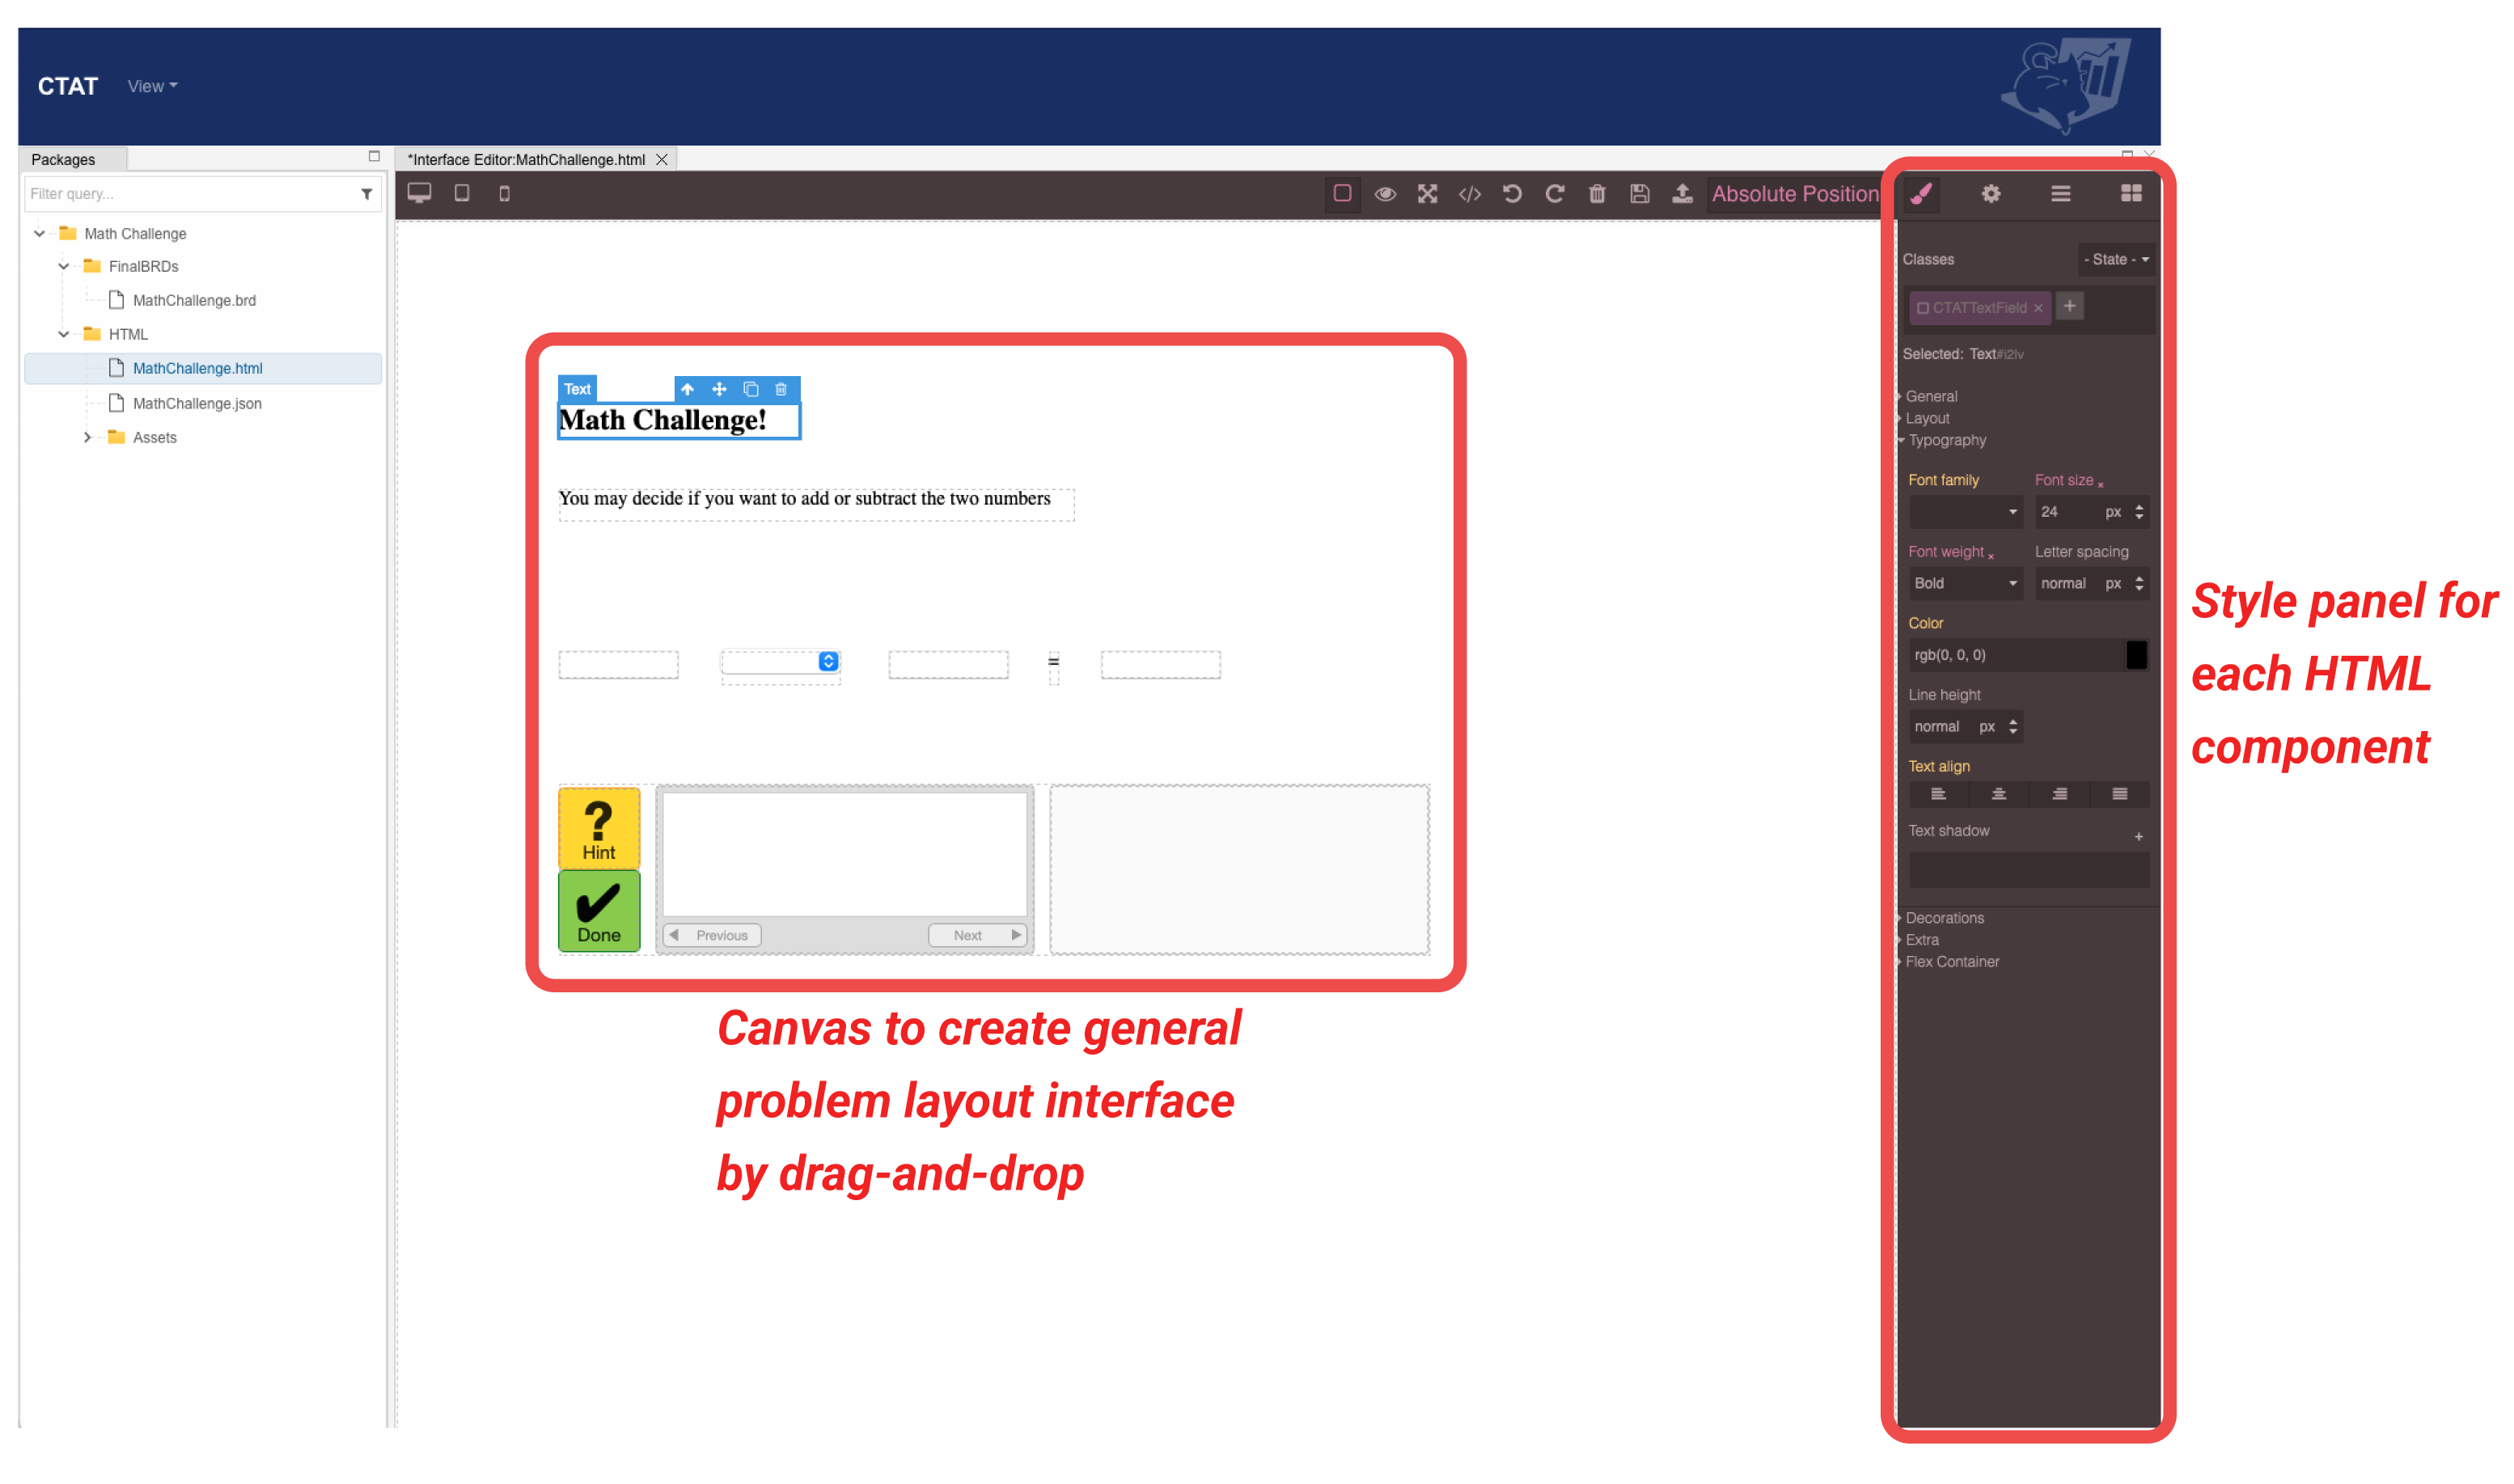
 We want to create a tutor like this:
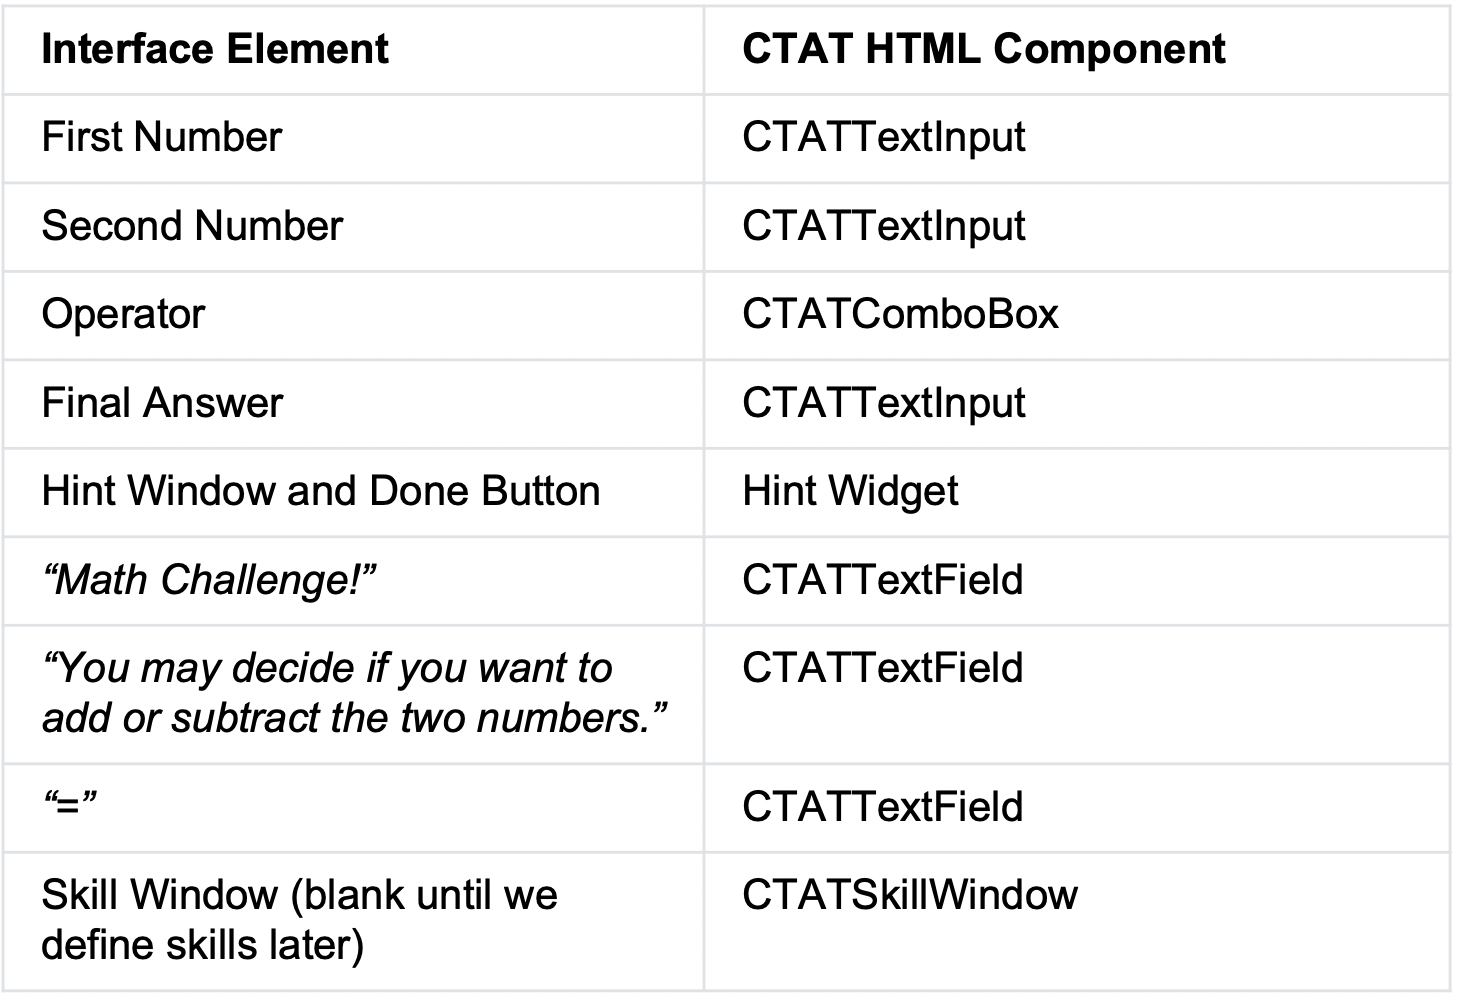
 Based on our needs, we will be using the following HTML components listed here:
 When designing an interface, you should ensure that each component has a unique id in the Component Settings Panel. The behavior graph will reference these unique IDs, so it's a good habit to use IDs that you (or a collaborator) can easily understand.

Optional - HTML/CSS coding
With HTLM/CSS coding, you have to hand-craft each feature and component (or you can modify the interface you created in the HTML editor after downloading it). If you want to code a component which will be tutored, make sure that you are following the source code here:
External problem-solving environment or simulator (optional)
This needs to be integrated using custom programming. See the documentation here: https://learnlab.org/opportunities/summer/readings/ctat%20tutors%20in%20moocs%20its%202016.pdf