Annotating a Behavior Graph - CMUCTAT/CTAT GitHub Wiki
This page continues a tutorial for building a very simple math tutor.
Table of Contents
Hints
You can take a look at how to add hints here: How to add hints.mp4
When a student requests a hint, the first (top-level) hint from the relevant link is displayed. A link can have multiple levels of hints, where each successive hint request by the student displays the next level of hint.
The hints in the first level are general and as you move down each successive hint becomes more specific. The last hint is commonly a bottom-out hint, a hint that informs the student of the correct answer so that they can continue. This approach, however, can facilitate students’ "gaming" of the tutoring system by clicking through to the final hint for each step of the problem.
Only correct action links can have hints associated with them. If you switch the action type of a correct action link to one of the other types, you will be prompted to choose what to do with the existing hints; you can convert them to buggy (error) messages or remove them from the link.
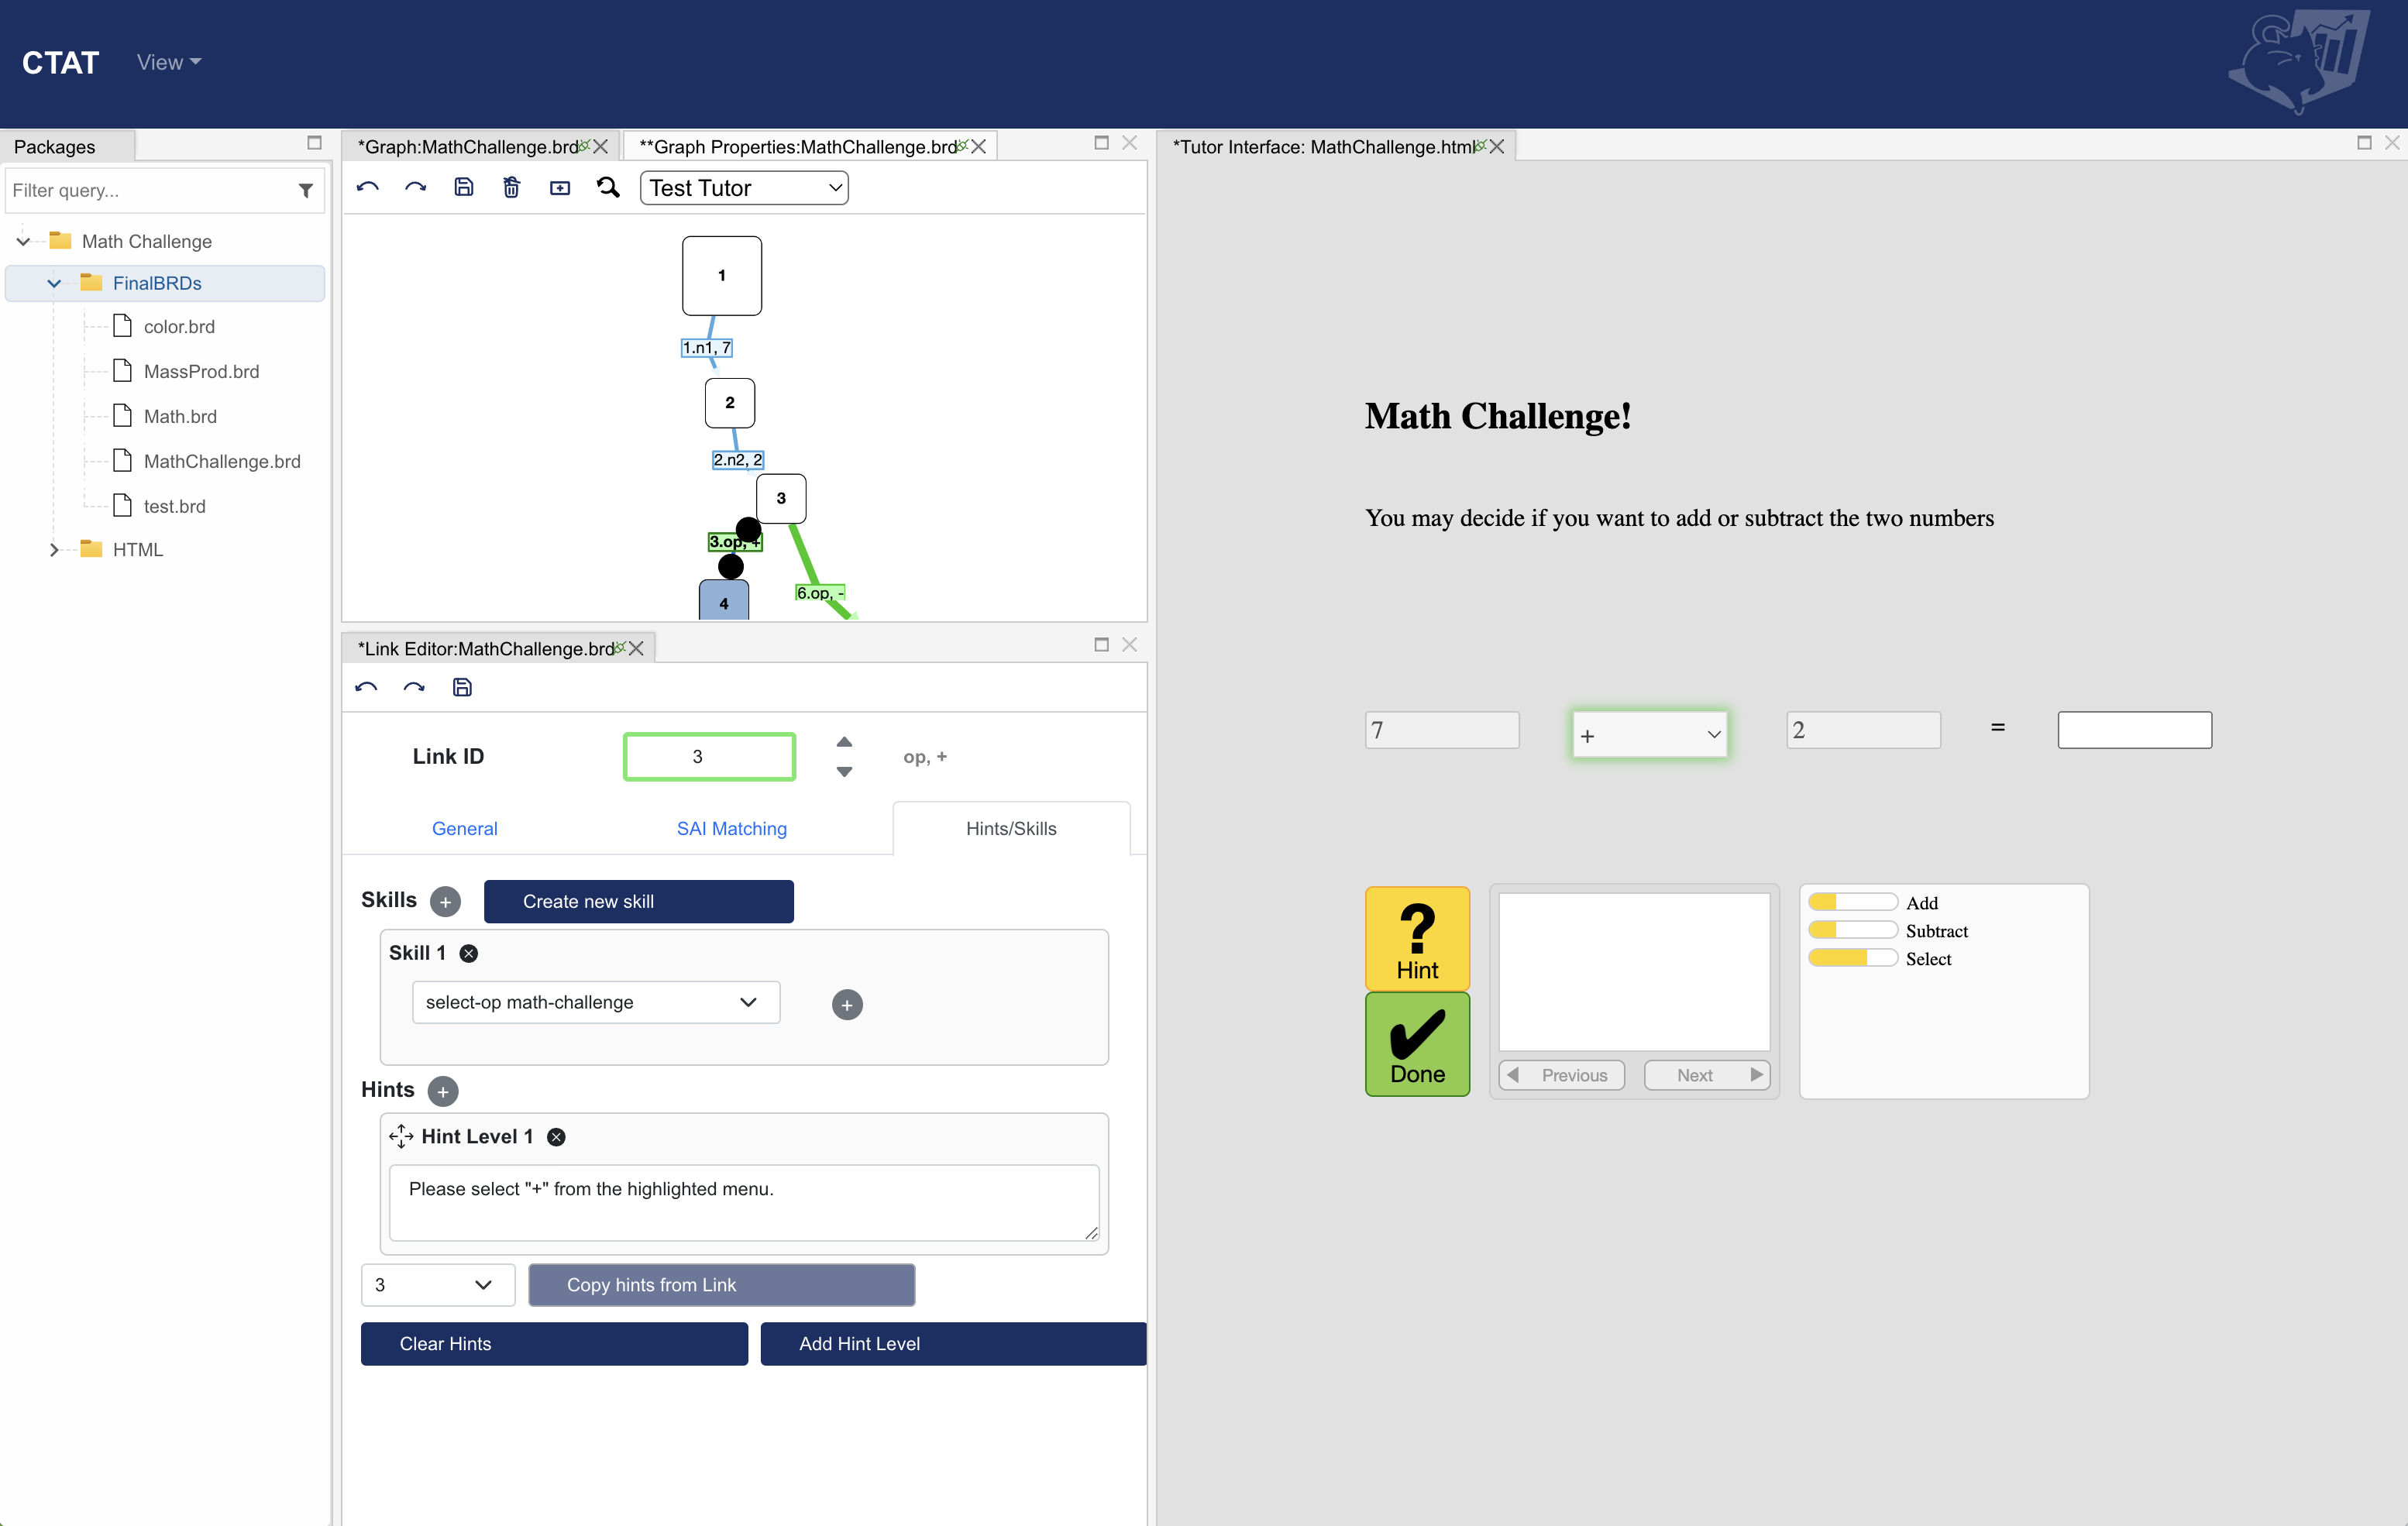
For example, if you want to add hints after a student selects the + operator. Click "Hints/Skills" in the Link Editor and select Add Hint Level to write 3 hints:
- Hint Level 1: How much is 7 + 2?
- Hint Level 2: Start at 7 and then count up 2.
- Hint Level 3: Please enter ‘9’ in the highlighted field.
Notice how each successive hint is more direct than the previous on what the student needs to do. Defining 3 levels of hints is only a guideline. It does not have to be 3 depending on the context, but that is generally practical.
You can also highlight the next step so that clicking on the hint button also tells you which input to work on next, to learn more about it watch the video here: How to highlight next step.mp4
You can also change the preferred step that you want next-step hints to focus on if there are multiple paths: How to set up a preferred step.mp4

Skills
Each link on a behavior graph can have any number of skill labels associated with it. A skill label is a tag used to describe a piece of acquired knowledge that is associated with a step (link) in the graph.
When applied consistently to steps in a problem, labels facilitate many types of analysis of the data generated by student use of the tutor. Such analysis based on knowledge components can be accomplished using the PSLC DataShop, a web application that facilitates learning science research through advanced reports and queries. Using DataShop, you can easily produce learning curves and other reports from log data coded with skill labels.
To create skills for your behavior graph, click Hint/Skills > Create new skill.
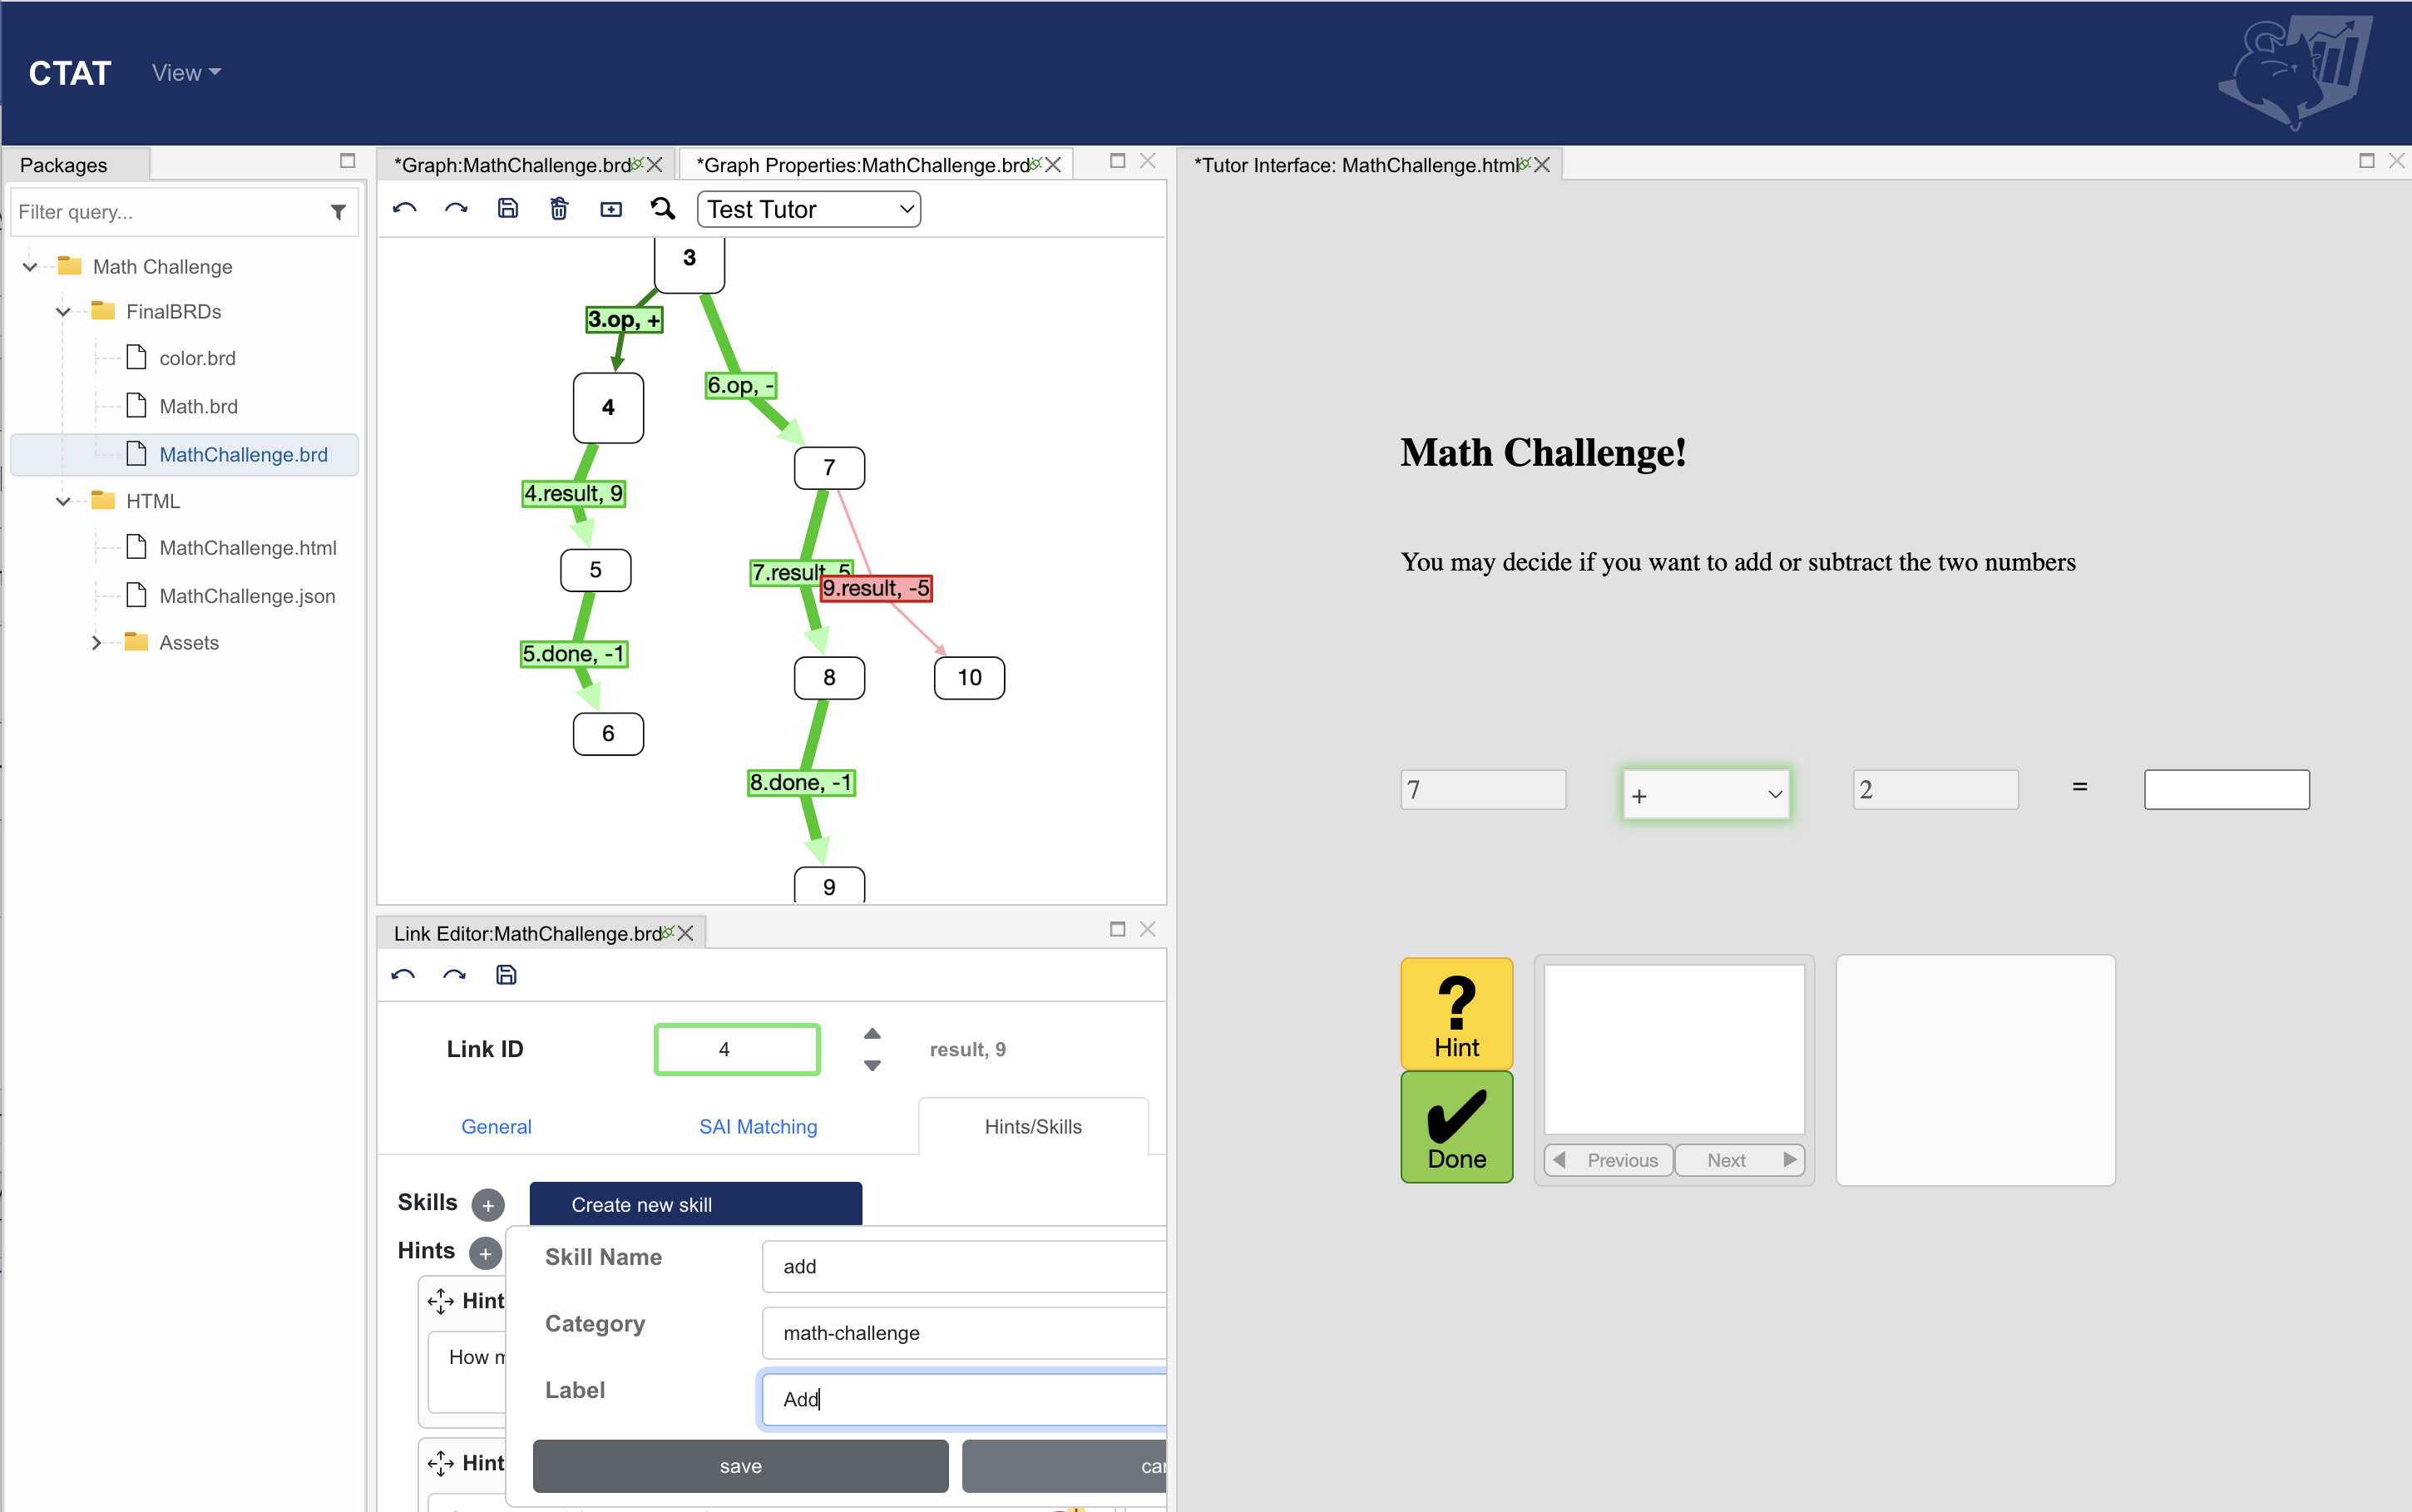 For each skill being learned in the above tutor you have to enter the following parameters:
Skill Name: Naming convention you want to use to be displayed in the behavior graph
Category: Generally used to differentiate across a group of skills in different tasks
Label: Label you want to use for each skill in the skill bar to be displayed to students.
| Skill Name | Category | Label |
|---|---|---|
| select-op | math-challenge | Select Operator |
| add | math-challenge | Add |
| subtract | math-challenge | Subtract |
After you are done defining the skills, you can see the links added to a particular skill. (In case you can’t see the skill bar, save the file and relaunch the tutor interface).