Unreal Engine 3 Kismet User Guide - BLCM/BLCMods GitHub Wiki
This page is a partial mirror of the Unreal Editor 3 Kismet User Guide, available: https://api.unrealengine.com/udk/Three/KismetUserGuide.html
Epic's Unreal 3 docs disappeared from their site for awhile in August 2018, which is what prompted this mirroring. They're back online now, but this mirror will remain just in case they ever go offline again.
This document isn't actually directly useful to Borderlands modders, since we don't have access to the actual Kismet editor which the Borderlands developers have, but if you're interested in modding Kismet sequences in BL2 or TPS, it may help to at least take a look at what Borderlands devs see when they edit this stuff. A basic overview of Kismet sequences can be found on our page for Kismet Sequence and BehaviorProviderDefinition Basics. This mirror omits many of the sections which are completely useless to modders, such as the specifics of dealing with UE's Kismet Editor UI. There's no need to know what hotkeys they have available, etc.
UnrealEngine3's UnrealKismet tool is a very flexible and powerful tool that allows non-programmers to script complex gameplay flow in level. It works by allowing you to connect simple functional Sequence Objects to form complex sequences. This document will give an overview of the UnrealKismet interface and how to create sequences. See the KismetReference for a description of the different types of Sequence Objects that are available, or KismetTutorial for a walk through of creating a simple sequence.
This pane is the workspace for creating Kismet sequences. It displays all of the actions, conditions, events, variables, and subsequences that belong to the current sequence. New sequence objects are added and connections are made between them here.
There are 4 categories of Object you will place to make up your Sequence
| Type | Image | Description |
|---|---|---|
| Event | 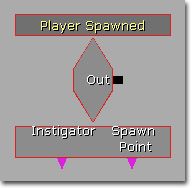 |
These are objects which create an "input" to your sequence, possibly from an Actor in the game. They are denoted by a red diamond. |
| Action | 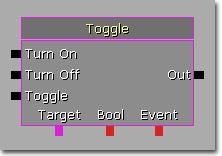 |
These are objects which perform some action on the Actors in your level. Denoted by a box with inputs on the left, outputs on the right and variable connections on the bottom. |
| Condition | 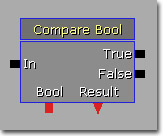 |
These do not actually affect the level, but the control flow of your sequence. |
| Variable |  |
These objects simply store information of a particular type for use by an Event, Action or Condition. They are denoted as a colored circle. |
The color of a variable indicates its type. The different colors are:
| Color | Type |
|---|---|
| Red | Bool (true or false) |
| Blue | Float number (e.g. 1.54) |
| Cyan | Integer number (e.g. 3) |
| Green | String (e.g. "Foo") |
| Gold | Vector (e.g. (0.5, 2.75, 5.5) ) |
| Purple | Object reference (e.g. an Actor in the level), Object List, Object Volume, or Player |
| Orange | Matinee Data |
| Black | Unlinked External or Named variable |
Here is a small example of the kind of sequence you may put together in Kismet:

In this case, when a player touches Trigger1 in the level, it will turn on PointLight_0. Black lines in Kismet represent "flow of operation". Following the arrows will show you the order in which actions will happen. The colored lines are simply connections between variables and an object.
Different Actors in the level will support generating different events. For example, a Trigger actor supports a Touch an Untouch event. To create a new Event in your Kismet sequence, select the Actor(s) you wish to create the event for in the main UnrealEd viewports and right click in Kismet to bring up the New Object menu. If the Actor(s) belong to the same level as the Kismet sequence, there will be a submenu called "Create Event Using ..." giving the name of the Actor you selected. That submenu will contain all the Event types that the Actor supports. Choose the event type you want and the new Event will appear. If the Actor has a sprite associated with it, it will draw it in the middle of the diamond.
If you select more than one Actor in the level and choose "Create Event Using.." it will create one Event for each Actor. Also, if you double-click on an Event, it will jump the UnrealEd camera to that Actor.
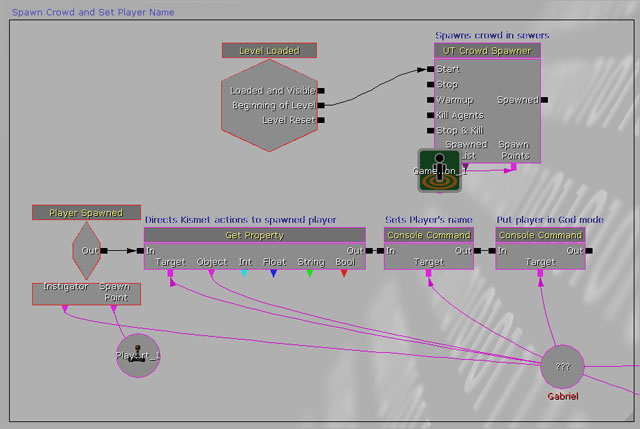
Sometimes the object that you want to have trigger an event is not present when editing the level in the editor. An example of this might be a creature spawned in-game. To solve this problem, you can "attach" an event to an object in a variable at runtime. Look at the example below:
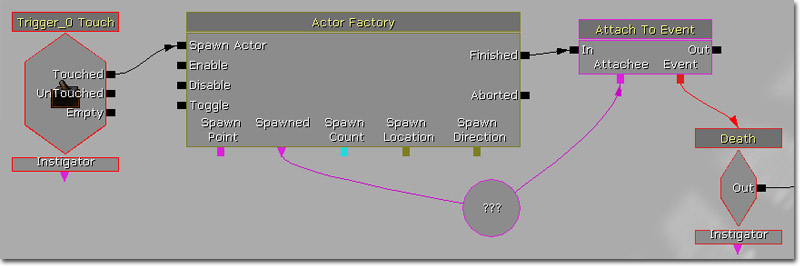
When the Actor Factory is executed, it creates a new actor and places it in the object variable (currently empty). It then calls the AttachToEvent action, to attach the Death event to the contents of the variable. Then, whenever the actor dies, that event will be fired. Note that this Event is not associated with any Actor when authoring the sequence in the editor.
When you make a new variable using the New Variable submenu, it will start off with the default value (usually 0 or empty). You can change its value by simply editing its properties. A quick way to create a new variable of the correct type and attach it to an existing variable connector is to right-click on the connector and choose "Create new ... variable".
You can also create Object variables containing a reference to an Actor in your level in the same way as creating Events. Simply select the Actor or Actors you wish to create variables for and choose "New Object Var Using...". To assign an Actor reference to an existing Object variable, select the Actor, right click on the variable and choose "Assign .. to object variable(s)". Double-clicking on an Object variable containing a reference to an Actor will jump the UnrealEd camera to that actor in the level in the same way as Events.
Most Sequence Objects have an ObjComment property. Any text you enter in there is shown above that object in blue text (see item 18 in the picture below). This lets you explain what this object is for, and can make understanding complex sequences or sequences written by other people much easier. See also the "Comment Boxes" section later in this document.
One powerful feature of UnrealKismet is the ability to create "sub-sequence" objects containing their own sets of sequence objects. In this way you can build a complex hierarchy of sub-sequences. You can use the Sequence Explorer Window (item 14 in the picture earlier) to see the current hierarchy and move around it. Each subsequence remembers its last view position and zoom.
To create a subsequence, simply select the objects you wish to place into the subsequence and choose "Create new sequence" from the New Object context menu. You will be prompted to enter a name for the new sequence. The selected objects will then be replaced by a single subsequence object. You can tell subsequence objects from regular objects by their blue title bar.
You can also create input, output and variable connectors for your subsequences. To create a input, add a "SequenceActivated" event to your subsequence. To create an output, add a "Finish Sequence" action. To create a variable connector, add an "External Variable". When you first place an External Variable, it will have a black outline, and the variable connector will be black. This is because the type has not been defined. To set the type, simply connect the External Variable to something, and it will take on that type and change color accordingly. You can change the connector name shown by the sequence in its parent by changing the InputLabel, OutputLabel and VariableLabel parameters.
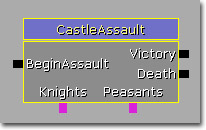
Here is an example subsequence:

And here is what it appears as in the parent sequence:
You can rename a subsequence at any time by right-clicking on it and choosing "Rename selected sequence", or while you are inside the sequence pressing the "Rename current sequence" button (item 2 on the picture earlier).
One problem you can run into with a complicated sequence is that you need to reference one variable from many places, at many points in the Sequence hierarchy. Though you can solve this problem using chains of External Variables, "Named Variables" provide another, simpler way.
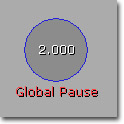
To use a Named Variable, first you have to give a name to an existing variable. Enter the name in the VarName field in its properties. When you do this, you will see its name in red underneath:
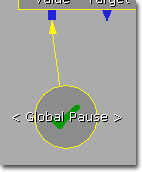
It is now possible to access this variable from anywhere in your sequence by using a Named Variable. To do this, add a new Named Variable using the New Object menu. Initially it will look like this:
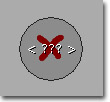
The black border means that it has no type - this is established when you first connect it to something in the same way as External Variables. The "< ??? >" in the middle means you have not yet given it a variable name to look for. To give it a name, you just enter it as the FindVarName property of the Named Variable. If we then connect it to and Int variable connector, and assuming an Int with that name is present anywhere in the levels sequence hierarchy, it should look like:
The tick inside the Named Variable indicates if it is having any problems. If you see a cross it could mean one of the following:
- Named Variable has no FindVarName.
- Named Variable has no type (has not been connected to anything).
- No variable could be found corresponding to FindVarName.
- The variable corresponding to FindVarName is of the wrong type.
- There is more than one variable corresponding to FindVarName.
If you see a cross you can find out what if going wrong by holding the cursor over the Named Variable and looking in the Status Bar at the bottom of the UnrealKismet window.
Kismet contains tools for helping you find definitions and uses of Named Variables. If you right click on a Named Variable, you can choose the "Find Definition Of ..." option, which will open the Kismet Search window (if not already open) and jump to the variable that this Named Variable refers to. Correspondingly, you can right click on a regular variable which has been named and choose "Find Uses Of ...". This will open Kismet Search and list all Name Variables referring to that variable.
One word of caution. Although Named Variables can simplify your script, the use of External Variables etc instead may make your sequence easier to follow.
Comment boxes are very useful for graphically grouping and annotating groups of objects. To create a comment box, select what you want to group and choose "New Comment" from the New Object context menu (or you can just press the "C" key). If nothing is selected when you create the comment it just creates some standalone blue text. Here is an example of a sequence using comment boxes:
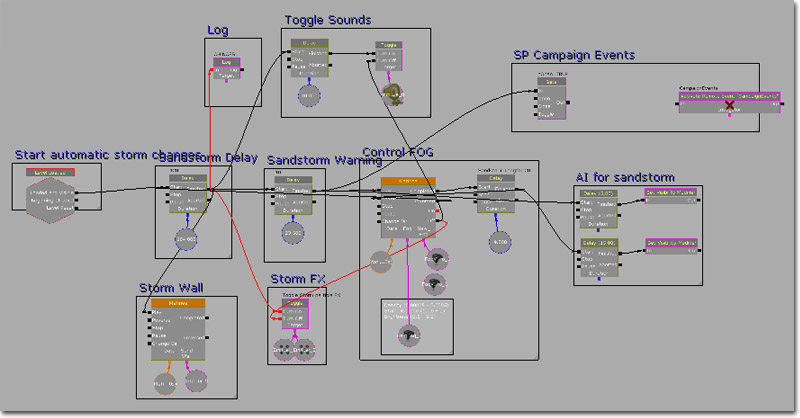
You can resize a placed comment box by selecting it and using the black triangle in the bottom-right corner. You can also change the border and fill color, border width, and even assign a texture or material to the box background. Comment boxes make understanding the sequence much easier and their uses is highly recommended!
In the main UnrealEd viewports, you can open the "Show Flags" drop down (the little black down arrow above each viewport) and check the "Kismet References" option under the "Advanced Options". This will highlight around all Actors which are currently referenced by either a Kismet Object Variable or Event. Actors in the current level will be highlighted with a box, while actors in the non-current level will be highlighted with brackets.
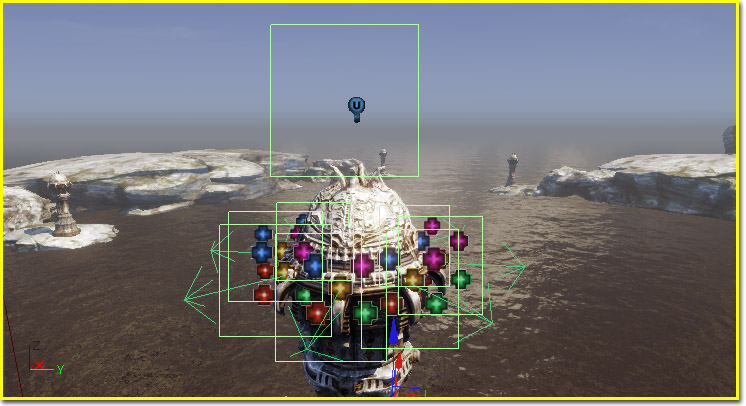
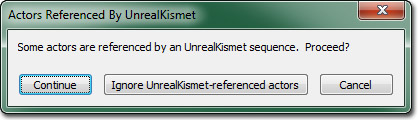
This can be very useful when editing a level for ensuring you do not accidentally re-arrange or remove Actors which the sequence will be using. Also, when an actor is referenced by Kismet and you try and delete the Actor or move it to another level, you'll be presented with the following warning:
In general, Kismet does not execute on the client; it runs on the server and programmers can allow changes that are relevant to gameplay for a given client to be replicated to it. This allows programmers to easily optimize for network performance and prevents sync issues where a client triggers a Kismet event but the server does not, causing changes on the client that do not actually exist on the server.
However, sometimes a Kismet event doesn't affect gameplay at all - it controls an ambient effect, spawns particles, or performs other actions that not only don't need to be in sync with the server but are wasteful in the case of a dedicated server where there isn't a local player to appreciate them. For these cases, there is a bClientSideOnly flag on all Kismet events. When set, the event is only triggered on clients - never on a dedicated server. In effect, when you set it you are saying "this is not important to the game state".