IPos Integration and Release - BBCWiki/IPos-Internal GitHub Wiki
-
Integration and Release Process Guide
- Table of Content
- Introduction
- Dev & Release
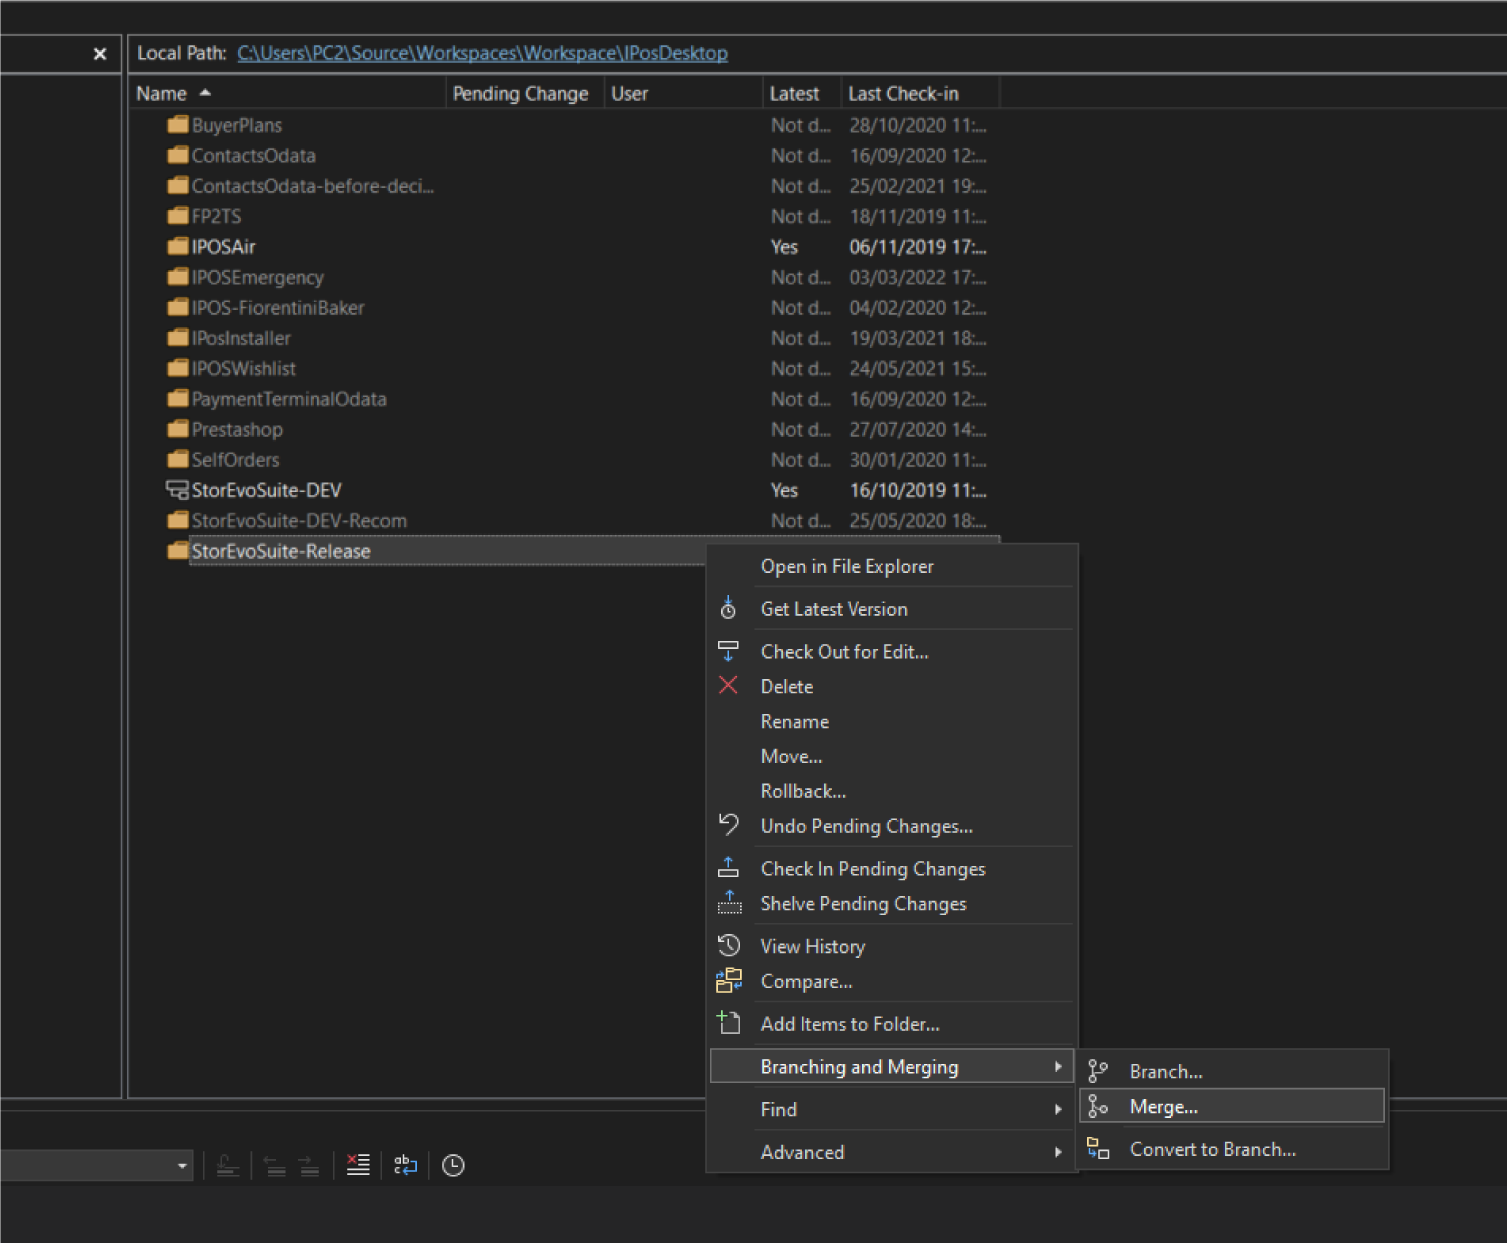
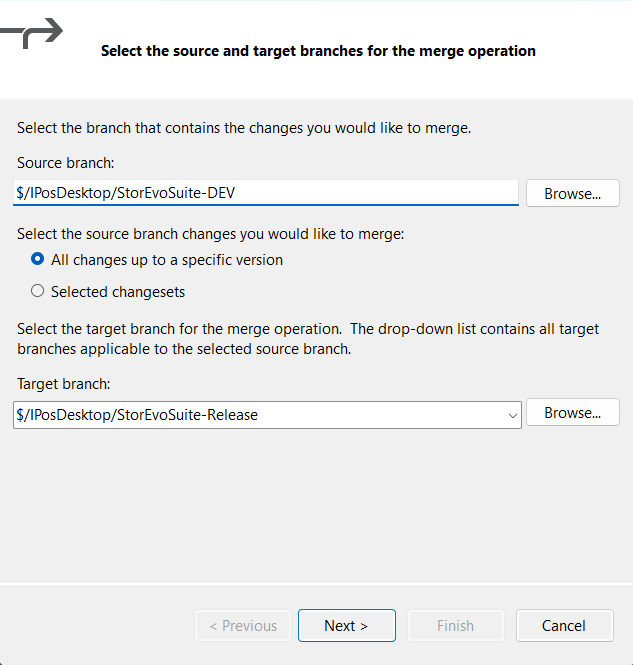
- Merge Dev --> Release
- Integration
- Check-In from all developers
- Get Latest Version
- Build
- Integration Test
- Integrate Release Notes
- Increment Version - on Backoffice, StorevoShop, HQR
- Database Snapshot
- Publish
- \10.5.6.114\wwwroot\IPOS\TestBBC\
- \10.5.6.114\wwwroot\IPOS\Releases\
- Check-In
- Notify Release Manager
The publish process in Visual Studio is a vital step that automates the deployment of applications to different target environments. It simplifies the transformation of source code into a distributable format and offers various publishing options to suit specific project requirements. With support for continuous integration and continuous deployment (CI/CD), Visual Studio ensures swift and efficient software releases, making it an indispensable tool for developers.Below will be presented the steps to follow for creating a new Publish in Visual Studio TFS.
If the new release requires initial testing locally by colleagues, we can publish directly from the development project. However, if the release is intended for deployment in a client's test environment or production, the publishing process must be carried out from the dedicated Release project.the Release is to be put on a test environment of the client/in production, the publish must be done from the Release project.
Open Dev Project → TeamExplorer → Source Control Explorer
The "Check-In from all developers" step involves each developer submitting their code changes to the version control system. It ensures that all code changes are tracked and can be reviewed, shared, and integrated into the main codebase efficiently.

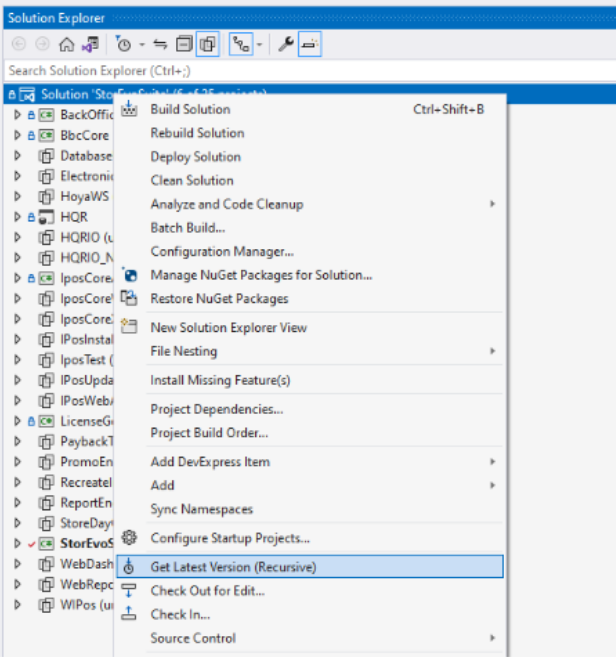
Get the latest version: Access Solution Explorer and go to Project StorEvoSuite → right-click to Get Latest Version (Recursive)
Build the Project to check if there are errors in the code.
To practically conduct integration testing, first establish a separate test environment resembling the production setup. Then, systematically execute predefined test scenarios, monitoring results and addressing integration issues promptly for a reliable release.
In this chapter, you need to integrate release notes into your software documentation to accurately reflect changes and maintain version control and collaboration for consistency.(ensure that the documentation remains uniform and coherent in terms of style, content, and format)
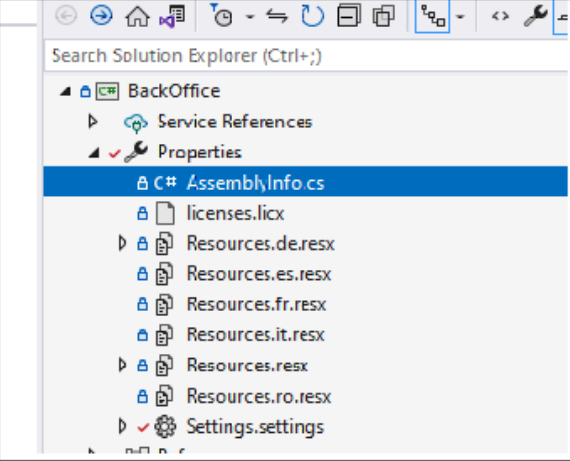
Go to BackOffice (BO) and StoreEvoShop → Properties → AssemblyInfo
Open and Modify: AssembleyInfo in BackOffice and StoreEvoShop
Increment the AssemblyVersion (Example: 1.23.7.4 to 1.23.7.5)
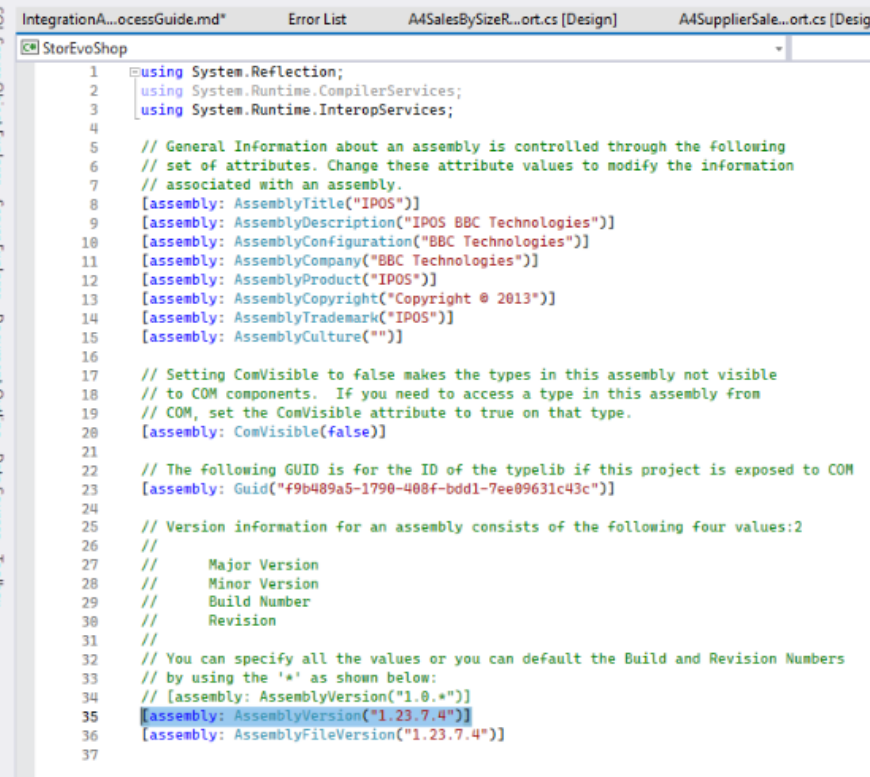
The assembly version "1.23.7.5" consists of:
- Major Version (1): Represents a major change in the software, which may introduce backward-incompatible modifications compared to previous versions.
- Minor Version (23): Indicates the addition of new features without affecting existing functionality.
- Patch Version (7): Contains bug fixes and minor improvements.
- Build or Revision Number (5): Represents a specific build or release of the software.
In conclusion, version "1.23.7.5" signifies a major version 1, with 23 minor updates, 7 bug fixes, and is the 5th build or revision of the 7th patch version. This step (Step 3) needs to be done only if changes have been made to the database, to the sources in the Project (such as procedures).
Check the current version here:
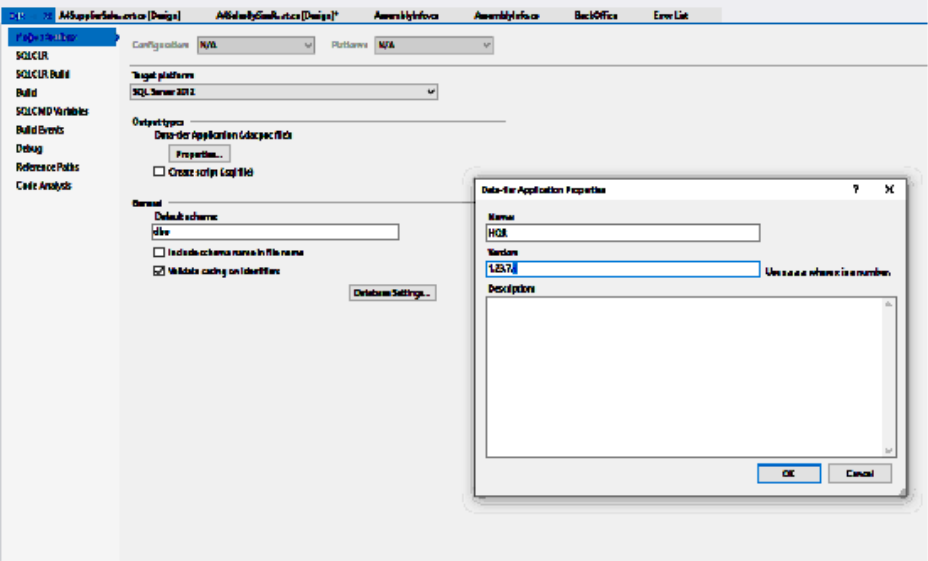
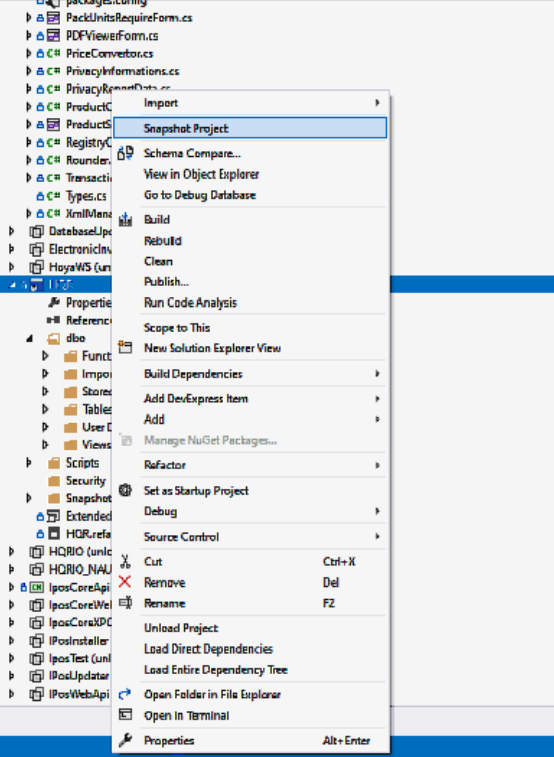
Create a new Snapshot Project and put the number of the version : 1.23.7.5 0
After creating the new snapshot, Build the Project.
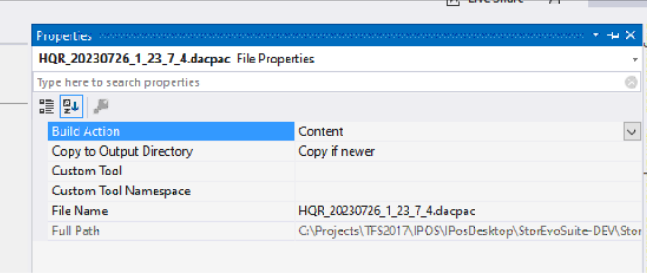
→ Delete the last version (Example: HQR_20230726_1_23_7_4.dacpac") and after that copy the new ".dacpac" file in StoreEvoShop in ApplicationData.
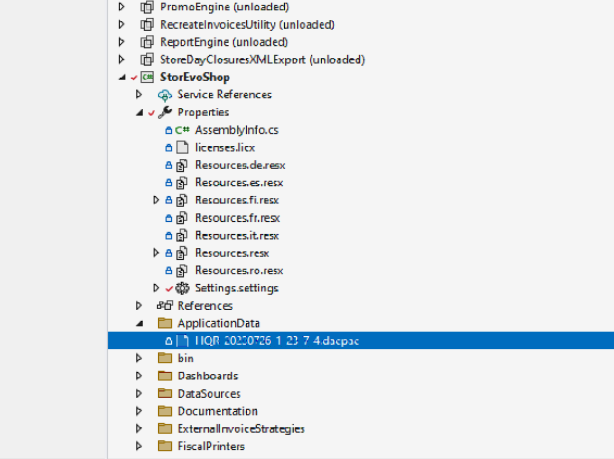
Modify in Properties on ".dacpac" file: BuildAction = "Content" and Copy to Output Directory = "Copy if newer"
Go to StoreEvoShop Project → Properties → Click on Publish

Here we need to specify the location to publish the application and the new publish will be created.
- For testing on our local db - Publish Path is: *\10.5.6.114\wwwroot\IPOS\TestBBC*
- For the client environment (test/production): *\10.5.6.114\wwwroot\IPOS\Releases*
Check-In the project. The purpose of this step is to have all the changes on the project sources. This allows for a specific version of the project to be retrieved at a given moment much faster.
- The next step involves taking over the new version of the application and placing it on the client's server by the technical department. The following details must be mentioned: the version number, the client for which the respective version is installed and the path where it is found (if it is in a special folder of the client or another general one).
- At the same time, it must be mentioned to the technical department and where it must be placed: in the local test environment or in the client's test environment or in certification.
- After the tests in the local environment have been successfully completed, the technical department notifies the client to put them in their test environment, then in certification and finally in production