Testing instructions for critical flows - Automattic/woocommerce-payments GitHub Wiki
See also Critical flows.
[!important] We have renamed "deposit" to "payout" yet the screen captures below may show "payout" or "deposit" interchangeably.
Reference
Shopper
- Ensure you went through the "Merchant store setup" section
- Test the "WooPay checkout" experience with shortcode checkout
- Test the "WooPay checkout" experience with blocks checkout
- Test the "Pay for order" experience with blocks checkout
- Test the "P24 checkout" experience with blocks checkout
- Test the "Bancontact checkout" experience with blocks checkout
- Test the "iDeal checkout" experience with shortcode checkout
- Test the "Klarna checkout" experience with shortcode checkout
- Test the "Klarna checkout" experience with blocks checkout
- Test the "Affirm checkout" experience with shortcode checkout
- Test the "Affirm checkout" experience with blocks checkout
- Test the "Afterpay checkout" experience with shortcode checkout
- Test the "Afterpay checkout" experience with blocks checkout
- Test the "Toggle terms when saving payment methods" experience with shortcode checkout
- Test the "Toggle terms when saving payment methods" experience with shortcode checkout
- Test the "Subscription checkout with Link & payment method change" experience with shortcode checkout
- Test the "Subscription checkout with Link & payment method change" experience with blocks checkout
- Test the "Manage payment method with regular card" experience
- Test the "Manage payment method with 3DSv2 card" experience
- Test the "Manage payment method with declined 3DSv2 card" experience
- Test the "$1M cart limit" experience with shortcode checkout
- Test the "$1M cart limit" experience with blocks checkout
Merchant
- Onboard via WooCommerce Settings - NOX in-context
- Onboard via Launch Your Store (LYS) - NOX in-context
- Manual plugin installation and setup
- Plugin update (via plugins page)
- Manual capture
- Partial refund
- View account balances
- View transactions
- Filter transactions
- Search transactions
- Export transactions as CSV file
- View transaction details
- View payouts
- Dispute created notifications
- Add order notes and update order status when disputes are created or closed
- Save evidence
- Winning dispute
- Losing dispute
- Transaction / Dispute / Payout details for large dataset
- Manual capture from Uncaptured tab in Transactions page
- Manual capture from payment details page
- View Uncaptured transactions in Transactions page
WC Subscriptions integration: Shopper
WC Subscriptions integration: Merchant
- Create a subscription product
- Purchase subscription product
- Suspend (pause) and resume a subscription
- Promote subscriptions with a discount coupon (signup, one-off, or recurring)
- Renew subscription automatically
- Renew subscription manually
Multi-currency: Shopper
Multi site flows
Set up multisite and install plugins
- Add a new site to your multisite network following this guide: PbPjnJ-1x-p2.
- Please request a multi site to be created for you if you don't have access to
specialopson JN.
- Please request a multi site to be created for you if you don't have access to
- Install the required plugins like WooCommerce and WooPayments at a network level.
- Go to the network dashboard by selecting
My Sites->Network Admin->Dashboard.
- From here, select the
Pluginssub menu and upload the plugin zip to install a plugin at a network level.
- In the plugin listing page, you'll be able to see
Networkat the bottom of the plugin.
- Go to the network dashboard by selecting
Manual plugin installation
- Follow the manual plugin installation steps listed for the single site flow.
Plugin update (via plugins page)
- Create a new site and finish setup wizard using United States address as a store address without checking WooPayments on Business Details step (You can also use an existing site if available).
- Install the latest stable version of WooPayments via WP-ADMIN -> Plugins page.
- Complete the WooPayments onboarding and KYC flow.
- Go to WP-ADMIN -> Plugins & click on Upload Plugin to upload the testing package.
- Click on Replace current with uploaded to update the installed version with the new one (screenshot).
- Confirm that the the plugin update is successful without any errors.
- Go to WooPayments pages and confirm that they are loading as expected.
Checkout with a normal credit card
- Add regular product to cart and go to checkout as a guest.
- Confirm that card fields are displayed.
- Fill the form with missing credit card fields, submit form, confirm errors are displayed.
- Fill the form with card number 4242424242424242, future expiration date, and any CVC code, submit the form.
- Confirm order complete page is shown.
- As a merchant, under WooCommerce > Orders, confirm that the latest order was created successfully.
- Under transactions, confirm that the transaction details are recorded successfully.
Test checkout versions
Merchant store setup
- Ensure that "Credit card / Debit card" is the only checked payment method in "WooCommerce > Payments > WooPayments > Payments accepted on checkout"
- The tests below test both "shortcode checkout" and "blocks checkout". Set up two separate pages to test with on your store. Add the checkout block from WooCommerce Blocks plugin.
- As a merchant, navigate to Pages > Add new.
- Add the Checkout block to the page.
- Make sure the Checkout block is rendered without any errors.
- Save the page.
- Go to the store page and add a product to your cart.
- Go to the newly created Checkout page.
- Make sure the newly created Checkout page is loaded without any errors.
Individual checkout version test scenarios
The individual scenarios below are each referenced in the "Shopper" tests section above, as well as the smoke tests.
Add credit card using other payment gateways
Expected outcome: Customers should be able to add credit cards to their account using other payment gateways without errors poping out (in Stripe's context)
Testing Instructions
- Have WooPayments installed and configured
- Have some other Credit Card Payment method installed and configured (e.g.: WC Stripe)
- Enable additional payment method in the WooPayments settings (e.g.: Klarna, or Afterpay, or Affirm, or P24, or any of the above)
- Log in as a customer
- Go to My account > Payment Methods
- Click on Add Payment Method
- Observe that "Credit card / debit card" should be the only WooPayments payment method displayed
- Payment methods from other plugins (e.g.: WC Stripe) should still be available
- Klarna, or Afterpay, or Affirm, or P24, or any of the WooPayments payment methods should not be displayed
- Fill the other gateway Credit Card details
- Try to submit
- The error "Your card number is incomplete" should not show up
Pay for Order
- Add a product and go to the checkout page
- Pay with a declined card
4000000000000002- the error should occur which is expected - Navigate to My account -> Orders and click Pay button in Actions column for the latest order
- Select 'Use a new payment method', fill the form but do not fill some of the inputs.
- Click on 'Pay for Order', check that you see the errors displayed.
- Fill out the form, check the box 'Save payment information to my account for future purchases.', click on 'Pay for Order', verify the order is placed.
- Check that the payment method has been saved, for example from My Account > Payment Methods.
- Set the order again to "Pending Payment" and test with a card that requires confirmation (
4000002500003155). - Test without saving the payment method.
- Repeat steps 1-6 but this time, pay with any non-card payment method (e.g.P24, EPS)
Toggle terms when saving payment methods
- As a customer, add a subscription product to the cart and proceed the checkout page.
- Ensure that the legal mandate is present underneath the payment fields inside on the card page.
- Ensure the "save payment information to my account for future purchases" checkbox is not shown.
- Remove any subscription products from the cart and add a regular product.
- Proceed to the checkout and note that when the save payment checkbox is checked, the legal mandate appears.
- Confirm that this mandate disappears if the checkbox is unchecked.
Subscription checkout with Link & payment method change
- Install and enable the Subscriptions plugin.
- Create a subscription product.
- Enable "Stripe Link" as a payment method
- Add the subscription product to the cart and continue with checkout.
- Purchase a subscription (using a different customer account as the test before) with Stripe Link.
- Go to My account -> Subscriptions and find the subscription you just purchased. Click View
- On the opened details page, click Change payment
- Use a new card payment method and fill the form in with card number
4242424242424242, future expiration date, and any CVC code. - Click Change payment method and confirm that you are successfully redirected back to the subscription's details page
- Confirm that on the details page, in the Payment row, you see the details of the card you just added
- Check ability to renew now on subscription.
- Change renewal date to be sooner if desired (min of 1 hour ahead) and confirm subscription automatically renews.
Bancontact checkout
- Change store billing country to Belgium
- If EUR is your default currency, navigate to WooCommerce > Settings > General and change the currency to USD.
- If EUR is an enabled currency in your store, navigate to WooCommerce > Settings > Multi-Currency and remove EUR as a currency.
- Navigate to Payments > Settings.
- Click Add payment method, verify Bancontact is in the modal, along with its icon.
- Select Bancontact, a notice should appear stating that Euros are being added to your store. Click Add selected, then scroll to the bottom and click Save changes.
- Verify Bancontact and its logo are now in the Payment methods area.
- Navigate to WooCommerce > Settings > Multi-Currency and verify EUR is now an enabled currency in your store.
- On the frontend, add an item to your cart, and go to checkout.
- Verify your currency is not EUR, payment method should show as Credit card / debit card and when selecting Use a new payment method, Bancontact should not appear.
- Switch your currency to EUR, payment method should show as Popular payment methods and when selecting Use a new payment method, Bancontact should appear.
- Select Bancontact.
- Complete checkout/place order.
- You will be taken to a Stripe test confirmation page, choose Authorize test payment.
- Once order is received, navigate to WooCommerce > Orders in the admin.
- Find your order and select it.
- Click Refund, and then increase a line item in your order to 1.
- Click Refund via WooPayments, verify your refund completed.
- Navigate to Payments > Transactions, you should see your Payment and Payment refund listed for your order, verify both have the Bancontact logo.
- Click on the Payment, then verify the Payment method both at the top and bottom are correctly formatting (they will have default test info).
- Do the same for the Payment refund.
- Navigate to Payments > Settings, then click the trash can icon to delete Bancontact. Verify the name and the logo in the modal are correct, then click Remove, scroll to the bottom and Save changes.
- Verify Bancontact is no longer in the list of Payment methods.
P24 checkout
- Change store billing country to Poland
- If Polish zloty is an enabled currency in your store, navigate to WooCommerce > Settings > Multi-Currency and remove PLN as a currency.
- Navigate to Payments > Settings.
- Click Add payment method, verify P24 is in the modal, along with its icon.
- Select P24, a notice should appear stating that PLN are being added to your store. Click Add selected, then scroll to the bottom and click Save changes.
- Verify PLN and its logo are now in the Payment methods area.
- Navigate to WooCommerce > Settings > Multi-Currency and verify PLN is now an enabled currency in your store.
- On the frontend, add an item to your cart, and go to checkout.
- Verify your currency is not EUR or PLN, payment method should show as Credit card / debit card and when selecting Use a new payment method, P24 should not appear.
- Switch your currency to EUR, payment method should show as Popular payment methods and when selecting Use a new payment method, P24 should appear.
- Switch your currency to PLN, payment method should show as Popular payment methods and when selecting Use a new payment method, P24 should appear.
- Select P24.
- Complete checkout/place order.
- You will be taken to a Stripe test confirmation page, choose Authorize test payment.
- Once order is received, navigate to WooCommerce > Orders in the admin.
- Find your order and select it.
- Click Refund, and then increase a line item in your order to 1.
- Click Refund via WooPayments, verify your refund completed.
- Navigate to Payments > Transactions, you should see your Payment and Payment refund listed for your order, verify both have the P24 logo.
- Click on the Payment, then verify the Payment method both at the top and bottom are correctly formatting (they will have default test info).
- Do the same for the Payment refund.
- Navigate to Payments > Settings, then click the trash can icon to delete P24. Verify the name and the logo in the modal are correct, then click Remove, scroll to the bottom and Save changes.
- Verify P24 is no longer in the list of Payment methods.
iDeal checkout
- Change store billing country to the Netherlands
- If EUR is an enabled currency in your store, navigate to WooCommerce > Settings > Multi-Currency and remove EUR as a currency.
- Navigate to Payments > Settings.
- Click Add payment method, verify iDEAL is in the modal, along with its icon.
- Select iDEAL, a notice should appear stating that EUR are being added to your store. Click Add selected, then scroll to the bottom and click Save changes.
- Verify iDEAL and its logo are now in the Payment methods area.
- Navigate to WooCommerce > Settings > Multi-Currency and verify EUR is now an enabled currency in your store.
- On the frontend, add an item to your cart, and go to checkout.
- Verify your currency is not EUR, payment method should show as Credit card / debit card and when selecting Use a new payment method, iDEAL should not appear.
- Switch your currency to EUR, payment method should show as Popular payment methods and when selecting Use a new payment method, iDEAL should appear.
- Select iDEAL.
- Complete checkout/place order.
- You will be taken to a Stripe test confirmation page, choose Authorize test payment.
- Once order is received, navigate to WooCommerce > Orders in the admin.
- Find your order and select it.
- Click Refund, and then increase a line item in your order to 1.
- Click Refund via WooPayments, verify your refund completed.
- Navigate to Payments > Transactions, you should see your Payment and Payment refund listed for your order, verify both have the iDEAL logo.
- Click on the Payment, then verify the Payment method both at the top and bottom are correctly formatting (they will have default test info).
- Do the same for the Payment refund.
- Navigate to Payments > Settings, then de-select the checkbox to delete iDEAL. Verify the name and the logo in the modal are correct, then click Remove, scroll to the bottom and Save changes.
- Verify iDEAL is no longer in the list of Payment methods.
Klarna checkout
As a merchant, ensure "Klarna" is enabled in the WooPayments settings, at Payments > Settings in the "Buy now, pay later" section. If you onboarded on Stripe with a US-based account, you can follow the instructions below. If the account you onboarded with is not US-based, you'll need to change billing country/currency accordingly.
- On the frontend, add an item to your cart, and go to checkout.
- Ensure that the presentment currency is "USD" via the currency widget (in case of multi-currency sites) or via WooCommerce > Settings > General, "Currency" section (in case of single currency site)
- Enter a US-based billing address
- Verify "Klarna" and its logo are now in the Payment methods area
- Select "Klarna" from the list of available payment methods
- Click "Place order"
- You'll be redirected to the Klarna testing page
- Select "Pay now in full with card"
- Pay with Klarna. You'll be redirected back to the merchant's site.
- As a merchant, navigate to WooCommerce > Orders.
- Find your order and select it.
- On the order page, ensure the order details states "Payment via Klarna" under the order number.
- On the order page, click the "Refund" button.
- Increase the item quantity to 1 for the item to be refunded
- Click the "Refund {amount} via WooPayments (Klarna)", verify the refund completed.
- Navigate to Payments > Transactions, you should see your payment and payment refund listed for the order. Verify both have the Klarna logo.
- Navigate to Payments > Settings, then de-select the checkbox to delete Klarna. Verify the name and the logo in the modal are correct, then click Remove, scroll to the bottom and Save changes.
- Verify Klarna is no longer in the list of Payment methods at checkout.
Affirm checkout
As a merchant, ensure "Affirm" is enabled in the WooPayments settings, at Payments > Settings in the "Buy now, pay later" section. If you onboarded on Stripe with a US-based account, you can follow the instructions below. If the account you onboarded with is not US-based, you'll need to change billing country/currency accordingly.
- On the frontend, add at least $50 worth of items to your cart, and go to checkout.
- Ensure that the presentment currency is "USD" via the currency widget (in case of multi-currency sites) or via WooCommerce > Settings > General, "Currency" section (in case of single currency site)
- Enter a US-based billing address
- Verify "Affirm" and its logo are now in the Payment methods area
- Select "Affirm" from the list of available payment methods
- Click "Place order"
- You'll be redirected to the Affirm testing page
- Click "Authorize test payment". You'll be redirected back to the merchant's site.
- As a merchant, navigate to WooCommerce > Orders.
- Find your order and select it.
- On the order page, ensure the order details states "Payment via Affirm" under the order number.
- On the order page, click the "Refund" button.
- Increase the item quantity to 1 for the item to be refunded
- Click the "Refund {amount} via WooPayments (Affirm)", verify the refund completed.
- Navigate to Payments > Transactions, you should see your payment and payment refund listed for the order. Verify both have the Affirm logo.
- Navigate to Payments > Settings, then de-select the checkbox to delete Affirm. Verify the name and the logo in the modal are correct, then click Remove, scroll to the bottom and Save changes.
- Verify Affirm is no longer in the list of Payment methods at checkout.
Afterpay checkout
As a merchant, ensure "Afterpay" is enabled in the WooPayments settings, at Payments > Settings in the "Buy now, pay later" section. If you onboarded on Stripe with a US-based account, you can follow the instructions below. If the account you onboarded with is not US-based, you'll need to change billing country/currency accordingly.
- On the frontend, add an item to your cart, and go to checkout.
- Ensure that the presentment currency is "USD" via the currency widget (in case of multi-currency sites) or via WooCommerce > Settings > General, "Currency" section (in case of single currency site)
- Enter a US-based billing address
- Verify "Afterpay" and its logo are now in the Payment methods area
- Select "Afterpay" from the list of available payment methods
- Click "Place order"
- You'll be redirected to the Afterpay testing page
- Click "Authorize test payment". You'll be redirected back to the merchant's site.
- As a merchant, navigate to WooCommerce > Orders.
- Find your order and select it.
- On the order page, ensure the order details states "Payment via Afterpay" under the order number.
- On the order page, click the "Refund" button.
- Increase the item quantity to 1 for the item to be refunded
- Click the "Refund {amount} via WooPayments (Afterpay)", verify the refund completed.
- Navigate to Payments > Transactions, you should see your payment and payment refund listed for the order. Verify both have the Afterpay logo.
- Navigate to Payments > Settings, then click the trash can icon to delete Afterpay. Verify the name and the logo in the modal are correct, then click Remove, scroll to the bottom and Save changes.
- Verify Afterpay is no longer in the list of Payment methods at checkout.
$1M cart limit
- As a customer, add sufficient products to the cart to go beyond the $1,000,000.00 USD (or 1.000.000,00 EUR) cart amount
- Go to the checkout page
- An error message should appear below the selected WooPayments payment method that tells the customer to lower the cart amount
WooPay checkout
Requirements
- Merchant account must be US-based
- WooPay must be enabled at checkout (Via WooCommerce > WooPayments Settings > Express checkouts)
- WooPay must be enabled on the product page (Via WooCommerce > WooPayments Settings > Express checkouts > WooPay > "Customize")
- Shoppers have a US phone number. Use the company testing number. See 3b9eb-pb
Create an account via WooPay login form
- As a customer, navigate to a product page for a product (any kind of product should work: simple, variable, virtual, subscription)
- Click "Buy with WooPay" next to the "Add to cart" CTA
- Customer should be redirected to the WooPay checkout page and presented with a login form. Note: If you click the button very quickly after page load you will get the OTP modal to complete the email and OTP steps and then get redirected.
- Enter a new email address into the "sign up" email field, click "Continue"
- Enter a valid phone number, click "verify your account"
- Enter the OTP code you received on the phone number previously entered
- The full checkout form should now load
- Fill in the details for the shipping address, card details
- Click "Place order"
- You should be redirected to the "Order success" page on the merchant's site
- Add a new product to the cart
- Go to the checkout page
- Enter the email address you previously entered on the "Email" field on checkout
- You should be prompted to log into WooPay (or be redirected directly to checkout, based on your browser's settings)
- Once landed on WooPay you should have the payment method/shipping address you used previously
- Click "Place order"
- You should be redirected to the "Order success" page on the merchant's site
Create WooPay account via the Save my info opt-in
- As a shopper go to the merchant site
- Add a non-subscription product to your cart
- Go to the blocks checkout page
- Use an email that is not associated with a WooPay account (this can be done by adding + before @ e.g. emails sent to both [email protected] and [email protected] will be delivered to the same inbox)
- Use a US address
- Use a real phone to receive the OTP via sms or a site that allows you to receive sms via a phone number
- Check the
Save my information for a faster and secure checkoutoption - Complete the merchant's site checkout by clicking the "Place Order" button.
- Go to https://pay.woo.com/account
- Fill the email address with the email you used to create the account
- Click continue
- Make sure you can see the OTP field
- Repeat the test from the beginning but this time use to the shortcode/classic checkout page instead
- Repeat the test with a subscription product
Manage payment method with regular card
- As a Shopper navigate to My account -> Payment methods and click Add payment method button.
- Fill the form in with card number
4242424242424242, future expiration date, and any CVC code. - Click Add payment method button.
- Observe Payment method successfully added. success message.
- Observe the payment method listed on the payment methods page:
)
- Use the newly saved payment method to purchase a simple product
Manage payment method with 3DSv2 card
- As a Shopper navigate to My account -> Payment methods and click Add payment method button.
- Fill the form in with card number
4000000000003220, future expiration date, and any CVC code - Click Add payment method button
- Observe the 3DS authentication pop-up modal appears correctly
- Fail the authentication and confirm that the user sees the error notice
We are unable to authenticate your payment method. Please choose a different payment method and try again. - Click Add payment method button once more and confirm that the authentication pop-up modal appears as expected
- Complete the authentication
- Observe Payment method successfully added. success message.
- Observe the payment method listed on the payment methods page.
- Use the newly saved payment method to purchase a simple product
Manage payment method with declined 3DSv2 card
- Click Add payment method button on the payment methods page
- Fill the form in with card number
4000000000000002, future expiration date, and any CVC code - Confirm the error notice
Error: Your card was declined.is displayed.
Checkout with Payment Request
Payment Request without the live account can only be tested with Chrome browser and its Payment Request Button feature.
- Enable Payment Request under Payment > Settings page and save settings.
)
- Ensure that the store is accessible via public HTTPS URL (e.g. with Jurassic Ninja).
- Add a real valid credit card to Chrome Payment settings. Test card used to work but no longer. See https://github.com/Automattic/woocommerce-payments/issues/4092.
Test add a new payment method to an existing subscription
Expected outcome: I am able to successfully change a subscription's payment method via My Account.
Testing instructions
Make sure that Manual Renewal Payments is disabled
- As a Merchant, ensure the WooCommerce Subscriptions plugin is installed.
- As a Shopper, purchase any subscription product.
- Navigate to My account → Subscriptions and open the newly created subscription entry.
- Observe 3 buttons for “Actions”. Click “Change payment” button.
- In the second block, select “Use a new payment method” option.
- Provide
5555555555554444as the test card number, future expiration date, and a CVC code. - Click the “Change payment method” button.
- Ensure the payment method is updated successfully.
Shipping cost changes when switching shipping methods
Testing instructions
First of all you'll need at least two shipping methods for at least one shipping zone.
- Go to WooCommerce > Settings > Shipping.
- Click "Locations not covered by your other zones".
- Click "Add shipping method" -> Select "Flat rate" in dropdown then click "Add shipping method".
- Click "Add shipping method" -> Select "Free shipping" in dropdown then click "Add shipping method".
- Mouse over "Flat rate" then click "Edit". set "Cost" to 20. Click "Save changes".
- Create a simple product. Set price to 20.
- Go to the product's page.
- Click "Buy now" button
- "Shipping" should cost $0 so far. Total should be $20.
- Enter/chose a shipping address.
- Notice "Shipping" costs $20 now. Total should be $40.
- In Shipping Method, chose "Free shipping"
- Shipping now should costs $0. Total should be $20.
Stripe Link
Expected outcome
Ability to save payment information to Stripe Link and use it for the checkout.
Testing instructions
- Navigate to Payments > Settings
- Check the Link by Stripe checkbox in the Express checkouts section
- If the previous step is not possible and there's a message on the checkbox stating To enable Link by Stripe, you must first disable WooPay, then uncheck the WooPay payment method and try to check Link by Stripe again
- Save changes
- Set store currency to USD (Merchant site -> My account -> Account details -> Default currency)
- Add any product to the cart and proceed to the checkout
- Fill in the billing/shipping/card information
- Stripe Link should allow you to register. Fill in email, phone number (
2065555555for US) and full name
-
After providing all the information, click Place order and confirm that the checkout finished successfully.
-
Add a new product to the cart and go to the checkout page
-
Expand the Card payment method
-
Confirm that the Card inputs have been replaced by the Stripe Link UI
-
Click Place order and confirm that the checkout ended up with a success
-
Navigate to WooCommerce -> Orders, find the order you've just made and confirm that it's in the Processing status
Stripe Link - Checkout with Blocks
Perform all the steps as for the classic checkout described above (except the note below), in the same sequence. Instead of classic checkout, create a Blocks checkout page and use it for the checkout.
Note: For the blocks checkout, the Stripe Link button will appear only after the Payment Element radio button is clicked and the element is opened.
Checkout from Product Page
- Go to product page and select product options (quantity and other params if required by product).
- Click Pay now button.
- Pick saved card from Chrome payment UI.
- Order should be completed successfully.
Checkout from the Cart
- Add several products to cart and go the cart page.
- Adjust cart settings if needed.
- Click Pay now button.
- Pick saved card from Chrome payment UI.
- Order should be completed successfully.
Checkout with 3DS card
- Set-up Payment Request as described above.
- Add a 3DS test card like 4000002500003155 to Chrome Payment settings. Any cardholder name, valid expiration date and any CVV will work.
- Try to pay with that card using the Payment Request button.
- Order should be completed successfully.
Onboard via WooCommerce Settings - NOX in-context
- Create a fresh site with WooCommerce and the WCPay Dev Tools plugin (link to latest zip) - (here is a direct Jurassic Ninja create link). Go to the site's WordPress admin dashboard.
- Install the WooPayments plugin using the latest zip using the Plugins menu item. Don't activate it yet.
- Make sure the WCPay Dev Tools plugin is activated and that
dev modeis enabled when clicking on the WCPay Dev main menu item: - Click on the "WooCommerce" main menu item and you will be redirected to the WooCommerce setup wizard. Click on the "Skip guided setup" link:
- Choose "United States" as your business location (the region doesn't matter) and click on "Go to my store":
- You will see red dot with
1near Payments tab. Click it: - You should see a WooPayments line at the top of the payment methods list. Click on "Save 10%" in the incentive banner:
- After WooPayments is installed, you will be redirected to the NOX In Context modal. Deselect all the payment methods in the list:
- Click on the Connect button and you should be asked to connect your site to your WordPress.com account (you may need to login and/or create a WordPress.com account):
- Approve your site WPCOM connection:
- The modal will open again, on the activate payments step in the NOX In Context modal. Choose "Test payments" and wait until it's finished:
- Check that "Set up payments" task is only partially completed with a test account badge:
- Click on the "Payments" main menu, top-level item and you should be redirected to the Payments Overview page. Check that account is complete:
- Navigate to WooPayments settings. Check that no payment methods were enabled.
- Navigate to the Payments Overview page. Reset the WooPayments account. Confirm it in the modal.
- After the test account is reset, you will be redirected to the WooCommerce NOX in-context onboarding modal:
- Now, leave the payment methods selected during the payment method selection step:
- Choose "Test payments" and wait until it's finished:
- You will be redirected to the WooCommerce home page. Click the "Set up payments" task:
- You will see the WooCommerce Payments Settings page. Click the "Manage" button for the WooPayments payment provider:
- Check that selected payment methods are enabled now:
- Temporarily disable
dev modevia the WCPay Dev Tools and click the "Activate payments" button in the WooPayments settings page to switch to a live account: - Confirm it in the modal.
- You will be redirected to the WooPayments NOX in-context onboarding modal, the Activate payments step. Re-enable
dev modeback and click "Activate payments":1.Pick the "Individual" business type and "Clothing and accessories" as type of goods sold. Click "Continue":
- Next you will be presented with the Stripe KYC embedded flow. Click the CTA button:
- Click Use test phone number and Use test code in the OTP modal or redirect:
- Complete the Stripe KYC by providing all the details asked in multiple steps, such as full name, email, date of birth, full address, phone number, social security number, test bank account, etc. On the last step, wait for all verifications to finish (they have "Verifying" loading badges) and then click the "Agree and submit" button.
- In a few seconds you will see the final success step. Click "Go to Payments Overview" and you will be taken to the WooPayments Overview page.
- Confirm the account is created and its status displayed:
- Navigate to WooPayments settings. Check that selected payment methods were transferred to live account:
Onboard via Launch Your Store (LYS) - NOX in-context
- Create a fresh site with WooCommerce at least 10.0 RC and the WCPay Dev Tools plugin (link to latest zip) - (here is a direct Jurassic Ninja create link). Go to the site's WordPress admin dashboard.
- Install the WooPayments plugin using the latest zip using the Plugins menu item. Don't activate it yet.
- Make sure the WCPay Dev Tools plugin is activated and that
dev modeis enabled when clicking on the WCPay Dev main menu item: - Click on the "WooCommerce" main menu item and you will be redirected to the WooCommerce setup wizard. Click on the "Skip guided setup" link:
- Choose "United States" as your business location (the region doesn't matter) and click on "Go to my store":
- You will get redirected to "WooCommerce > Home". Click on Launch your store task.
- Click on the "Set up payments".
- Enable WooPayments.
- On the "Payment Methods selection" screen. Click "Continue".
- Continue with the "Jetpack connection". Connect to WP.com.
- On the Activate payments step, pick the Individual business type and Clothing MCC. Click Continue.
- Click the CTA on Stripe embedded KYC. Use test phone number and test code to pass 2FA step.
- Complete the Stripe KYC by providing all the details asked in multiple steps, such as full name, email, date of birth, full address, phone number, social security number, test bank account, etc. On the last step, wait for all verifications to finish (they have "Verifying" loading badges) and then click the "Agree and submit" button.
- Check that Set up payments step is completed and exit the LYS using back button:
- Check that Get paid task is completed. Navigate to Payments menu item.
- You should be redirected to the Payments Overview page. Check that account is complete. Navigate to WooPayments settings. Check that all payment methods were enabled.
Manual plugin installation and setup
- Create a new site and click on "Skip guided setup" when redirected to the WooCommerce setup wizard:
- Choose "United States" as your business location (the region doesn't matter) and click on "Go to my store":
- Follow instructions in the docs https://woocommerce.com/document/woopayments/startup-guide/#h-manually-installing-woopayments to manually install and set up WooPayments.
- After completing the onboarding wizard and KYC flow you should be redirected to Payments > Overview Page (with the menu 'Payments' active).
- Make sure there is success note.
Manual capture
- Using Merchant account enable Manual capture on Payments > Settings page and save settings.
)
- Follow normal card checkout flow as a Shopper to make a purchase. Take a note of order number created.
- Using Merchant account go WooCommerce > Orders page and open the order created above. The order should have status
On Hold. - In the order sidebar choose Capture charge in Order actions dropdown and click
>button next to it. After page reload the order should change status toProcessingand notes should be added to the order about successful charge.)
Note: when trying to change order status to "Cancelled" before capturing a payment, a modal should appear to indicate that authorization will be cancelled. If approved, order form will be submitted to process status change.
Partial refund
- Go to the order page for the order purchased with WC Payments. You might need to create one using steps from normal card checkout flow.
- Click
Refundbutton to activate refund UI. - Update
QtyandRefund amountfields to make sure only part (not all) products and fees are refunded. - Click
Refund [sum] via WooPayments (Card)button to issue refund. - After page reload check order status (
Processing) and notes in the right sidebar. Successful refund notes should be added. - Go to transaction details page by clicking the link at one of the order notes (
pi_abcd...). - Check transaction summary and timeline details. It should reflect status
Partial refundand refunded amounts. - Repeat steps 2-6. Make sure following partial refunds work well and reflected on
Payment detailspage.
View account balances
- As a Merchant, navigate to 'Payments > Overview'.
- Ensure you can see a currency-formatted
Total balancevalue. It can be a negative, positive or zero value. - Ensure you can see a currency-formatted
Available fundsvalue. It can be a negative, positive or zero value.
View transactions
- As a Merchant, navigate to 'Payments > Transactions'.
- For a random transaction, ensure the presented links from columns 'Order', 'Subscription', 'Customer' and 'Payout' are opening.
- Ensure the totals rendered at the transactions list bottom reflecting the correct amount of transactions.
- Ensure that sorting the list by 'Date/Time', 'Amount', 'Fees', 'Net' is not changing the totals and sorts list entries as expected.
Filter transactions
- As a Merchant, navigate to 'Payments > Transactions'.
- Note the select box above the transactions list.
- Click it, click 'Advanced filters', 'Add filter', 'Date' appearing sequentially when the previous element being clicked.
- The newly appeared element will list a select box with several operators: 'Before', 'After', 'Between'.
- For each of the operators, provide a date/dates range and click 'Filter'.
- Ensure the listing updated and contains only entries satisfying the filter and the totals are reflecting the proper amount of transactions.
Search transactions
- As a Merchant, navigate to 'Payments > Transactions'.
- Note the search element in the transaction list:

- Remove the search element content and type in an order number, wait for autocompletion and click the value it suggests (e.g. 'Order #001').
- Ensure the listing updated and contains only entries satisfying the filter and the totals are reflecting the proper amount of transactions.
- Remove the search element content and type in a customer name, wait for autocompletion and click the value it suggests (e.g. 'Customer Name (email)').
- Ensure the listing updated and contains only entries satisfying the filter and the totals are reflecting the proper amount of transactions.
Export transactions as CSV file
- As a Merchant, navigate to 'Payments > Transactions'.
- Apply a date filter, and date sorting to the transactions list.
- Note the 'Export' element at the top of the transactions list:
- Click the "Export" button and a CSV file should be downloaded.
- Open the downloaded file and ensure the document entries are matching the list contents.
View transaction details
- As a Merchant, navigate to 'Payments > Transactions'.
- Click on a transaction entry for a card payment.
- Observe the page content, it should be similar to this screenshot:
- Ensure the timeline contains similar entries.
- Ensure the data (order total, fees, dates, and card number) are matching between all 4 blocks.
View payouts
This should be tested on a long-lived site to ensure there is an existing history of payouts.
- As a Merchant, navigate to 'Payments > Payouts'.
- Ensure the totals rendered at the payouts list bottom reflecting the correct amount of payouts.
- Ensure that sorting the list by 'Date', 'Amount' is not changing the totals and sorts list entries as expected.
Dispute created notifications
- Make sure you are using a live, not a test WooPayments account on the store. Test accounts don't receive email notifications from the Transact Platform!
- As a Shopper make a test purchase using this card number
4000000000002685. - After the order is completed, at merchant's email should arrive an email with the title
You have a disputed payment for ... (ch_...). - Ensure the email properly states the order total in
The disputed charge is for ... USD. This amount, plus a $15.00 USD .... - Ensure the 'View and respond' link from the email is properly opening to the transaction details page showing the dispute details.
Add order notes and update order status when disputes are created or closed
Expected outcome
- An order note is created when:
- A dispute is created
- A dispute is closed
- Dispute funds have been withdrawn
- Dispute funds have been reinstated
- An order's status is changed to:
on-holdwhen a dispute is createdcompletedwhen a dispute is closed and the dispute is not a lossrefundedwhen a dispute is closed and the dispute is a loss
- The order refund button should change to:
disabledwhen a dispute is createdenabledwhen a dispute is closed and the dispute is not a loss- Not visible when a dispute is closed and the dispute is a loss
- With WooCommerce 7.9+, expect a notice under order details that looks like this:
Testing Instructions
-
Purchase a product using a dispute-specific test card
-
Navigate to the order page as admin (
WooCommerce > Orders) -
Ensure the order has been set to
on-holdand there is an order note indicating a dispute was created and that links to the correct dispute page -
Using the dispute link in the order note, navigate to the transaction detail page and make sure dispute details are listed
-
Accept the dispute
-
Navigate back to the order page as admin
-
Ensure there is a new order note indicating the dispute was closed and the order has an appropriate status
-
Repeat steps 1-4 above
-
This time challenge the dispute, being sure to replace the content of the 'Cover Letter' field with the string
winning_evidence. You can find this field in the 'Review' step of the 'Challenge Dispute' wizard. -
Again, navigate to the order page and confirm the order status (
completed) and note -
Repeat steps 1-4 once more
-
Challenge the dispute, ensuring that the content of the 'Cover Letter' field is replaced with the string
losing_evidence. -
Navigate to the order page and confirm the order status (
refunded) and note added.
Save evidence
-
Open the link from the email you received in 'Dispute created notifications' testing instructions.
-
Click 'Challenge dispute' button.
-
Pick a product type, e.g. 'Physical product'
-
Fill in some test data (with at least one small file attached in the Recommended documents section) and click
Save for Laterbutton at the very bottom of the form. -
Click
Canceland then confirm to go back to the payment details page. -
Click on the
Continue with challengebutton. -
Ensure the test data you filled in the previous step is available, including the file(s) you uploaded.
Winning dispute
-
Follow instructions from 'Dispute created notifications'.
-
Follow instructions from 'Save evidence', but provide
winning_evidenceas value for theCover Lettertext area and clickSubmit -
After submission, go to Payments > Disputes and select the ‘All Disputes’ filter.
-
Ensure the list contains the evidence and it is in 'Won' status.
-
Ensure merchant receives an email with the title 'You won a dispute for ... (ch_...)'.
-
Ensure the email properly states the order total in 'The disputed charge was for ... USD. This amount, plus a $15.00 USD ...'.
Losing dispute
- Follow instructions from 'Dispute created notifications'.
- Follow instructions from 'Save evidence', but provide
losing_evidenceas value for theCover Lettertext area and click Submit. - After submission, go to Payments > Disputes and select the ‘All Disputes’ filter.
- Ensure the list contains the evidence and it is in 'Lost' status.
- Ensure merchant receives an email with the title 'You lost a dispute for ... (ch_...)'.
- Ensure the email properly states the order total in 'The disputed charge is for ... USD. This amount, plus a $15.00 USD ...'.
Transaction / Dispute / Payout details for large dataset
Please refer to the "Call for testing" post for the test site and its credentials, or ask the release lead if it's missing.
- Upload the version under test that was provided in the Call for testing
- Purchase a product using a test card for disputes (https://stripe.com/docs/testing#disputes)
- Visit Payments > Transactions and make sure that everything displayed looks correct
- Each column shows the expected value (amount, number, name, ...)
Order #,Customer, andPayout datecolumns have links to another place (like the Order details screen for the Order # column)- None of the columns are blank or wrongly formatted (like N/A for the Order # column)
- Visit Payments > Disputes and make sure that everything displayed looks correct
- Each column shows the expected value (reason, status, dates, ...)
Order #andCustomercolumns have links to another place (like the Order details screen for the Order # column)- Each row has a link to the related transaction details page that will display dispute details
- None of the columns are blank or wrongly formatted
- Visit Payments > Payouts and make sure that everything displayed looks correct
- Each column shows the expected value (amount, status, date, ...)
- Each row has a link to the transactions included in that particular payout
- None of the columns are blank or wrongly formatted
Manual capture from Uncaptured tab in Transactions page
- Using Merchant account enable Issue an authorization on checkout, and capture later on Transactions section of Payments > Settings page and save settings.
- Follow normal card checkout flow as a Shopper to make a purchase. Take a note of order number created.
- Using Merchant account go to Payments > Transactions. Check there is an Uncaptured tab next to Transactions tab.
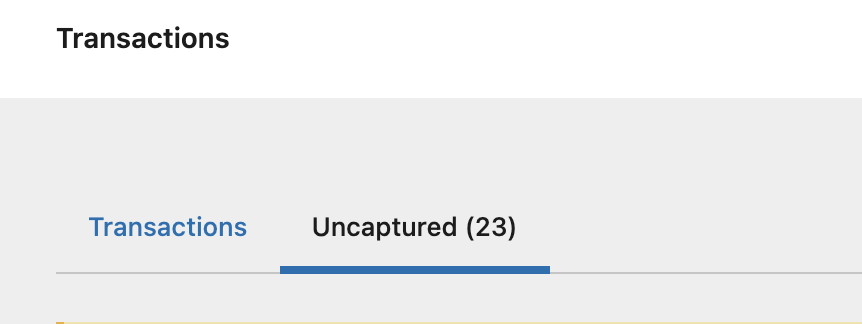
- Click on Uncaptured tab. Check there is a table of Uncaptured transactions, similar to this screenshot:
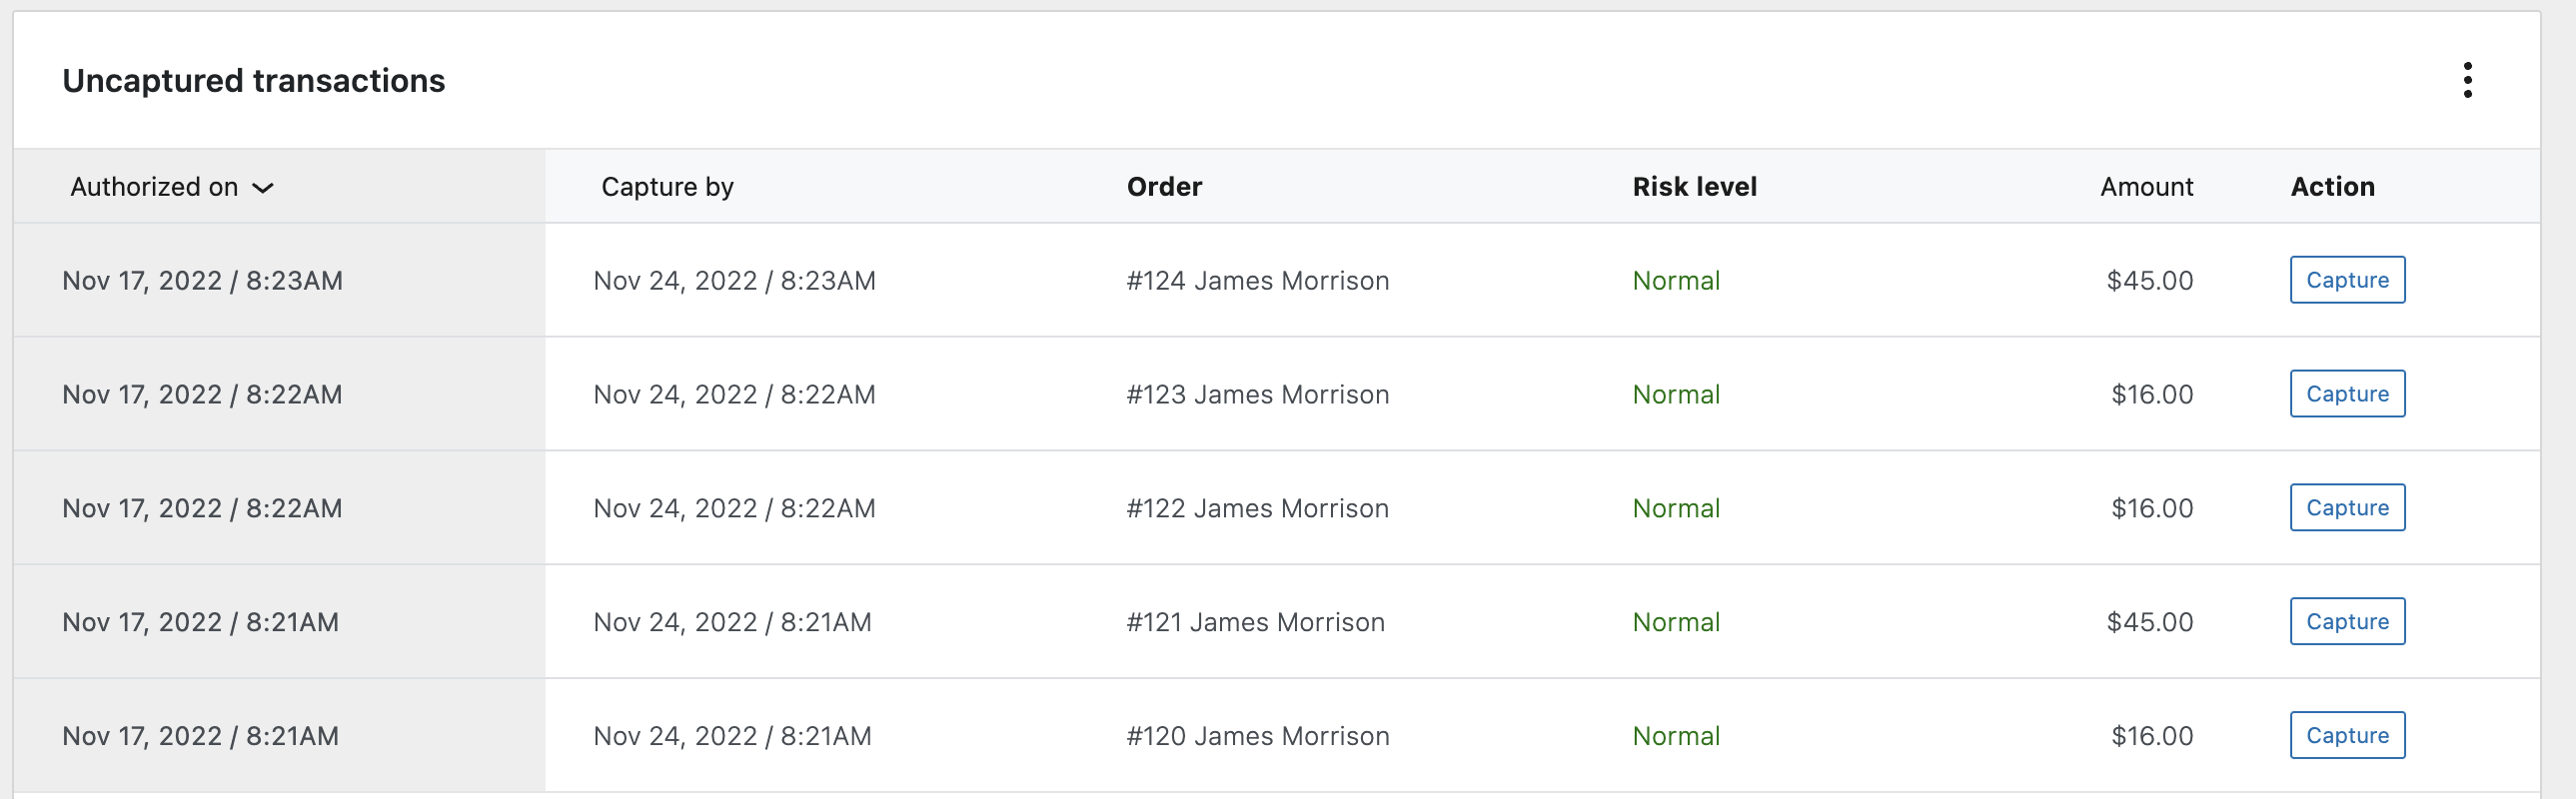
- In the Uncaptured transactions table, locate the row with the order you created in previous step. Note it and click on 'Capture' button.
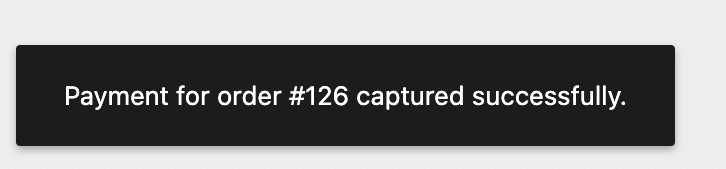
- Check that the button shows a loading state.
- After a moment, check that a notification appears informing that the order was successfully captured.
- Click on Transactions tab. Check that a new row of type Charge is added to the table for the order you just captured.
Manual capture from payment details page
- Using Merchant account enable Issue an authorization on checkout, and capture later on Transactions section of Payments > Settings page and save settings.
- Follow normal card checkout flow as a Shopper to make a purchase. Take a note of order number created.
- Using Merchant account go to Payments > Transactions. Check there is an Uncaptured tab next to Transactions tab.
- Click on Uncaptured tab. Check there is a table of Uncaptured transactions, similar to this screenshot:
- In the Uncaptured transactions table, click on the row with the order you created in previous step. It will take you to the payment details page.
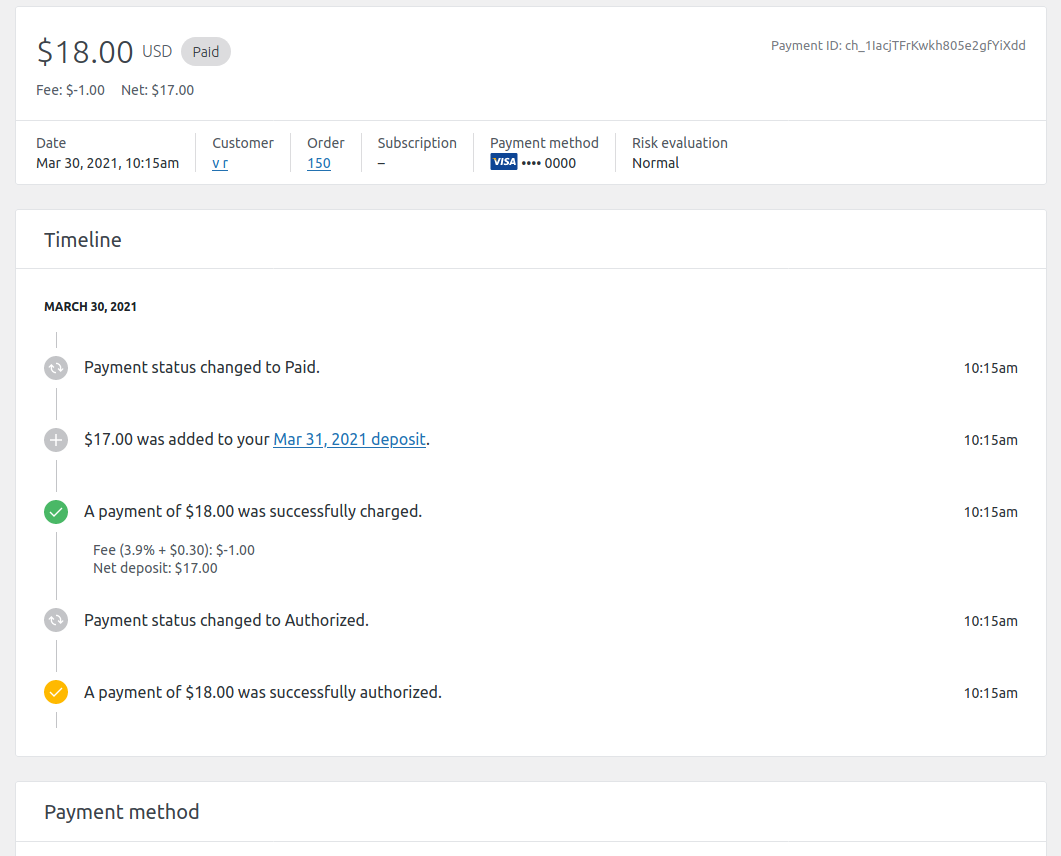
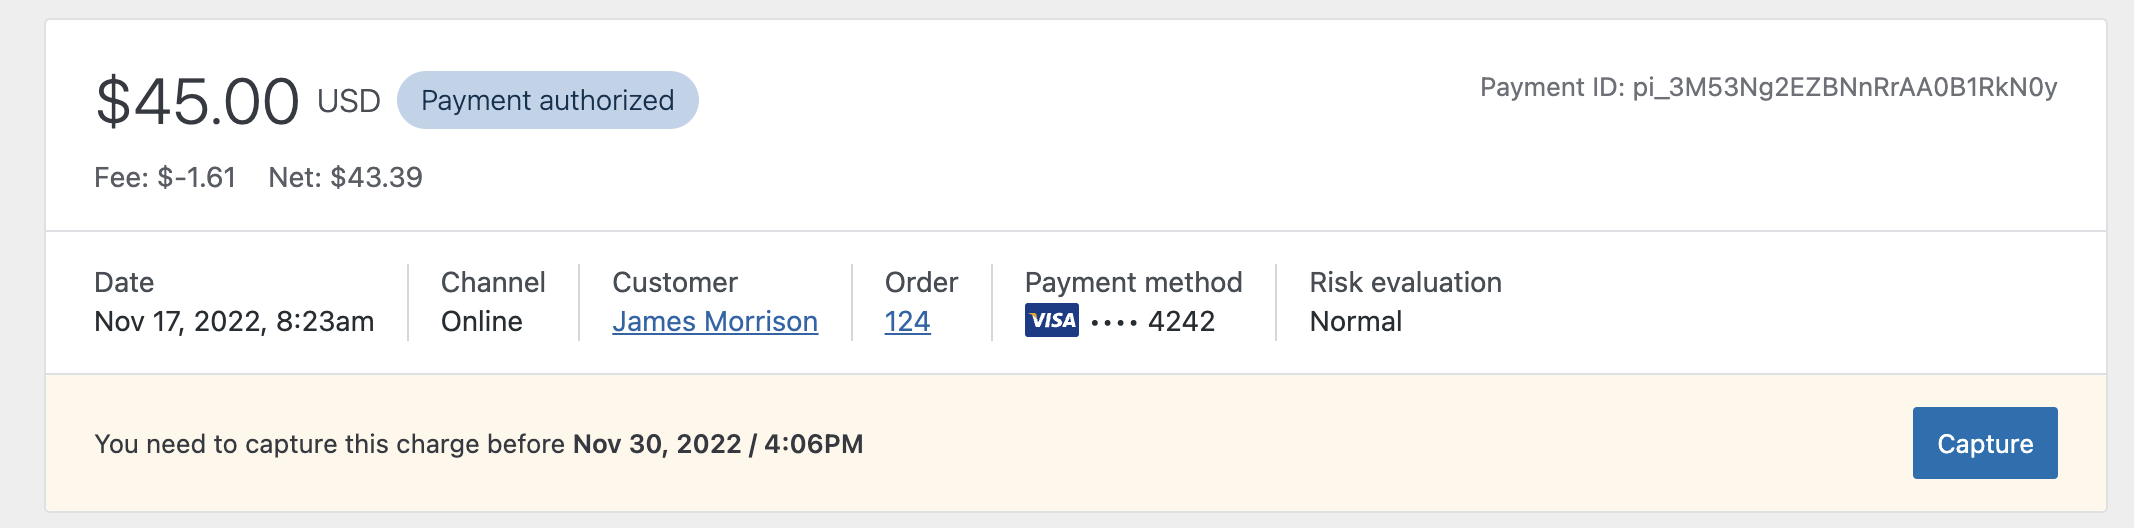
- In the payment details page, check that there is a section that contains information about the capture deadline and a Capture button, like in this screenshot:
- Click on 'Capture' button.
- Check that the button shows a loading state.
- After a moment, check that a notification appears informing that the order was successfully captured and that the Capture button and deadline disappears.

- Check that the Timeline section is updated: payment successfully charged, amount added to next payout and payment status changed to
Paid:
View Uncaptured transactions in Transactions page
- Using Merchant account enable Issue an authorization on checkout, and capture later on Transactions section of Payments > Settings page and save settings.
- Follow normal card checkout flow as a Shopper to make a purchase.
- Using Merchant account go to Payments > Transactions. Check there is an Uncaptured tab next to Transactions tab and click it.
- Check the totals rendered at the bottom of the table are correct.
WooCommerce Subscriptions integration test flows
All of the flows in this section require WooCommerce Subscriptions installed and active.
Create a subscription product
Ensure WooCommerce Subscriptions is installed and active.
- Navigate to
Products → Add new. - Change the product type to
Simple subscription. - Add a product name and description.
- Add a subscription price.
- Publish the product.

✅ Your subscription product should be available to purchase in store (front end).
Purchase subscription product
Ensure WooCommerce Subscriptions is installed and active.
- As a Merchant create a subscription product (see official documentation for more details).
- As a Shopper purchase the product using a test card.
- Navigate to 'My account -> Subscriptions'.
- Ensure the new subscription is listed there:
) .
. - Ensure 'Subscription' link and 'View' button are opening.
Suspend (pause) and resume a subscription
Suspend a subscription
Ensure WooCommerce Subscriptions is installed and active.
- Navigate to
WooCommerce → Subscriptions. - Hover an active subscription and click the
Suspendbutton.
✅ Ensure the subscription status has transitioned to On hold.
Resume a paused subscription
Ensure WooCommerce Subscriptions is installed and active.
- Navigate to WooCommerce → Subscriptions.
- Hover over a suspended subscription and click the
Reactivatebutton.

✅ Ensure the subscription status has transitioned to Active.
Promote subscriptions with a discount coupon (signup, one-off, or recurring)
Ensure WooCommerce Subscriptions is installed and active.
- Navigate to Marketing → Coupons → Add coupon.
- Add the coupon code and description.
- Select the desired discount type:
Recurring Product [%] Discountto discount every renewal.Sign Up Fee [%] Discountto discount the sign-up fee only.Fixed cart discountorPercentage discountto discount the initial subscription order.
- Add the coupon amount (or percentage value).
- Publish the coupon.

✅ As a shopper, confirm the coupon code works and shows the correct discount. (See shopper flow below.)
Renew subscription
Ensure WooCommerce Subscriptions is installed and active.
- Follow steps from 'Purchase subscription product'.
- As a Shopper, navigate to 'My account -> Subscriptions'.
- Note the newly created subscription and click the 'View' button located on the right side of the corresponding list entry.
- Note the content of the 'Related orders' section (after renewing a new entry expected to be listed there).
- Note the 'Renew now' button and click it.
- You expected to land on the checkout page.
- Ensure the 'Complete checkout to renew now.' success message is shown up.
- Complete the checkout and ensure the 'Related orders' section in the subscription has a new entry.
Set subscriptions default payment method
Ensure WooCommerce Subscriptions is installed and active.
Follow steps from 'Change payment method to saved card', except:
- Make 2 purchases of subscription products, so you get 2 entries in the subscription listing.
- Make sure to mark 'Update the payment method used for all of my current subscriptions (optional)' checkbox when changing the payment method.
- Ensure both subscription entries are using the selected payment method.
Change subscriptions default payment method
Ensure WooCommerce Subscriptions is installed and active.
After completing steps from 'Set default payment method' change payment method again:
- Make sure to mark 'Update the payment method used for all of my current subscriptions (optional)' checkbox when changing the payment method.
- Ensure both subscription entries are using the new payment method.
Renew subscription automatically
Ensure WooCommerce Subscriptions is installed and active.
- As a Merchant create a subscription product (see official documentation for more details).
- As a Merchant navigate to 'WooCommerce -> Settings -> Subscriptions'
- Enable 'Display the auto renewal toggle' and click 'Save changes' button on page bottom.
- As a Shopper add the subscription product to the cart and complete checkout.
- As a Shopper, navigate to 'My account -> Subscriptions' and open the newly created subscription entry.
- Ensure 'Auto renew' toggle is available and enabled.
- Ensure 'Payment' states the selected payment method.
- Copy the subscription ID (#) for your newly created subscription.
- As a Merchant, navigate to 'WooCommerce -> Status -> Scheduled Actions'.
- As a Merchant, use the subscription ID in the 'Search hook, args and claim ID' field, on the top-right corner of the page.
- Search for a 'Pending' hook named 'woocommerce_scheduled_subscription_payment' and which argument states
'subscription_id' => {SUBSCRIPTION_ID}. - Hover over the table row and click 'Run' to simulate an automatic renewal for the newly created subscription.
- As a Shopper, navigate to 'My account -> Subscriptions', and ensure the given subscription is updated and another order entry is attached to it under 'Related orders'.
Renew subscription manually
Ensure WooCommerce Subscriptions is installed and active.
- As a Merchant create a subscription product (see official documentation for more details).
- As a Merchant navigate to 'WooCommerce -> Settings -> Subscriptions'
- Enable 'Accept Manual Renewals', enable 'Accept Early Renewal Payments' and ' Turn off Automatic Payments ' and click 'Save changes' button on page bottom.
- As a Shopper add the subscription product to the cart and complete checkout.
- As a Shopper, navigate to 'My account -> Subscriptions' and open the newly created subscription entry.
- Ensure 'Payment' states 'Via Manual Renewal'.
- Observe 2 buttons for 'Actions'. Click 'Renew now' button.
- Ensure you are landed to the checkout page and can complete the checkout.
- Navigate to 'My account -> Subscriptions -> View Subscription' and ensure the subscription is updated and a new order entry is attached under 'Related orders'.
Cancel an active subscription and re-subscribe
- Navigate to
My account → Subscriptions - Click a subscription ID to navigate to subscription detail page.

- Click the
Cancelbutton to cancel the subscription.
✅ Confirm the subscription Status now reads Pending Cancellation and the end date is correct. 
- Navigate to
My account → Subscriptions - Click a subscription ID to navigate to its details pages.

- Click the
Reactivatebutton to resume the subscription.
✅ Confirm the subscription Status now reads Active and the next payment date is correct.
Use a coupon when purchasing a subscription product
This flow requires that the store has a coupon set up. Follow the steps in Promote subscriptions with a discount coupon (signup, one-off, or recurring) flow to set up a coupon; or use an existing coupon.
- Navigate to a subscription product on the front end.
- Click the
Sign up nowbutton.
- Navigate to the cart.
- Add a recurring coupon code to the coupon code field and click the
Apply couponbutton. - Ensure the cart totals are correct.
✅ Confirm that the coupon discounts are correct.
- Proceed to checkout.
- Complete checkout with any testing card (e.g. 4242424242424242).
- Navigate to
My account → Subscriptions
✅ Ensure the newly purchased subscription appears on this page and the details are correct.
Multi-currency: Check out as a guest shopper
- Go to the shop page on the site. Verify the currency switcher appears in the sidebar. Change the selected currency and verify that the page should reload and all items in the shop will now display in the selected currency.
- Test toggling the
Display currency symboloption and verify the currency symbol no longer displays in the currency switcher list. Do the same with theDisplay flagsoption. - Add some items to the cart and go to the cart page, click
Proceed to checkout, then clickPlace orderon the checkout page. Use a Stripe test card: 4242 4242 4242 4242, any cardholder name, valid expiration date and CVV will work. - Order should be completed correctly.
Multi-currency: Checkout as a logged-in shopper
- Go to the
My Account -> Account Detailspage. Update the "Default currency" option, save changes. - Go to the shop page. Prices should be displayed in your selected currency.
- Add some items to the cart and go to the cart page, click
Proceed to checkout, then clickPlace orderon the checkout page. Use a Stripe test card: 4242 4242 4242 4242, any cardholder name, valid expiration date and CVV will work. - Order should be completed correctly.