LA Development Guide - AtlasOfLivingAustralia/documentation GitHub Wiki
- Introduction
- Install basic dependencies
- Install sdkman
- Install maven
- Clone the ALA module you are interested in
- Install grails
- Basic build
- Install Intellij or similar
- Import the ALA module in Intellij
- Development configuration
- Development databases
- Patching ALA
- General ALA development/contribution recommendations
- More information
This is an unofficial guide to setup and ALA development environment and start to contribute to ALA code base and adapt it to your node needs.
Disclaimer: Software forks and custom code changes are sometimes quite easy to do, but quite hard to maintain, even for Google. So we recommend to try to generalize your software customizations and send Pull Requests to ALA repositories, so your code can be useful to other LA nodes (and also maintained by all of us).
sudo apt install curl git openjdk-8-jdk
sudo update-java-alternatives -s java-1.8.0-openjdk-amd64
(you may need to do sudo apt-get install icedtea-8-plugin)
Install sdkman:
curl -s "https://get.sdkman.io" | bash
source "$HOME/.sdkman/bin/sdkman-init.sh"
sdk versionSome ALA modules are build with maven (like biocache-store):
sudo apt install maven

mvn --versionIn this guide we'll use ala-bie as sample:
git clone https://github.com/AtlasOfLivingAustralia/ala-bie.git
cd ala-bie
Install the grails version that uses the ALA module you are interested in:
grep grailsVersion gradle.properties
# Doing this in our cloned module ala-bie shows that nowadays grailsVersion=3.2.11 so:

sdk install grails 3.2.11

grails --versionLet's do a basic build to download dependencies and test the repository building before modify any code:
# in ala-bie
./gradlew build
Downloading https://services.gradle.org/distributions/gradle-3.4.1-all.zip
(...)
Finished Precompiling Assets
:compileWebappGroovyPages NO-SOURCE
:compileGroovyPages
:bootRepackage
:assemble
:processTestResources NO-SOURCE
:testClasses UP-TO-DATE
:test NO-SOURCE
:check UP-TO-DATE
:build

BUILD SUCCESSFUL

Total time: 10 mins 0.015 secs
The war should be in:
ls build/libs/
ala-bie-1.4.20.war ala-bie-1.4.20.war.originalFollowing some tutorial, install an IDE like intellij:
sudo snap install intellij-idea-community --classicRun Intellij from Ubuntu "Activities" and choose default options, like suggested plugins.
In our example, as ala-bie is a grails project, check the Intellij documentation about Creating Grails Application from Existing Code.
For Maven projects, see IntelliJ documentation about Importing Maven Project from Existing Code. To begin, 'Open' a 'pom.xml' file.
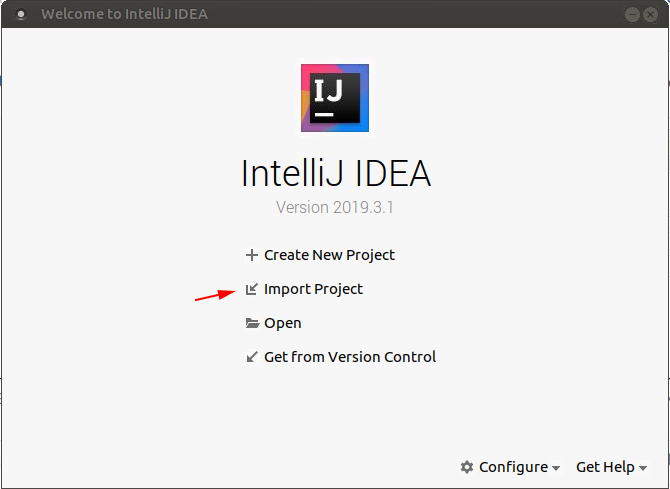
Select "Import project" in main Intellij dialog:
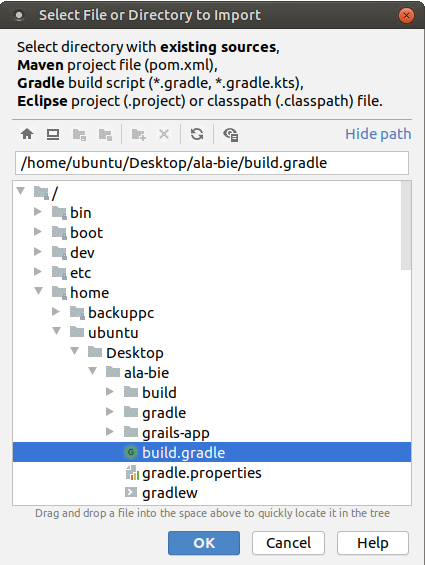
In your project structure select build.gradle file:
Intellij will index, compile and build our code:

Now you can run your project (select the Gradle Sidebar):
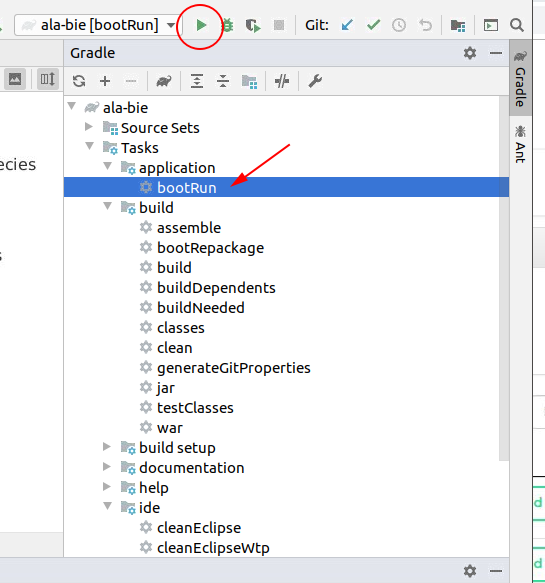
So you can see in your console something like:
2020-01-16 13:05:41.745  INFO --- [           main] au.org.ala.bie.Application               : Started Application in 8.767 seconds (JVM running for 10.183)
Grails application running at http://localhost:8080 in environment: development
and some browser tab will open pointing to your running instance: http://localhost:8080 .
In many cases this will fail because we need some LA module configuration (similar to the one created by ansible in /data/*/config/ and also access to some database (depending on the module).
Some LA modules don't require db connections (like regions, or biocache-hub) so we can point our development configuration to some production biocache-service, spatial, etc to do our development tests.
ALA uses grails plugins to allow customization and reusing of code. For instance:
-
ala-hubusesbiocache-hubs,downloads-plugin,ala-charts-plugin,images-client-plugin, ... - etc
If we want to work with ala-hub and only with the biocache-hubs plugin, we can do something like this:

notice that ../biocache-hubs should be in your files system in a sibling directory to ala-hub:
project(':biocache-hubs').projectDir = new File(settingsDir,'../biocache-hubs')

As we mentioned previously your LA module will look to /data for configuration properties like in production. So we need to generate some configuration.
A fast way to generate many of these configurations is to use ansible, locally with the help of the LA ansible generator and:
https://github.com/living-atlases/la-data-generator
Later, you'll have to setup where grails will run, with some variable like:
grails.serverURL=http://localhost:8080/
for instance.
You need some local database (mysql, postgresql, mongo, etc) to run your LA module correctly in local, but exists other options like to have some VM, vagrant or docker environment. Also you can tunnel you db connections via ssh.
Some ALA modules are using docker to get a development database easily, for instance:
- https://github.com/AtlasOfLivingAustralia/spatial-service#running-it-locally
- https://github.com/AtlasOfLivingAustralia/image-service#running-it-locally
Other option if you have a test LA environment you can use their database. For this you can tune your mysql connections (for instance) via ssh:
ssh -L 33060:127.0.0.1:3306 ubuntu@your_la_demo -N -fand setup that port in your development configuration:
dataSource.url=jdbc\:mysql\://localhost:33060/specieslists?autoReconnect=true&connectTimeout=0&useUnicode=true&characterEncoding=UTF-8
Don't forget to match your mysql user & password with those configured in your LA test environment.
You can use this also to tunnel solr and cassandra connections.
Following our example, imagine that we want to patch the "Online Resources" section in the main page of each specie in bie service:
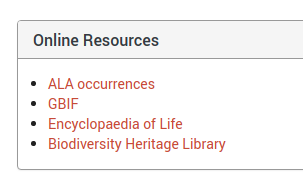
this is generated by: https://github.com/AtlasOfLivingAustralia/ala-bie/blob/master/grails-app/views/species/_onlineResources.gsp and nowadays has this ALA url hardcoded:
<li><a href="https://biocache.ala.org.au/occurrences/search?taxa=${tc?.taxonConcept?.nameString?.replace(" ","%20")}">ALA occurrences</a></li>
You can simply edit this URL in your ala-bie fork, put your biocache url instead:
<li><a href="https://biocache.la.site/occurrences/search?taxa=${tc?.taxonConcept?.nameString?.replace(" ","%20")}">Wakanda occurrences</a></li>
generate a new war, and deploy your custom war to your bie server.
This is the faster way to do it (in short term), but has several inconveniences:
- You have to maintain this little change over time, that is, the next time you want to update the
bieservice, you should update your fork and merge these kind of small changes with new ALA upstream code. - Other LA portals need to do the same effort. Identify where the code is, modify it, generate a new war, etcetera. A waste of time if some other portal had solved this already.
- Also, it's easy to lose this change over time or to discorauge you to update your ALA software because of these customizations.
No problem should ever have to be solved twice. Eric S. Raymond, 2001
The prefered way to do this is to create a general patch (not specific to any national node) and send a Pull Request to the ala-bie ALA repository, so others nodes can get this fix in the future.
This is what @angelicalleite did in this PR. Thanks indeed!
You can have a more detailed explaniation of how to create a Pull Request in this howto.
You can follow this workfrow to send patches to ALA. Try to have two remotes, your fork and the upstream ALA repo:
$ git remote -v
origin  [email protected]:vjrj/ala-install.git (fetch)
origin  [email protected]:vjrj/ala-install.git (push)
upstream        [email protected]:AtlasOfLivingAustralia/ala-install.git (fetch)
upstream        [email protected]:AtlasOfLivingAustralia/ala-install.git (push)
From time to time keep in sync your fork:
$ git fetch --all          # I'm in origin/master and I want to update with upstream
Fetching upstream
Fetching origin
and pull/rebase your fork:
$ git pull --rebase upstream develop
From github.com:AtlasOfLivingAustralia/ala-install
 * branch              develop     -> FETCH_HEAD
Already up to date.
Current branch develop is up to date.
When you want to send a PR:
$ git checkout -b some-new-feature    # I create a local branch to add something
Switched to a new branch 'some-new-feature'
Or directly forking from develop:
git checkout -b some-new-feature upstream/develop
Do some fix/enhancement in "whatever" file and commit it:
$ git commit whatever
$ git push origin some-new-feature
some this branch is pushed to your remote fork and you can send the PR from the github interface. Verify that the PR only have this whatever change.
When doing pull requests (PRs):
- Try to follow the current code indentation and style. Avoid unnecessary refactorizations.
- Try send a unique PR per functionality, fix, or enhancement so it's more easy to review and merge (even revert if we need it). Don't send big PR with different changes. For instance, if you want to send a PR to fix some issue, only send the minimum changes in order to fix that issue and don't send unrelated code changes with that issue.
- Try to add unit tests where ever possible (or add to existing tests with cases for the change)
- Create an issue in the same repository and link the PR to the issue. In the issue, describe why the change was made and provide details so someone else can test the functionality, e.g. expected output before change and expected output after applying the PR change.
- Related with i18n, try only to add additions and changes to English typically at
grails/i18n/messages.properties. Other translations are done via crowdin and later synchronized automatically. - Try to do PR to
developbranches (if exists) of each module. - Keep your local forks updated with the ALA repo by setting your git upstream value.
- Before submitting a PR make sure you
rebaseyour local branch.
See Development-Resources for more LA development wiki pages and more related information.