Lesson4: Server side mboxes - Adobe-Marketing-Cloud/target-iot-lab GitHub Wiki
##Objective
In this part of the lab we will demonstrate how you can use Adobe Target to control a physical light bulb using the Server Side Delivery API. The Server Side Delivery API can be used to integrate Adobe Target with any server side platform that can make HTTP calls.
The lightbulb cannot operate without an application to control it. As such, we have built an desktop application called the Wellness Home Automation server. The Wellness Home Automation server will make an API call to Target using the Server Side Delivery API, determine the right experience to show, and then adjust the setting on the lightbulb accordingly.
Here's how the setup works:
![] (https://github.com/Adobe-Marketing-Cloud/target-iot-lab/blob/master/lab-images/lesson4_img0a.PNG)
Since we could not provide you all with an actual light-bulb, we have simulated one for you on your screen.
We will be doing the following in this Lesson:
- Setup a mbox request from the Wellness Home Automation server application.
- Update the Wellness activity that we setup in Lesson 2, to deliver a personalized experience to this new mbox.
- See how this is used to personalize the experience on the light bulb
For reference of the Server Side delivery mbox please review: https://marketing.adobe.com/developer/documentation/test-target/serverside-delivery
##Exercise 1: Setting up your Home Automation Server project
The Home Automation Server is a Java project which will launch a simple screen to control our smart lightbulb. We will be editing this project in IntelliJ (a Java development environment) and inspecting the server side mbox call.
First, let's launch the project and the smart light-bulb screen.
- Step 1: Open up IntelliJ , and launch the project "wellness-desktop" as highlighted below.

- Step 2: Click on "build.gradle" so that it's highlighted

- Step 3: Click the green arrow to run this application. It is highlighted with a red box in the screenshot below.

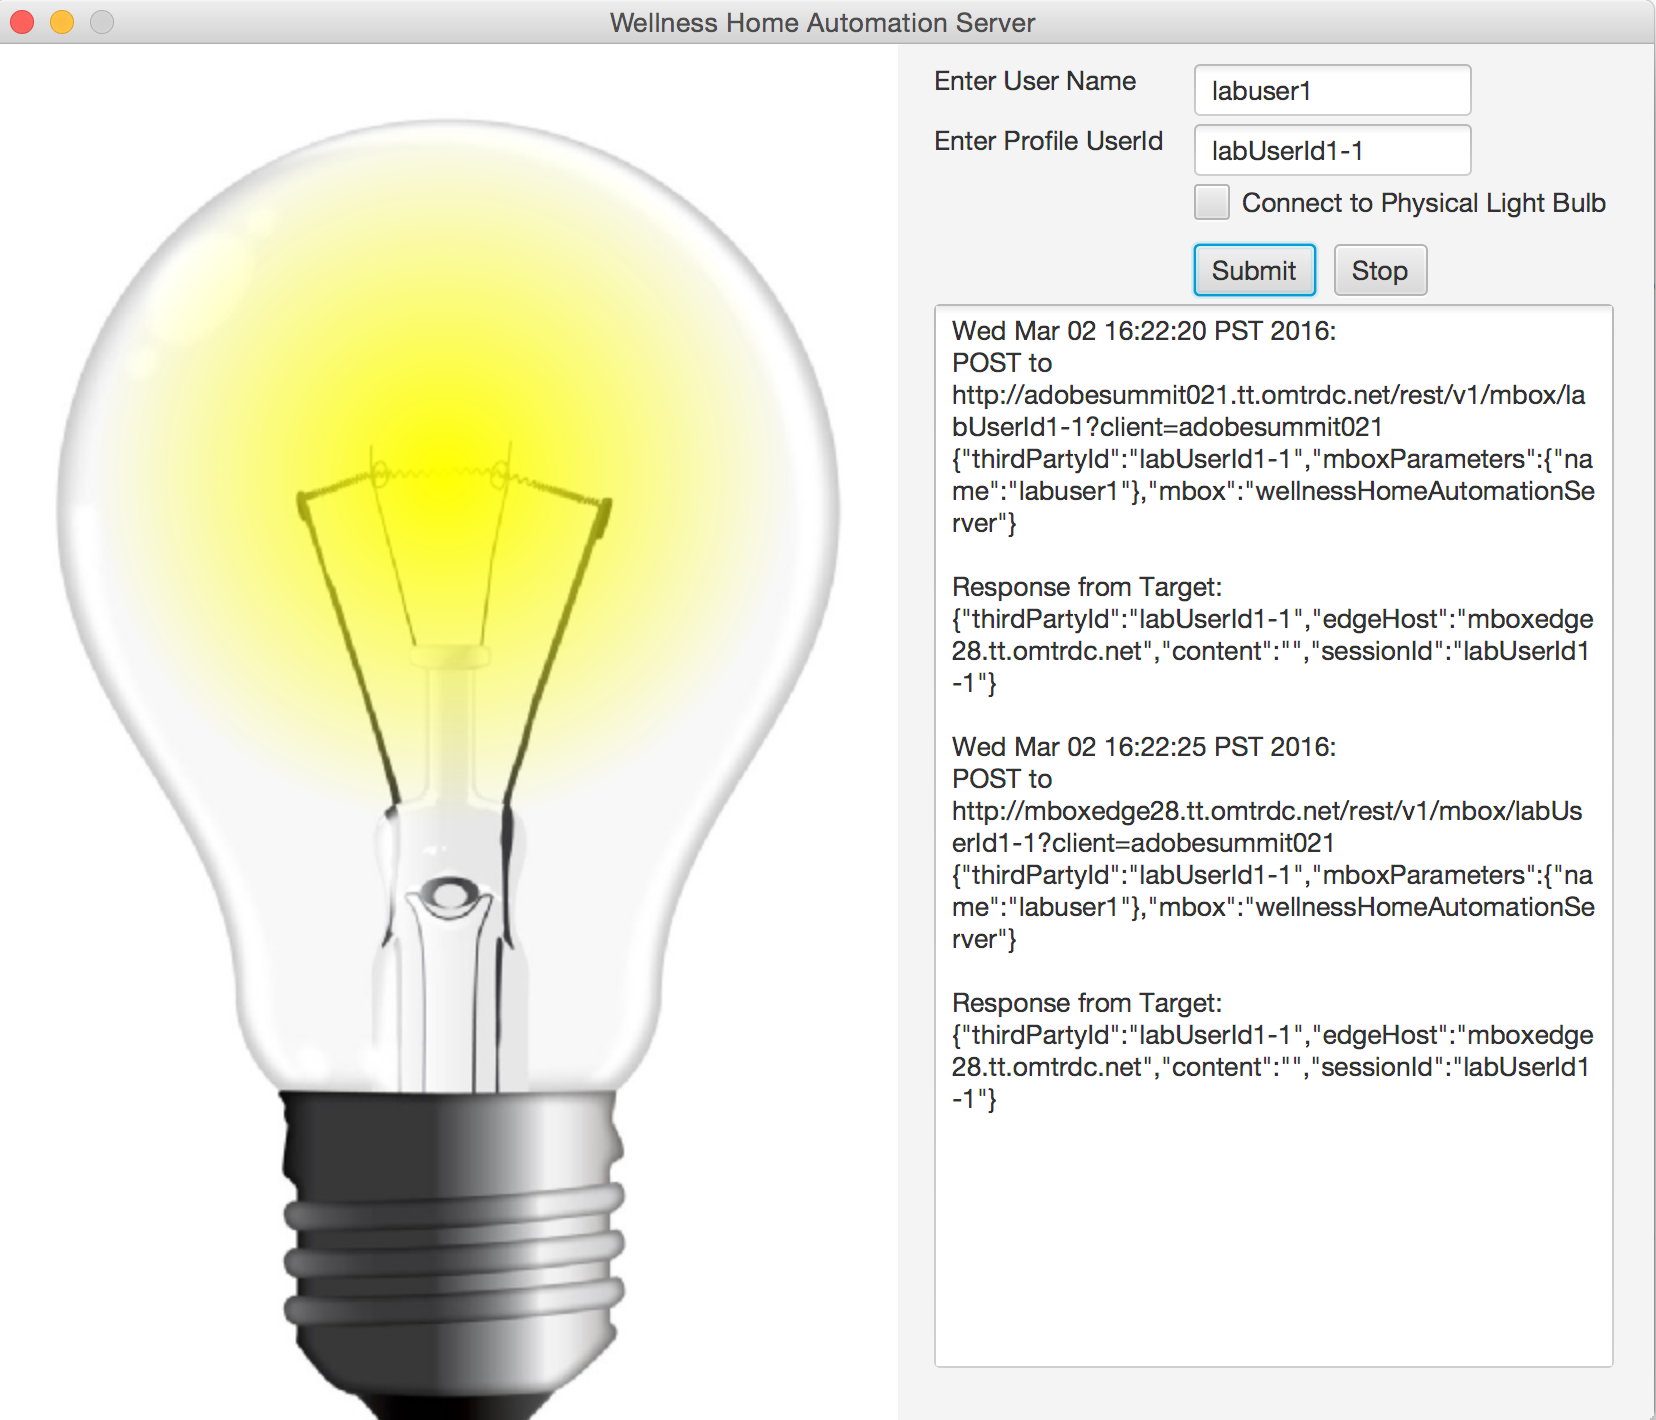
You should now see the light-bulb show up on your screen! It should look as follows:
Next, let's dig in to understand how the Home Automation Server calls the Target Edge server to fetch the mbox content. In this case, the mbox content will be the color of the light for a given user.
- Step 4: Browse to the file ../target-iot-lab/wellness-desktop/src/com/adobe/summit2016/SessionMboxCallService.java
- Step 5: Scroll down to see the following logic. This logic makes the call to Targets Edge server to fetch the mbox content. Recall that the mbox will be used to identify the light bulb and Home Automation Server as a "location" that is part of a Target Activity. You can see that the mbox name itself is being passed in from a different class ( Main ), and the call includes the third party id and the mbox parameters.
Here is another look at the code:
	String url = "http://" + host + "/rest/v1/mbox/" + thirdPartyId +
            "?client=" + clientCode;
    try {
        URL urlToRequest = new URL(url);
        HttpURLConnection urlConnection = (HttpURLConnection) urlToRequest.openConnection();
        urlConnection.setDoOutput(true);
        urlConnection.setRequestMethod("POST");
        urlConnection.setRequestProperty("Content-Type", "application/json");
        JSONObject mboxRequestJson = new JSONObject();
        mboxRequestJson.put("mbox", mbox);
        mboxRequestJson.put("thirdPartyId", thirdPartyId);
        mboxRequestJson.put("mboxParameters", new JSONObject(mboxParameters));
        DataOutputStream dStream = new DataOutputStream(urlConnection.getOutputStream());
    ..
Now, let's go back to the light bulb and test it out.
- Step 6: Enter the value for your lab user in the User Name field, and the corresponding thirdPartyId value in the VisitorID field like below: User Name = labuser01 Profile UserId = labUserId01-visitor1

- Step 7: Click Submit, and you will see calls go out to Target and return a "default response" as shown. You have not yet created a Target activity using the mbox, "wellnessHomeAutomationServer", so there is no personalized content that comes back for the user. Click "Stop" after you have seen some responses.
	POST to http://adobesummit021.tt.omtrdc.net/rest/v1/mbox/labUserId1-1?client=adobesummit021 {"thirdPartyId":"labUserId1-1","mboxParameters":{"name":"labuser1"},"mbox":"wellnessHomeAutomationServer"}
Response from Target: {"thirdPartyId":"labUserId1-1","edgeHost":"mboxedge28.tt.omtrdc.net","content":"","sessionId":"labUserId1-1"}
Next, we will fix the Target activity to return a response for our new mbox!
##Exercise 2: Updating the Wellness activity for the new mbox.
- Step 1: Login to target and locate the activity that you created in Lesson 2.
-
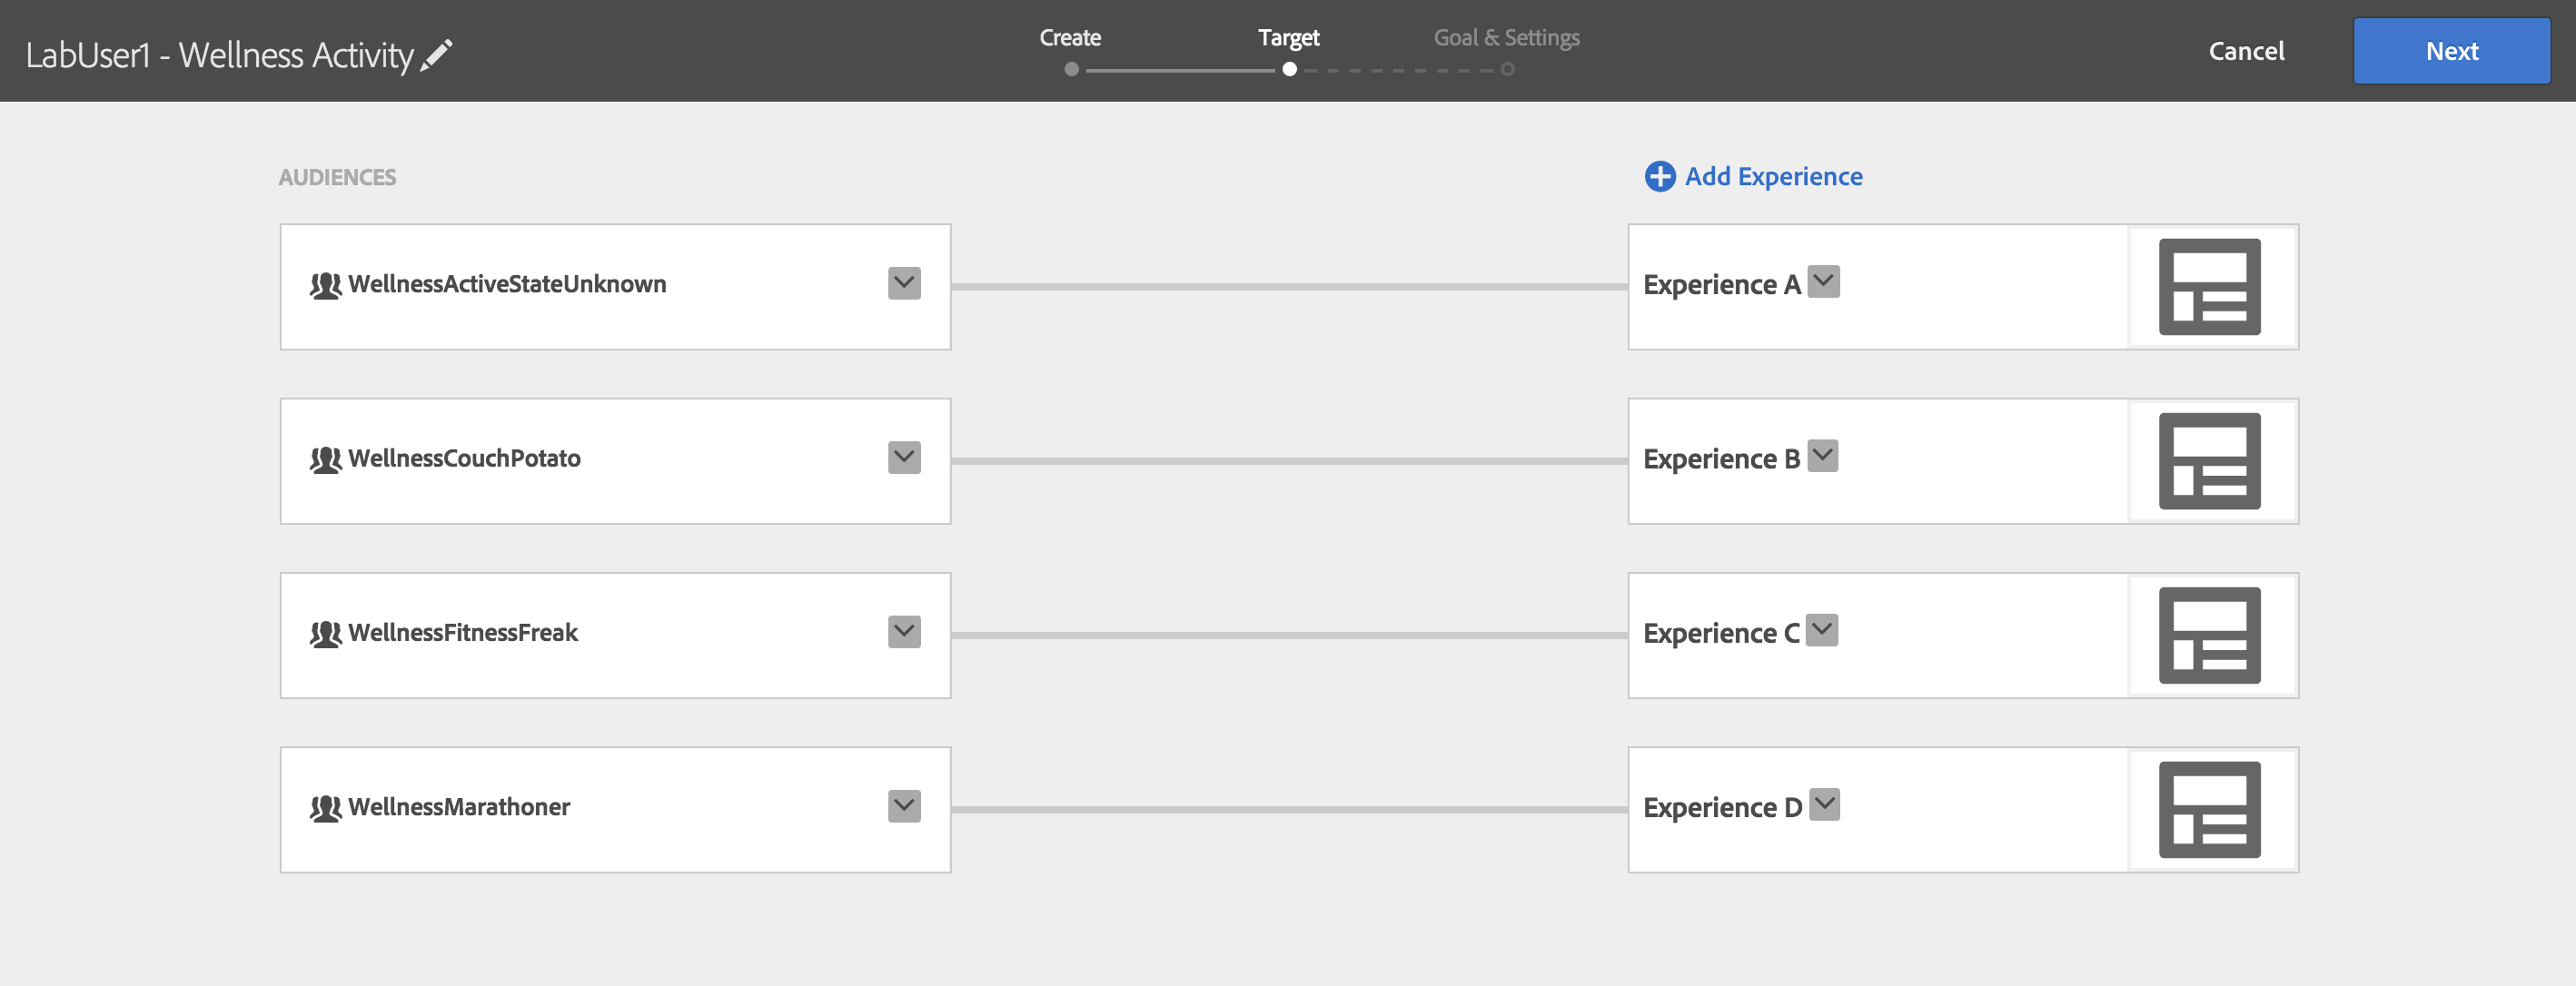
Step 2: We will be editing the activity as follows:
-
WellnessActiveStateUnknown audience should be shown LightBulb_Default offer
-
WellnessCouchPotato should be shown LightBulb_CouchPotato offer
-
WellnessFitnessFreak should be shown LightBulb_FitnessFreak offer
-
WellnessMarathoner should be shown LightBulb_Marathoner offer
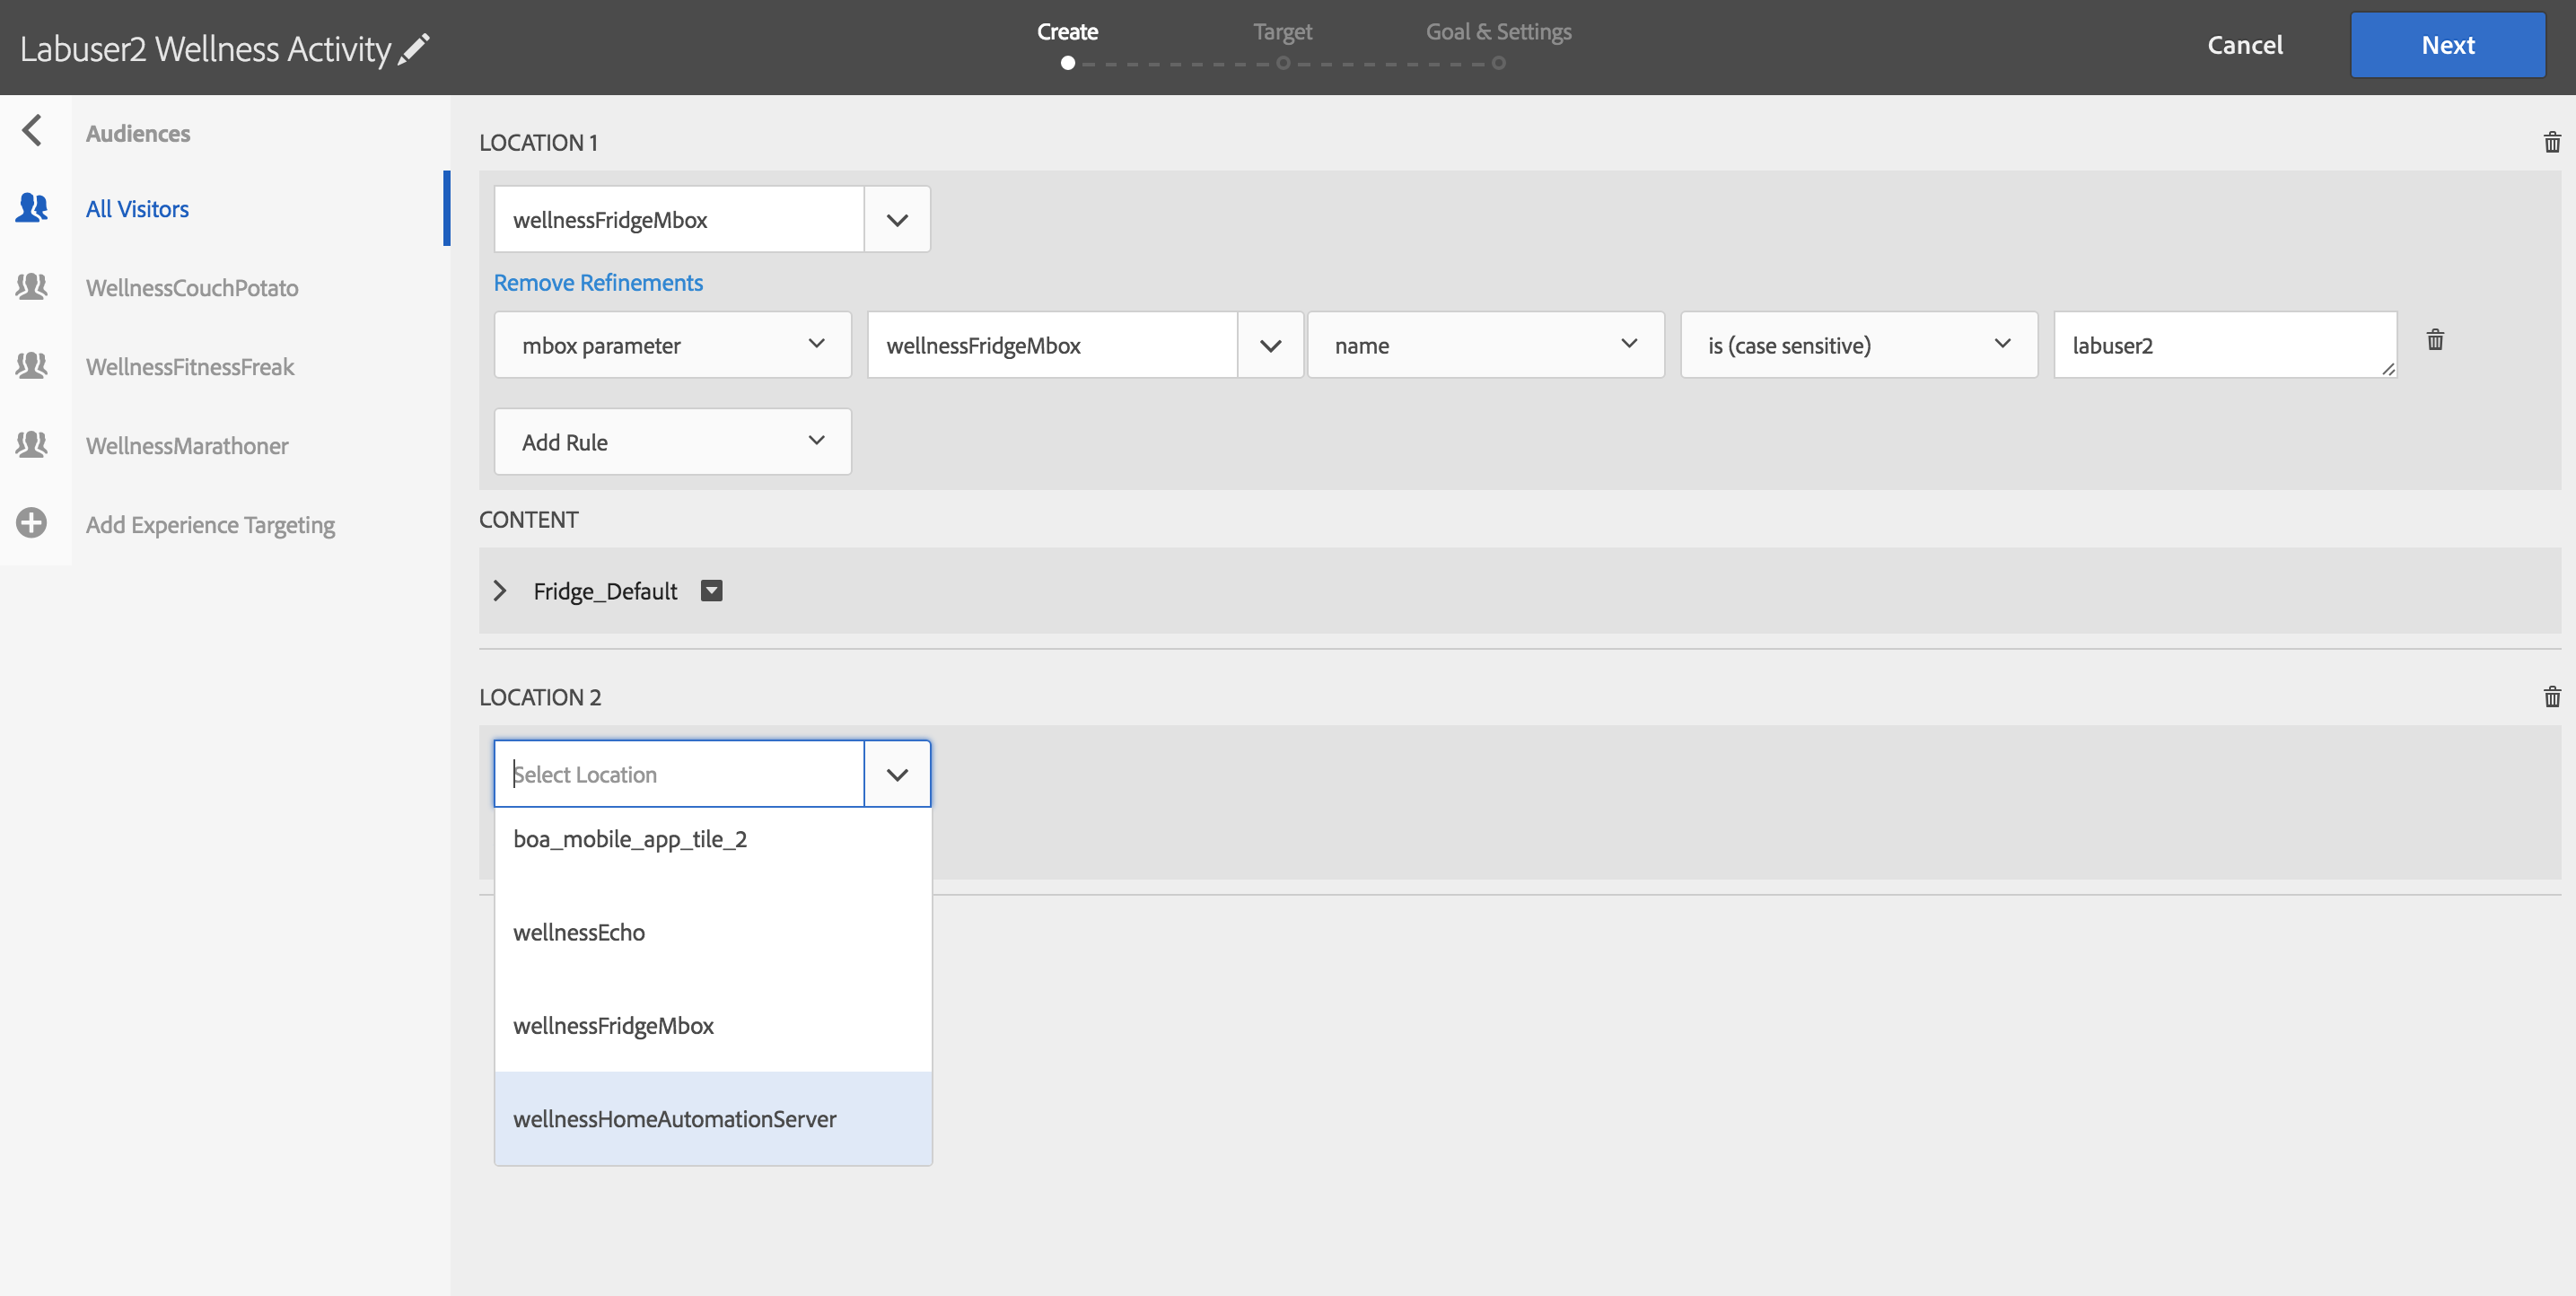
First click "Add Location" in the activity created in previous lesson, and choose wellnessHomeAutomationServer mbox.
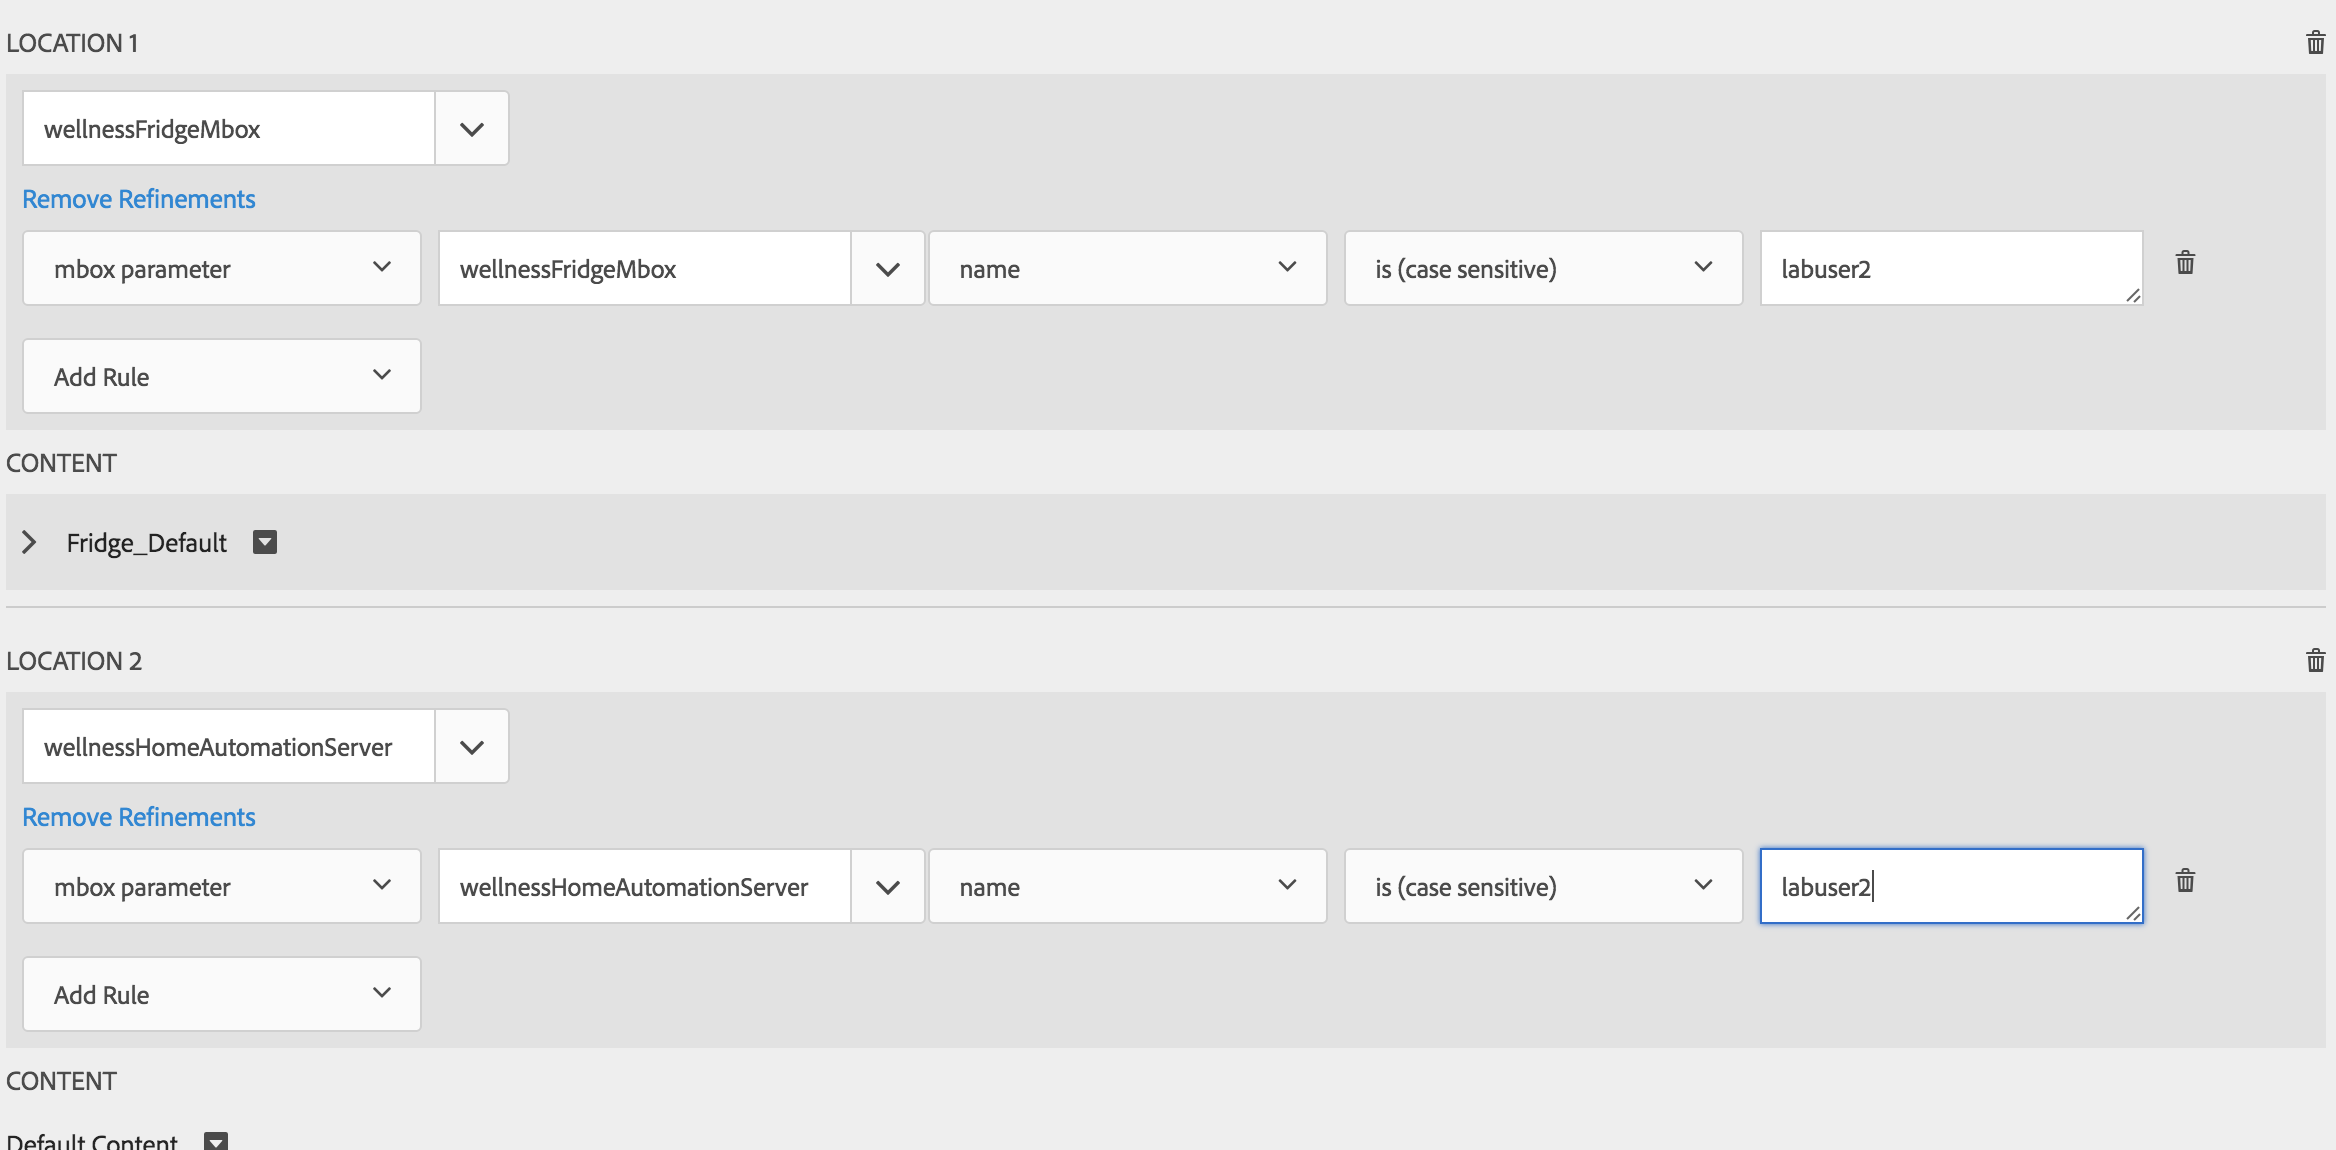
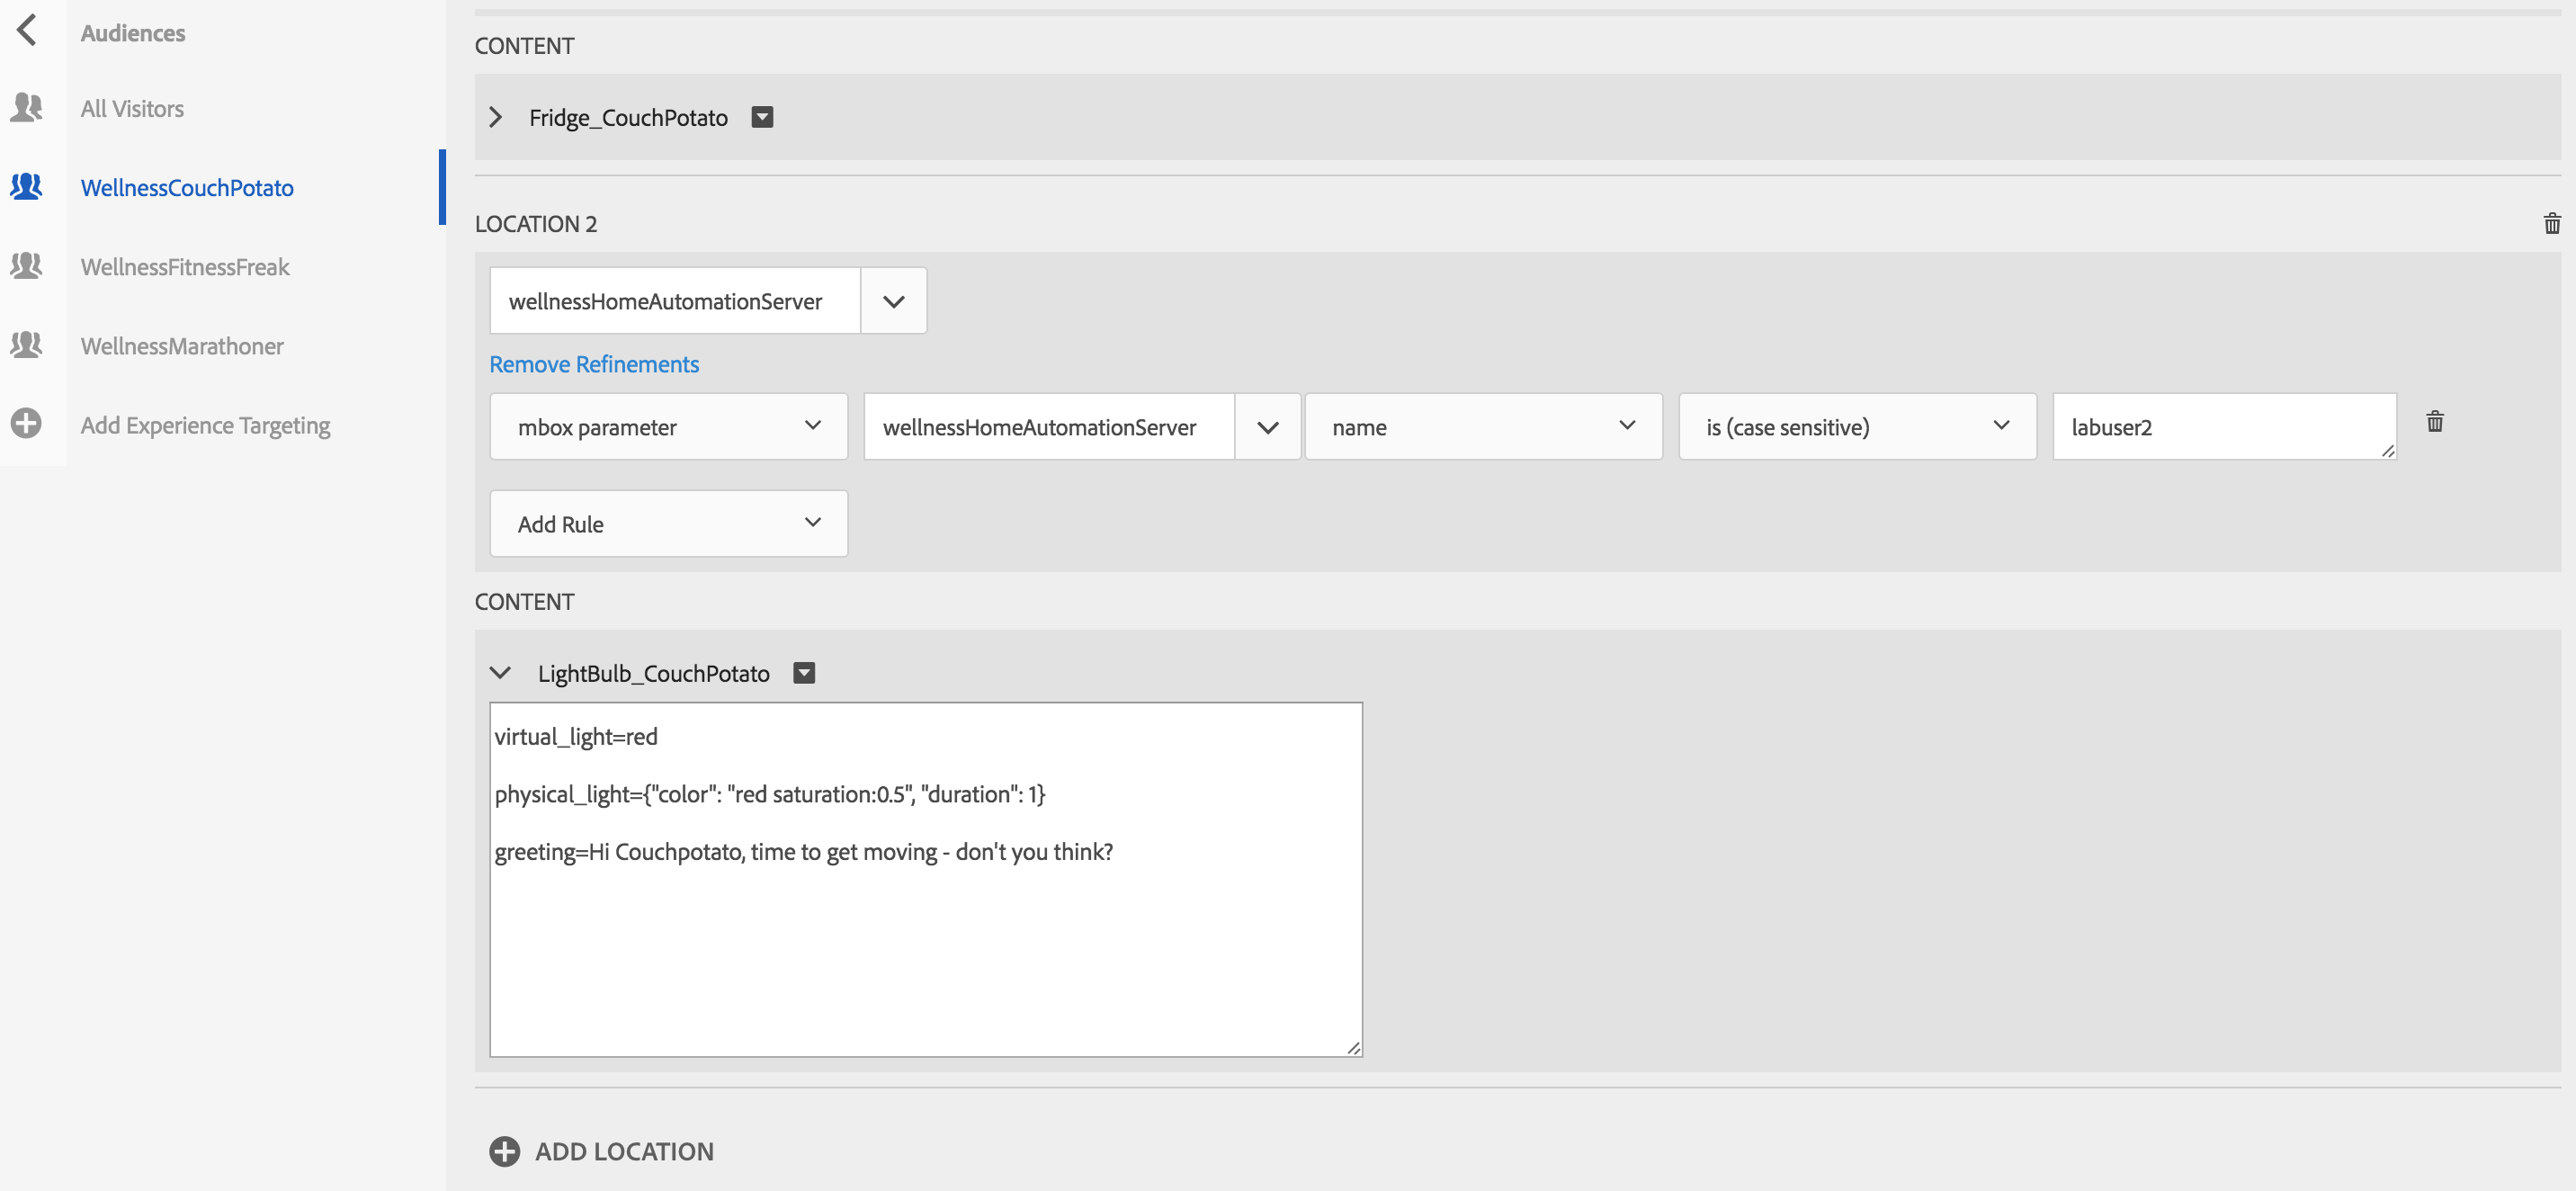
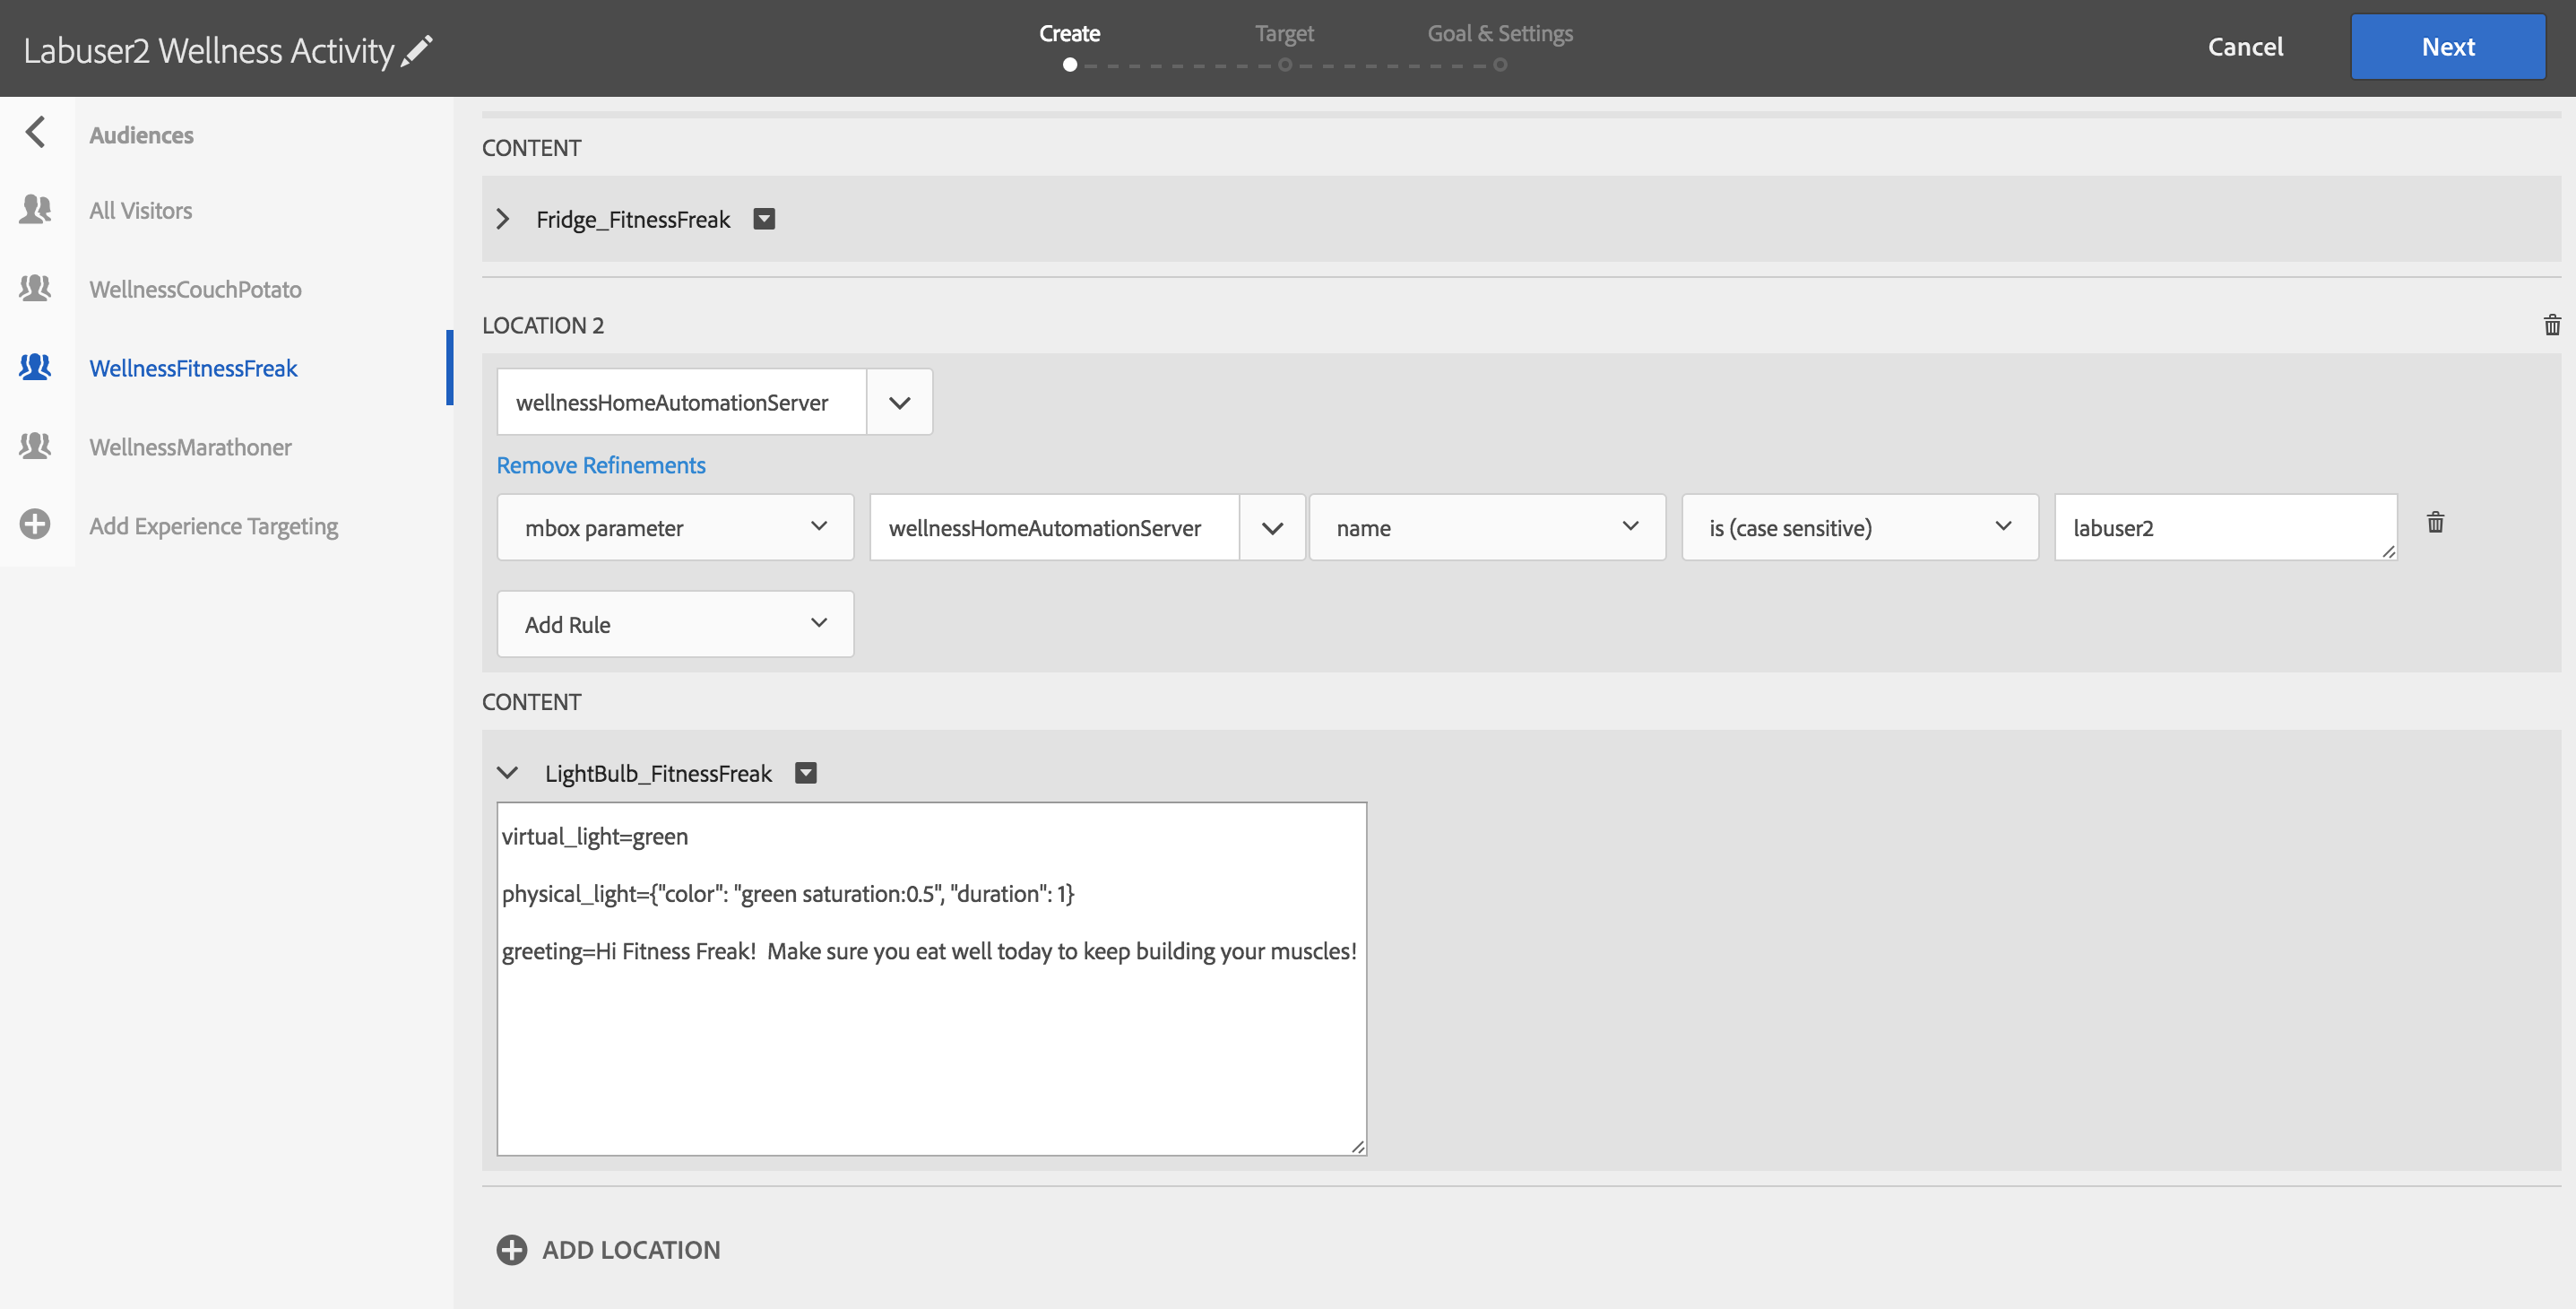
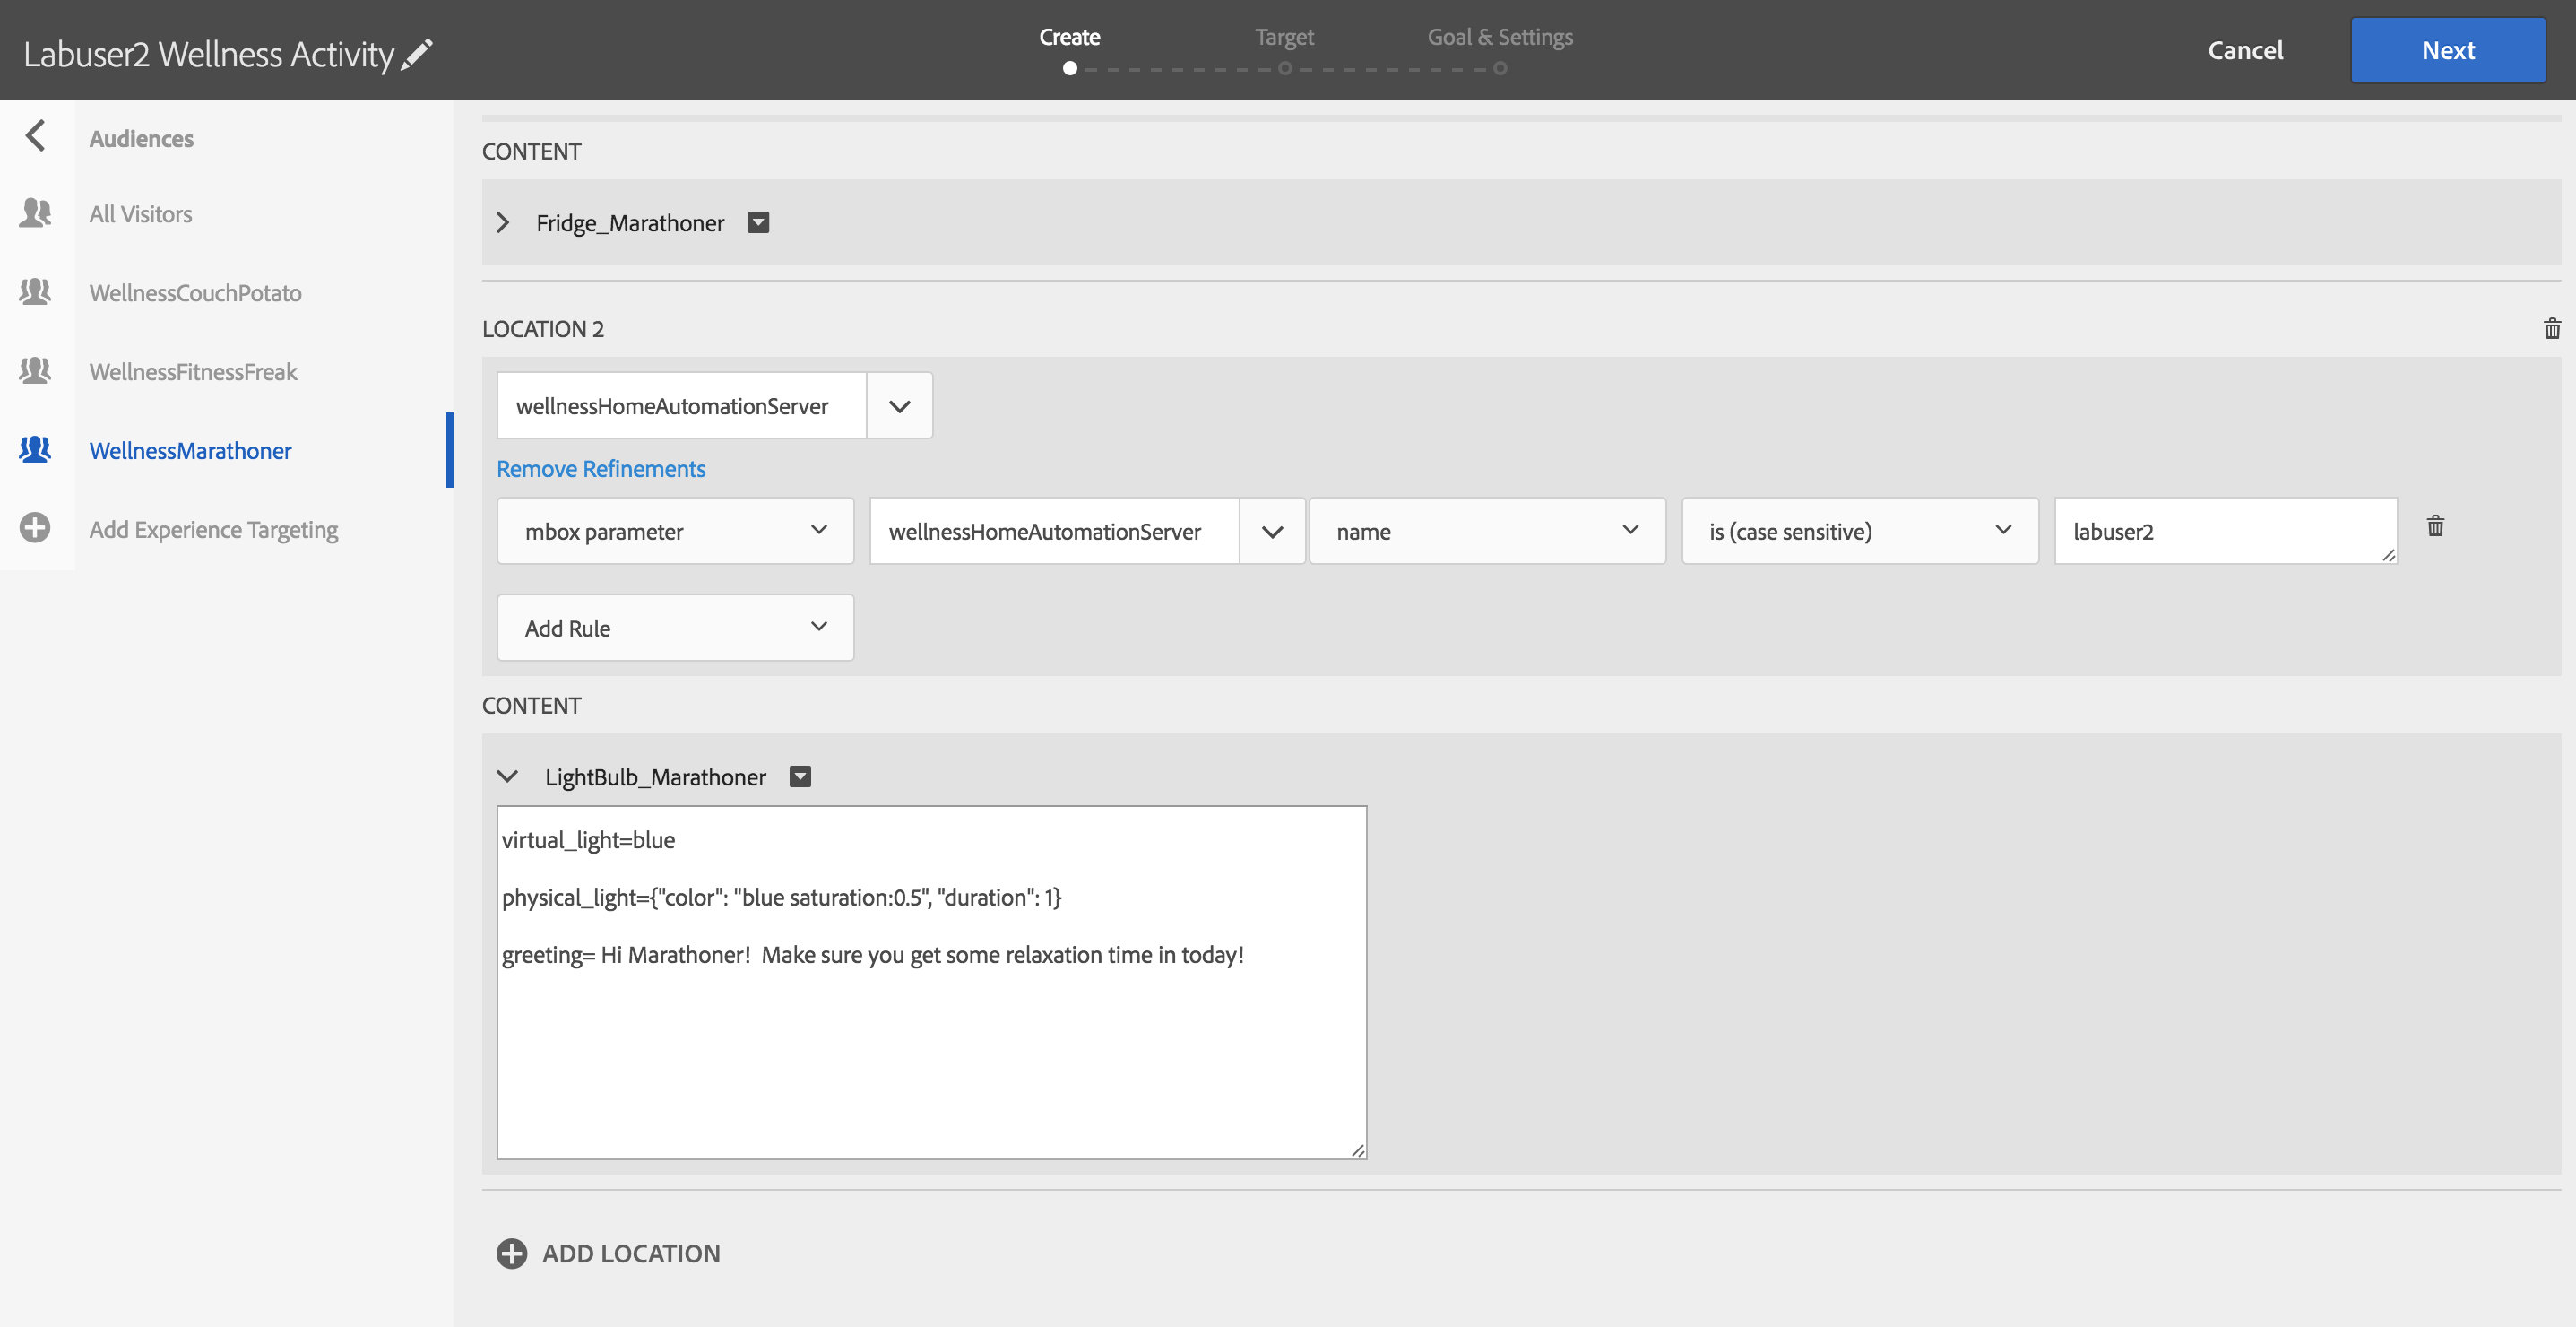
Next, click "Add Refinements" link below wellnessHomeAutomationServer you just added and add targeting for the mbox parameter "name" equals your LabUserId as shown:
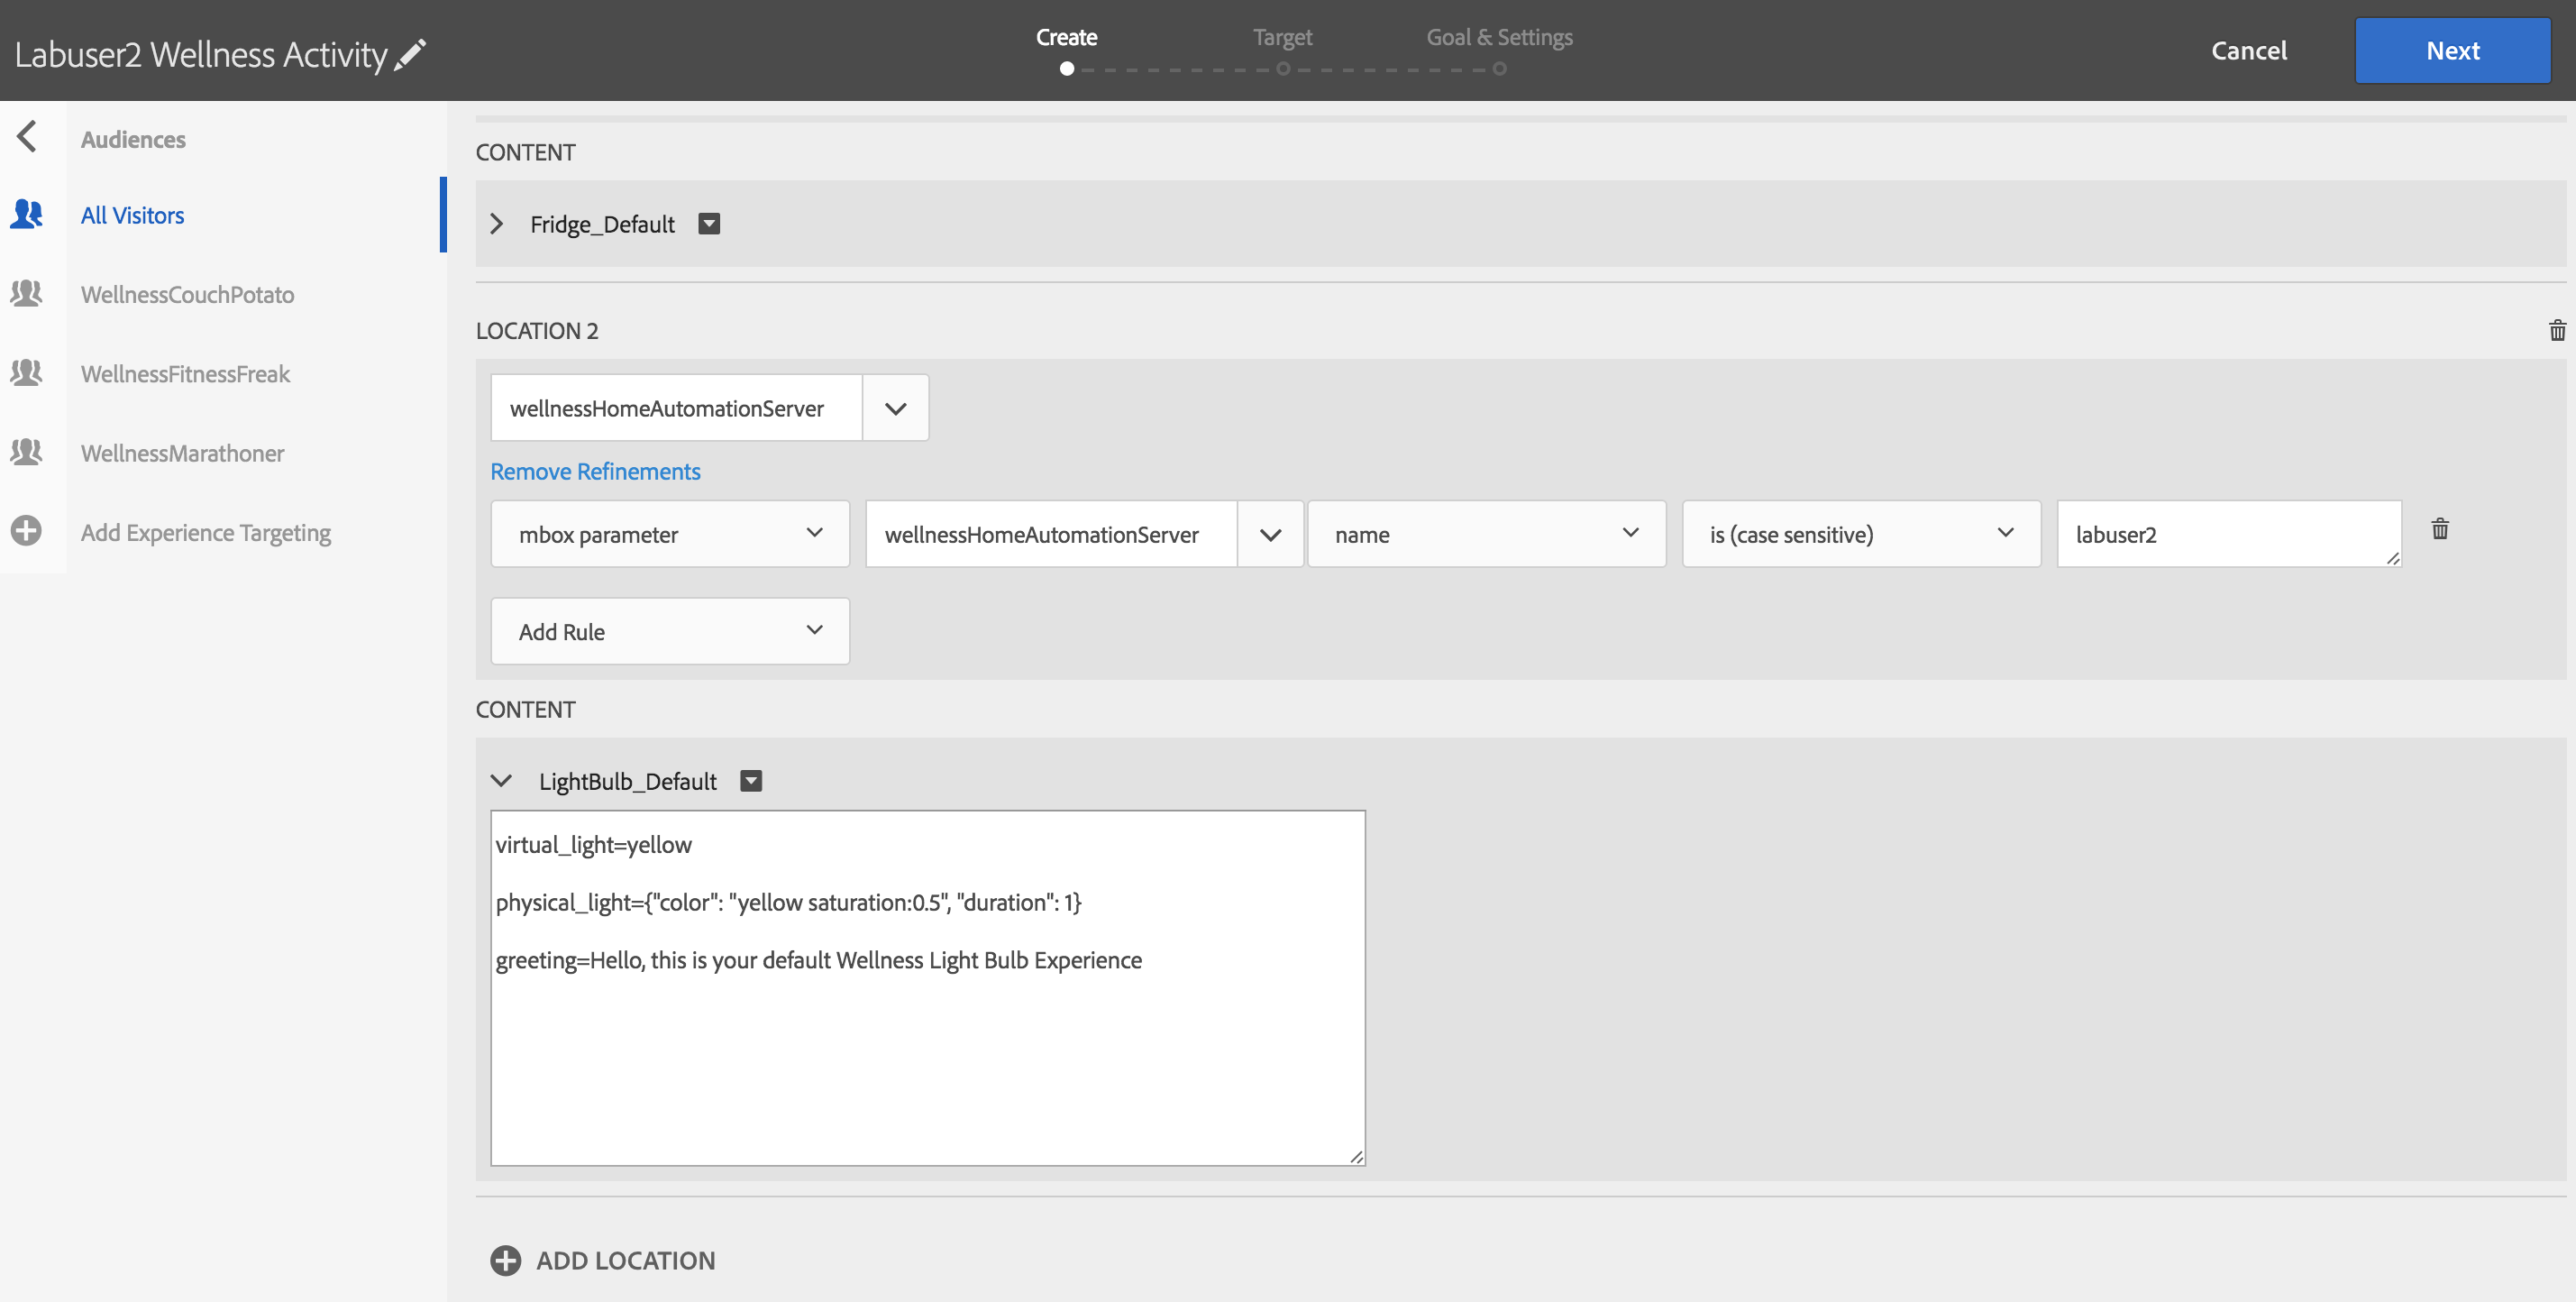
Now for each experience, choose the right "LightBulb" offer - as follows.
-
WellnessActiveStateUnknown audience should be shown LightBulb_Default offer
-
WellnessCouchPotato should be shown LightBulb_CouchPotato offer
-
WellnessFitnessFreak should be shown LightBulb_FitnessFreak offer
-
WellnessMarathoner should be shown LightBulb_Marathoner offer
-
Step 3: Click Next after you have added the LightBulb offers for the wellnessHomeAutomationServer location
- Step 4: Click Next again on the overview of the activity, no changes are needed.
-
Step 5: Click Save, without making any changes to the conversion step.
-
Step 6: Lets test the changes, by going back to the Java application that is still running and clicking submit
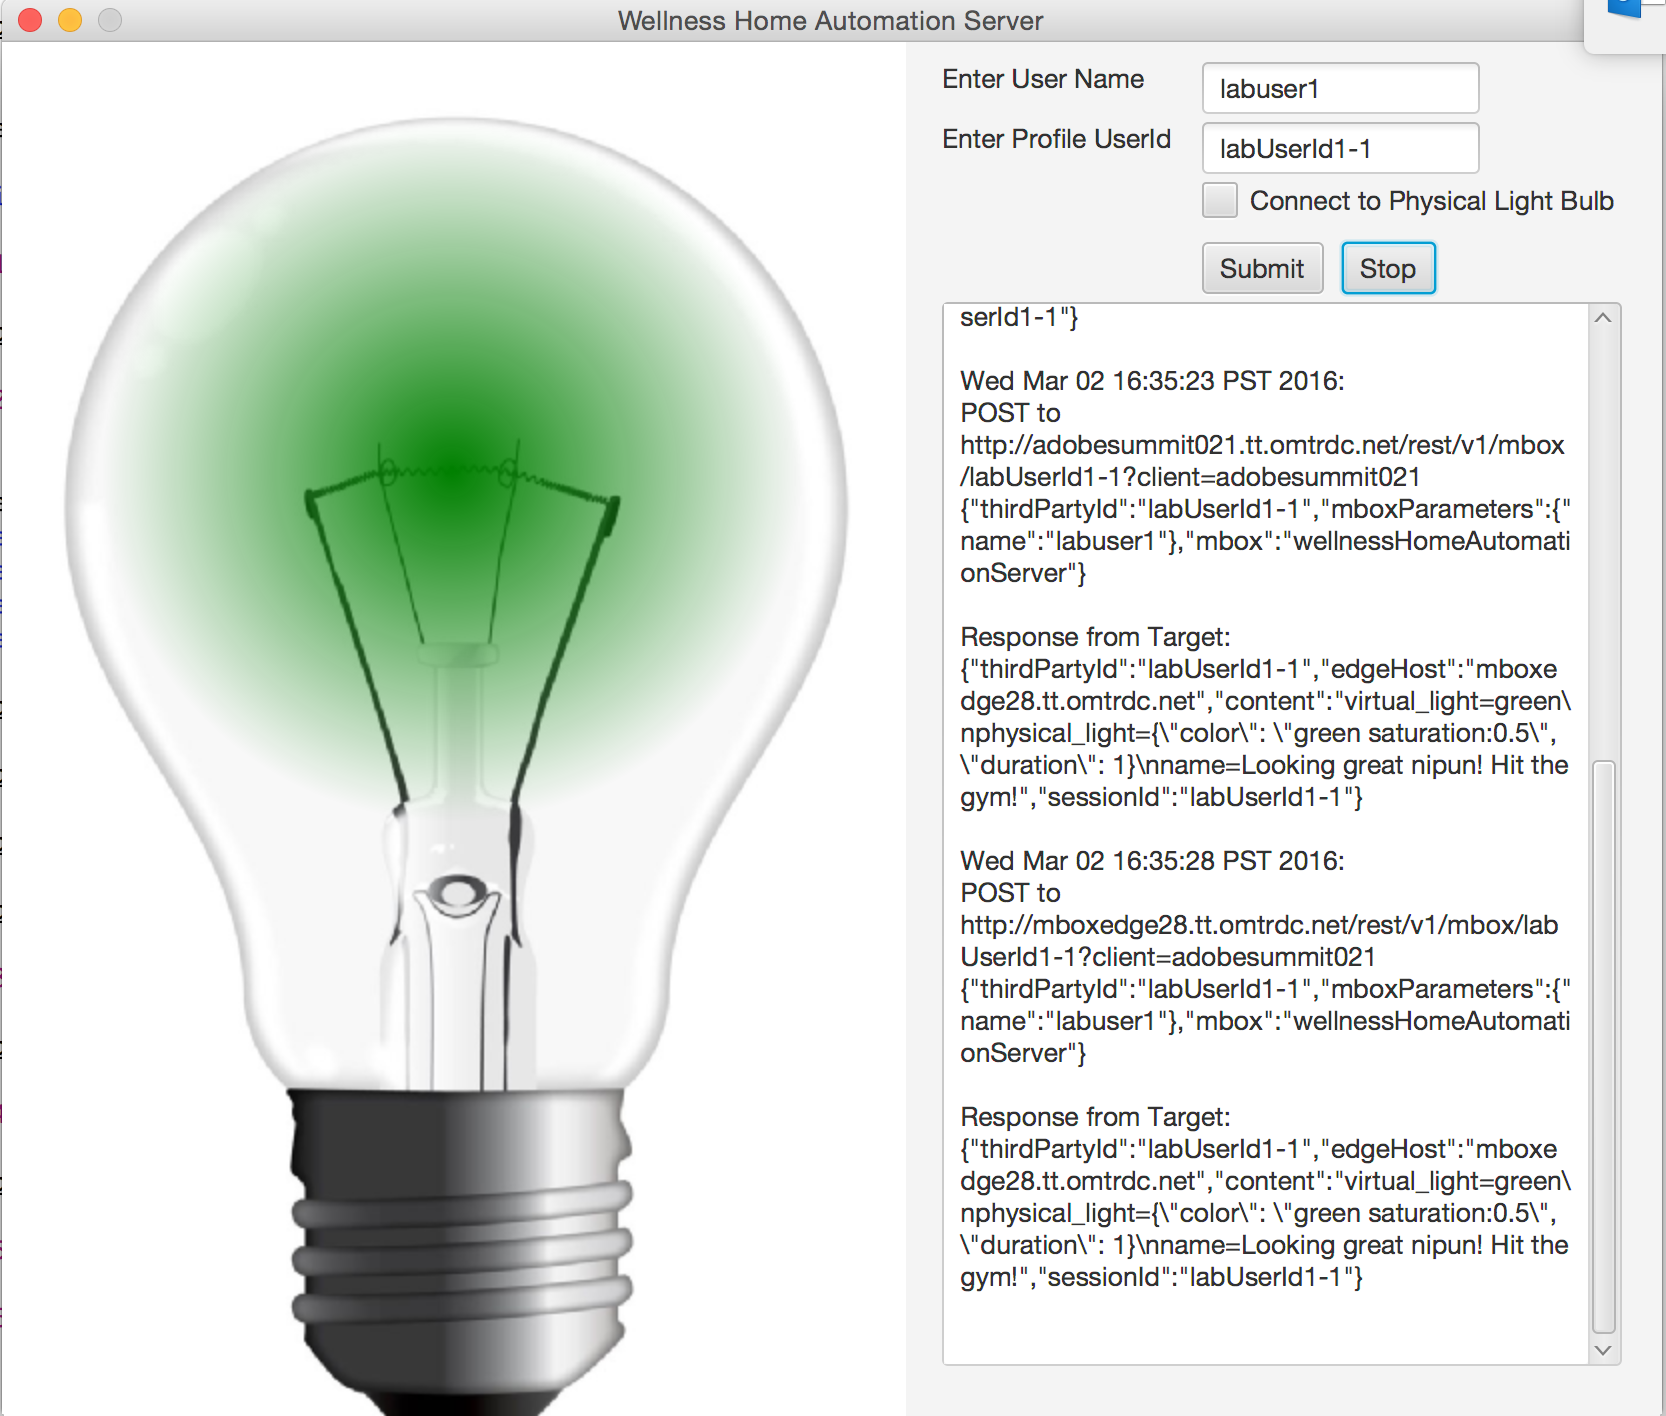
You should see that we get a response for "Green" lightbulb since this corresponds to the thirdPartyId that we updated.
	POST to http://adobesummit021.tt.omtrdc.net/rest/v1/mbox/labUserId1-1?client=adobesummit021 {"thirdPartyId":"labUserId1-1","mboxParameters":{"name":"labuser1"},"mbox":"wellnessHomeAutomationServer"}
Response from Target: {"thirdPartyId":"labUserId1-1","edgeHost":"mboxedge28.tt.omtrdc.net","content":"virtual_light=green\nphysical_light={\"color\": \"green saturation:0.5\", \"duration\": 1}\nname=Looking great nipun! Hit the gym!","sessionId":"labUserId1-1"}
- Step 7: You can go and update the profile in Postman for the same LabID and Visitor id, and see that the changes come thru after a short delay
##Conclusion
In this lesson we learned how to make a server side api call to deliver mbox requests for a connected experience.
