Lesson 5: Understanding Server side mbox calls - Adobe-Marketing-Cloud/target-api-examples GitHub Wiki
##Objective
Adobe Target allows mbox calls to originate from a browser, mobile device or even another Server. The "Server Side delivery api" can be used to integrate Adobe Target with any server side platform that can make HTTP calls.
For reference please review https://marketing.adobe.com/developer/documentation/test-target/serverside-delivery
In this lesson we will learn how to use the server side delivery api to look at the content of our Lab activity.
Note For this lesson, we will be working with your thirdpartyId, please visit your Travel website
http://adobe-marketing-cloud.github.io/target-api-examples/travel-demo/labuser<USERNUMBER>.html
For example: http://adobe-marketing-cloud.github.io/target-api-examples/travel-demo/labuser71.html
Now scroll down to see your third party id.
##Exercise 1: Running Server side delivery api
For our activity we will simulate a server side POST request to the following url.
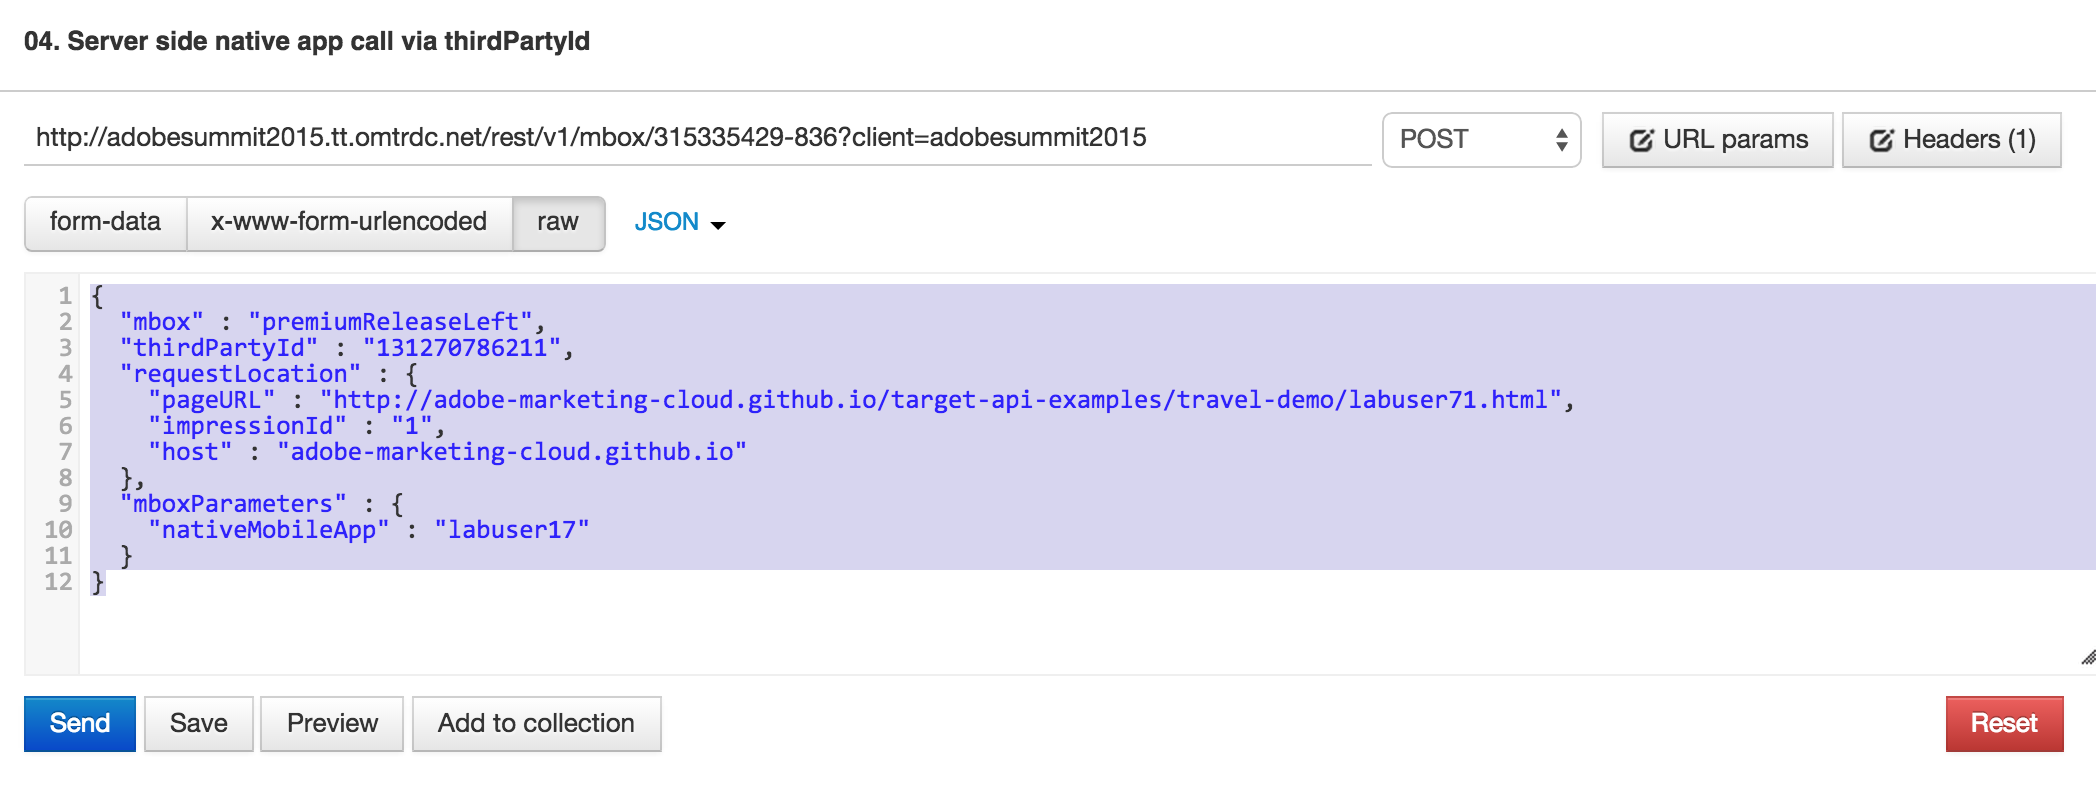
http://adobesummit2015.tt.omtrdc.net/rest/v1/mbox?client=adobesummit2015The request url contains a session id and the client code, the rest of the details are passed in the HTTP POST payload as shown below.
{
  "mbox" : "premiumReleaseLeft",
  "thirdPartyId" : "131270786211",
  "requestLocation" : {
    "pageURL" : "http://adobe-marketing-cloud.github.io/target-api-examples/travel-demo/labuser71.html",
    "impressionId" : "1",
    "host" : "adobe-marketing-cloud.github.io"
  },
  "mboxParameters" : {
    "nativeMobileApp" : "labuser17"
  }
}
The request here does not contain mboxPC because we are relying on mbox3rdPartyId for tracking same user across channels. Usually the users are registered/logged-in in native application and from email/other IDs we can get the appropriate mbox3rdPartyId.
In this case we just copied the third party id from web page in order to mimic real authentication in native application.
Lets see this api call in action by using the "PostMan" plugin in the chrome browser.
-
Step 1: Open up the PostMan plugin in Chrome browser
-
Step 2: Locate the call titled “04. Server side native app call via thirdPartyId”
-
Step 3: Edit the request payload with your specific third-party id
- Step 4: Click "Send" to make the request, you should see the response for the Native Mobile offer because the request contains the "nativeMobileApp" parameter.
{
    "thirdPartyId": "131270786211",
    "content": "<!-- \n{\n\t\"imageUrl\": \"images/aruba-mobile-native.jpg\",\n\t\"offerName\": \"Aruba, Mobile Native App\",\n\t\"offerContent\": \"We travel not to escape life, but for life not to escape us. This release is all about features and productivity. Target makes it easy for you to create personalized digital experiences that deliver real results and revenue.\"\n}\n-->\n<section>\n<a href=\"#\" class=\"image featured\"><img src=\"images/aruba-mobile-native.jpg\" alt=\"\" /></a>\n<header>\n\t<h3>Aruba, Mobile Native App</h3>\n</header>\n<p>We travel not to escape life, but for life not to escape us. This <a href=\"https://www.adobe.com/solutions/testing-targeting.html#\">release</a> is all about features and productivity. Target makes it easy for you to create personalized digital experiences that deliver real results and revenue.\t\t\t\t\t\t\t\n</section>"
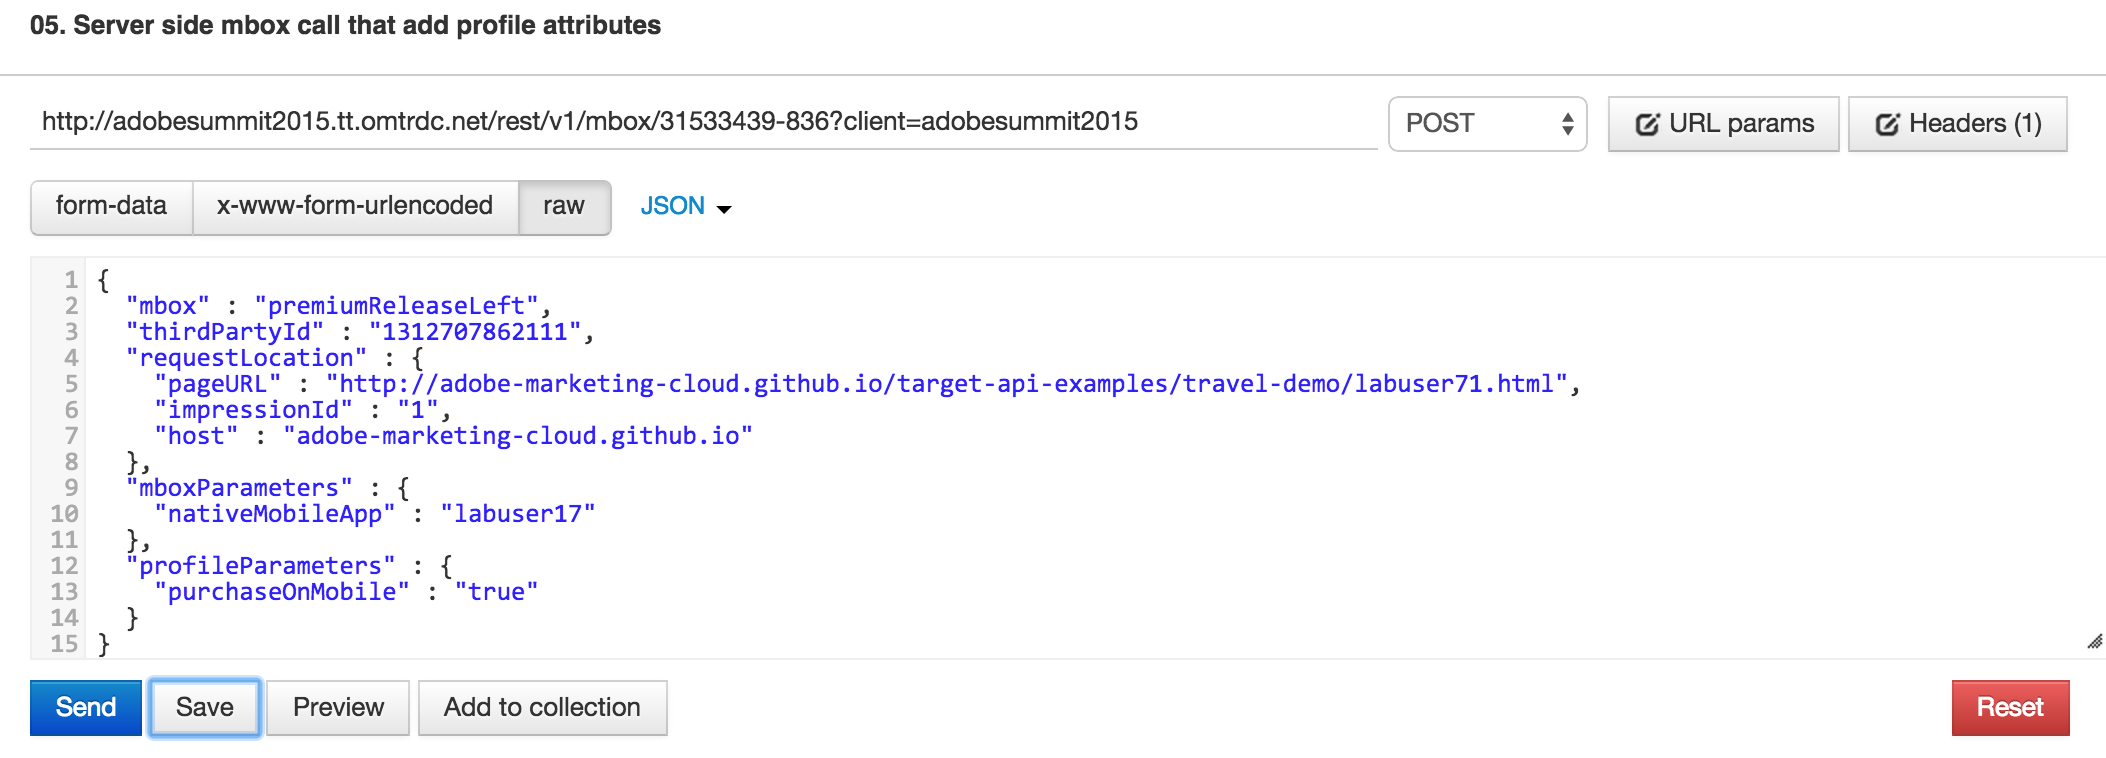
}- Step 5: Now, lets make a server call to simulate a purchase. This will be achieved by sending custom profile attribute "purchaseOnMobile" in the server side call. As result user will qualify for audience A (Users that purchased from mobile) - Cancun offer.
The request payload looks like this:
{
  "mbox" : "premiumReleaseLeft",
  "thirdPartyId" : "1312707862111",
  "requestLocation" : {
    "pageURL" : "http://adobe-marketing-cloud.github.io/target-api-examples/travel-demo/labuser71.html",
    "impressionId" : "1",
    "host" : "adobe-marketing-cloud.github.io"
  },
  "mboxParameters" : {
    "nativeMobileApp" : "labuser17"
  },
  "profileParameters" : {
    "purchaseOnMobile" : "true"
  }
}
In Postman locate the call titled 05. Server side mbox call that add profile attributes. Make sure you update the USERNUMBER and thirdPartyId in the request payload and click "Send"
The response will be for the Cancun offer since the profile contains the purchaseOnMobile parameter.
{
    "thirdPartyId": "1312707862111",
    "content": "<!-- \n{\n\t\"imageUrl\": \"images/cancun.jpg\",\n\t\"offerName\": \"Cancun like never before (Purchase on mobile)\",\n\t\"offerContent\": \"We travel not to escape life, but for life not to escape us. This release is all about features and productivity. Target makes it easy for you to create personalized digital experiences that deliver real results and revenue.\"\n}\n-->\n<section>\n<a href=\"#\" class=\"image featured\"><img src=\"images/cancun.jpg\" alt=\"\" /></a>\n<header>\n\t<h3>Cancun like never before (Purchase on mobile)</h3>\n</header>\n<p>We travel not to escape life, but for life not to escape us. This <a href=\"https://www.adobe.com/solutions/testing-targeting.html#\">release</a> is all about features and productivity. Target makes it easy for you to create personalized digital experiences that deliver real results and revenue.\t\t\t\t\t\t\t\n</section>"
}Note: Now your visitor profile referred to by your thirdparty id has recorded a purchase from the Mobile app – so you should see the corresponding experience when we refresh your browser using the same third party id.
- Step 6: Refresh your browser after a few minutes, to see the new experience that is shown for visitors after mobile app purchase.
In this lesson we learnt how the Adobe Target Server side delivery calls are used. The same call could be made from a custom application to integrate Adobe Target wherever testing is needed.


