PE1100N V2 - ASUS-IPC/ASUS-IPC GitHub Wiki
1. Flash Image
PE1100N V2 only support flash image via Ubuntu and doesn't support flash image via Windows.
1.1 Recovery Mode
-
System Requirement
• Linux Host Computer (x86 Ubuntu 18.04 and above)
• Micro USB cable
-
Enter Force Recovery Mode
For PE1100N V2 Box, the Flash Port is number ❷, and the Force Recovery Button is number ❹.
Please perform the following steps to force the PE1100N V2 to enter force recovery mode:
[PE1100N V2]
- Power off the PE1100N V2 and remove the power cable.
- Connect Host Computer and PE1100N V2 Flash Port (number ❷) with Micro USB cable.
- Press and hold the Force Recovery Button (number ❹).
- Connect the power cable and Power ON the PE1100N V2.
- After 3s release the Force Recovery Button.
[Host Computer]
Make sure PE1100N V2 is entered to force recovery mode, type command ‘lsusb’, you can see: “NVidia Corp”, it means PE1100N V2 is in force recovery mode.

1.2 Flash Image
[Host Computer]
-
Extract BSP file on Host Computer.
BSP file example :
| System | File Name |
|---|---|
| PE1100N V2 Orin Nano 4GB | PE1100N_V2 Orin Nano 4GB Super JetPack x.x.x Image Vx.x.x |
| PE1100N v2 Orin Nano 8GB | PE1100N_V2 Orin Nano 8GB Super JetPack x.x.x Image Vx.x.x |
| PE1100N v2 Orin NX 8GB | PE1100N_V2 Orin NX 8GB Super JetPack x.x.x Image Vx.x.x |
| PE1100N V2 Orin NX 16GB | PE1100N_V2 Orin NX 16GB Super JetPack x.x.x Image Vx.x.x |
sudo tar xvpf PE1100N_V2_JONXS_Orin-NX-16GB-Super_JetPack-ssd-6.2.0_L4T-36.4.3_v1.0.0-debug-20250515.tar.gz
- Change folder
cd mfi_PE110xxxxxxxx
sudo ./tools/kernel_flash/l4t_initrd_flash.sh --erase-all --flash-only --showlogs --network usb0
- Flashing the image takes around 15 minutes.
[PE1100N V2]
After 15 minutes, PE1100N V2 will auto reboot.
NOTE :
- Do not use a USB Hub between Host Computer and PE1100N V2.
- You can know the process of flashing image from “mfi_PE1100N-orin/initrdlog”.
2. LTE Setting
2.1 How to set up a SIM card
NOTE : Please insert the SIM card and power on the device.
-
Click to open the settings bar at the top right side of the desktop.

-
Click Mobile Broadband Settings

-
Switch on the Mobile Broadband to enable LTE function

-
Open the Network bar below the IMEI

-
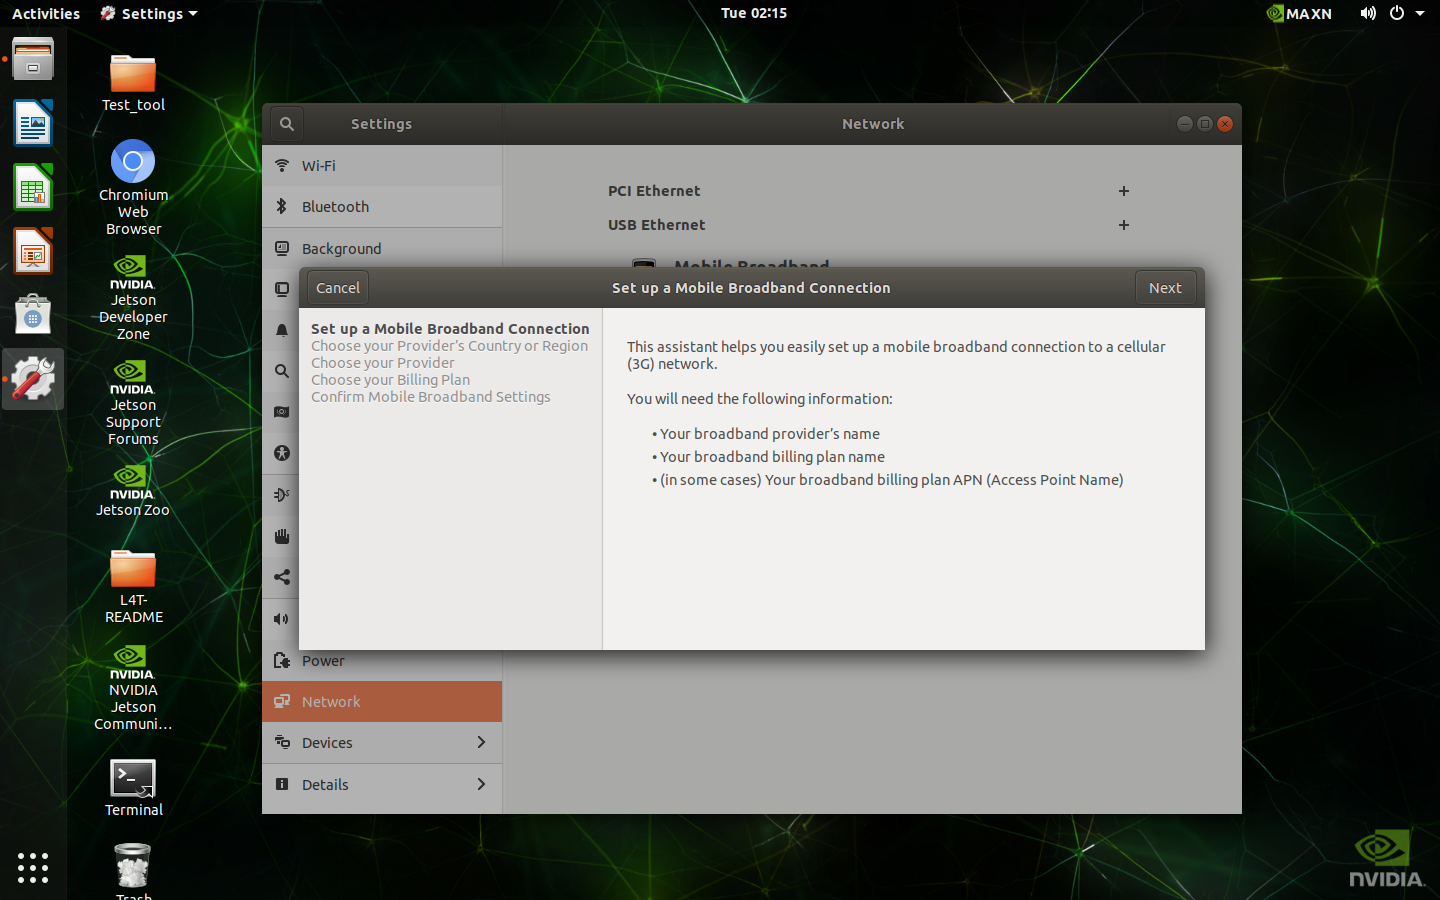
Select Add new connection

-
Click Next on the top right of the window
-
Select your country

-
Select your provider

-
Select your plan

-
Click Apply on the top right of the window

-
It will use this configure to connect to the internet automatically

-
The current signal strength also appear on the settings bar

2.2 How to switch SIM card slot
-
Open Terminal on the desktop

-
Type command ‘
sudo PE1100N-config’, if it asks for a password, enter the password set by yourself. Press Enter.
-
Select Ok

-
Select 5. SIM Select SIM slot and press Enter

-
Select 1 SIM1 or 2 SIM2 and press Enter

-
Select Finish and press Enter

-
Select Yes and press Enter to reboot

2.3 How to check SIM card status
-
Open Terminal on the desktop

-
Type command ‘
sudo PE1100N-config’, if it asks for a password, enter the password set by yourself. Press Enter.
-
Select Ok

-
Select 7. Configuration and press Enter

-
Check SIM slot and SIM state on the screen

3. Switching M.2, COM Mode, and SIM
- Open Terminal on the desktop
- Type command ‘sudo PE1100N-config’, if it asks for a password, enter the password set by yourself. Press Enter.
- Select Ok
- Select the M.2, COM Mode, and SIM you want to switch
4. Switch DIO Instructions
- Open Terminal on the desktop
- Type below command to switch DIO
Set one DO Value: sudo dio_out #DO_Num # Value
Get one DI Value: sudo dio_in #DO_Num
Get all DO Value: sudo dio_out
Get all DI Value: sudo dio_in
5. LED Functions
5.1 Turn on/off LED
- Open Terminal on the desktop
- Below command are examples to turn on LED (Type Echo 1 or 0 for turning on/off LED)
ETH0 : sudo echo 1 > /sys/class/leds/eth0-led/brightness
ETH1: sudo echo 1 > /sys/class/leds/eth1-led/brightness
UART0: sudo echo 1 > /sys/class/leds/uart0-led/brightness
UART1: sudo echo 1 > /sys/class/leds/uart1-led/brightness
CAN: sudo echo 1 > /sys/class/leds/can-led/brightness
WIFI: sudo echo 1 > "/sys/class/leds/wifi-led/brightness
LTE: sudo echo 1 > /sys/class/leds/lte-led/brightness
5.2 Disable kernel LED function
- Open Terminal on the desktop
- Type below commands to disable kernel LED function
ETH0: sudo echo none > /sys/class/leds/eth0-led/trigger
ETH1: sudo echo none > /sys/class/leds/eth1-led/trigger
UART0: sudo echo none > /sys/class/leds/uart0-led/trigger
UART1: sudo echo none > /sys/class/leds/uart1-led/trigger
CAN: sudo echo none > /sys/class/leds/can-led/trigger
WIFI: sudo echo none > /sys/class/leds/wifi-led/trigger
LTE: sudo echo none > /sys/class/leds/lte-led/trigger
5.3 Recover Kernel LED function
- Open Terminal on the desktop
- Type below commands to recover kernel LED function
ETH0: sudo echo eth0 > /sys/class/leds/eth0-led/trigger
ETH1: sudo echo eth1 > /sys/class/leds/eth1-led/trigger
UART0: sudo echo uart0 > /sys/class/leds/uart0-led/trigger
UART1: : sudo echo uart1 > /sys/class/leds/uart1-led/trigger
CAN: sudo echo can > /sys/class/leds/can-led/trigger
WIFI: sudo echo wifi > /sys/class/leds/wifi-led/trigger
LTE: sudo echo lte > /sys/class/leds/lte-led/trigger
6. Others
6.1 ASUS IoT API (DIO Function Control)
Asus_API_Programming_Guide_v1.05_20240223.pdf
ASUS API (Library, Header files, Sample code)
6.2 PE1100N V2 console port connect to PC - USB to UART Bridge
- When PE1100N V2 console port is connected to a PC, it is possible that a USB to UART Bridge exclamation mark may appear in Device Manager.
The baud rate is 115200
- In this case, you need to install the following driver (F81232_231115_whql.zip). After restarting, you will be able to use the console port to read logs normally
6.3 OS and NVIDIA SDK Version Mapping Table (TBD)
6.4 Backup and Restore OS image
The backup and restore steps are applicable to Jetpack 6.0 and above
- Installation Prerequisites
$ sudo apt update
$ sudo apt install -y abootimg binfmt-support binutils cpio cpp device-tree-compiler dosfstools \
iproute2 iputils-ping lbzip2 libxml2-utils netcat nfs-kernel-server openssl python3-yaml qemu-user-static \
rsync sshpass udev uuid-runtime whois xmlstarlet zstd lz4 chrpath diffstat xxd wget bc
- Download and prepare the Linux_for_Tegra source code
$ wget https://developer.nvidia.com/downloads/embedded/l4t/r36_release_v3.0/release/jetson_linux_r36.3.0_aarch64.tbz2
$ tar xf jetson_linux_r36.3.0_aarch64.tbz2
- Download and prepare the sample root file system
$ wget https://developer.nvidia.com/downloads/embedded/l4t/r36_release_v3.0/release/tegra_linux_sample-rootfilesystem_r36.3.0_aarch64.tbz2
$ sudo tar xpf tegra_linux_sample-root-filesystem_r36.3.0_aarch64.tbz2 -C Linux_for_Tegra/rootfs/
-
Download the backup and restore patch file for PE1100N
https://drive.google.com/file/d/1fw7jiq7SIMnj18erY5YQA7kF2xogE0uU/view?usp=sharing
-
Overwrite the original BSP by patch files
$ tar zxf PE1100N_r3630_backup_restore_patch.tar.gz
$ cp -r PE1100N_r3630_backup_restore_patch/Linux_for_Tegra/* Linux_for_Tegra/
# sudo tar -xf PE1100N_r3630_backup_restore_patch/kernel_module/kernel_supplements.tbz2 -C Linux_for_Tegra/rootfs/
# sudo tar -xf PE1100N_r3630_backup_restore_patch/kernel_module/kernel_oot_modules.tbz2 -C Linux_for_Tegra/rootfs/
-
Create the backup image
-
Enter Force Recovery Mode
- Power off the PE1100N and remove the power cable.
- Connect Host Computer and PE1100N Flash Port with Micro USB cable.
- Press and hold the Force Recovery Button.
- Connect the power cable and Power ON the PE1100N.
- After 3s release the Force Recovery Button.
-
Run this command from the Linux_for_Tegra folder:
$ cd Linux_for_Tegra
$ sudo ./tools/backup_restore/l4t_backup_restore.sh -e nvme0n1 -b PE1100N-orin
If this command completes successfully, a backup image will be stored in Linux_for_Tegra/tools/backup_restore/images.
-
-
Restore a PE1100N using a backup image
-
Enter Force Recovery Mode
- Power off the PE1100N and remove the power cable.
- Connect Host Computer and PE1100N Flash Port with Micro USB cable.
- Press and hold the Force Recovery Button.
- Connect the power cable and Power ON the PE1100N.
- After 3s release the Force Recovery Button.
-
Run this command from the Linux_for_Tegra folder:
$ cd Linux_for_Tegra
$ sudo ./tools/backup_restore/l4t_backup_restore.sh -e nvme0n1 -r PE1100N-orin
-
6.5 Build Image (TBD)
7. Intelligent Video Analytics Samples
7.1 Metropolis Microservices for Jetson
NVIDIA Metropolis Microservices is a collection of software components designed for building intelligent video analytics applications. It's part of NVIDIA Metropolis, which is a platform aimed at transforming cities, enterprises, and industries into smart environments using computer vision, deep learning, and AI.
Prerequisites
- Jetson Orin devices with JetPack 6.2 OS
- Android phone or tablet
- Install Docker
sudo apt install -y docker.io
sudo usermod -aG docker $USER
newgrp docker
- Install nvidia-jetson-services
sudo apt update
sudo apt install -y nvidia-jetson-services
- Launch the Redis, Ingress and VST services
sudo systemctl start jetson-redis
sudo systemctl start jetson-ingress
sudo systemctl start jetson-vst
- Download Jetson Platform Services Reference Workflow & Resources
Follow the link below, and select on Version History tab
Choose 2.0.1 -> Download
https://catalog.ngc.nvidia.com/orgs/nvidia/teams/jps/resources/reference-workflow-and-resources
- Launch NVStreamer
unzip files.zip
rm files.zip
cd files
tar -xvf nvstreamer-2.0.1.tar.gz
cd nvstreamer
sudo docker compose -f compose_nvstreamer.yaml up -d --force-recreate
- Launch AI_NVR
cd <path of files>
tar -xvf ai_nvr-2.0.1.tar.gz
sudo cp ai_nvr/config/ai-nvr-nginx.conf /opt/nvidia/jetson/services/ingress/config/
cd ai_nvr
For Orin AGX:
sudo docker compose -f compose_agx.yaml up -d --force-recreate
For Orin NX 16G:
sudo docker compose -f compose_nx16.yaml up -d --force-recreate
For Orin NX 8G:
sudo docker compose -f compose_nx8.yaml up -d --force-recreate
For Orin Nano 8G/4G:
sudo docker compose -f compose_nano.yaml up -d --force-recreate
Docker containers will be created after executing the above instructions.
- Visit the NVStream Streamer Dashboard
http://localhost:31000/
Click "File Upload" and select sample_1080p_h264.mp4 from the files folder.
The file should appear on the dashboard once it has been uploaded successfully
Ex: The RTSP URL is rtsp://192.168.1.46:31555/nvstream/root/store/nvstreamer_videos/sample_1080p_h264.mp4
- Visit the VST Dashboard
http://localhost:30080/vst
Click “Sensor Management”, then add the device
- Enter the sample RTSP URL
- Enter the sample name
- Click submit
The sample video should be listed on the VST Dashboard.
- Example for Metropolis analytics
A. Go to http://localhost:30080/vst
B. Click Live Streams.
C. Select the sample VST.
D. Expand Analytics.
E. Click “ROI”.
F. Add areas of interest, then click “Done”
If creating a ROI or Tripwire fails, please try the below setting in: /opt/nvidia/jetson/services/vst/config/vst_config.json and restart vst by: sudo systemctl restart jetson-vst. Please replace your own jetson device IP in below setting. "analytic_server_address": "http://10.19.225.134:30080/emdx",
ROI and Tripwire creation issues (Jetson Forums) : https://forums.developer.nvidia.com/t/roi-and-tripwire-issue-creating-and-saving-them/325875
G. Enter “People” on the dialog, then click Submit
H. Select People on “Select ROIs”
I. Click “Show”
J. Detected people will be displayed on the video screen.
- Download and install NVIDIA Jetson Services on Android phone or tablet
Follow the link below, and there is an Android app that allows you to track events and create areas of interest to monitor
you can find it on Google Play as AI NVR.
https://play.google.com/store/apps/details?id=com.nvidia.ainvr
- Execute NVIDIA Jetson Services on Android device
A. Enter the JETSON_IP address, then press “Submit”
B. Press “Analytics”
C. This App allows you to track events and create areas of interest to monitor
Reference:
- Tutorial mmj
https://www.jetson-ai-lab.com/tutorial_mmj.html - NVIDIA Metropolis Microservices
https://developer.nvidia.com/metropolis-microservices - Overview of AI-NVR
https://www.nvidia.com/zh-tw/on-demand/session/other2024-mmj2/
7.2 Running DeepStream Python samples (TBD)
7.3 Visual Language Models (VLM) for Jetson
VLMs are multi modal models supporting images, video and text and using a combination of large language models and vision transformers. Based on this capability, they are able to support text prompts to query videos and images thereby enabling capabilities such as chatting with the video, and defining natural language based alerts.
Prerequisites
- Jetson Orin devices with JetPack 6.2 OS
- Android phone or tablet
- Install Docker
sudo apt install -y docker.io
sudo usermod -aG docker $USER
newgrp docker
- Install nvidia-jetson-services
sudo apt update
sudo apt install -y nvidia-jetson-services
- Launch the VST services
sudo systemctl start jetson-vst
- Download Jetson Platform Services Reference Workflow & Resources
Follow the link below, and select on Version History tab
Choose 2.0.1 -> Download
https://catalog.ngc.nvidia.com/orgs/nvidia/teams/jps/resources/reference-workflow-and-resources
- Launch NVStreamer
unzip files.zip
rm files.zip
cd files
tar -xvf nvstreamer-2.0.1.tar.gz
cd nvstreamer
sudo docker compose -f compose_nvstreamer.yaml up -d --force-recreate
- Visit the NVStream Streamer Dashboard
http://localhost:31000/
Click "File Upload" and select sample_1080p_h264.mp4 from the files folder.
The file should appear on the dashboard once it has been uploaded successfully
Ex: The RTSP URL is rtsp://192.168.1.46:31555/nvstream/root/store/nvstreamer_videos/sample_1080p_h264.mp4
- Visit the VST Dashboard
http://localhost:30080/vst
Click “Sensor Management”, then add the device
- Enter the sample RTSP URL
- Enter the sample name
- Click submit
The sample video should be listed on the VST Dashboard.
- Launch VLM
cd <path of files>
tar -xvf vlm-2.0.1.tar.gz
cd vlm/example_1
sudo cp config/vlm-nginx.conf /opt/nvidia/jetson/services/ingress/config
sudo cp config/prometheus.yml /opt/nvidia/jetson/services/monitoring/config/prometheus.yml
sudo cp config/rules.yml /opt/nvidia/jetson/services/monitoring/config/rules.yml
Start the foundation services and launch it.
sudo systemctl start jetson-ingress
sudo systemctl start jetson-monitoring
sudo systemctl start jetson-sys-monitoring
sudo systemctl start jetson-gpu-monitoring
sudo docker compose up -d
The first time the VLM service is launched, it will automatically download and quantize the VLM. This will take some time.
You can visit the page http://JETSON_IP:5015/v1/health, If the VLM is ready it will return {“detail”:”ready”}. If you are launching the VLM for the first time it will take some time to fully load.
Important If it shows {“detail”:”model loading”}, it means it is not ready yet.
- Interact with VLM Service
A. Control Stream Input via REST APIs
You can start by adding an RTSP stream for the VLM to use with the following curl command. This will use the POST method on the live-stream endpoint. Currently the VLM will only support 1 stream but in the future this API will allow for multi-stream support.
Replace 192.168.100.45 with your Jetson IP and replace the RTSP link with your RTSP link.
curl --location 'http://192.168.100.45:5010/api/v1/live-stream' \
--header 'Content-Type: application/json' \
--data '{
"liveStreamUrl":"rtsp://192.168.100.45:31554/nvstream/root/store/nvstreamer_videos/sample_1080p_h264.mp4"
}'
This request will return a unique stream ID that is used later to set alerts and ask follow up questions and remove the stream.
Ex: "id": "f16ffb43-95a4-44c5-bc5f-00cad33ddaf2"
B. Set Alerts
Alerts are questions that the VLM will continuously evaluate on the live stream input. For each alert rule set, the VLM will try to decide if it is True or False based on the most recent frame from of the live stream. These True and False states as determined by the VLM, are sent to a websocket and the jetson monitoring service.
When setting alerts, the alert rule should be phrased as a yes/no question. Such as “Is there people?”. The body of the request must also have the “id” field that corresponds to the stream ID that was returned when the RTSP stream was added.
curl --location 'http://192.168.100.45:5010/api/v1/alerts' \
--header 'Content-Type: application/json' \
--data '{
    "alerts": ["is there people?"],
    "id": "f16ffb43-95a4-44c5-bc5f-00cad33ddaf2"
}'
C. View RTSP Stream Output
Once a stream is added, it will be passed through to the output RTSP stream. You can view this stream at "rtsp://JETSON_IP:5011/out". Once a query or alert is added, we can view the VLM responses on this output stream.
Ex: You can view this RTSP stream by VLC
D. Delete the stream
To shut down the example you can first remove the stream using a DELETE method on the live-stream endpoint. Note the stream ID is added to the URL path for this.
curl --location --request DELETE 'http://192.168.100.45:5010/api/v1/live-stream/f16ffb43-95a4-44c5-bc5f-00cad33ddaf2'
This request will return “Stream removed successfully”
- Using VLM Service from Android phone
A. Download and install NVIDIA Jetson Services on Android phone or tablet
Follow the link below, and there is an Android app that allows you to track events and create areas of interest to monitor
you can find it on Google Play as AI NVR.
https://play.google.com/store/apps/details?id=com.nvidia.ainvr
B. Execute NVIDIA Jetson Services on Android device
Enter the JETSON_IP address, then press “Submit”
Press message button.
Now you can talk to the VLM service. For example, ask VLM what he sees on the screen.
Reference
Visual Language Models (VLM) with Jetson Platform Services
https://docs.nvidia.com/jetson/jps/inference-services/vlm.html