Official Map Modding Tutorial (Part 2) : Making a custom ydr! - 5mods/tutorials GitHub Wiki
Background Info: Whats up modders back at you with my second tutorial for gta V map modding. In this one we will be making a custom .ydr. The next tutorial will show you how to add it in gta V.
REMEMBER TO CHECK OUT MY PREVIOUS TUTORIALS BEFORE DOING THIS ONE
- Part one: https://forums.gta5-mods.com/topic/17754/official-map-modding-tutorial-part-1-setting-up-a-dlc-pack
Programs we will be using for this tutorial:
- Blender (or your preferred modeling program) https://www.blender.org/download/
- Gims EVO https://www.gta5-mods.com/tools/gims-evo-with-gta-v-support
- 3DS Max https://www.autodesk.com/education/free-software/3ds-max
- Open IV https://www.gta5-mods.com/tools/openiv
Making a custom .ydr
For this tutorial we will be converting a cube model into .ydr because I want to start out with something simple. For more complex objects its more or less of the same. I will be showing you how to make it from blender, you can use your preferred modeling software. Anyways lets get started.
Step One: I will be making a cube in blender, I wont be explaining how to make the cube, but I will be going over a couple things when converting from blender. First thing is whatever you want to be textured make sure it has a specific material assigned. For example, for this cube I have assigned a material named "Cube Texture" now I will be making this a solid color, but for more complex objects you will need to uv map, texture, etc. Like this:

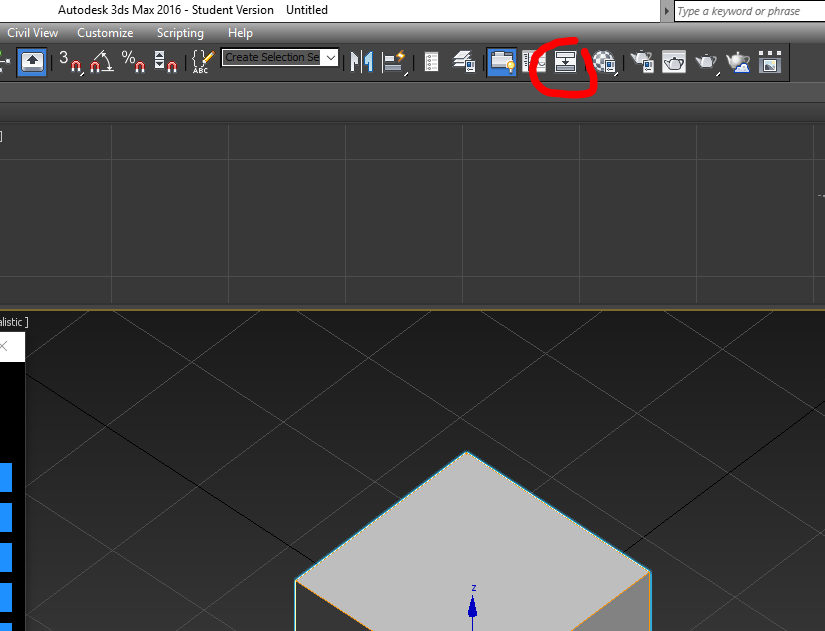
Step Two: Open up 3ds max you must have installed and setup gims evo for this step. The first thing to do is import the .fbx you made earlier. Now once viewing the .fbx make sure the scale factor is set to 1.0 for example:

Step Three: Once inside gims evo you will want to click the object hierarchy on the right side and reset the transform and scale for example:

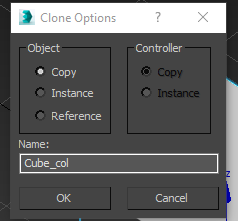
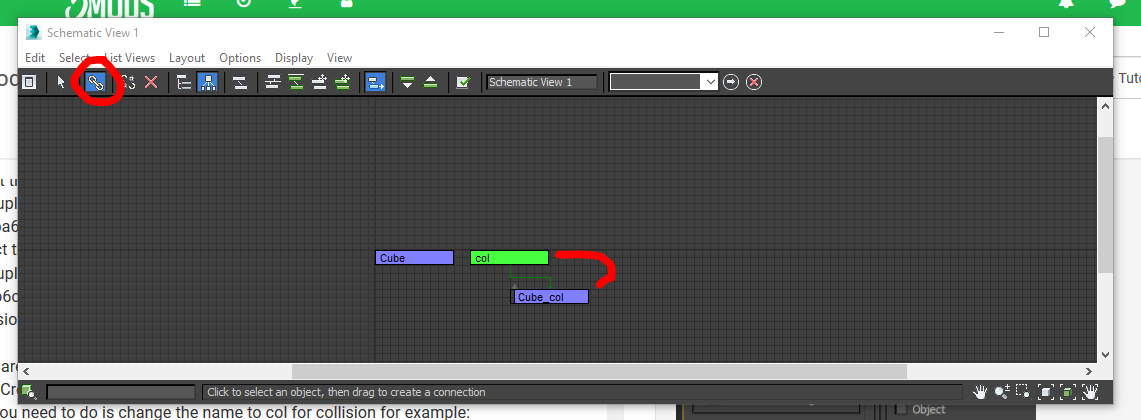
Step Four: Now what you wanna do is right click the object and clone it make sure to clone it as a copy and not a instance. This cloned object will be for your embedded collision so I would name it the "Objects name" + _col for example:
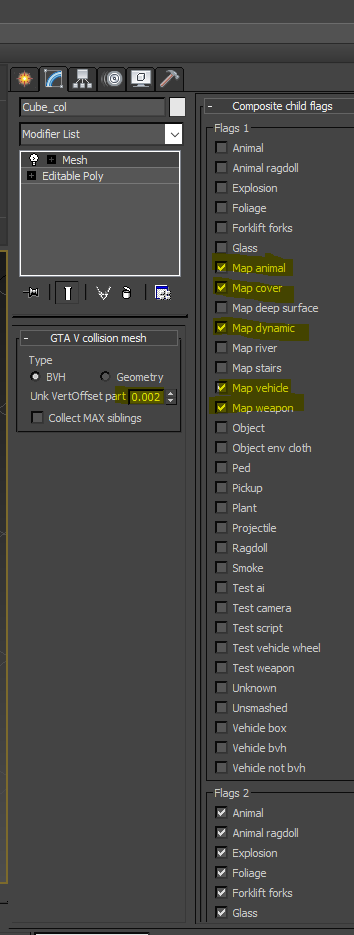
Step Five: Now you want to make the collision material to do this just click the material editor:


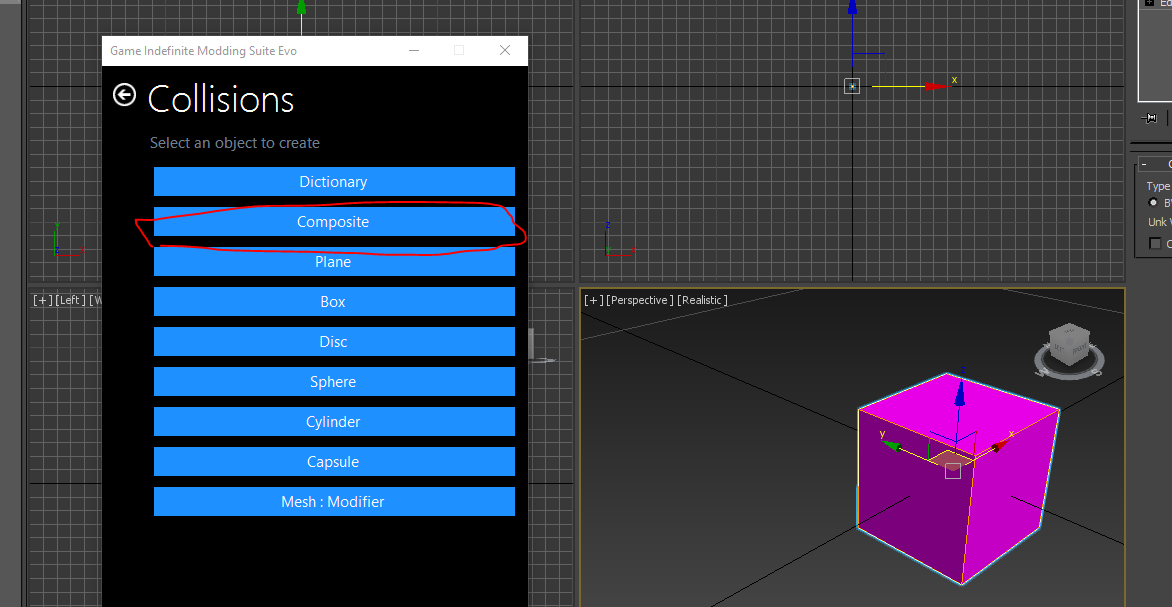
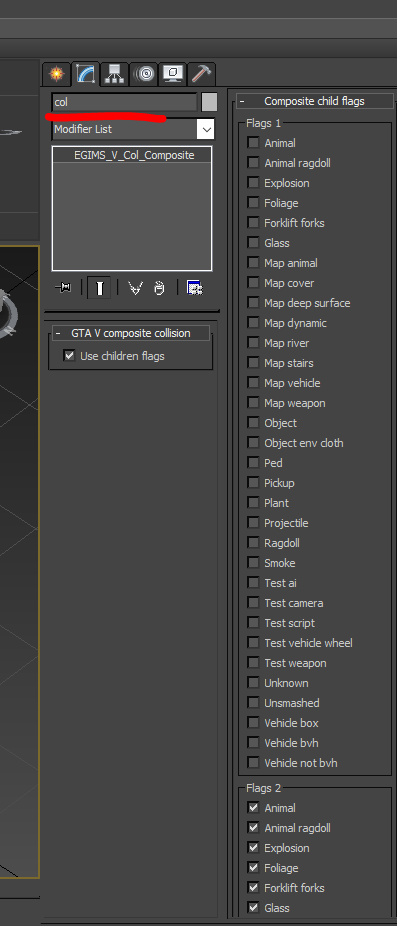
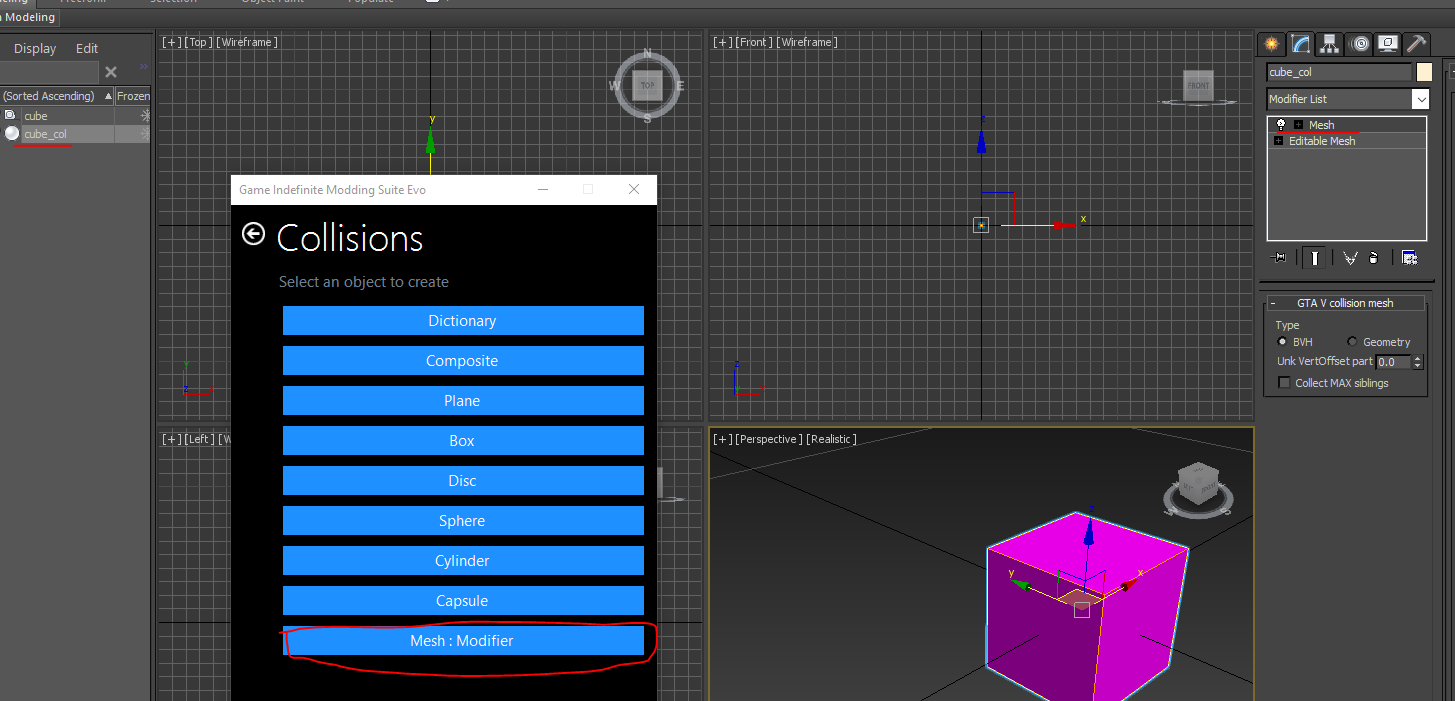
Step Six: To start, click "Create Object > Collisions > Composite" then click the scene view like this:
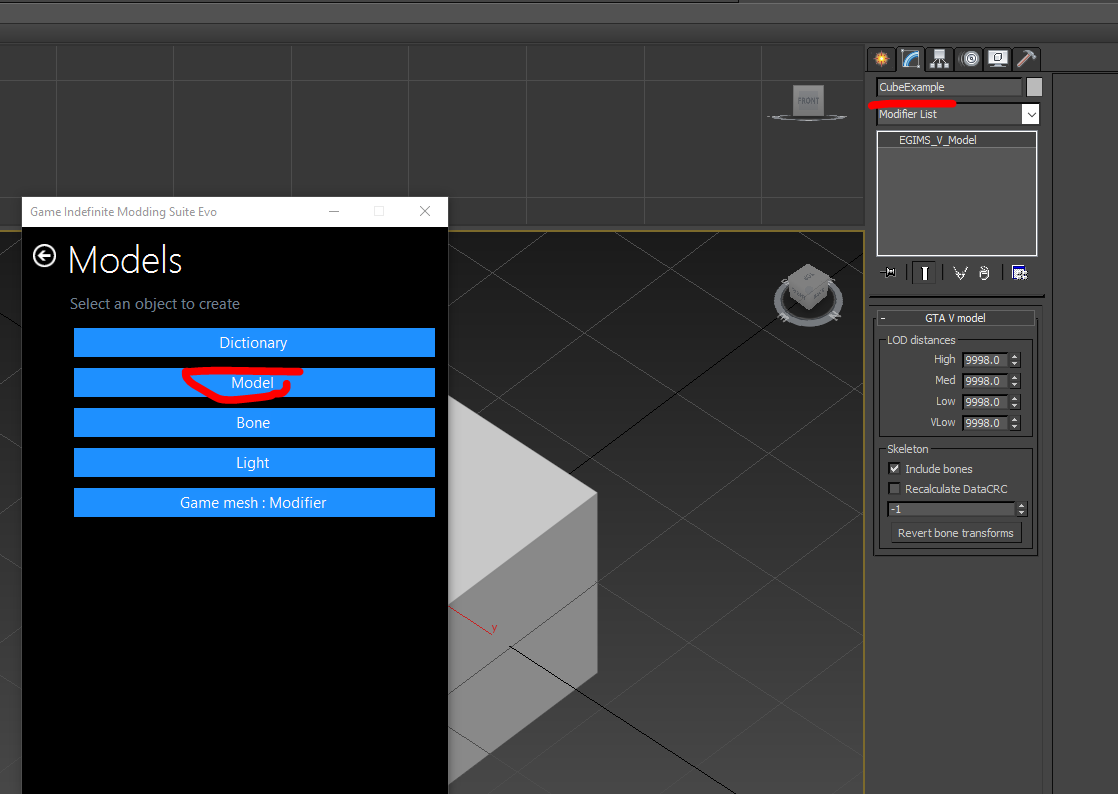
Step Seven: Making the model and game mesh modifier. To do this go to "Create Object > Models > Model " then click on the scene view. Next name that object to the name that you want the actual model to be. For this cube I will name it "CubeExample". For example:


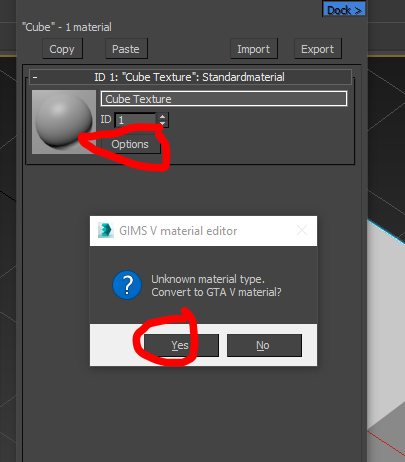
Step Eight: Setting embedded texture. For this all I am gonna do is take a small .dds image that is the color I want the cube to be green in my case and you select the object mesh then click material editor. Like this:


Step Nine: Now everything is complete last steps are to export the .odr. When exporting the hierarchy, absolutely has to be setup like this:

Conclusion: If you followed all the steps then you have successfully created your first custom .ydr with embedded collision and textures. Last thing for you to do is go to the models.rpf that's in your dlc pack from the last tutorial and import the .odr into openIV. Now when you double click it you should end up with something like this:


Extra Notes: More complex objects will require more work and there is a lot about shader's, vertex painting, etc that I didn't cover. Don't expect to make rockstar quality models by using this method. This was just to show you a very basic example. I have alot more to teach you which one day I might get into, but for now this should do...
IF YOU NEED HELP BEST WAY TO CONTACT ME IS THROUGH DISCORD YOU CAN JOIN MY MAP MODDING SERVER HERE : https://discord.gg/7xbYQaN Your always welcome dont be afraid to join!!