Basic Ped YMT Editing ‐ Components, Clothes, Textures - 5mods/tutorials GitHub Wiki
Introduction
The Ped ymt files are manifest files containing metadata about your Peds, allowing you to customize models by changing their physical features and clothing where applicable. Not to be confused with the single file called peds.ymt.
Changing clothes and outfits is easily done with trainer mods like Menyoo and Simple Trainer. The trainers use what are called native functions to allow you to make these wardrobe changes in game. For example GTA5 has the following native function:
void SET_PED_COMPONENT_VARIATION(Ped ped, int componentId, int drawableId, int textureId, int paletteId)
There are 12 wardrobe component variations, described in the Native Name column of the table below. They are numbered from 0 to 11 and are often called slots. The drawables refer for example to a shirt, or a sweater, or a tshirt. A texture on the other hand could allow one tshirt to be red or black or sport a cool logo. These different texture options are called texture variations. Together with the drawables they are called component variations. So for example, a torso has id's for the torso component itself as well as drawable and texture id's.
| Native Name | Description | Menyoo Name |
|---|---|---|
| PV_COMP_HEAD | 0. Head | Head |
| PV_COMP_BERD | 1. Masks | Beard/Mask |
| PV_COMP_HAIR | 2. Hair Styles | Hair |
| PV_COMP_UPPR | 3. Torsos | Torso |
| PV_COMP_LOWR | 4. Legs | Legs |
| PV_COMP_HAND | 5. Hands/Bags/Parachutes | Hands/Back |
| PV_COMP_FEET | 6. Shoes | Shoes |
| PV_COMP_TEEF | 7. Accessories | Teeth/Scarf/Necklace |
| PV_COMP_ACCS | 8. Undershirts | Accessory/Tops |
| PV_COMP_TASK | 9. Body Armor | Task/Armour |
| PV_COMP_DECL | 10. Decals | Emblem |
| PV_COMP_JBIB | 11. Tops | Tops2 (Outer) |
YMT files need to be decrptyed and exported as xml (text) files before they can be modified or edited. There are two principal tools that will allow you to do this: The Meta Toolkit and CodeWalker's RPF Explorer. Both have their advantages and disadvantages.
Exporting YMT to XML As stated above, ymt files can't be edited directly. In summary, this is how the two tools work.
-
Meta Toolkit. Export the ymt file to your desktop or any folder from OpenIV. Then just drag the ymt file on top of the executable MetaTool.exe and it will automatically generate your xml file.
-
RPF Explorer. Run the explorer and let it scan your game installation. When ready, right click your file and select export to xml.
Terminology The two tools use different terminology, one is more cryptic than the other but you will quickly familiarize yourself with either tool as you edit your exported xml file.
| Component | Meta Toolkit | RPF Explorer |
|---|---|---|
| Components | <hash_E2489C4F> | CPVComponentData |
| Drawables | <hash_68AC8351> | CPVDrawblData |
| Texture Variations | <hash_4A92222A> | CPVTextureData |
| Available Items | <hash_B29BE228>0 255 1 2 3 4 255 5 6 255 255 255</hash_B29BE228> | See Below due to text length |
| Available Items | See Above due to text length | 00FF01020304FF0506FFFFFF |
Of course CPVTextureData is much easier to understand and relate to than <hash_4A92222A>, but you will definitely get used to the jargon in no time at all.
When 255 appears it means that Item is not being used by the model, RPF Explorer uses the hex FF instead. The single digits in Meta Toolkit refer to the item numbers, 0 being the head and 1 the hair. RPF Explorer uses 00 and 01 for the same items respectively. Notice that in this example hair is numbered 1 rather than 2 because component 1 isn't being used in that particular model.
Applications Editing the ymt file can allow you, depending on the models, to add both drawables ( a new jacket for example) and new textures. Another example is to combine an original model with a retextured one so that you have all the clothing options in one model instead of two or more.
Textures Textures will generally be found in the YTD file. You can add textures or modify them and import them easily with OpenIV.
How to Export from YMT to XML The video below shows the simple steps to export your ymt to xml for editing with each of the two tools described in previous post. The output of the files is different, the terminology isn't the same for the 2 methods, as we can see in the table above. https://www.youtube.com/watch?v=auULeD9MrLI
Application Example In the video below, for personal use and as an example only, we combine 4 texture variations from an original mod and a re-textured version of this mod. Only texture variations are changed, not the Drawables, as this is a very simple example. Of course, you can also create your own drawables and/or your own textures. In fact I changed the original white pants (too bright for my liking) to black in the original mod. You can't create components however AFAIK.
Warning: before playing with these files, backup your original files, the slightest error will either keep the ped from spawning, cause texture losses in scenery, or possibly crash your game.
Important. You can't just swap drawables and textures from ped mod A and use them for ped mod B - the models have to be identical or at least have the same basic skeletons and related features. For example clothes and textures for the MP male and female aren't suited for other peds, although some components might work.
Note: you can do this for your own use, on your own system, but you will not be able to upload the mod without permission from the authors. https://www.youtube.com/watch?v=ubREDa7G_EY
Editing the XML from the YMT In this video we look at adding a texture variation to the Hair Component. A texture variation in this case involves adding blonde hair to the default black hair. A drawable variation, not displayed in the video, would be for example adding a new hair style (not just the colour) but it's essentially the same process. The video has two examples. One with the more cryptic terminology name scheme from Meta Toolkit. The other one with the easier to understand name from RPF Explorer. Why use Meta Toolkit you ask? Much faster if you have a complex game folder structure (which is my case). In the video, hair is in the second component. Since numbering starts at 0, Hair will be 1 when using the Meta Toolkit and it will be 01 when using RPF Explorer. https://www.youtube.com/watch?v=B5dGU_-sRqI&t=31s
Converting XML to YMT In this short video, with a kickass soundtrack and copyright claim, from Canadian Rock band Trooper, we will see how easy it is to convert our edited XML (from YMT) back to YMT using both tools, Meta Toolkit and RPF Explorer. https://www.youtube.com/watch?v=M01qXXEvMHY
Importing Additional Textures
In this last video we will look at importing the additional textures. In the previous videos we already added the extra slot for the hair. In this video we will look at adding the hair texture. It is important to rename the textures so they aren't duplicated.
In this example both the original and the re-textured had the hair imaged named as:
hair_diff_000_a_whi.dds
We kept the original as hair_diff_000_a_whi.dds and we renamed the re-textured one:
hair_diff_000_b_whi.dds
What if we added a third texture? It would be hair_diff_000_c_whi.dds and what if we added a new drawable instead of just a new texture?
For example a different hair style. It would be hair_diff_001_a_whi.dds. This time the number is incremented, from diff_000 to diff_001, rather than the letter a to b. However if you add a drawable or a texture for an existing drawable, it must be designed for your 3D model specifically.
https://www.youtube.com/watch?v=VDyqhcMsqVQ
The YDD File
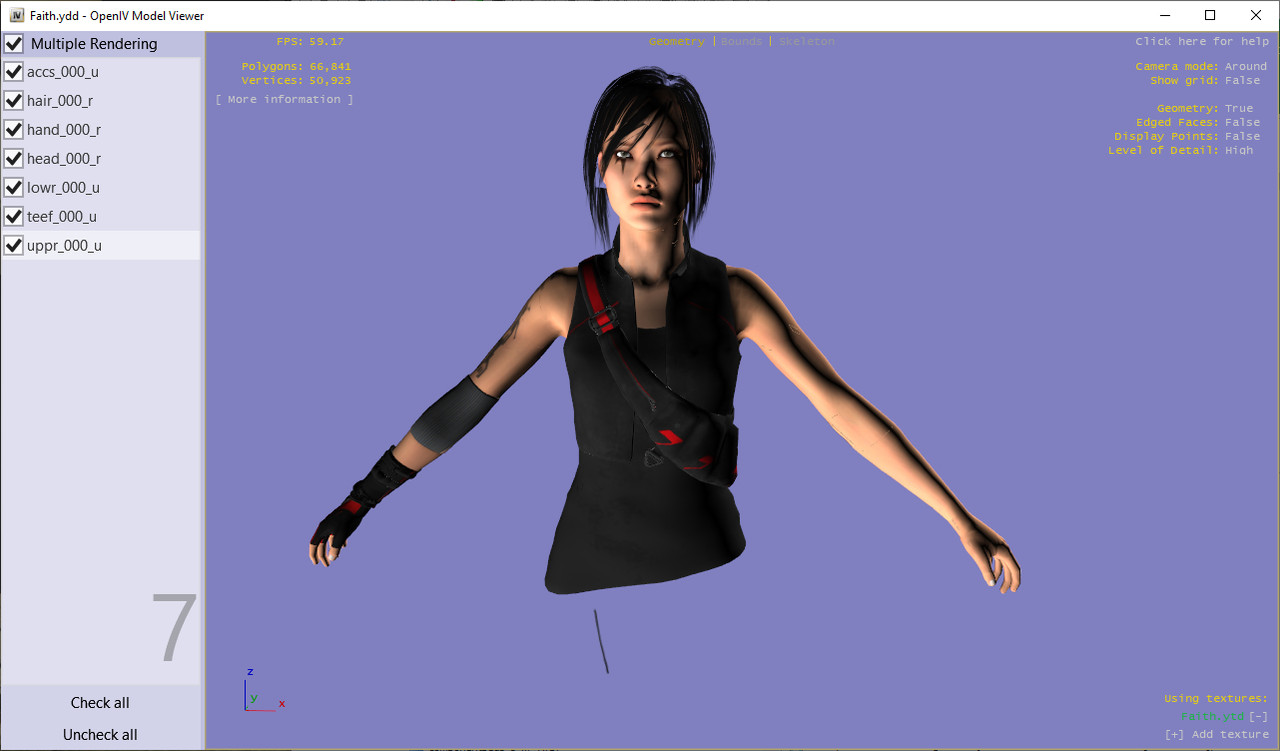
Now let's look at the three other files that are generally packaged with the YMT file for a Normal ped (as opposed to a streaming ped). The YDD file is the drawable dictionary. These contain 3D models like jackets or pants and can be viewed from OpenIV. The .ydd file will show us the available components, which in the .ymt were described like this:
<hash_B29BE228>0 255 1 2 3 4 255 5 6 255 255 255</hash_B29BE228> Meta Toolkit
<availComp>00FF01020304FF0506FFFFFF</availComp> RPF Explorer
From the viewer for the .ydd file we see the 7 components being used (i.e. available) in alphabetical order. Remember that in the Meta Toolkit version of ymt, these 7 are displayed in numerical order: 0, 1, 2, 3, 4, 5, and 6. In RPF Explorer version of ymt, these are 00, 01, 02, 03, 04, 05, and 06.
A word of caution for new scripters. The terminology above applies to available components and is different from the one used for the native function. Here, slot 1 is hair whereas in the native function, 2 is hair. Remember that 255 or FF means a component isn't available, so the numbering scheme for our tools skips over and increments by one. The native functions don't skip any numbers, 3 is always the torso for example.
This can be confusing when editing the xml file from the ymt. You need to look at the order of the slots rather than their number to understand what you're editing, particularly since the xml tags will not give you any clue.
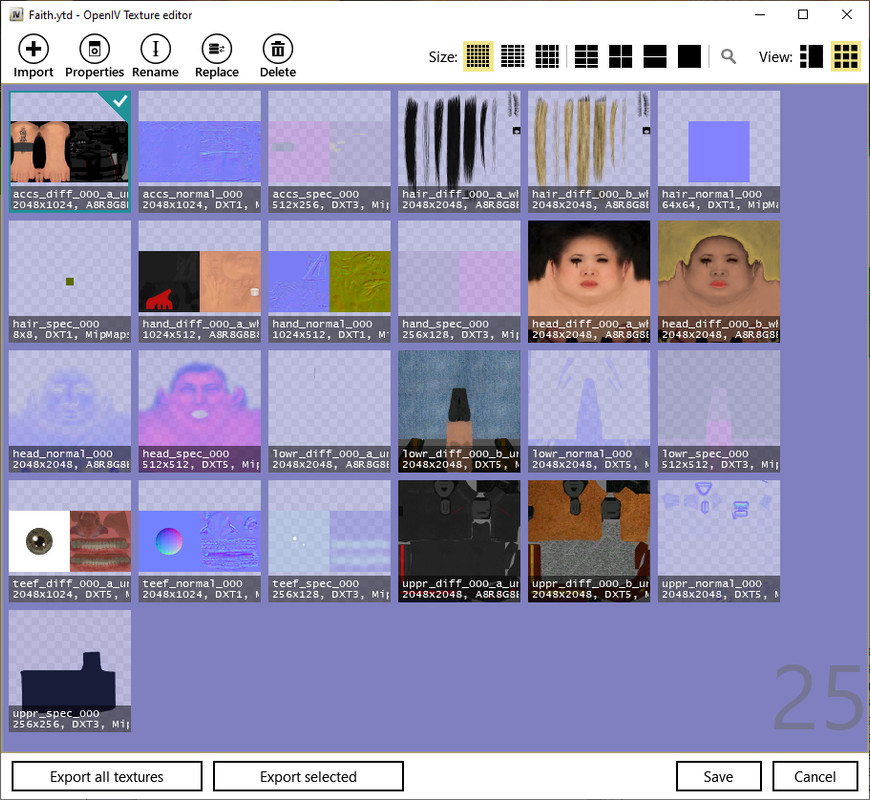
The YTD File
Now let's look at the YTD file which is the texture dictionary and can also be viewed from OpenIV. This file contains the textures for the model, although textures can also be embedded with the 3D model itself. The content and naming of the files is consistent with what we saw with the YDD file, but here you can also view texture variations.
Here we can see the head_diff, hair_diff, lowr_diff (pants), and uppr_diff (top/torso) that we added in our videos.
The YFT File
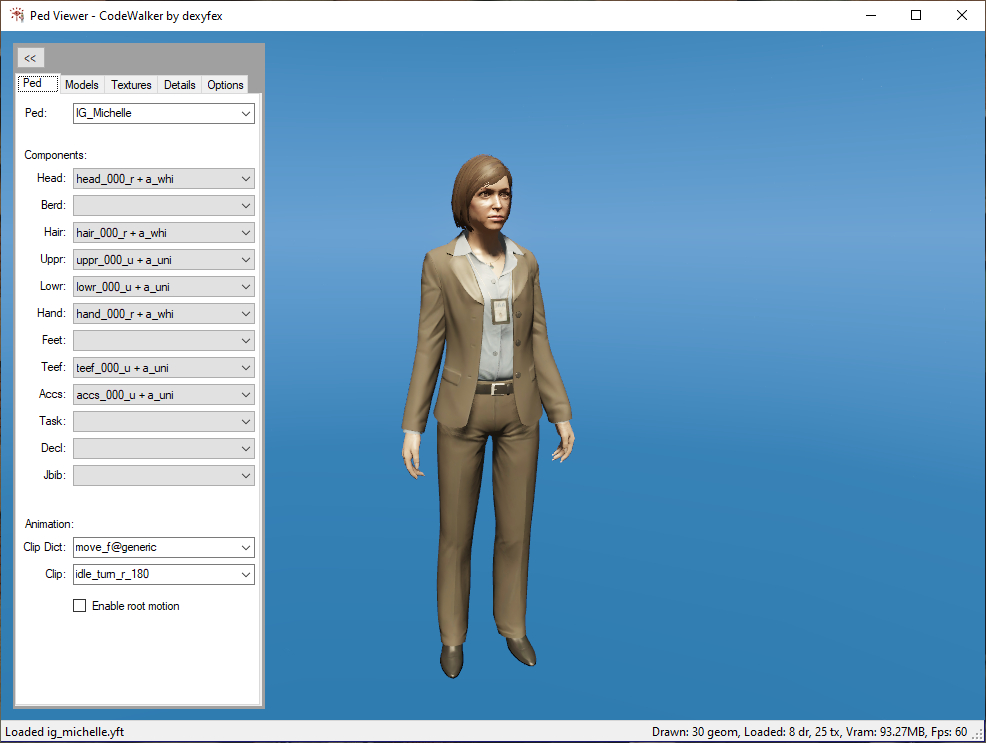
Which brings us to the last of the 4 common files used with Normal peds. The YFT, or fragment file, contains the 3D model for the ped. It is best viewed from the CodeWalker Ped Viewer. In the tabs there is valuable information about the model. Fragment is just GTA5 terminology.
In the case of our model Faith, it is based on the story mode game model named IG_Michelle.
Here you can see the 7 components again and this can help you number them, remembering to skip the blanks:
0. head, 2. hair, 3. upper, 4. lowr, 5. hand, 7. teef, 8. accs
The YLD File
Although not discussed within the scope of editing ymt files, for those who are curious you may also see on occasion a yld file, which is the cloth dictionary file - it defines the cloth physics available in certain models. It isn't very common.
Breaking Convention
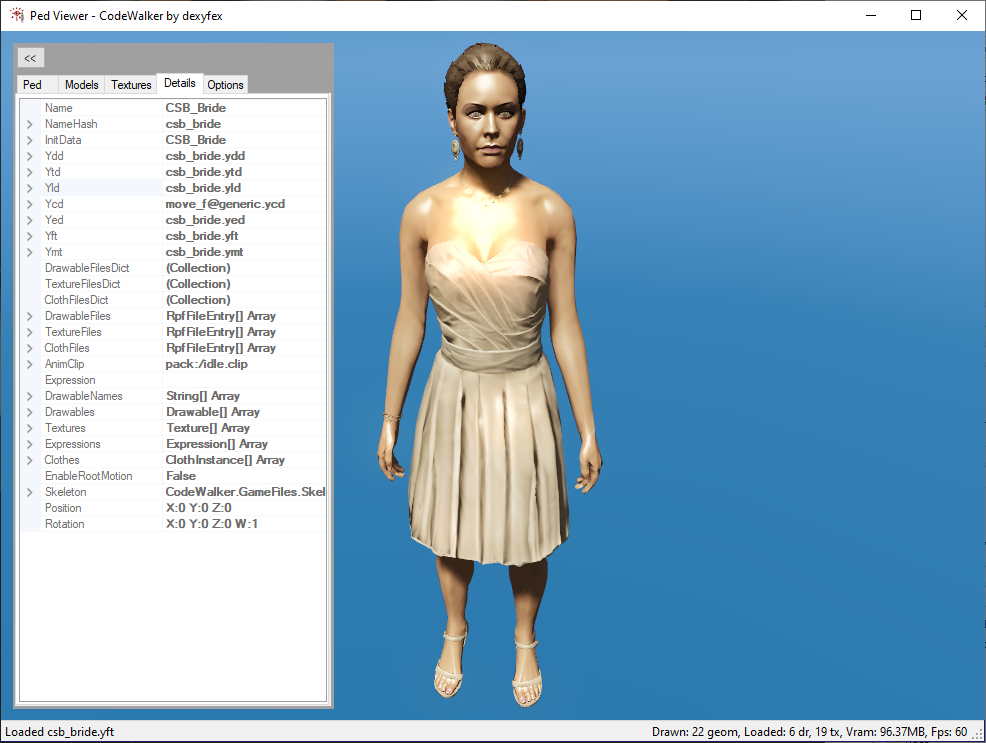
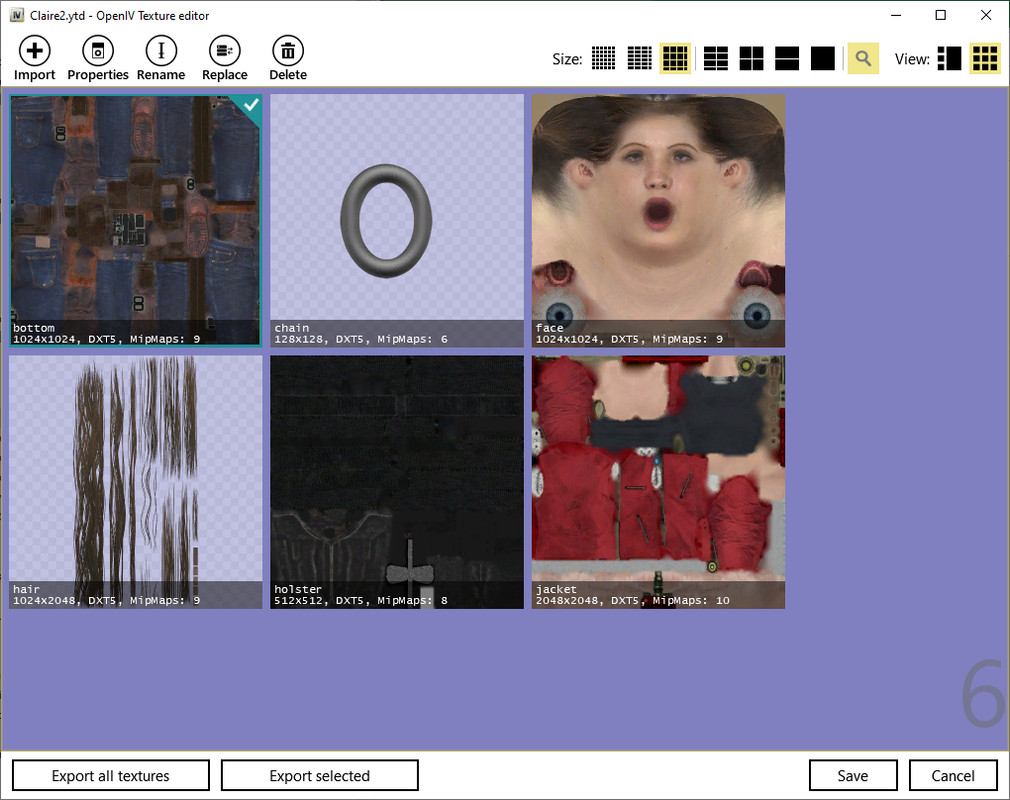
And for those who finally got comfortable with the naming conventions used in GTA5 such as WTF do they call it Teef or Jbib, you will sometimes be surprised with terminology that uses words such as face or jacket. For example this model below.
Actually when it comes to respecting rules and conventions, this tutorial describes those the game peds adhere to. Addon ped mods however are another matter as mod creators often make up their own rules. For example, some will use legs to display glasses - not very intuitive to say the least.
However, the YMT file structure remains the same even for these rebels. Which brings us to one unfortunate point. Despite your best efforts, patience, and attention to detail, there is absolutely no guarantee changes you make will work with the model you are working on. Unless you can examine the model itself, ideally in Zmodeler (the tool most frequently used to create 3rd party peds), you can never fully understand the underlying structure of the model.
A Note About Streamed Peds Contrary to popular belief streamed peds are not peds with their own Twitch channels. Streamed peds differ from Normal peds in that they have a folder containing many ytd and ydd files, 1 file for each different texture variation. Contrast that with Normal peds which only have 1 ytd file and 1 ydd file as containers for all the textures. Streamed Peds however only have 1 ymt and 1 yft files as is the case for their Normal ped counterparts. Examples of Streamed Peds are player_zero (Michael), player_one (Franklin), and player_two (Trevor). The MP male and MP shemale are also streamed peds. https://www.youtube.com/watch?v=L3IITuQAatU
Peds.ymt
The .ymt files described in this tutorial should not be confused with the file called peds.ymt. This file is also an xml file but it isn't encrypted so it can be easily edited from OpenIV (or a text editor). It contains metadata for all vanilla peds. If you are using @ReNNie's addonpeds template then you will edit a similar file for addon peds but the file is called peds.meta.
You will find peds.ymt at \update\update.rpf\x64\data and \mods\update\update.rpf\x64\data
Examples of the medatdata, which is quite extensive and very different from the ymt files in this tutorial:
      <Name>S_F_Y_Hooker_01</Name>
      <PropsName>S_F_Y_Hooker_01_p</PropsName>
      <ClipDictionaryName>move_f@generic</ClipDictionaryName>
      <BlendShapeFileName>null</BlendShapeFileName>
      <ExpressionSetName>expr_set_hookers_hiheels</ExpressionSetName>
      <ExpressionDictionaryName>null</ExpressionDictionaryName>
      <ExpressionName>null</ExpressionName>
      <Pedtype>CIVFEMALE</Pedtype>
      <MovementClipSet>MOVE_F@HEELS@C</MovementClipSet>
      <MovementClipSets>
        <Item>MOVE_F@HEELS@C</Item>
        <Item>MOVE_F@CHICHI</Item>
      </MovementClipSets>
      <StrafeClipSet>MOVE_PED_STRAFING</StrafeClipSet>
      <MovementToStrafeClipSet>MOVE_PED_TO_STRAFE</MovementToStrafeClipSet>
      <InjuredStrafeClipSet>MOVE_STRAFE_INJURED</InjuredStrafeClipSet>
      <FullBodyDamageClipSet>DAM_KO</FullBodyDamageClipSet>
      <AdditiveDamageClipSet>DAM_AD</AdditiveDamageClipSet>
      <DefaultGestureClipSet>ANIM_GROUP_GESTURE_F_GENERIC</DefaultGestureClipSet>
      <FacialClipsetGroupName>facial_clipset_group_gen_female</FacialClipsetGroupName>
      <DefaultVisemeClipSet>ANIM_GROUP_VISEMES_F_LO</DefaultVisemeClipSet>
      <SidestepClipSet>CLIP_SET_ID_INVALID</SidestepClipSet>
      <PoseMatcherName>Male</PoseMatcherName>
      <PoseMatcherProneName>Male_prone</PoseMatcherProneName>
      <GetupSetHash>NMBS_SLOW_GETUPS</GetupSetHash>
      <CreatureMetadataName>AmbientHeels</CreatureMetadataName>
      <DecisionMakerName>default</DecisionMakerName>
      <MotionTaskDataSetName>STANDARD_PED</MotionTaskDataSetName>
      <DefaultTaskDataSetName>STANDARD_PED</DefaultTaskDataSetName>
      <PedCapsuleName>STANDARD_FEMALE</PedCapsuleName>
      <PedLayoutName/>
      <PedComponentSetName/>
      <PedComponentClothName/>
      <PedIKSettingsName/>
      <TaskDataName/>
      <IsStreamedGfx value="false"/>
      <AmbulanceShouldRespondTo value="true"/>
      <CanRideBikeWithNoHelmet value="false"/>
      <CanSpawnInCar value="false"/>
      <IsHeadBlendPed value="false"/>
      <bOnlyBulkyItemVariations value="false"/>
      <RelationshipGroup>CIVFEMALE</RelationshipGroup>
      <NavCapabilitiesName>STANDARD_PED</NavCapabilitiesName>
      <PerceptionInfo>DEFAULT_PERCEPTION</PerceptionInfo>
      <DefaultBrawlingStyle>BS_AI</DefaultBrawlingStyle>
      <DefaultUnarmedWeapon>WEAPON_UNARMED</DefaultUnarmedWeapon>
      <Personality>Hookers</Personality>
      <CombatInfo>default</CombatInfo>
      <VfxInfoName>VFXPEDINFO_HUMAN_GENERIC</VfxInfoName>
      <AmbientClipsForFlee>FLEE</AmbientClipsForFlee>
      <Radio1>RADIO_GENRE_DANCE</Radio1>
      <Radio2>RADIO_GENRE_POP</Radio2>
      <FUpOffset value="0.00000000"/>
      <RUpOffset value="0.00000000"/>
      <FFrontOffset value="0.00000000"/>
      <RFrontOffset value="0.14700000"/>
      <MinActivationImpulse value="20.00000000"/>
      <Stubble value="0.00000000"/>
      <HDDist value="3.00000000"/>
      <TargetingThreatModifier value="1.00000000"/>
      <KilledPerceptionRangeModifer value="-1.00000000"/>
      <Sexiness>SF_HOT_PERSON</Sexiness>
      <Age value="0"/>
      <MaxPassengersInCar value="0"/>
      <ExternallyDrivenDOFs/>
      <PedVoiceGroup>S_F_Y_HOOKER_01_R2PVG</PedVoiceGroup>
      <AnimalAudioObject/>
      <AbilityType>SAT_NONE</AbilityType>
      <ThermalBehaviour>TB_WARM</ThermalBehaviour>
      <SuperlodType>SLOD_HUMAN</SuperlodType>
      <ScenarioPopStreamingSlot>SCENARIO_POP_STREAMING_NORMAL</ScenarioPopStreamingSlot>
      <DefaultSpawningPreference>DSP_NORMAL</DefaultSpawningPreference>
      <DefaultRemoveRangeMultiplier value="1.00000000"/>
      <AllowCloseSpawning value="false"/>
    </Item>

**Summary and Other non-related file types**

This post was dedicated to peds but GTA5 has many other file types. We reviewed the following files above:

**YTD**: The texture dictionary.
**YFT**: The fragment object. Fragment is R* terminology for a 3D Model. They also call them Archetypes.
**YDD**: The drawable dictionary.
**YMT**: Besides the metadata for peds, can also be seen in scenarios
**YLD**: The cloth dictionary.

In addition, just to list a few of the more common ones, we have:

**YDR**: a single drawable object (3D model) file, whereas YDD can contain many drawables in one single file (or many YDR files). The YDR file is common in YMAPs and even some vehicles (wheels for example). A YDR may contain a texture dictionary and LODs for the model (up to 4 LODs - level of detail).

**YND**: These are path nodes, they define a traffic path for vehicles. They are binary files, not directly viewable.


**YTYP**:  text file containing a group of MapTypes (Archetypes), each defining where a object will be placed in GTA5 map. Also known as definition entries.

**YMAP**:  file containing the metadata for the placements of Archetypes, each defining an entity in GTA5.  This file is useful to view (it's plain text) if you don't know the location of an MLO or YMAP as it will give you the x, y, z coordinates on the map.

**YBN**:  bounds file, more commonly referred to as collisions or static collisions. These are used, as an example, to keep you from falling through the floor of an interior. You can view YBN files with OpenIV.

**YMF**:  These are metadata text files for MLOs (interiors) and YMAPs.

**YCD**:  These are animation files including poses.

**YNV**. These contain nav meshes.

**YSC**. These are script resource files.

**AWC**. These are audio files.

**BIK**. These are video files, for example during loading.

**DLC**:  Downloadable content.

**RPF**:  Rage Package Format/File.

**MLO or MiLO**.  Exact meaning unknown but refers to interiors, especially common with FiveM. Possibly stands for Moveable Interior Loader given they can be moved anywhere (mobile) on the GTA5 map and they load interiors.

**Some more notes regarding terminology**

Documentation is seriously lacking with respect to modding GTA5 in general. This can be overwhelming and frustrating for new creators or users trying to do their own customization and edits.

For example when browsing YTD files in OpenIV, what would something like `hair_diff_000_a_whi.dds` mean?

Let's break it down using the file **g_m_y_korean_01.ytd**. Opening this file we would find a texture called hair_diff_000_a_whi.dds. Well actually the **whi** is replaced with **kor** as we shall see.

**hair**: the 3rd component (numbered 2) or slot which is the ped's hair
**diff**: diffuse. A diffuse map is the most common kind of texture map. Others are normal and specular.
**000**: identifies the first drawable, second would be 001 etc.
**a**: identifies the texture for the drawable, options are from a to z
**kor**: suffix for the ped's texture race. whi is white, u would be universal, kor is Korean, etc. Components have a _u suffix for universal or _r for race.
**dds**: the image file type, DirectDraw Surface.

What about ped props? These are defined by the following native function:

`int GET_PED_PROP_INDEX(Ped ped, int componentId) // 0x898CC20EA75BACD8 0x746DDAC0 b323`

If you take a peek with Menyoo or a similar trainer, you will see 5 ped props are used in GTA5:

Hats (helmets), Glasses, Ear Pieces, Watches, and Bangles. Or, respectively, p_head, p_eyes, p_ears, p_lwrist, p_rwrist. Unless I'm mistaken, R* assumes that watches will always be worn on the left wrist (p_lwrist) while bangles/braclets will be worn on the right (p_rwrist).

Our ped above has props, in a file called g_m_y_korean_01_p.ytd. Opening that file we would find a texture called p_eyes_diff_000_a.dds, as an example, for glasses.

Notice the **p suffix** for the ytd file, and **p prefix** for the texture dds file.

**Native Database Update**
It now lists 14 component variables rather than 12.
Additions, just for documentation purposes are:
`PV_COMP_INVALID = -1` //easy to understand as it will return nothing or an error.
`PV_COMP_MAX` // not documented, max is always 12 so unsure why it's there.
componentId: enum ePedVarComp { PV_COMP_INVALID = -1, PV_COMP_HEAD, PV_COMP_BERD, PV_COMP_HAIR, PV_COMP_UPPR, PV_COMP_LOWR, PV_COMP_HAND, PV_COMP_FEET, PV_COMP_TEEF, PV_COMP_ACCS, PV_COMP_TASK, PV_COMP_DECL, PV_COMP_JBIB, PV_COMP_MAX };
**Ped Component Types in SHVDN3**
Just to make things even more complicated, here is how scripthookvdotnet treats the 12 components, these are displayed in alphabetic order:
namespace GTA { public enum PedComponentType { Face, Head, Hair, Torso, Legs, Hands, Shoes, Special1, Special2, Special3, Textures, Torso2, } }