Milestone 4 Sec480 - 5huckle/OFFICIALTECHJOURNAL GitHub Wiki
Intro
Videos used for reference here:
This milestone will focus on VCenter AD Integration, PowerCLI and Linked Clones.
General Steps
- General Steps:
- Set up AD Certificate Authority via Powershell
- Make sure you have “-adm” account in AD
- check using: Get-ADUser -Filter 'Name -like "jibreel"'. Use the -adm account for your active directory
- Create “accounts” OU structure
- Create vcenterldap service account
- Create vcenter-admin AD group (add your -adm useer)
- Join vcenter to Domain
- Copy AD cert to xubuntu-wan
- Add new SSO Provider on vcenter (Active Directory over LDAP)
- Need the proper “DNs” for users and groups OU’s in AD Add your vcenter-admin account to SSO Users and Groups - Administrators in vcenter
Part one
Setting up AD CA via Powershell
Use the following commands to install AD CA via Powershell:
Install-WindowsFeature ADCS-Cert-Authority -IncludeManagementTools
Install-AdcsCertificationAuthority -CAType EnterpriseRootCa -CryptoProviderName "RSA#Microsoft Software Key Storage Provider" -KeyLength 2048 -HashAlgorithmName SHA256 -ValidityPeriod Years -ValidityPeriodUnits 3

Then you need to navigate you your vCenter via xubuntu-wan internet browser. It will not be accessible via the public internet.
Once you are there, click the three lines in the top left corner to open a drop down menu, click on the Administration tab and navigate down to Single Sign On > Configuration > Active Directory Domain. From there, Click Join Domain and enter the -adm account you identified earlier.

Then you have to reboot the node:
- On the vSphere Client main page, click Administration > Deployment > System Configuration.
- Under System Configuration, select a node from the list.
- Click Reboot Node.
Adding Admin group to vCenter
After rebooting, use openssl to figure out and record your master key into a blank file, you will need this later.
openssl s_client -connect dc1-jibreel:636 -showcerts
Results should look like this

Next, we browse to vCenter>Administration>Single Sign On>Configuration>Add new identity
Fill out the page to look like this (note: I did have some issues configuring this and verifying it due to an issue with the primary server URL, will be troubleshooting that but this is what is should look like.)
(Update: the issue was I thought I had to decide on a new password rather than use my already configured password. It works now)

After that, go to single sign on>Users and Groups>Groups>Administrators>Add Members. You'll want to swtich the search domain from vsphere.local to jibreel.local, then you will be able to add the vcenter-admins group you created earlier into the administrator group.
Part two
Goals
The goal of this milestone is to set up Powershell from Xubuntu-Wan and to get Ansible set up
Prep
Using this source, set up Xubuntu dependencies for powercli and ansible>
sudo apt install sshpass python3-paramiko git
sudo apt-add-repository ppa:ansible/ansible
sudo apt update
sudo apt install ansible
ansible --version
cat >> ~/.ansible.cfg << EOF
[defaults]
host_key_checking = false
EOF
sudo snap install powershell --classic
Then use 'pwsh' to access the newly provisioned Powershell
Working with pwsh
PLEASE DOUBLE CHECK EVERYTHING< IT WILL SAVE YOU A LOT OF TIME
Connecting to the server

Creating a linked clone
- Assign Variables
- $vm = Get-VM -Name dc1
- $snapshot = Get-Snapshot -VM $vm -Name "Base"
- $vmhost = Get-VMHost -Name '192.168.7.38'
- $ds = Get-Datastore -Name "datastore1"
- $linkedClone = "{0}.linked" -f $vm.name
- running '$linkedclone' should give the output: dc1.linked
- $linkedvm = New-VM -LinkedClone -Name $linkedclone -VM $vm -ReferenceSnapshot $snapshot -VMHost $vmhost -Datastore $ds
- $newvm = New-VM -Name 'server.2019.gui.base' -VM $linkedvm -VMHost $vmhost -Datastore $ds
Final Result:

Part three
This was the guide I used for set up
Create new groups in vCenter. Inventory>480-devops. right click>New Folder>New VM and Template Folder

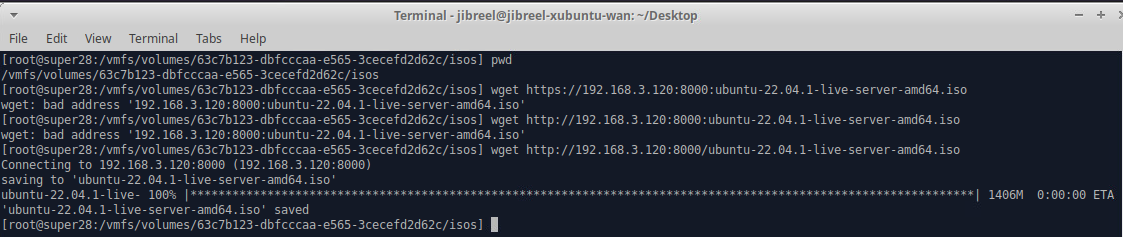
Download ubuntu iso file via 192.168.3.120:8000 to ESXI host
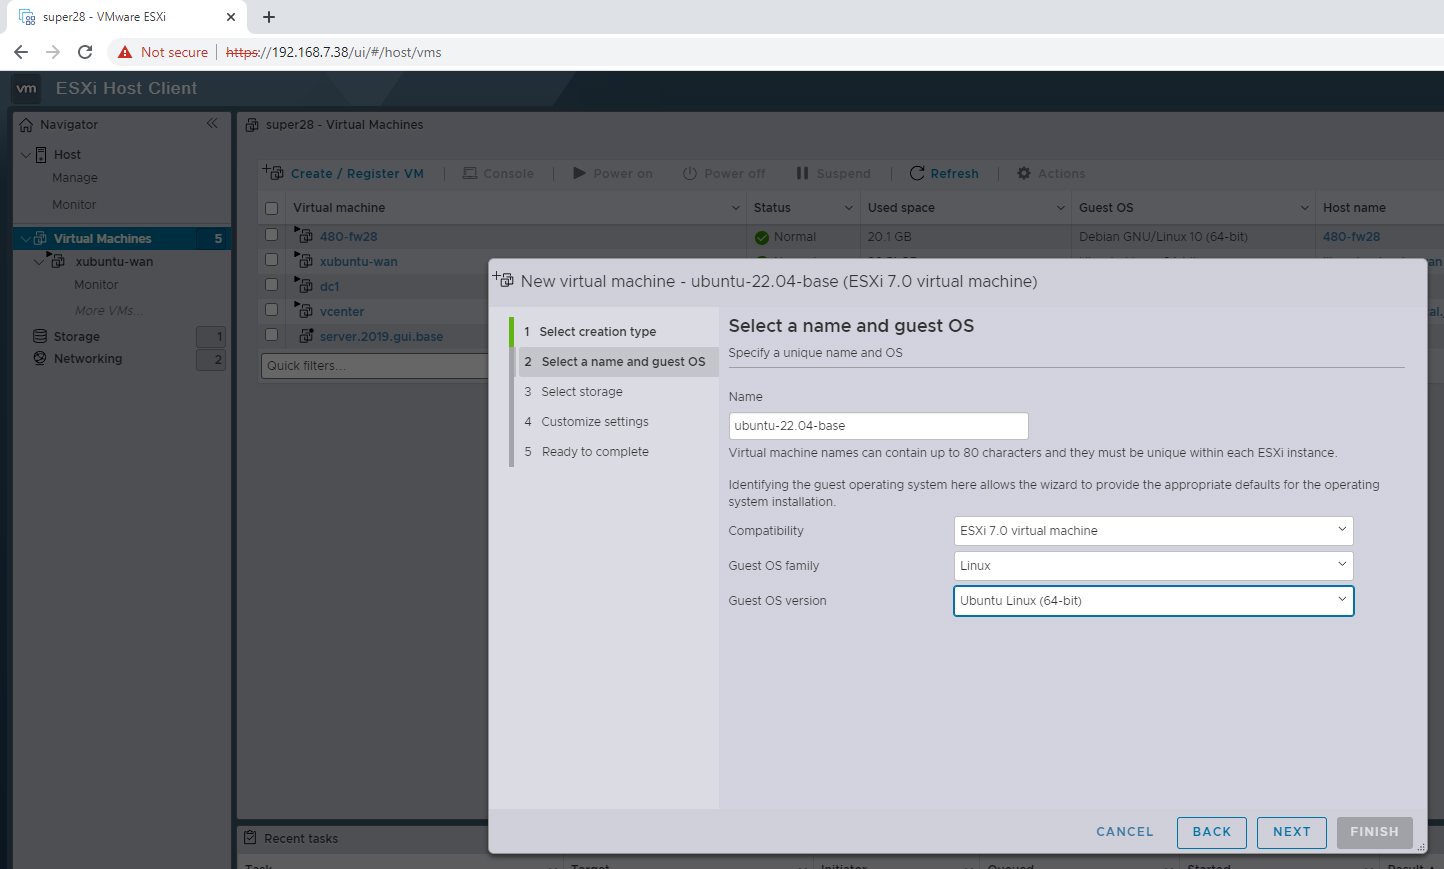
Create the VM on your ESXi host box (https://192.168.7.38). Make sure the Compatibility, Guest OS Family, and Guest OS Version all match up
- Custom Settings
- CPU: 2
- Memory: 2 GB
- Hard disk: 20 GB
- Disk provisioning: Thin provisioned
- Network Adapter 1: VM Netowrk
- CD/DVD Drive: Datastore ISO file
- You will be brought back to the isos file, select datastore1-super21, click isos, look for the ubuntu-live-server iso, then click select
Run through the same process as before for creating a snapshot
- $vm = Get-VM -Name ubuntu-22.04-base
- $snapshot = Get-Snapshot -VM $vm -Name "Base"
- $vmhost = Get-VMHost -Name '192.168.7.38'
- $ds = Get-Datastore -Name "datastore1"
- $linkedclone = "awx"
- $linkedvm = New-VM -LinkedClone -Name $linkedclone -VM $vm -ReferenceSnapshot $snapshot -VMHost $vmhost -Datastore $ds
Set Network Adapter Address
- $linkedvm | Get-NetworkAdapter | Set-NetworkAdapter -NetworkName 480-wan