05 Making content changes - 18F/federalist-jekyll-netlify-cms-guides GitHub Wiki
The State Resource pages have a more complex layout, but we’ve tried to eliminate any code so you can manage these pages without being dependent on developers. State Resource pages are divided into 56 states and territories. Each state has four sub-pages:
- Understanding and Finding Child Care
- Financial Assistance For Families
- Health & Social Services
- Child Development & Early Learning
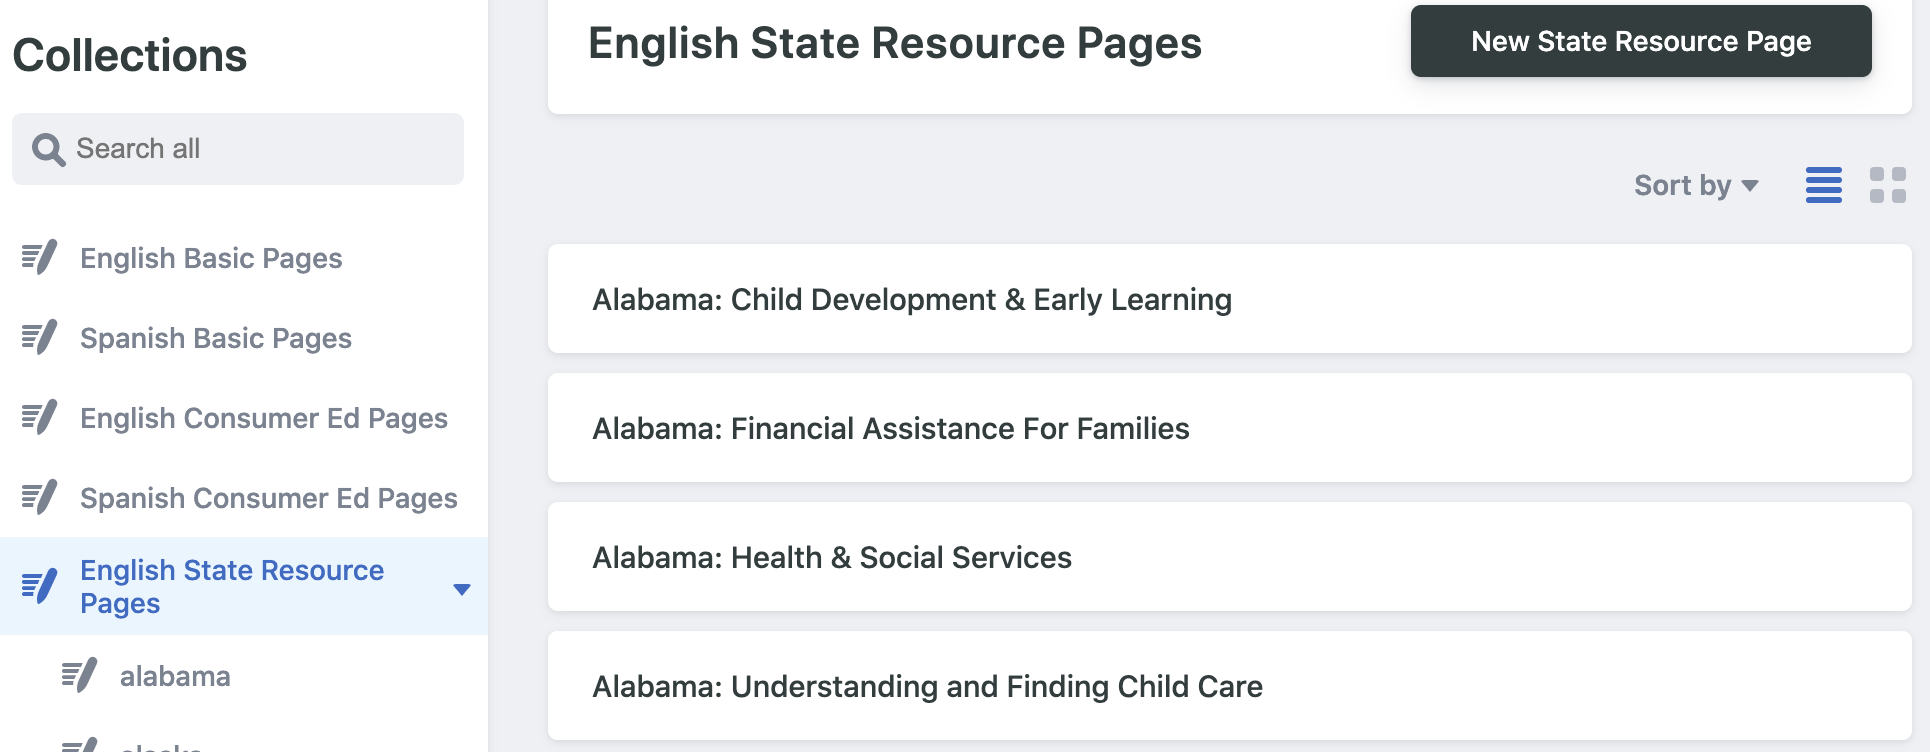 Alabama State Resource pages
For example, here’s how to edit the Alabama State Resource pages in English.
- Under Collections, click on English State Resource Pages in the left navigation.
- Click on the sub-page Alabama: Understanding and Finding Child Care.
- Currently, we’re not able to display the sub-pages when you click on the state name. (This is part of our future recommendations.)
- View the four (4) fields that make up each state sub-page:
- The permalink, which is short for “permanent link,” is the full URL for a given post. Note: if you change it in English, make sure you change the corresponding permalink in Spanish. This is not automatic (yet).
- The title appears both at the top of the page as the first heading (known as an
<H1>tag in HTML) and in the browser window (known as a<title>tag in HTML). - The description text appears at the top of the page introducing the sub-page content.
- Sections are a nested group of fields. Each section has a Section Title and at least one link. Notice that the Child Care Search section has one (1) link but Choosing Quality Care for Your Children has four (4) links. Click the Add link button to add another link. There is currently no limit to the number of links you can add.
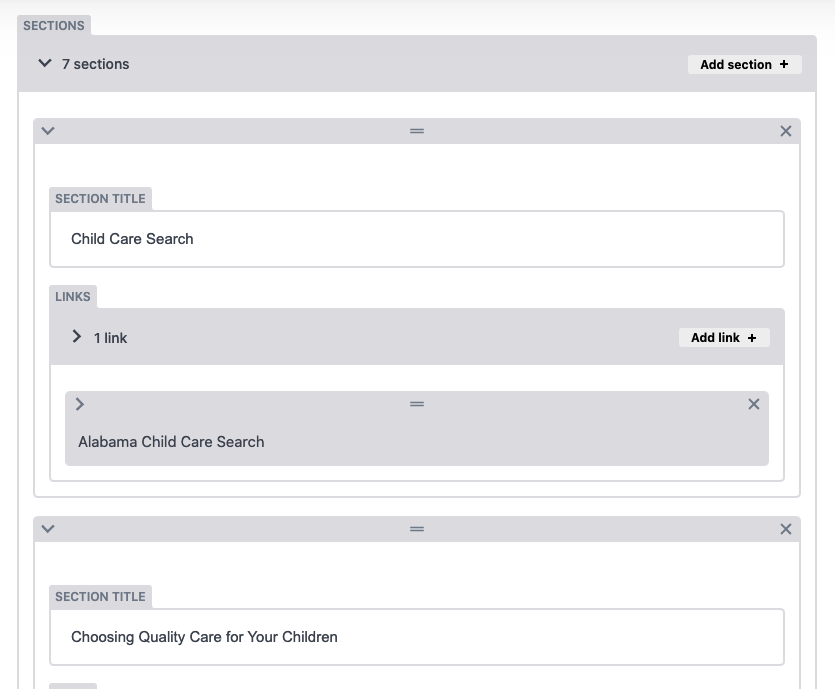 Sections have nested fields for a section title and links.
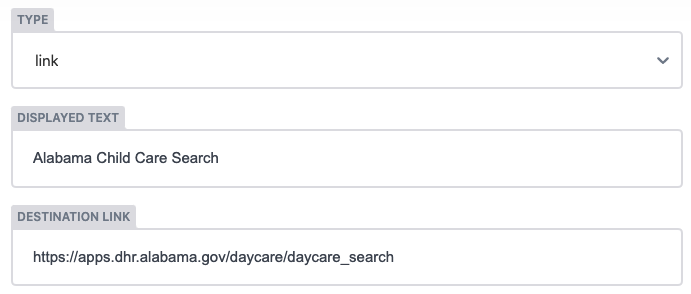
- Let’s add a new link under Child Care Search. Each link has three fields:
- Type. Choose either link or telephone from the dropdown list.
- Telephone makes sure the phone number is accessible on mobile devices.
- Displayed text is the link label.
- Destination link is the URL.
- Save your changes.
Note: The first external link shows up on the homepage hero (first button) and on the left side of each state page (baby button).
The Consumer Education pages use a different layout template from other site pages. In order to reuse content and avoid duplication, we let the Consumer Education pages dynamically drive other sections of the site.
Making a change in the Title, Description, or Sort Order of a page will reflect in the dynamically driven sections:
 The Learn More page is dynamically driven by the Consumer Education pages.
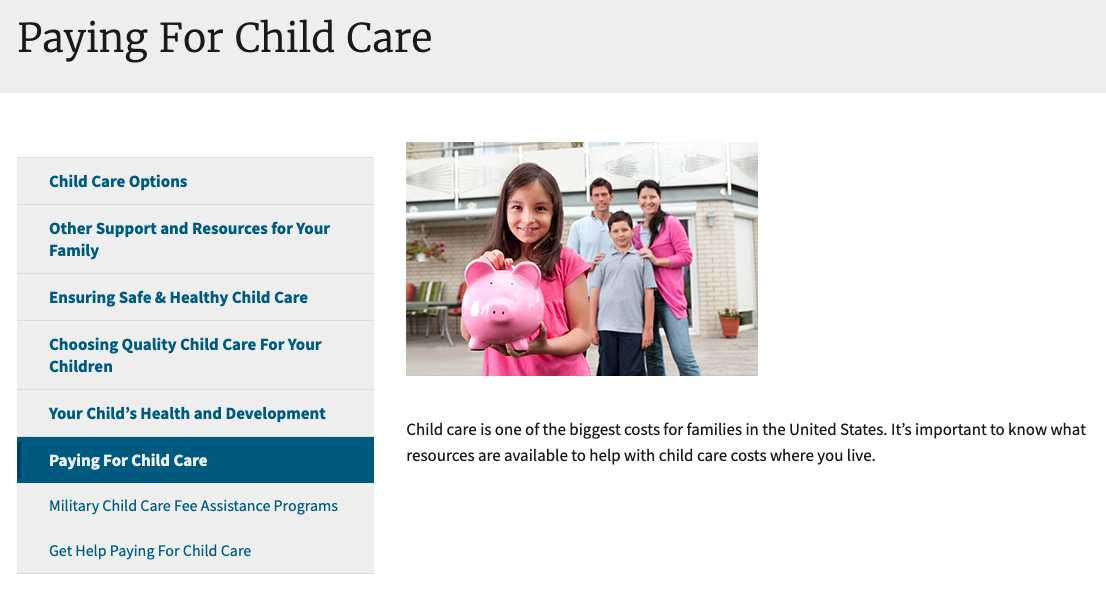 The Consumer Education side navigation is dynamically driven by the Consumer Education pages.
Here’s how tp add a new page under Paying for Child Care in English.
- Under Collections, click on English Consumer Ed Pages in the left navigation.
- Click on the New Consumer Ed Page button. You can also use the Quick add > English Consumer Ed Page at the top of the admin navigation.
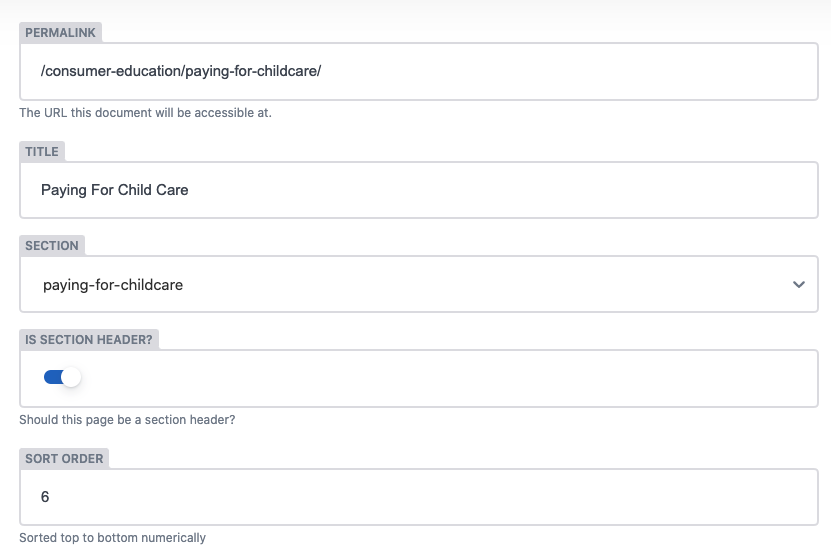
- Complete the six (6) fields that make up a Consumer Education page:
- The Permalink, which is short for “permanent link,” is the full URL for a given post. Note: if you change it in English, make sure you change the corresponding permalink in Spanish. This is not automatic (yet).
- The Title appears both at the top of the page as the first heading (known as an
<H1>tag in HTML) and in the browser window (known as a<title>tag in HTML). - The Section dropdown menu lets you select one of the Consumer Education main topics. Note: if you change the section a page belongs to, you’ll have to update the permalink manually.
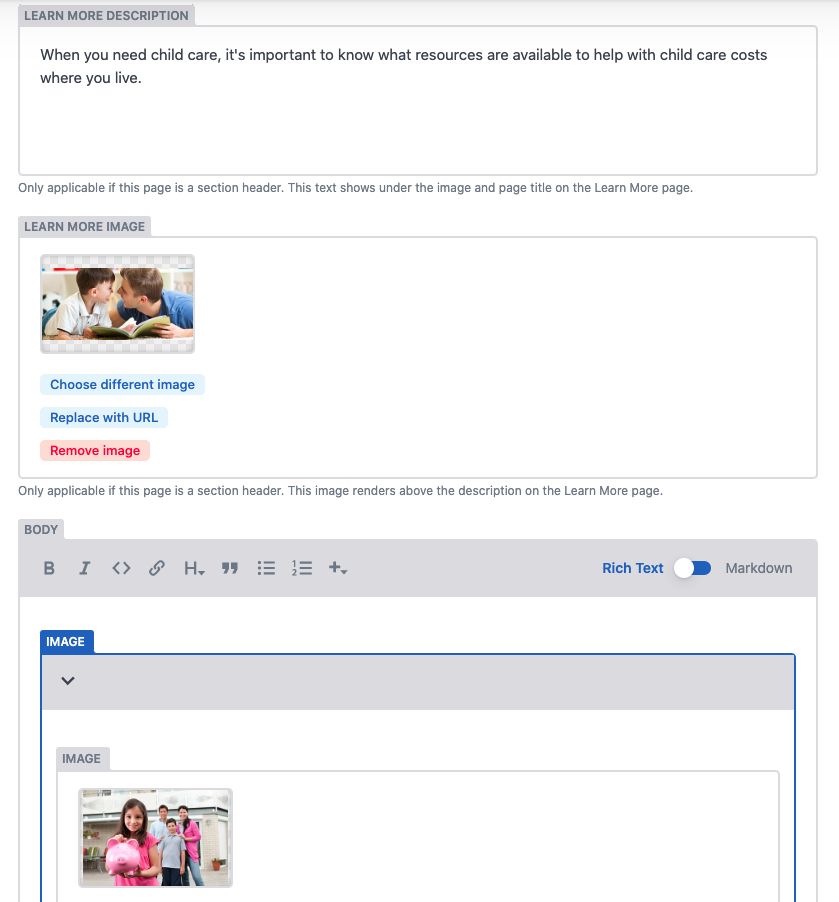
- The Section Header toggle enables the Learn More Image and Learn More Description that appear on the Learn More landing page.
- This new page isn’t a new section, so let’s make sure this toggle is turned off.
- Display the page according to its numeric Sort Order. Changing this field in English will change it for Spanish too.
- The Body field contains the main page content.
- Click Save.
 Consumer Education fields
 Consumer Education fields continued
The Basic pages have their own layout. The following pages are included in the Basic pages collection:
- About ChildCare.gov
- Contact Us
- Page not found (404)
- Families: State and Territory COVID-19 Resources
- Providers: State and Territory COVID-19 Resources
- COVID-19 Resources and Information
- Website Disclaimers
- Child Care Health and Safety Violations: State and Territory Reporting Information
- Home
Note: The homepage is dynamically driven. Only the page title is editable in Netlify CMS.
Here’s how you’d create a new Basic page in English.
- Under Collections, click the English Basic Pages in the left navigation.
- Click on the New English Basic Page button. You can also use the Quick add > English Basic Page at the top of the admin navigation.
- Enter a title in the Title field.
- Enter content in the Body field.
- Make formatting changes using Rich Text or Markdown.
- Once you’re ready, click Save.
Once you make a change, the Save button will immediately become enabled and the collection shows Unsaved Changes.
 Screenshot of saving content.
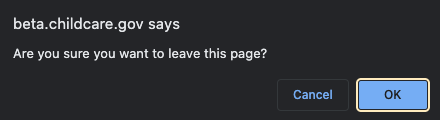
If you try to move away from the page editor without saving, Netlify CMS will ask you “Are you sure you want to leave this page?” It’s safer to click Save as you work.
There are two ways of formatting content in Netlify CMS: Rich text and Markdown.
Rich text allows you to enter and format text like you would in a document. It enables the What You See Is What You Get (WYSIWYG) panel with bold, italics, underline and other common editing features.
Markdown is a lightweight markup language that you can use to add formatting elements to plaintext text documents.
Kramdown is the version of Markdown that Jekyll processes. It provides small snippets of code to easily style content.
These Kramdown codes can be used to attach USWDS styling classes (or your own!). For example, we use Kramdown codes on external links. We attach the Kramdown code {: .usa-link--external} to display the external link icon style.
This feature is also used to style tables. Using Kramdown, we add an HTML id and class to create an anchor link for each table and give them a USWDS table style.
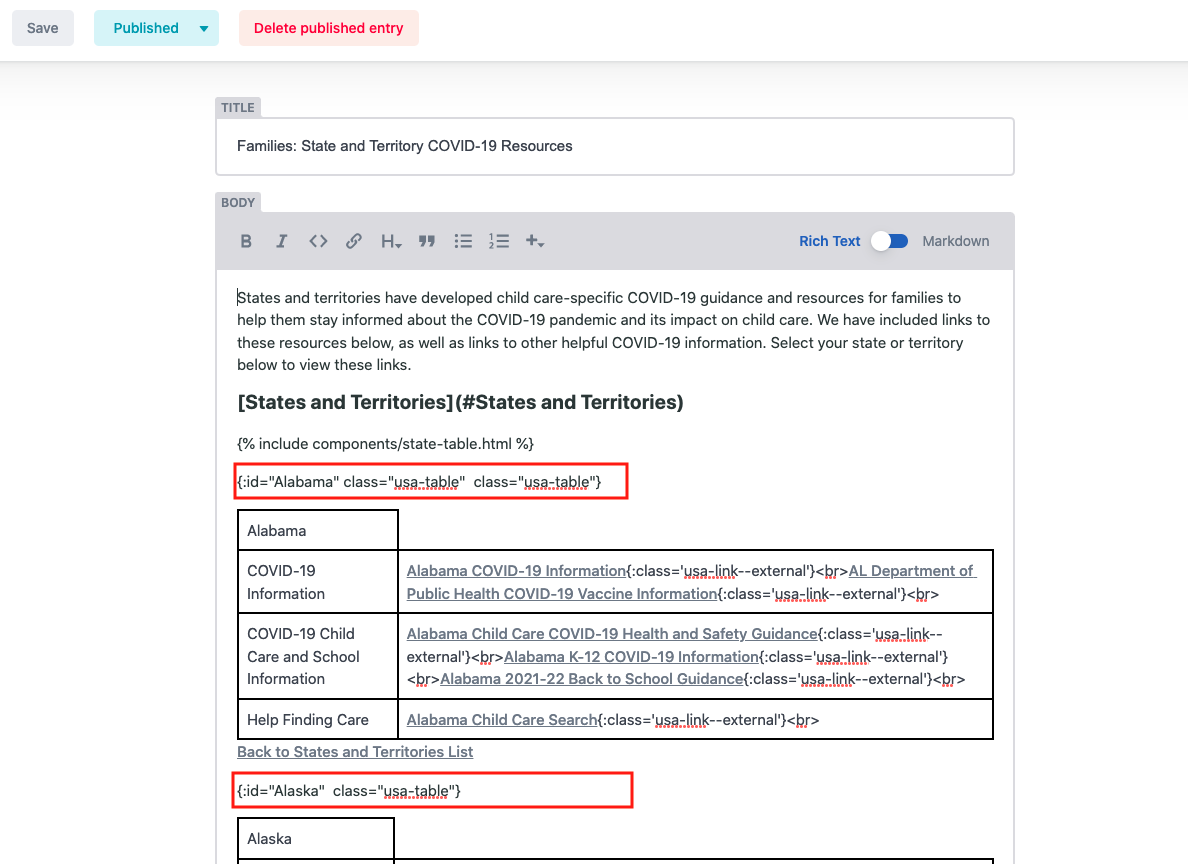 Example of Kramdown classes used to style tables
Note: Some page layouts (Home, State Resources Home, and Learn More) include images that are dynamically configured and are not (yet) editable in the CMS. The following instructions are for images within Netlify CMS content pages. The image widget allows editors to upload an image or select an existing one from the media library.
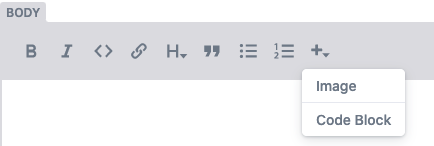
- Click on the Add component button.
 Screenshot of selecting an image.
- Select the Image option.
- This creates an image object within the content. By default, it has three fields: Image, Alt text, and Title.
- To select an image, select Choose an image or Insert from URL.
- Choose an image opens up the media library. You can upload a new image or select an existing image.
- Click Choose selected to use the selected image.
- To cancel, click outside the library or click the Close button.
- If you used the Copy Path feature on another site image, you can Insert from URL. If you use an image from another website, make sure it’s public and visible to everyone.
- Click Save.
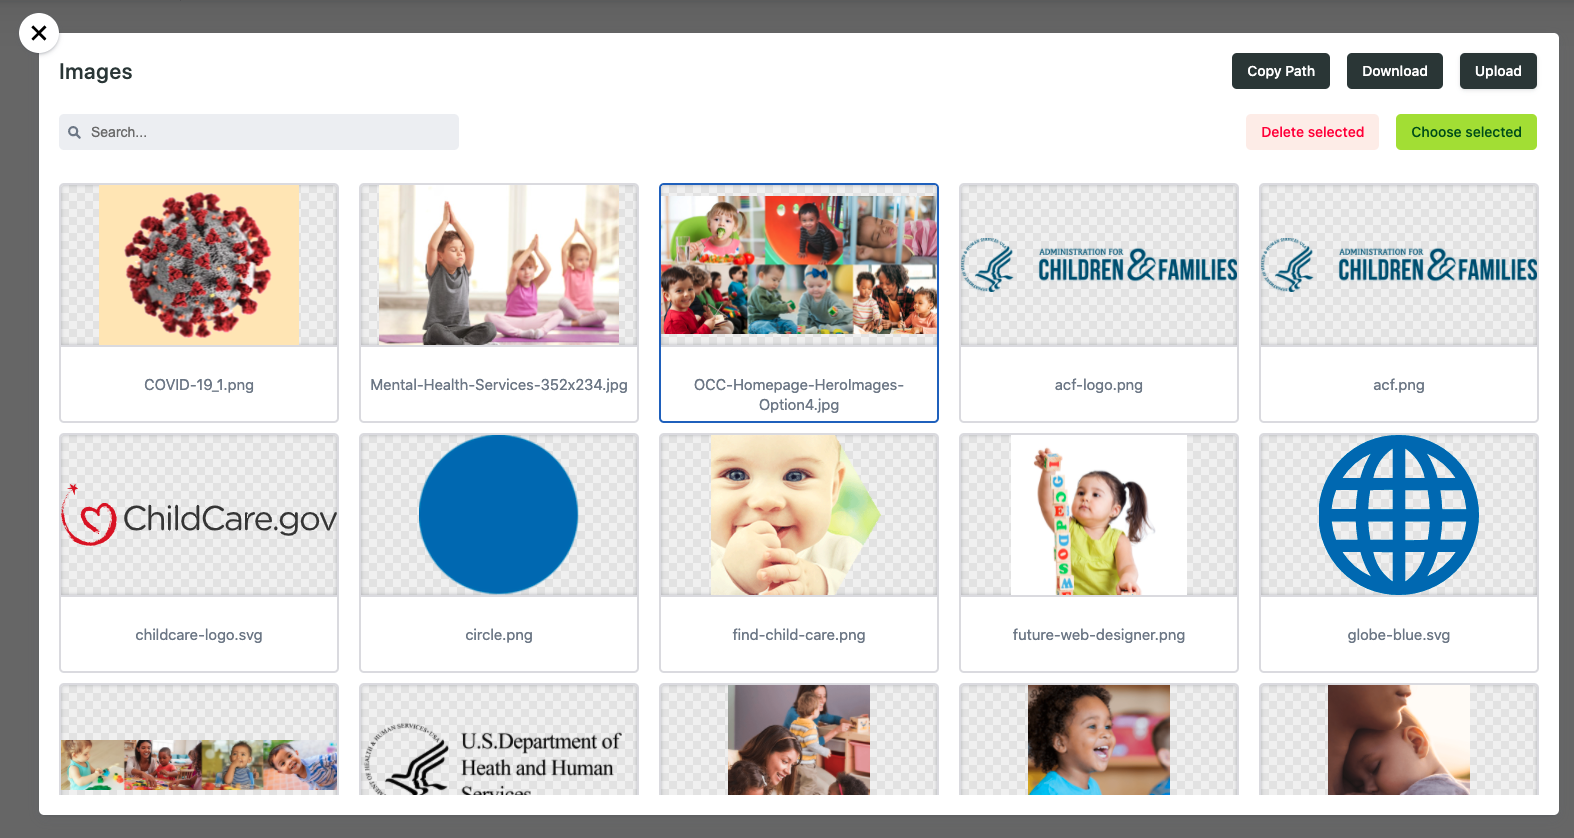 Screenshot of media library.
You can manage media assets using the media library. Access the media library by clicking on an image within the content editor or going to the Media tab from the admin page.
Most common file types are allowed, including PDF.
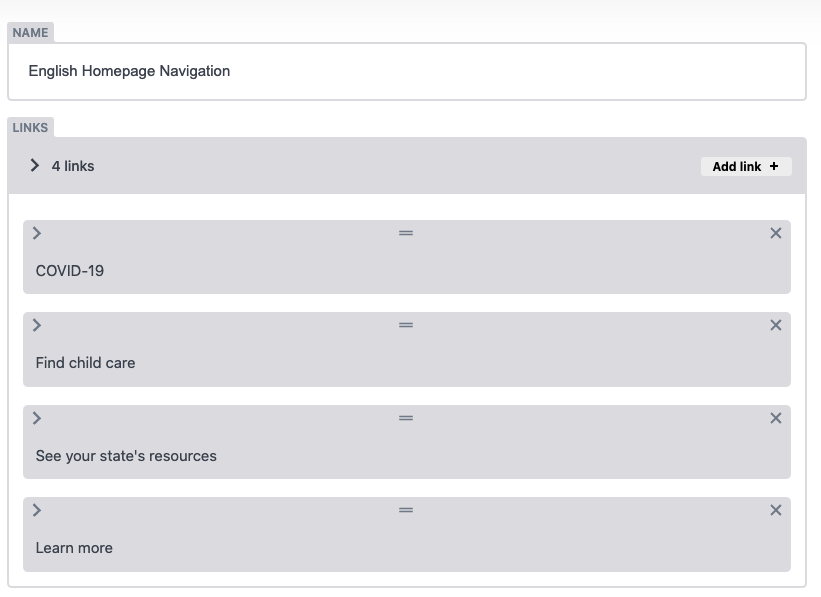
The site navigation links are also managed in Netlify CMS. Here’s how you would add or edit a navigation link in English.
- Under Collections, click Site Navigation in the left navigation.
- Click English Homepage Navigation.
- Click the expand arrow to show all of the navigation fields.
- Click the Add link button to add another set of fields.
- Enter the link text in the Text field.
- Enter the link URL in the Destination field.
- Drag and drop the new fields to reorder them in the navigation.
- Click Save.
Note: Make sure that you create a corresponding navigation link in the Spanish Homepage Navigation menu. The Destination URL should begin with /es/.