Localization
There are a few ways of achieving localization:
- Localizing MSI
Embedding transformation routines in the msi file so when UI requests UI text resources, msi transforms them into a culture-specific version just before returning them to the called. - UI Localization
Managed UI can extract from msi culture-specific localization file and apply it to itself.
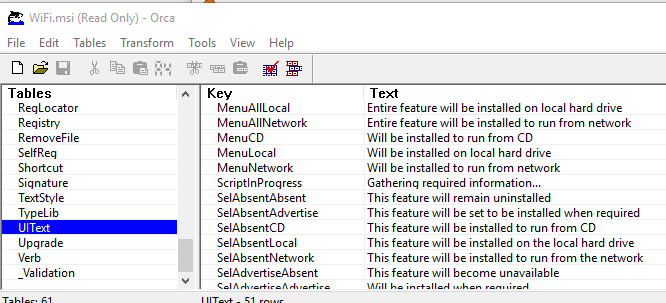
MSI does not support localization in a traditional (multi-language) way. Thus a given msi file contains all UI text content embedded in a single language in the UIText table.
And if you want to build msi with non-default language you will need to indicate the desired language (and the localization file if you use any custom UI text):
project.Language = "de-de";
project.LocalizationFile = "WixUI_de-de.wxl";

project.BuildMsi();
And if you are customizing any UI dialogs you will need to have the new/changed UI text reflected in the localization file.
Things are more complicated when you need to have one msi that supports multiple languages. The problem is that MSI has only a single repository for UI text - UIText table.
To overcome this problem you have to use a "trick". You can embed (in your MSI) multiple transformation routines that can update the UIText table content with a new language equivalent at runtime just before displaying the UI. And if this msi is executed on the OS, which language matches one of the embedded transformations, this transformation will be automatically triggered and effectively switch the setup UI language. Alternatively, you can force the transformation manually via command line parameters of msiexec.exe or your bootstrapper:
1031 - German language id
msiexec /i setup.msi TRANSFORMS=:1031Generating transformations and embedding them is not a bit convoluted even though not terribly difficult:
- Build primary msi with the default localization (e.g.
setup.en-US.msi). - Build msi with the alternative localization (e.g.
setup.de-DE.msi). - Use
torch.exeanalyze the difference between these two msi files and store it as a transformation file (e.g.setup.de-DE.mst). - Insert transformation file content with language ID as a key in the
_Storagestable of the primary msi file. - Update the primary msi summary section with the list of all supported languages' IDs.
Thanks, WixSharp all this can be automated:
// #1
product.Language = "en-US";
string productMsi = project.BuildMsi(path);

// #2-3
product.Language = "de-DE";
string mstFile = project.BuildLanguageTransform(productMsi, "de-DE");

// #4
productMsi.EmbedTransform(mstFile);

// #5
productMsi.SetPackageLanguages("en-US,de-DE".ToLcidList());
If you need to use custom UI text then you may also need to supply a custom localization file in BuildLanguageTransform(...).
And if you don't need any customization then you can simply use a single method BuildMultilanguageMsi that encapsulates the all code above:
var product =
    new ManagedProject("My Product",
        new Dir(@"%ProgramFiles%\My Company\My Product",
            new File("readme.txt")));

product.Language = "en-US,de-DE,ru-RU";
product.GUID = new Guid("6f330b47-2577-43ad-9095-1861bb258777");

product.BuildMultilanguageMsi();
It is recommended that in the combined list of supported languages, you use your target OS language as a first item.
// Russian OS
product.Language = "ru-RU,de-DE,en-US";

// English OS
product.Language = "en-US,de-DE,ru-RU";
This will ensure that all transformations are embedded in such a way that the produced msi can switch to any alternative language both automatically and manually.
If this recommendation is not followed then it can lead to the inability to switch manually to the default language on the OS of the alternative language:
// English OS
product.Language = "ru-RU,de-DE,en-US";
If the produced msi file is executed by double clicking on en-US OS it will automatically show English UI as expected. But an attempt to switch to Russian UI with msiexec /i setup.msi TRANSFORMS=:1049 will fail as such a transformation does not exist.
Working sample: Source/src/WixSharp.Samples/Wix# Samples/Bootstrapper/MultiLanguageSupport
If during the MSI session, you need to localize (translate) some content before displaying it to the user (e.g. with a message box) you need to access the localization data dynamically and apply it to the untranslated content.
The Session object gives you access to all localization data that you need. Either MSI localization (UIText table) or WixSharp localization (a wxl file in Binary table).
MsiRuntime type is a class for easy access to the session data and in the case of ManagedProject it is easily available with the session event argument (void Project_Loaded(SetupEventArgs e)).
void Project_UIInitialized(SetupEventArgs e)
{
    var runtime = e.ManagedUI.Shell.MsiRuntime();
    var rawMsg = "Click [WixUINext] button when you are ready.";
    var translatedMsg = rawMsg.LocalizeWith(runtime.Localize);

    MessageBox.Show(translatedMsg);
However, if you choose to go with low-level session events (raw Custom Actions) then you need either to access session data manually or construct MsiRuntime on-fly:
[CustomAction]
public static ActionResult MyAction(Session session)
{
var runtime = new MsiRuntime(session);The previous section described the localization model supported by MSI/WiX. Basically UI localization should come from the wxl file which contains culture-specific resources. When it comes to the custom UI provided by WixSharp (ManagedUI) or extended by the user, the wxl approach still works the same way. However, if you also have an option that does not require you to specify the desired language from the command line or the bootstrapper.
Since MandagedUI allows you to define a reach behaviour you can implement a detection/selection routine that would allow UI then pull the culture-specific routine from the MSI file:
static void Localize(this ManagedProject project)
{
    project.AddBinary(new Binary(new Id("de_xsl"), "WixUI_de-DE.wxl"))
           .AddBinary(new Binary(new Id("gr_xsl"), "WixUI_el-GR.wxl"));

    project.UIInitialized += (SetupEventArgs e) =>
    {
        MsiRuntime runtime = e.ManagedUI.Shell.MsiRuntime();

        switch (DetectLanguage())
        {
            case SupportedLanguages.German:
                runtime.UIText.InitFromWxl(e.Session.ReadBinary("de_xsl"));
                break;

            case SupportedLanguages.Greek:
                runtime.UIText.InitFromWxl(e.Session.ReadBinary("gr_xsl"));
                break;
        }
    };
}
. . .
Working sample: Source/src/WixSharp.Samples/Wix# Samples/Managed Setup/MultiLanguageUI.
Note, because WixSharp's UI dialogs are nothing else but WinForms/WPF controls, you can also utilize .NET localization resource-based approach (*.resx) as well.
If you have a few custom elements on the stock dialog or a complete custom dialog, you may choose to avoid customizing wxl file(s) and provide localization for a few new UI elements by just extending wxl-based resources (translations) at runtime from the user-defined C# routine.
Example: You need to place on the dialog a button for copying text. You want the button text to be "Kopieren" (German) or "Copy" (English).
You can achieve the runtime translation of that single button text without adding new entries to the German and English wxl files.
You will need to enclose the translatable part of the button text in square brackets. I.E. "[Copy]".
This is how MSI/WiX recognises the localizable content.
You will also need to add the translation from the UIInitialized event handler:
. . .
project.UIInitialized += (e)=>
{
    MsiRuntime runtime = e.ManagedUI.Shell.MsiRuntime();

    if (CultureInfo.CurrentUICulture.TwoLetterISOLanguageName == "de")
        runtime.UIText["Copy"] = "Kopieren";
    else if (CultureInfo.CurrentUICulture.TwoLetterISOLanguageName == "en")
        runtime.UIText["Copy"] = "Copy";

};
That's it. The actual replacement of the button text will be done automatically by WixSharp.
You can find the working sample here.