Installation Guide
- Prerequisites
- Installing Package Dependencies
- Configuring PHP
- Configuring MySQL
- Downloading the Application
- Configuring Web Server
- Restarting Services
- Installing the Application
- Configuring Cron Jobs
- Final Configuration
- Troubleshooting
- Docker Image (video tutorial)
- Softaculous (cPanel, Plesk, ISPmanager, H-Sphere, DirectAdmin, InterWorx)
- Fantastico (cPanel, ISP Manager, DirectAdmin, ISP Config)
- Cloudron
- Helm Chart
sudo apt install wget
wget https://raw.githubusercontent.com/freescout-helpdesk/freescout/dist/tools/install.sh
chmod u+x install.sh
sudo ./install.sh
- Windows (there is no any tutorial yet but some people managed to install FreeScout on Windows)
- Centmin Mod on CentOS
- CentOS / Rocky / RHEL
- Laragon
- SuSE - it does not support
php-imapextension but there is a workaround here.
If you want you can let professionals install FreeScout for you.
Prerequisites required to run FreeScout are listed here. In this tutorial we are going to install FreeScout on Ubuntu LTS and use Nginx/Apache as a web server, but you can use any web server you like (Nginx, Apache, IIS, etc). Before you start installation please make sure to read about choosing a server.
You will also need a mailbox email address which will be used to fetch incoming emails (and optionally to send outgoing emails). This email can be set up anywhere (Gmail, G Suite, Yahoo, Office365, Zoho Mail, etc). This email is supposed to be accessed via FreeScout only, as all incoming emails will be automatically marked as READ and FreeScout will not fetch emails which have been read by people accessing the mailbox. If in your company you already have a mail server allowing SMTP and IMAP connection, just create a new email address (for example, support@company.com) and use it as a support mailbox email.
Make sure to learn about sending emails.
If you want to connect FreeScout to G Suite or Microsoft Office 365 via OAuth see this instruction.
Keep in mind that for the browser push notifications to work, HTTPS protocol is required.

sudo apt-get update
sudo apt remove apache2
sudo apt install nginx
sudo rm /var/www/html/*nginx*.html
Install PHP in FPM mode and all required extensions. Below are instructions for PHP 8.x or PHP 7.x.
DO NOT use PHP 8.1 as it contains critical bugs causing problems with parsing XML/HTML in some cases. PHP 8.2 and newer are OK.
PHP 8.x
sudo apt install php8.0 php8.0-mysql php8.0-fpm php8.0-mbstring php8.0-xml php8.0-imap php8.0-zip php8.0-gd php8.0-curl php8.0-intl
PHP 7.x
sudo apt install php7.4 php7.4-mysqli php7.4-fpm php7.4-mbstring php7.4-xml php7.4-imap php7.4-json php7.4-zip php7.4-gd php7.4-curl php7.4-intl
Make sure that correct version of PHP is used in console by running: php -v
Make sure that extensions are also enabled in console version by running: php -m
sudo apt install mysql-server libmysqlclient-dev
If you want to use MariaDB (it will automatically remove the mysql-server installation if any):
sudo apt install mariadb-server mariadb-client
sudo apt install git
For FPM we need to fix_pathinfo:
If you are working under the root user:
echo ‘cgi.fix_pathinfo=0’ >> /etc/php/8.0/fpm/php.ini
In other cases:
sudo -- "$SHELL" -c "echo 'cgi.fix_pathinfo=0' >> /etc/php/8.0/fpm/php.ini"
Log into the MySQL root administrative account:
mysql -u root -p
Create FreeScout database and user (replace "XXX" with the real password):
CREATE DATABASE `freescout` CHARSET utf8mb4 COLLATE utf8mb4_unicode_ci;
GRANT ALL PRIVILEGES ON `freescout`.* TO `freescout`@`localhost` IDENTIFIED BY "XXX";
If above code does not work try:
CREATE USER 'freescout'@'localhost' IDENTIFIED BY 'XXX';
GRANT ALL PRIVILEGES ON `freescout`.* TO `freescout`@`localhost`;Create the new directory, set permissions. Make sure to replace /var/www/html with the path on your server (this is just an example):
sudo mkdir -p /var/www/html
sudo chown www-data:www-data /var/www/html
cd /var/www/html
Now you need to download the app. There are two ways to do it:
-
Download the application build from https://freescout.net/download/ and extract it into
/var/www/html. This method can be used if installing via cPanel for example. -
Download the app using Git into the current directory (it must be empty):
sudo git clone https://github.com/freescout-helpdesk/freescout .
This will install the app from dist branch with all the composer dependencies included.
Run the following commands:
git pull origin master
git checkout master
When running composer commands always add --ignore-platform-reqs flag: composer install --ignore-platform-reqs
When making a pull request make sure to submit it to the
masterbranch, NOTdist!!!
We are installing application in /var/www/html/ (application directory), so server's web root directory must be /var/www/html/public.
Web server runs as www-data user. All application files must be owned by www-data, so that application can self-update itself.
Run the following command to make sure that www-data user is the owner of all the files in the application directory:
sudo chown -R www-data:www-data /var/www/html
Now if you have some SSH user (for example freescout) which you are going to use for development, add this user to www-data group to allow edit files and folders created by the web server. If you are not going to work with files via SSH/FTP just skip this step.
www-data must be the primary group of the freescout user. Otherwise you will be getting a Permissions issue
sudo  usermod -g www-data freescout

find /var/www/html -type f -exec chmod 664 {} \;
find /var/www/html -type d -exec chmod 775 {} \;
If you are installing FreeScout in a subdirectory, just make corresponding changes in the web server configuration files and specify proper App URL when installing the app.
Create a new server config (make sure to replace "example.com" with your actual site name):
sudo cp /etc/nginx/sites-available/default /etc/nginx/sites-available/example.com
sudo rm /etc/nginx/sites-enabled/default
sudo ln -s /etc/nginx/sites-available/example.com /etc/nginx/sites-enabled/example.com
sudo nano /etc/nginx/sites-enabled/example.com
The modified Nginx configuration file will look like this:
server {
    listen 80;
    listen [::]:80;

    server_name example.com www.example.com;

    root /var/www/html/public;

    index index.php index.html index.htm;

    error_log /var/www/html/storage/logs/web-server.log;

    # Max. attachment size.
    # It must be also set in PHP.ini via "upload_max_filesize" and "post_max_size" directives.
    client_max_body_size 20M;

    location / {
        try_files $uri $uri/ /index.php?$query_string;
    }
    location ~ \.php$ {
	fastcgi_split_path_info ^(.+\.php)(/.+)$;
	fastcgi_pass unix:/run/php/php8.0-fpm.sock;
	fastcgi_index index.php;
	fastcgi_param SCRIPT_FILENAME $document_root$fastcgi_script_name;
	include fastcgi_params;
    }
    # Uncomment this location if you want to improve attachments downloading speed.
    # Also make sure to set APP_DOWNLOAD_ATTACHMENTS_VIA=nginx in the .env file.
    #location ^~ /storage/app/attachment/ {
    #    internal;
    #    alias /var/www/html/storage/app/attachment/;
    #}
    location ~* ^/storage/attachment/ {
        expires 1M;
        access_log off;
        try_files $uri $uri/ /index.php?$query_string;
    }
    location ~* ^/(?:css|js)/.*\.(?:css|js)$ {
        expires 2d;
        access_log off;
        add_header Cache-Control "public, must-revalidate";
    }
    # The list should be in sync with /storage/app/public/uploads/.htaccess and /config/app.php
    location ~* ^/storage/.*\.((?!(jpg|jpeg|jfif|pjpeg|pjp|apng|bmp|gif|ico|cur|png|tif|tiff|webp|pdf|txt|diff|patch|json|mp3|wav|ogg|wma)).)*$ {
        add_header Content-disposition "attachment; filename=$2";
        default_type application/octet-stream;
    }
    location ~* ^/(?:css|fonts|img|installer|js|modules|[^\\\]+\..*)$ {
        expires 1M;
        access_log off;
        add_header Cache-Control "public";
    }
    location ~ /\. {
        deny  all;
    }
}
If you want to run FreeScout in a subdirectory (for example https://example.com/subdirectory) see recommendations for Nginx config here.
Apply Nginx config:
nginx -t
service nginx reload
Install Certbot:
sudo snap install --classic certbot
sudo ln -s /snap/bin/certbot /usr/bin/certbot
sudo certbot --nginx
The specific commands to use for different distros can be obtained from https://certbot.eff.org/
Enable HTTPS on Nginx and test automatic certificate renewal:
certbot --nginx --register-unsafely-without-email
certbot renew --dry-run
When asked choose option 2: Redirect - Make all requests redirect to secure HTTPS access.
Add to root crontab:
0 12 * * * /usr/bin/certbot renew --quiet
If you want to set up the FreeScout behind Nginx proxy see this instruction.
Apache virtual host configuration:
<VirtualHost *:80>
  ServerName example.com
  DocumentRoot "/var/www/html/public"
  Options Indexes FollowSymLinks
  ErrorLog /var/www/html/storage/logs/web-server.log
  <Directory "/var/www/html/public">
    AllowOverride All
    Require all granted
  </Directory>
</VirtualHost>
To install FreeScout into a subdirectory no need to create extra .htaccess files, just make sure to set proper path in Directory parameter. Also keep in mind that .htaccess files in upper-level directories may causeproblems for FreeScout.
Make sure that Apache mod_rewrite is enabled, otherwise you will always receive 404 Not Found error in browser. To enable mod_rewrite do the following:
sudo a2enmod rewrite
sudo systemctl restart apache2
Also mod_headers is needed to secure uploads folder:
sudo a2enmod headers
sudo systemctl restart apache2
If you receive error 500, try to add the following to the Apache virtual host configuration:
RewriteBase /
Import the .htaccess file using URL Rewrite.
Select URL Rewrite > Import Rules > ... > select .htaccess from the public directory > Delete the line highlighted in red.
Install cygwin.
Nginx:
nginx -t
service nginx restart
service php8.0-fpm restart
Apache:
service apache2 restart
service php8.0-fpm restart
There are two ways to install the app:
- Use web installer (recommended).
- Install manually.
If you want to use web installer, DO NOT create
.envfile manually. If.envfile exists in the root of your app, web installer won't run. To run web installer, remove.envfile and/storage/.installed(if exists), then remove all files from /bootstrap/cache`.
Open web installer https://your-domain.com/install and follow instructions:
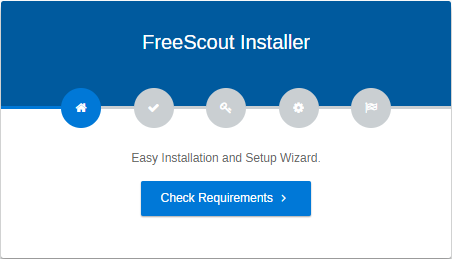
Installation wizard will guide you through the steps of installation process:
- Check PHP extensions
- Check folders permissions
- Choose database type: MySQL or PostrgeSQL
- Enter database details
- Choose application timezone
- Create admin user
This method is for advanced users who can use SSH console.
- Copy
.env.exampleas.envand make appropriate changes in the file. - Generate APP_KEY in the
.envfile:
php artisan key:generate
- Clear application cache and apply
.envfile changes:
php artisan freescout:clear-cache
- Create a symbolic link from "public/storage" to "storage/app/public"
php artisan storage:link
- Create tables:
php artisan migrate
- Create admin user:
php artisan freescout:create-user
Set up a cron task for www-data SSH user (if you don't know how to do it, contact your hosting provider). Make sure to replace /var/www/html/ with the path to your installation.
crontab -u www-data -e

* * * * * php /var/www/html/artisan schedule:run >> /dev/null 2>&1
On some shared hostings you may need to specify the full path to the PHP executable, for example, /usr/local/bin/php-8.0:
* * * * * export PHP_PATH=/usr/local/bin/php-8.0; $PHP_PATH /var/www/html/artisan schedule:run >> /dev/null 2>&1
This command runs every minute and also makes sure one instance of it runs as a daemon in the background. DO NOT ADD --no-interaction flag to the command as in this it will not run the background queue:work daemon!
In you are using Plesk, see this instruction.
Run the following command to make sure that console version of PHP which you are using satisfies all the requirements (use the same php as in the cron job):
php /var/www/html/artisan freescout:check-requirements

(or)

/usr/local/bin/php-8.0 /var/www/html/artisan freescout:check-requirements
Make sure that the cron job user is not messing up file ownership and permissions. Otherwise you will be getting a Permissions issue. If you execute cron job under the user different from www-data files and folders will be created under this user and www-data user may face permissions issue.
If regular cron jobs are not functioning on your hosting cron job can be executed via the URL which can be found in "Manage » System » Cron Commands". But this method is not recommended as some features may not work as expected. Use it at your own risk.
This step is performed to comply with modern cybersecurity standarts.
In order to allow FreeScout to update itself and modules automatically in the background configure the following cron job:
0 1 * * * /var/www/html/tools/update.sh --yes >> /var/www/html/storage/logs/update.log
This command will check for updates and install them every day at 1am (use this tool to generate desired cron schedule).
Before setting up this cron task make sure to update FreeScout via tools/update.sh script at least once to make sure it actually works.
After finishing configuration steps below it's highly recommended to read the FAQ - it contains a lot of useful information.
Got to Settings » Mail Settings and configure System Emails (alerts to admin, password resets and invitation emails to users).
In Settings » Alerts you can configure receiving alerts by email when some errors occur in the app.
Pay attention to the memory_limit parameter in the php.ini of your console PHP. This parameter determines maximum attachment size which FreeScout can retrieve when fetching incoming emails (read more here).
The following parameters determine maximum attachment size which support agents can upload:
- php.ini:
upload_max_filesize - php.ini:
post_max_size - nginx config:
client_max_body_size
In "Manage » Settings" you can adjust "Max. Message Size" option (it takes into account messages text and attachments).
If you want to store attachments using something like S3 – see this.
If you are using CloudFlare (otherwise skip this section):
-
DO NOT ENABLE "Security » WAF » Managed Rules » Cloudflare OWASP Core Ruleset" option as it will cause all kinds of unpredictable issues (see this).
-
If you are using CloudFlare Rocket Loader you'll need to disable it as it's not compatible with strict Content Security Policy used by FreeScout (see this).
-
Add the following line to the /.env file and clear cache in order to allow the application to properly detect visitor's IP address:
APP_CLOUDFLARE_IS_USED=true
In order to check CloudFlare logs select your website in CloudFlare and go to "Security » Events" and scroll down to "Activity log".
Make sure that your system configuration is fine in Manage » System
If you get any errors, check app logs in Manage » Logs » App Logs. If you have problems with loading JavaScript, menu will not work, so you need to check logs on the server in storage/logs folder.
You can also enable debugging (only if installed manually from master) to see error messages in your browser by uncommenting the following in .env file (don't forget to remove it when you finish debugging): APP_DEBUG=true
This is the most common issue. Usually failed to open stream or File /modules/modulename/js/laroute.js does not exist errors mean that you have permissions issue.
Symptoms:
file_put_contents(/var/www/html/storage/framework/cache/data/): failed to open stream: no such file or directoryfile_put_contents(/var/www/html/storage/framework/cache/data/5e/3c/5e3cbbed47195384f39edf30b47d8cd8245cdff8): failed to open stream: Permission deniedError: File '/www/html/public/storage/js/vars.js' does not existFile /modules/modulename/js/laroute.js does not existFile /modules/modulename/css/module.css does not existError occurred creating [...] symlink: symlink(): No such file or directory
Solution:
This issue means that the web server user does (www-data) not have permissions to write in some folder in storage. Make sure that web server user (www-data) has write permissions in storage folder and run again the following commands:
sudo chown -R www-data:www-data /var/www/html
Also make sure that the cron task user or some other user is not messing up file ownership and permissions. If you execute some FreeScout console command under the user different from www-data files and folders will be created under this user and www-data user may face permissions issue.
After that clear cache to generate missing files:
php artisan freescout:clear-cache
If the issue still persists try to manually type https://your-freescout.org/system/tools address and click "Clear Cache".
Try this.
Manually create a /public/storage symlink:
php artisan storage:link
or create symlink manually:
ln -s /var/www/html/storage/app/public public/storage
Make sure that PHP is able to write to public/css/builds and public/js/builds (see Configuring permissions)
If using HTTPS make sure it's properly configured: https://github.com/freescout-helpdesk/freescout/wiki/Installation-Guide#-if-https-is-configured-but-the-app-is-loading-via-http-instead-of-https
The only solution is to disable Rocket Loader in CloudFlare (see this).
This means that PHP can not create a temporary file. On Windows for example you need to give PHP permission in IIS 10 to write to C:\Windows\temp\.
If you are using NGINX Proxy Manager or any other proxy, disable all kinds of Assets Cache (like in this issue).
Something went wrong during DB migration. Try to execute the following console command:
php artisan migrate
This error is mostly related to the Apache web server. In this case check your Apache redirect rules, check or remove all higher-level .htaccess file. Try to add the following to the Apache virtual host configuration: RewriteBase /
It means that in /storage/framework/cache/data/ there are files created by a user different from www-data, and www-data user can not completely clear cache. Run the following command to make www-data user an owner of all the FreeScout files:
sudo chown -R www-data:www-data /var/www/html
Just create a new admin user via console:
php artisan freescout:create-user
Make sure you don't run any cron jobs under root user.
Check app logs in Manage » Logs and in Manage » System make sure that directories are writable (see this issue).
If you are using Nginx, make sure it has correct config.
See this.
- Keep in mind that each user has also Timezone settings in the profile.
- Make sure that server time is correct
- Check Timezone in "Manage » Settings"
- Make sure that HTTPS is configured.
- Make sure user has properly configured Notification Settings.
- Check app logs in Manage » Logs.
- Make sure that "Mute Notifications" option is disabled for the user.
Make sure you have php-imap extension enabled in web and console PHP: https://github.com/Webklex/laravel-imap/issues/30#issuecomment-348748107
If php-imap extension can't be enabled on your server by some reason, see this workaround.
If you are using PHP's mail() function to send outgoing emails keep in mind that there is a bug in some PHP versions causing outgoing emails to be broken (see this issue). Just upgrade or downgrade your PHP version
Make sure your background jobs are running properly.
See this.
See this.
Check running processes using htop or ps aux console command and see what kind of FreeScout's artisan commands are running.
See this.
Make sure that it's not connected to the Office Hours module or Noreply Emails module.
Make sure that in your mailbox Fetching Settings you have correct folder in "IMAP Folder To Save Outgoing Replies". See this or this.
If you are using Cloudflare DO NOT ENABLE "Security » WAF » Managed Rules » Cloudflare OWASP Core Ruleset" option as it will cause all kinds of unpredictable issues (see this).
When running composer commands always add --ignore-platform-reqs flag: composer install --ignore-platform-reqs
Even if you execute schedule:run command with a custom path to PHP it will execute commands using the default path:
$ /usr/bin/php8.0 /path/to/freescout/installation/artisan schedule:run
Running scheduled command: '/usr/bin/php' 'artisan' freescout:fetch-monitor > '/dev/null' 2>&1
Running scheduled command: '/usr/bin/php' 'artisan' freescout:check-conv-viewers > '/dev/null' 2>&1
Running scheduled command: '/usr/bin/php' 'artisan' freescout:fetch-emails > '/path/to/freescout/installation/storage/logs/fetch-emails.log' 2>&1
Running scheduled command: '/usr/bin/php' 'artisan' queue:work --queue='emails,default,1e0dfc970c9f3c1aca93f5554779bc52' --sleep=5 --tries=1 > '/path/to/freescout/installation/storage/logs/queue-jobs.log' 2>&1
Content-type: text/html; charset=UTF-8
See the solution here.
See this.
Make sure you don't have same folder specified in "IMAP Folders" and "IMAP Folder To Save Outgoing Replies" in your mailbox fetching settings.
Try to use some other than PHP's mail function sending method (See this issue).
Increase memory_limit value in php.ini. Keep in mind that console PHP may have it's own php.ini file.
Make sure that your server does not set X-Frame-Options header or sets X-Frame-Options to SAMEORIGIN (see this).
Configure HTTPS protocol in your FreeScout instance.
Such issue existed in old versions of FreeScout when customer using FreeScout was replying to you (see this issue). In order to avoid this issue you need to update your FreeScout to the latest version and ask your customer to do the same.
See this.
Also see FreeScout FAQ, Sending Issues, Fetching Issues and Modules Troubleshooting