Launch File - dhanushshettigar/Getting-Started-With-ROS2 GitHub Wiki
Introduction to Launch Files
Launch files are essential in ROS2 for managing the startup of multiple nodes and organizing the launch process. They allow developers to specify configurations, parameters, and dependencies for their robot systems, making it easier to handle complex systems with multiple components.
Table of Contents
- Creating a ROS2 Package
- Creating a URDF Directory
- Adding a URDF File
- Opening VS Code
- Creating a Launch Folder
- Creating the Launch File
- Modifying Setup.py
- Building the Package
- Sourcing the Install Folder
- Launching the Robot Description Package
- Understanding the RViz Screen
- Adding Robot Model, TF, and Robot Description Topic
Step 1: Move Inside ROS2 Workspace and Create a Package
Navigate to your ROS2 workspace's src folder and run the following command to create a new package named my_robot_description using the ament_python build type:
ros2 pkg create my_robot_description --build-type ament_python
This command sets up a new ROS2 package with the necessary directory structure and files for a Python-based package.
Step 2: Create a New Directory Named urdf
Inside your package, create a new directory to hold your URDF (Unified Robot Description Format) files:
mkdir urdf
This directory will store the URDF files that describe the robot model, allowing ROS2 to understand the robot's physical properties and structure.
Step 3: Create a New URDF File for Your Robot
Inside the urdf directory, create a new file to define your robot model:
touch my_robot.urdf
The .urdf file will contain XML-formatted information about your robot's links, joints, and other physical properties, which ROS2 will use for simulation and visualization.
Step 4: Move One Directory Back and Open VS Code
Go back to the src directory and open Visual Studio Code:
cd .. && code .
This allows you to view and edit all the contents of your ROS2 workspace in VS Code, making it easier to manage your package files.
Step 5: Create a New Folder Named launch
Inside your package, create a new folder to store your launch files:
mkdir launch
Launch files are crucial for managing multiple nodes and configurations when starting your robot system.
Step 6: Create the Launch File
Inside the launch folder, create a new file named display.launch.py and paste the following code:
from launch import LaunchDescription
import os
from ament_index_python import get_package_share_path
from launch_ros.parameter_descriptions import ParameterValue
from launch.substitutions import Command
from launch_ros.actions import Node

def generate_launch_description():
   urdf_path = os.path.join(get_package_share_path('my_robot_description'), 'urdf', 'my_robot.urdf')
   robot_description = ParameterValue(Command(['xacro ', urdf_path]), value_type=str)

   robot_state_publisher_node = Node(
       package="robot_state_publisher",
       executable="robot_state_publisher",
       parameters=[{'robot_description': robot_description}]
   )

   joint_state_publisher_gui_node = Node(
       package="joint_state_publisher_gui",
       executable="joint_state_publisher_gui"
   )

   rviz2_node = Node(
       package="rviz2",
       executable="rviz2"
   )

   return LaunchDescription([
       robot_state_publisher_node,
       joint_state_publisher_gui_node,
       rviz2_node
   ])
This launch file sets up the necessary nodes to visualize the robot model in RViz and publish the robot's state.
Step 7: Modify setup.py to Include Newly Created Folders
Open the setup.py file in your package and add the newly created folders for URDF and launch files to the data_files section:
('share/' + package_name + '/urdf', ['urdf/my_robot.urdf']),
('share/' + package_name + '/launch', ['launch/display.launch.py']),
This step ensures that the files are installed correctly when you build the package.
Step 8: Move to Workspace and Build the Package
Navigate back to your workspace root directory and build the package using:
colcon build --packages-select my_robot_description
This command compiles your package and prepares it for execution, ensuring that all dependencies are resolved.
Step 9: Source the Install Folder
After building, source the install folder to update your environment:
source install/setup.bash
This step ensures that your terminal recognizes the newly built package and its nodes.
Step 10: Launching the Robot Description Package
Now you can launch your robot description package using:
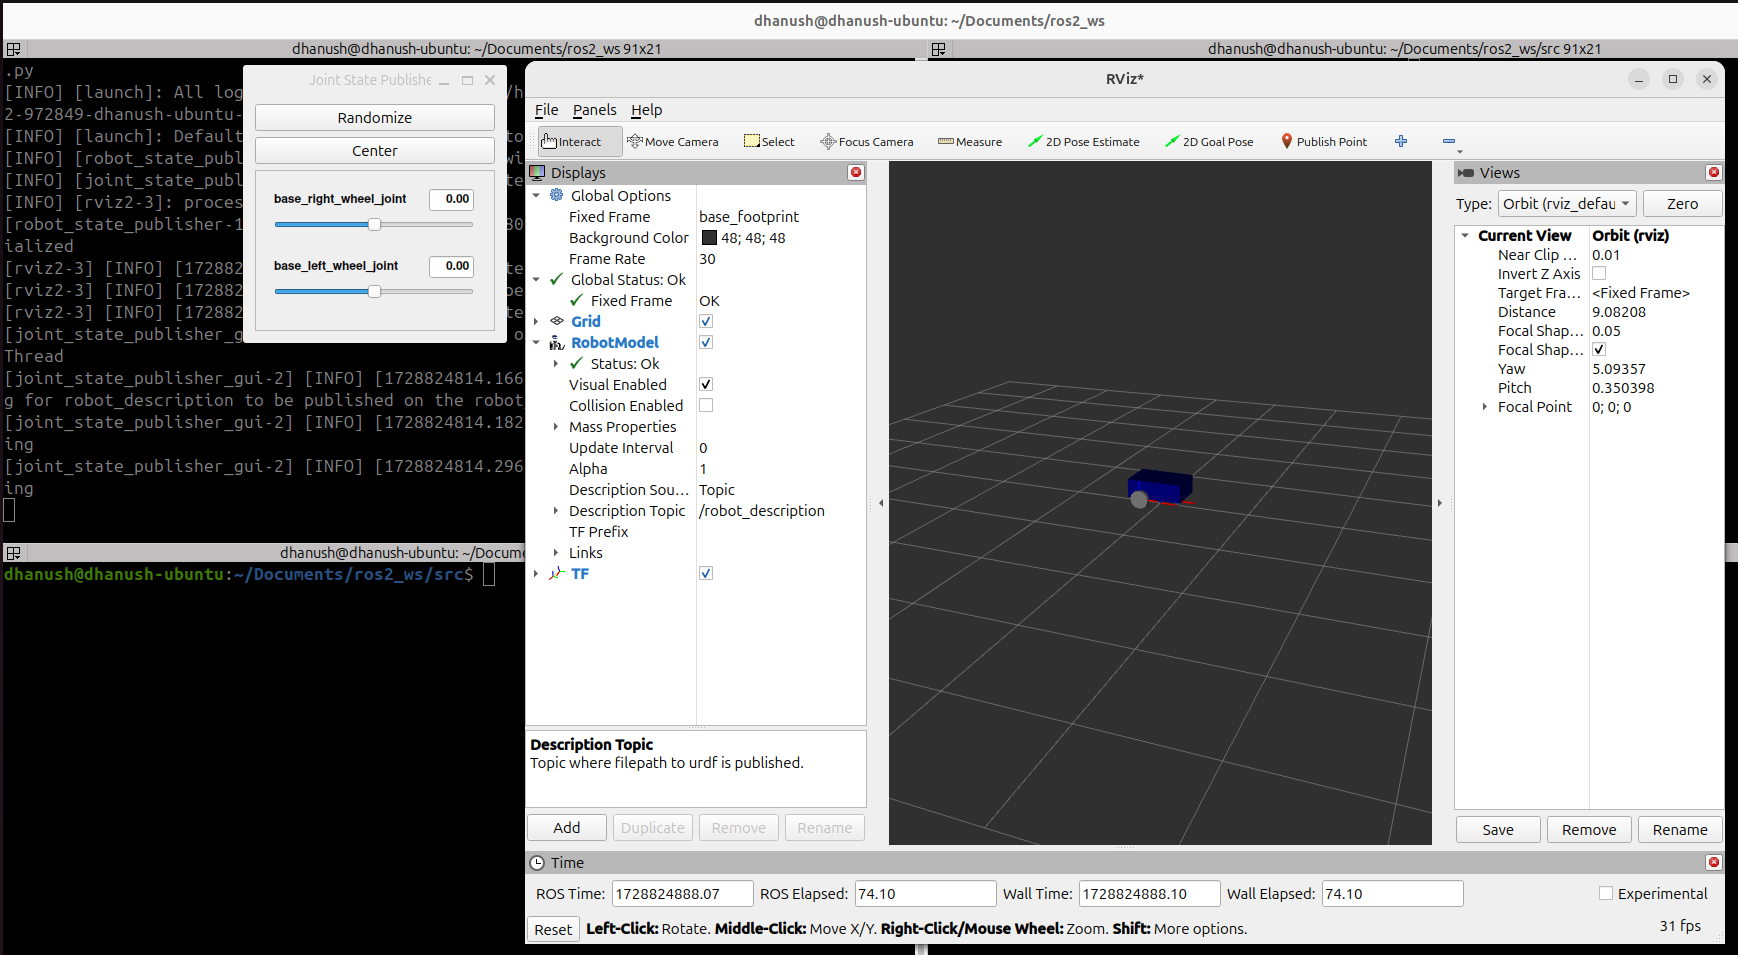
ros2 launch my_robot_description display.launch.py
This command starts all the nodes specified in your launch file, enabling you to visualize your robot model in RViz.
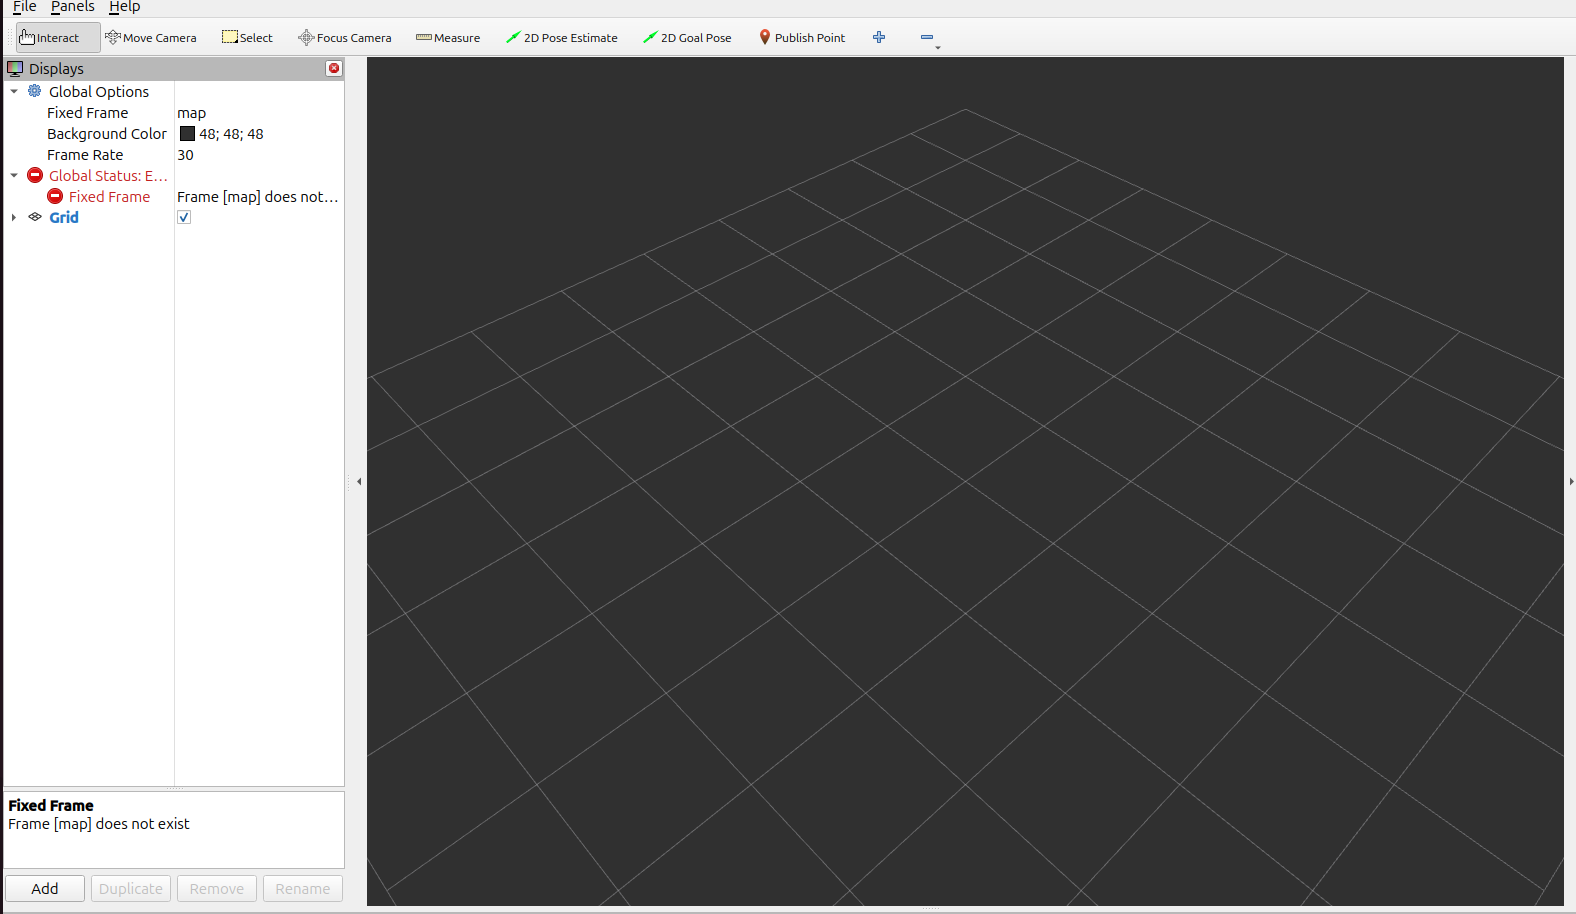
Step 11: Understanding the RViz Screen
Upon launching, you may see an empty RViz screen. This occurs because RViz requires configuration data to display the robot model properly.
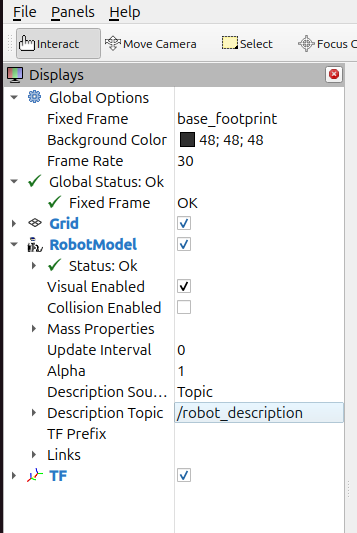
Step 12: Adding Robot Model, TF, and Robot Description Topic
You can now add the robot model and transform (TF) information to RViz by selecting the appropriate settings and subscribing to the robot description topic.