Releasing changes to production - DOI-ONRR/nrrd GitHub Wiki
We aim to release changes to the live site once a month, with rare ad hoc releases as necessary. This generally follows a pretty simple process.
Regular releases
For our regular releases, we follow this process:
- Before starting the release process, make sure any PRs that should be part of the release are merged into
dev. - Create a branch for release-releated changes by updating the version in the
gatsby-config.jsfile and updating the what's new section in theWhatsNew.jsfile (src/components/content-partials/WhatsNew.mdx). Our team uses the semantic version system of Major.Minor.Patch to guide our releases version. Major may include a new dataset; minor may include monthly data updates, new functions, or several cosmetic or content changes; patch may include a fix to an incorrect value within a dataset. Refer to the current version and the Semantic Versioning Site to determine which version number to use.
- Open a PR with the release changes branch and assign a team member to review it. Once it has been reviewed, merge this PR to
dev. - Open a PR from
devtomaster(usually done by the product manager or someone acting in that role). If you are releasing a new blog, this step will need to be done in the blog-nrrd repository as well.

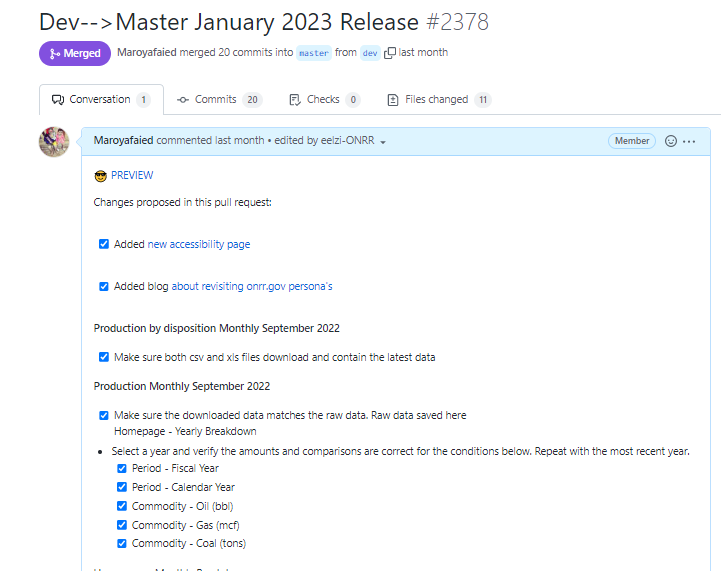
- Fill in the PR description with a list of major changes in that release and include the checklist for reviewing data . Provide the link to the development site.
-
Use the link for the dev branch to carefully review the site and make sure only the expected things have changed.
- It can be helpful to have the live site open in another window for visual regression testing.
- Check different layouts and interactions
- Make sure data is still present and unchanged (or changed only in expected ways).
-
Based on their knowledge and skill sets, assign at least two other team members to review the PR.
-
The assigned team members should review changes, commits, and the preview to make sure everything looks as expected.
-
Draft a new release, drawing heavily from your list of changes/issues in your release PR.
- Fill in the box for tag version with a “v” and your release number (no spaces).
- Select master for the target branch. This is the branch where the release will be published.
- Fill in the version number (with a “v”) and the date for the release title.
- Save the release as a draft.

-
Once the assigned team members have reviewed and approved the PR, the product manager – or the team member acting in that capacity – will review and merge the PRs to the live site.

-
Publish the draft GitHub release that you set up in step 10.
-
Make sure Circle Ci successfully built the site and verify that the changes are live as expected (can take 20-30 minutes).

Celebrate!

Ad Hoc or Emergency Releases
Occasionally, we may have a situation, such as an urgent bug fix or data update, that necessitates an ad hoc release. If we have an urgent PR that needs to be released directly into production without going through the process of reviewing and merging all commits in dev, the product manager or a person acting in that capacity will decide to do an ad hoc release. In this case, we will follow the procedures for a release, with these key changes:
- Change the version number in
gatsby-config.jsand use the branch that needs to be released for this change. - Set the PR up to go from your current branch directly into
master. - Use the Federalist preview link for your branch to carefully review the site and make sure only the expected things have changed.
- Assign at least two other team members to review the PR:
- Code-related changes must have the developer and/or content strategist review them.
- Content-related changes must have the content strategist, product manager, or program analysts review them.
- PRs related to new designs must have the user experience designer review them (although these PRs probably will not be urgent and should just go through the normal release process).
- Visual design-related PRs must have the content strategist or user experience designer review them.
How to upload monthly datasets
The Revenue, Disbursement, and Production data are updated on a monthly basis. This section provides directions for properly uploading the data.
When making regular updates to monthly data sets, use the Github issue label "Maintenance".
- The Open Data, Design and Development (ODDD) Team will receive an email from DORC (or other respective group) with the new monthly data attached as an Excel document.
- Save this original excel file from the email in Teams folder (General > NRRD > Data)
- Save the file as .CSV onto your computer.
- Rename this file to match the monthly .CSV files located at GitHub\nrrd\database\static\csv.
- REVENUE: for revenue, there is no need to rename the file. You will be moving that new monthly file into the location above at a later step.
- The file needs to be saved as a .CSV and NOT an Excel workbook for the upload.
- Open the .CSV file in notepad. Check to make sure there are no extra commas at the end of the data/document. If there are extra commas, delete them and save the document. (These commas can prevent the data from properly uploading.)
- Rename this file to match the monthly .CSV files located at GitHub\nrrd\database\static\csv.
- Open up GitHub desktop:
- navigate to the NRRD Repository,
- make sure your current branch is "Dev", and
- refresh the repository by clicking "Fetch origin" to make sure it is updated before adding new information.
- If this is the first new data set in this release, create a new branch in Github desktop. If there is already an existing pull request, then open that pull request and make your changes directly within that pull request. We want all of our data changes for each release to be within one branch and pull request. By working from the existing pull request, you are also working within the branch that was created for that pull request.
- Give the branch a simple but descriptive name like "upload monthly data"
- Within GitHub desktop, click:
- Repository > Show in explorer > database > Static > csv > choose correct folder (revenue, production, or disbursements)
- Overwrite the existing .CSV file located at GitHub\nrrd\database\static\csv with your new file.
- Make sure your new file name matches the monthly .CSV files located at GitHub\nrrd\database\static\csv.
- If the file names are the same, you can copy+paste the new .CSV file into the appropriate folder to overwrite the older one.
- REVENUE: for revenue, you just need to copy+paste the new monthly file in the location above. No need to rename it for overwrite.
- Within GitHub desktop, click:
- Repository > Show in explorer > database > changelog > changelog-data > choose correct .yaml file (revenue, production, or disbursements).
- Open the .yaml file in VSCode.
- Update the ID. Example: "production-monthly-YY-MONTH".
- Update the author to your name.
- For disbursements, make sure that you update the year parameter when you are changing fiscal years. Example: "CALL load_disbursement_monthly(YYYY)"
- For revenue, make sure to rename the file with the latest monthly .csv file name.
- Remember to save your work!
- Then, you need to commit.
- In summary section of the Commit in GitHub desktop, write a brief description such as "uploaded monthly disbursements."
- Hit the commit button and create a Pull Request. If you are committing to an existing pull request, it will append the new information. You will use the same preview link to see your updates.
- For Pull Requests:
- For these monthly data uploads, we usually do one monthly Pull Request for all the uploads.
- Remember your Branch Name - you will need it to fill out the Pull Request.
- Include the appropriate checklist (those listed below on this page in the appendix) in the Pull Request description, or as a comment.
How to upload annual Federal Sales data
- The Open Data, Design and Development (ODDD) Team will receive an email from DORC with the new annual data attached as an Excel document.
- Save this original excel file from the email in Teams folder (General > NRRD > Data)
- Save the file as .CSV onto your computer as federal-sales.csv
- Rename this file to match the monthly .CSV files located at GitHub\nrrd\database\static\csv.
- The file needs to be saved as a .CSV and NOT an Excel workbook for the upload.
- Open up GitHub desktop:
- navigate to the NRRD Repository,
- make sure your current branch is "Dev", and
- refresh the repository by clicking "Fetch origin" to make sure it is updated before adding new information. Optional: If this is the first new data set in this release, create a new branch in Github desktop. If there is already an existing pull request, then open that pull request and make your changes directly within that pull request. We want all our data changes for each release to be within one branch and pull request. By working from the existing pull request, you are also working within the branch that was created for that pull request.
- Give the branch a simple but descriptive name like "federal sales"
- Within GitHub desktop, click:
- Repository > Show in explorer > database > Static > csv > choose correct folder (revenue, production, or disbursements)
- Overwrite the existing .CSV file located at GitHub\nrrd\database\static\csv with your new file.
- Make sure your new file name matches the monthly .CSV files located at GitHub\nrrd\database\static\csv.
- Open the federal_sales_notes csv file in the GitHub\nrrd\database\static\csv\data_dictionary folder and update the date the data was pulled. DORC will provide this information.
- Manually update the date on the GitHub\nrrd\src\pages\downloads\federal-sales.mdx and GitHub\nrrd\src\pages\downloads\index.mdx files
- Open up the yaml file in GitHub\nrrd\database\changelog\changelog-data\sales.yaml
- Update the ID. “sales-MON-YYYY”
- Update the author to your name.
- Remember to save your work!
- Then, you need to commit.
- In summary section of the Commit in GitHub desktop, write a brief description such as "uploaded federal sales."
- Hit the commit button and create a Pull Request. If you are committing to an existing pull request, it will append the new information. You will use the same preview link to see your updates.
- For Pull Requests:
- For data uploads, we usually do one monthly Pull Request for all the uploads.
- Remember your Branch Name - you will need it to fill out the Pull Request.
- Include the federal sales checklist in the Pull Request description, or as a comment.
How to upload OGOR-B data
This dataset will be updated on a monthly bases. Below are directions for properly uploading the data.
-
The Open Data, Design and Development Team will receive an email from DORC with the new monthly data attached as an Excel document.
-
Save this original excel file from the email in Teams folder (General > NRRD > Data)
-
Save the file onto your computer.
-
Open up GitHub desktop:
- navigate to the NRRD Repository,
- make sure your current branch is "Dev", and
- refresh the repository by clicking "Fetch origin" to make sure it is updated before adding new information
-
Create a new branch in Github desktop. * Give the branch a simple but descriptive name like "upload monthly data"
-
Within GitHub desktop, click:
- Repository > Show in explorer > Static > downloads > OGOR-B

- Repository > Show in explorer > Static > downloads > OGOR-B
-
Copy and paste only the new data to both the excel version of the file titled 'OGORB" and to the csv version of the file called "OGORBcsv"

-
Go to atom then go to src > pages > downloads > production-by-disposition.mdx and update the date with the most recent month and go to file > save.

-
Then, you need to commit.
- In summary section of the Commit in GitHub desktop, write a brief description such as "uploaded Nov OGOR B data"
-
Hit the commit button and create a Pull Request.
NOTE: The OGOR-B hyperlink in the Download Data section will give you a 404 error in your preview. The updates must be in dev before you can check the hyperlink and download the data.
Troubleshooting for specific datasets
Some datasets, especially ones that we only get yearly, will have unique issues that need resolving. This is where we compile known issues in hopes that it will help us resolve problems for the next year.
For data issues that are beyond the scope of regular data updates, including troubleshooting, add the label "Data Management" to your Github issue.
Production - Fiscal Year
Here are issues found in previous FY Production datasets:
- As of FY21, this datasets now includes all of OGOR-B. This means that DORC converted their old data system to OGOR-B data and had to create a new pull utilizing SAS. They are working out the bugs of this new pull.
- When we get the new dataset, we need to make sure that the data is properly 'rolled up'. Meaning, there should only be one line item per commodity per location per year. If for example, you see multiple line items for oil in the Gulf of Mexico in a given year, the data is not properly rolled up. If the data is not rolled up, we need to go back to DORC and request a new dataset.
- The volumes now include those with 0. When exporting from SAS to excel, these 0s in the volume column turn into " - ". If these " - " are present, you need to format the volume cells to be numbers with no decimal places.
- In the FY22 dataset, we found the "Santa Barbar" County misspelling. We notified DORC and they should fix it for next year. Check the new dataset to make sure it's been corrected. If it hasn't, you can correct it in you dataset before uploading it to a PR.
- You can use the following formula in excel to compare county spelling differences between the live data and raw data: =TRIM(SUBSTITUTE(A2,B2,""))
- Make sure that the 'land class' and 'land category' columns are in the correct location in the dataset given to us by DORC. It should match the order within the CSV file the following location "Repository > Show in explorer > database > Static > csv > production > fiscal_year_production.csv". When you copy+paste the new data to this CSV file, make sure you keep the column order present.
Revenue - Federal Revenue by Company
Here are issues found in previous CY Federal Revenue by Company datasets:
- All updates are to be made in the CSV file located at: "Repository > Show in explorer > database > Static > csv > federal_revenue_by_company_CY2013-CY2019.CSV"
- Before adding in the new data, make sure the dataset DORC sent does not have any $0.00 or blank cells in the revenue column. If it does, confirm with DORC that it is ok to delete these line items.
- In the new dataset, also make sure that the revenue agency types all have spaces between the dashes. For example, it should be "ONRR - Royalties" and not "ONRR-Royalties". If there are no spaces in between the dashes, use Excel's find and replace to make sure all agency type names are corrected.
- This file name (federal_revenue_by_company_CY2013-CY2019.CSV) needs to be updated to reflect that the most recent CY.
- The data tab within the CSV file also needs to be updated to remove "CY20" from it.
- There is an excel file in the same location as the CSV. This file does not need updating and should be removed.
Revenue true-up
Every year, DORC sends us a revenue true-up file from the previous several years.
- Create and publish a new branch for this revenue true-up.
- At GitHub\nrrd\database\static\csv\revenue, be sure to remove any individual monthly revenue files that this true-up is replacing first.
- After those individual files are removed, open the "Jan 2005-Oct 2022 Revenues for NRRD_CSV" file.
- Within this file, delete out the months that the new true-up is updating.
- Then, add in the new data to this file.
- Make sure the entire revenue column is formatted as a number, NOT as a currency (this was an issue with the 2023 dataset).
- In the 2024 dataset, several counties were misspelled in the raw data from DORC. Check the spelling of the following counties: Pointe Coupee (misspelled Point Coupee and Pt Coupee), East Baton Rouge (misspelled E Baton Rouge), Golden Valley (misspelled Golden Valle), St. Charles (misspelled St Charles), St. Clair (misspelled St Clair).
- You can use the following formula in excel to compare county spelling differences between the live data and raw data: =TRIM(SUBSTITUTE(A2,B2,""))
The following query was used to identify the problematic locations:
SELECT DISTINCT county_code_desc,
  fips_code
FROM monthly_revenue_elt e
WHERE NOT EXISTS (
  SELECT 1
  FROM LOCATION l
  WHERE land_class = e.land_class_code
    AND land_category_code_desc = land_category
    AND e.state = l.state
    AND county_code_desc = county
    AND e.fips_code = l.fips_code
    AND agency_state_region_code_desc = offshore_region);
- Check to make sure all data is present before saving the file.
- Save the file, then rename the file to have the most recent month in the file name. (Jan 2005-MONTH YEAR Revenues for NRRD_CSV.csv)
- At GitHub\nrrd\database\changelog\changelog-data, open the "revenue-true-up.yaml" file. Update the file name to match the .csv file name in the previous step. Also update the ID (revenue-true-up-2024) and author appropriately. Save this file.
- Create the PR.
Manual updates to the Coal Excise Tax webpage (to be done each fiscal year)
The Coal Excise Tax webpage contains a data table within the .mdx file that we manually update for each fiscal year (FY). The data is from the IRS.
- Open the coal-excise-tax.mdx file located at GitHub\nrrd\src\pages\how-revenue-works.
- Copy the latest table entry and paste it directly below.
- Update the new table entry to the correct new FY.
- To update the table entry with the newest FY excise tax statistics, go to https://www.irs.gov/statistics/soi-tax-stats-excise-tax-statistics.
- Download the Excel that contains the latest FY data.
- Within the Excel, scroll down to the coal entry.
- For Surface mined, sum the "At 4.4 percent of sales price" and "At $0.55 per ton" entries. Add that summed value to the "Surface mining" column of the .mdx table.
- For Mined underground, sum the "At 4.4 percent of sales price" and "At $1.10 per ton" entries. Add that summed value to the "Subsurface mining" column of the .mdx table.
- For a total, sum together the surface and subsurface columns. Add that summed value to the "Total" column of the .mdx table.
- Save the .mdx file and include it in your PR.
Appendix: things to check while reviewing changes
For all of the things below, compare against the live site, looking for NEW issues or bugs introduced with the in-review PR. If you notice additional bugs that are shared between the live site and new PR, those don't need to be resolved before merging — open a new GitHub issue to describe the issue, and prioritize it for future sprints.
Navigate between pages
- Check several types of location profile page to ensure data and liquid templates are working as expected
- Check links are working correctly
- Check drop downs menu and validate they work
Text
- No misspelling
- Correct spacing
- Correct format
- Accurate dates displayed
Maps
- Appears on the page
- Shaded correctly
- Hover behavior works
- county/offshore area maps: hover behavior and do detail tables open
Data
- Review 1 verified 5-10 sample lines of data--against source data and relevant charts (Assigned commodities)
- Review 2 verified 5-10 sample lines of data--against source data and relevant charts (Assigned commodities)
Bar Charts
- Hover behavior is working
- Data displayed is correct
- Chart changes if you select yearly or monthly
Check all browsers
- Chrome
- Safari
- Firefox
- Edge
Check all devices
- Dell Laptop
- Chromebook
- Macbook
- iPad
- iPhones
- Samsung phones
Check all responsive breakpoints
- < 480 px (switches to one-column layout)
- 600 px (changes bar chart layout from three column to accordion with one column)
- 768 px (converts side navigation from separate column to the right to a select list)
- > 768 (full site layout)