DomKit - HeapsIO/heaps GitHub Wiki
DomKit is a library that can be used together with Heaps to create complex UI and integrate custom 2D components into it.
You should get install it first using:
haxelib git domkit https://github.com/HeapsIO/domkit.git
You can then add it to your project libraries with -lib domkit (together with -lib heaps)
You can see compile and run the corresponding Heaps Sample
In order to use Domkit to create a heaps components, you simply need to implements h2d.domkit.Object and define your document in the SRC static as the following sample shows:
class SampleView extends h2d.Flow implements h2d.domkit.Object {

    static var SRC =
        <sample-view layout="vertical">
            Hello World!
            <bitmap src={tile} public id="mybmp"/>
        </sample-view>

    public function new(tile:h2d.Tile,?parent) {
        super(parent);
        initComponent();
    }
}

...

var view = new SampleView(h2d.Tile.fromColor(0xFF,32,32),s2d);
view.mybmp.alpha = 0.8;
You can read more about Domkit Markup Syntax in the reference below.
You can then apply CSS at runtime to your document by using the following code:
var style = new h2d.domkit.Style();
// resource referencing res/style.css (see Heaps Resources documentation)
style.load(hxd.Res.style);
style.addObject(view);
Here's an example CSS that can apply to previous view:
.box {
    padding : 20;
    background : #400;
}In order to get runtime CSS reload you need to:
- use a
hxd.Res.initLocal()so you use a local filesystem to load resources. This is only available to some platforms such as HashLink - enable resources live update with
hxd.Res.LIVE_UPDATE = true;
Then every time you modify your CSS file, the style will be reapplied to all your currently displayed components. Errors will be displayed in case of invalid CSS property or wrongly formatted value.
You can add an init macro that will process at compile time your CSS and will report any issue at Haxe compilation time. This can be done by calling inside a macro:
domkit.Macros.checkCSS("res/style.css");Or my adding to your Haxe compilation parameters :
--macro domkit.Macros.checkCSS('res/style.css')
Please note that since each CSS property can be used by different components in different ways, and since you can't always tell by CSS rules on which component type the property will be applied, we only check that the property is valid and the CSS accepted for one of the components that defines it.
When compiled with -lib domkit, each h2d.Object will have an extra dom : domkit.Properties field that can be used for changing the state of the object wrt CSS :
mybmp.dom.addClass("myclass");
mybmp.dom.hover = true;
More code can be found in the Heaps Domkit sample.
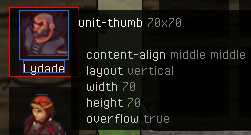
You can inspect your components by enabling the domkit inspector. This is done using
style.allowInspect = true;You can then using middle mouse button click anytime to enable/disable domkit inspector. Move your mouse over any component to see its name, id, classes and properties. You can use the mouse wheel to browse the component hierarchy. Maintaining Ctrl while clicking will also display the hierarchy in a separate tree-view.
In order to define custom components, you need to:
- implements
h2d.domkit.Object(if not already inherited from your superclass) - add
@:pfor each property you wish to expose to domkit markup/CSS - you can add
@:uiComp("name")metadata in order to customize the component name
Here's a small example:
// MyComp.hx

enum CustomStyle {
    Big;
    Small;
    Medium;
}

@:uiComp("my")
class MyComp extends h2d.Flow implements h2d.domkit.Object {

    @:p public var style(default,set) : CustomStyle;

    function set_style(s) {
        this.style = s;
        // ....
        return s;
    }

}
It is now possible to use your component from any document SRC by doing the following:
<my style="medium"/>
It is possible to have a component that also have a SRC. In that case, you need to reference the component name in your SRC root node name so its properties can be applied correctly.
Components are resolved by name by adding Comp to the capitalized component name. For instance <something/> will try to load SomethingComp class from local context.
If you wish to customize this name resolution, you can use an init macro such as:
// add --macro Init.setup() to your HXML / Haxe compilation parameters
class Init {
    public static function setup() {
        domkit.Macros.registerComponentsPath("my.comps.$");
    }
}
In the path, the $ character is the capitalized component name.
By default "$Comp" is a registered path in Heaps.
Some properties requires custom parsing. For instance color codes, padding boxes, etc.
You can specify which parser method to use by changing @:p metadata in the following way:
// will use parseTile CSS parser method
@:p(tile) public var tile : h2d.Tile;
You can use any identifier that is allowed in the current CSS parser. The default Heaps parser can be found in h2d/domkit/BaseComponents.hx
You can extend this parser with your own custom parser to support additional CSS parsing rules. Here's an example:
class MyParser extends h2d.domkit.BaseComponents.CustomParser {
    public function parseIntValues( value : domkit.CssValue ) : Array<Int> {
        return switch( value ) {
        case VList(vl): [for( v in vl ) parseInt(v)]; // comma separated values
        default: [parseInt(value)]; // single value
        }
    }
}
And then in your component you need to specify which custom parser to use:
@:uiComp("my") @:parser(MyParser)
class MyComp extends h2d.Flow implements h2d.domkit.Object {
   ...
   @:p(intValues) public var values : Array<Int>;
}
And it means you can now use values this way in attributes or CSS:
<my values="1,2,3"/>
Domkit markup allows the following syntaxes.
<node attr="value"/>A component with a CSS attribute value. Please note that the value has to be valid CSS and is parsed then interpreted based on the components custom parsing rules in order to be translated to the actual runtime value for the corresponding node property.
<node attr={expr}/>Set the attribute based on an Haxe code expression. Unlike previous syntax, here the expression must directly evaluates to the property runtime value, without going through CSS interpretation.
<node attr/>A shortcut for attr="true". Allows to easily set boolean attributes
<node id="identifier"/>Creates a field on the current class and set it to the component value upon initialization. By default the field is private.
<node public id="identifier"/>Same as above, expect the field is public.
<node id="group[]"/>Creates an Array of components on the current class and push the component value into it upon initialization.
<node(value1,value2,value3)/>Allows to pass constructor arguments to your custom component. ATM only Haxe values are allowed to be passed, DomKit does not allow passing CSS values to constructor arguments.
<flow>
${ for( t in tiles ) <bitmap src={t} id="btns[]"/> }
</flow>
When using ${..} syntax, you can inject any Haxe code into the markup language, allowing you to add if/for/method calls/etc.
Some TextThis is the equivalent of <text text={"Some Text"}/>, so you can apply CSS to the text components created this way.
<node>$component</node>When just a Haxe variable identifier is injected into the document content, we assume it contains another component value to be inserted there.
<some>
// commented <a/></a>
</some>
A single line comment within body
<some>
<a> /* commented <a/></a> */ </a>
</some>
A multiline / delimited comment within body
@something

@call(value)

@custom.path(value1,value2,value3)
These are markup macros that can be processed in a custom manner by setting domkit.Macros.processMacro in an init macro. It allows you to process identifier path and arguments (Haxe expressions) to return some markup syntax that will be then processed.
This is the complete documentation for allowed CSS attributes for native Heaps components.
See corresponding heaps documentation
x : 0.5
x position
y : 0.5
y position
alpha : 0.5
opacity
rotation : 45
rotation (unlike Heaps, value is expressed in degrees, not radians)
visible : true
toggle visibility
scale : 2.5
scale : 0.5 0.8
scale-x : 0.5
scale-y : 2
Uniform or X/Y scaling
blend : none
blend : alpha (default)
blend : add
Blendmode
These properties are only valid when the object parent is a <flow/> (see corresponding heaps documentation)
margin : 5
margin : 10 20
margin-left : 20
margin-top : 10
margin-bottom : 5
margin-right : 0
margin : 10 20 5 0
Margins around the object (these are FlowProperties.padding values)
align : left
align : top
align : bottom right
halign : right
valign : bottom
Allows to override alignment for a single object in the flow
position : absolute
position : auto
Tells if the object position is automatically set by the flow or manually managed
offset : 10 20
offset-x : 10
offset-y : 20
Offset the object after final position calculus.
min-width: 100
min-height: none
Gives minimal width/height to the object wrt flow calculus.
See corresponding heaps documentation
color : #ff0000
color : #f00
Color tint
smooth : true
smooth : auto
Toggles bilinear filtering or keep auto mode
tile-wrap : true
Enables tile wrapping
See corresponding heaps documentation
src : url("my/tile.png")
src : #f00 20 20
Load the tile or creates one with the specific color and size
See corresponding heaps documentation
text : "some text"
Text content to display
font : url("path/to/bitmapfont.fnt")
Set font to be used for display
letter-spacing : 2
Space between letters
line-spacing : 4
Space between lines
max-width : none
max-width : 300
Maximum width for auto text wrapping
text-align : left
text-align : right
text-align : middle
Alignment of the text (usually not used within a flow, instead use the align property)
text-shadow : 1.5 2 #f00 0.5
Set a drop shadow for the text (dx,dy,color,alpha)
text-color : #f00
Changes text color
See corresponding heaps documentation
width : auto
width : 500
min-width : 450
max-height : none
Set min/max width/height constraints
background : url("my/resource")
background : url("my/resource") 5 8
background : #f00
background : transparent
Flow background with optional borderWidth/Height
background : tile("my/resource",5)
background-tile-pos: 3
background : tile("my/resource",5,8)
background-tile-pos: 3 7
Flow background with split tile (vertical and optional horizontal frames) and separate attribute for setting the sub tile
debug : true
Display debug lines
layout : vertical
layout : horizontal
layout : stack
Sets the flow in either layout display mode
multline : true
Activates multiline
padding : 5
padding : 10 20
padding-left : 20
padding-top : 10
padding-bottom : 5
padding-right : 0
padding : 10 20 5 0
Padding values around contained elements
hspacing : 10
vspacing : 5
Horizontal and vertical spacing between contained elements
content-align : left
content-align : right top
content-valign : middle
content-halign : right
Changes horizontal/vertical default alignment for contained elements (flow horizontalAlign/verticalAlign)