Behavior Tutorial
This tutorial will take you through the creation of Behaviors. In the process, we will discuss many other bits and pieces of the engine. We’ll make a basic game of survival, where you will control a fish that needs to be fed to stay alive.
Before embarking on this tutorial, you should have obtained the engine, learned some about the structure of a Torque-based game, and created and edited your first script file. To learn more about those concepts, please see our earlier tutorials:
What you need
- A local checkout of Torque 2D
- A text editor.
Chapter 4. Adding Real Game Play
Our first step is to create a new project. We are going to start with a template – a pre-planned structure that follows best practices. This is merely to save a little time creating and naming directories. We’ll still need to bring in modules and add our own code to make it all work.
Go to your original Torque2D project directory and then into the folder tutorials. Within that folder there is a tutorial starter project fishTutorialBase.

Make a copy of this starter template to any place you’d like to keep your project -- somewhere you can start a new project and almost certainly not in the tutorials directory itself. Before any changes, you should have the following setup:

Inside of this project, there is a starter module named DeadlyReef. This will not be enough, however. We’ll need a copy of the AppCore and a copy of the TropicalAssets from the main Torque2D project directory. Go back to your Torque2D/modules directory and copy these to your project. Here is a list of all the modules in your main Torque2D module directory. The two we want are highlighted:

You should now have the following layout in your copy of the fishTutorialBase:

Finally, you will also need a copy of the engine itself to reside in the top directory of your project. Assuming you have obtained or built the Torque2D engine, copy it to this starter directory. That is, copy the following files to your top-level directory, depending on your operating system:
-
Windows
- Torque2D.exe
- OpenAL32.dll
- unicows.dll
-
Mac
- Torque2D(.app)
Your final setup should look as follows (on Mac in the picture):

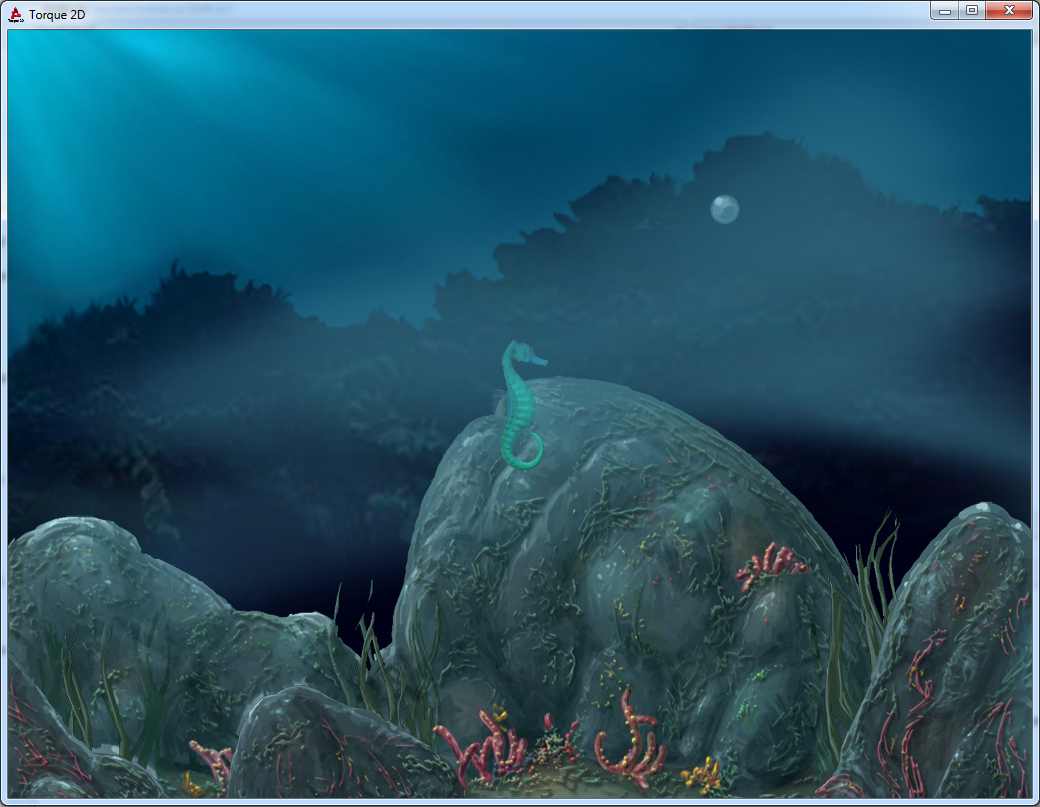
Already, your project should run! If all was copied correctly, you should be able to run and see the following scene.

There isn't that much going on, but for the effort, we are progressing quite nicely. We copied a skeleton tutorial, copied two modules into it, and copied the Torque2D engine itself into it. For this effort, we have a nice unerwater scene with a single seahorse.
Torque2D started up, and read the main.cs script file in your top-level directory. This is how every project starts. From there, it is up to our main.cs script to load and run the game. In our case, it did two things. One, it scanned the module directory, meaning that is found all the modules available to your project, just for reference. Then, it loaded the group of modules with the group name game. Here are those two steps.
ModuleDatabase.scanModules( "modules" );
ModuleDatabase.LoadGroup( "game" );
Any modules with a group attribute set to game will now load. Any number of them can be included. In our case, this was the one module named DeadlyReef. You can check this module's module.taml file and see for youself.
    <ModuleDefinition
        ModuleId="DeadlyReef"
	      VersionId="1"
	      Description="Feeding your fish game"
	      Dependencies="TropicalAssets,AppCore"
	      Group="game"
	      ScriptFile="main.cs"
	      CreateFunction="create"
	      DestroyFunction="destroy">
    </ModuleDefinition>
OK. So now that DeadlyReef has loaded, it calls the create function in DeadlyReef/main.cs. For tutorial purposes, our startup has been condensed a lot. Look at the function DeadlyReef/main.cs:create, you will see that it creates a canvas, a scene window, and a scene in quick succession. Up and running!
DeadlyReef/main.cs then calls to the TropicalAsset module's function buildAquarium. Wait a minute. TropicalAsset is not in the group game so how did it get loaded? To see how, look back at the DeadlyReef module definition again. It depends on TropicalAssets. You have to admit, that’s pretty awesome. As long as modules know there place in the hierarchy – what they depend on, how to initialize themselves via a create function, etc. – things work at any scale of game, from the smallest infinite runner to the biggest RPG.
But, we digress. Our purpose here is to make a game. We are going to feed that seahorse. And, yes, a seahorse is a fish.
Our first order of business will be to get our fish moving about at our command. There are two ways we could move the seahorse and stay within the bounds of good design. One is to give the fish a class, and provide class methods. But in this tutorial, we will create a reusable Behavior and attach it to the fish.
A behavior is similar to a class. It has a definition with methods and fields. It can be instantiated. However, several behaviors can be “attached” to one game object. Ideally, each behavior handles one aspect of a game object's state independent of the other behaviors.
Games tend to be made of many objects each interacting with each other in similar but different ways. For example, many objects will probably move, fight, take injuries, make sounds, model health loss, etc. Each of these concepts are relatively separate from the others. Each could be an individual behavior instead of a chunk of functions within one big class.
Otherwise, before you know it, a class that represents an object can become quite bloated with features. And for each new object that is pretty similar to others, there is a tendency to share the same class but with subtle differences tracing throughout the code. Think of a behavior as a way to take one slice of this functionality and keep it self-contained.
For a more complete description, you may want to check out Mick West's seminal blog post on the subject at http://cowboyprogramming.com/2007/01/05/evolve-your-heirachy/.
The first behavior is already written, so we can study it and attach it to our fish. Ideally, you will have a set of reusable behaviors you create or share with others. So let’s start by having one called ShooterControlsBehavior, which uses four key buttons to move our fish around.
First, let’s just try it and see what happens. Edit your DeadlyReef/main.cs file. Go to the create function and add the following exec line of code below. The rest of the code is shown for context.
    In DeadlyReef/main.cs:

    function DeadlyReef::create( %this )
    {
       // … not showing some of the code to save space

       exec("./scripts/aquarium.cs");
       exec("./scripts/behaviors/movement/shooterControls.cs");

       buildAquarium(mainScene);
       ...
    }
Go to the DeadlyReef::spawnPlayerFish function and add the following two lines, again in context.
    In DeadlyReef/main.cs:

    function DeadlyReef::spawnPlayerFish(%this)
    {
        ...  // hiding a bit here to save space

        %fish.setCollisionGroups( 15 );

        %controls = ShooterControlsBehavior.createInstance();
        %fish.addBehavior(%controls);

        mainScene.add( %fish );
    }
That should do it! You just instantiatd a Behavior and attached it to your fish. Run your game. You should be able to move the fish around using the arrow keys. If you are more of a “WASD” gamer – if you like to drive around with your left hand – try the following update to that last function:
    In DeadlyReef/main.cs:

    function DeadlyReef::spawnPlayerFish(%this)
    {
        ...

        %controls = ShooterControlsBehavior.createInstance();
        %controls.upKey = "keyboard W";
        %controls.downKey = "keyboard S";
        %controls.leftKey = "keyboard A";
        %controls.rightKey = "keyboard D";
        %fish.addBehavior(%controls);
        ...
    }
Now restart the game and you should be able to use W, A, S, and D to move around. Not working? Be very careful of your variable names. Did you always use %controls and not %control on accident. Is there any error output in console.log that can help?
Once all is well, you can decide on arrows or WASD from here on.
Now that we know how easy it is to attach a behavior, let’s dig in a little and see how a behavior is created.
Look in your project again. From the top, we want modules/DeadlyReef/scripts/behaviors. As a pretty good practice, keeping the behaviors together as a group is probably a good idea, but it's not necessary. You may end up with lots of them! Further, notice there is a movement directory within the behaviors directory. This is for keeping related behaviors together. Use your intuition on the organization here.
Go into the movement directory and open the ShooterControls.cs file. A common practice is to break each behavior into its own file and to put the BehaviorTemplate at the top of that file. This file is no exception. This next part is easily the largest chunk of boilerplate code to grasp
    In ShooterControls.cs

    if (!isObject(ShooterControlsBehavior))
    {
        %template = new BehaviorTemplate(ShooterControlsBehavior);

        %template.friendlyName = "Shooter Controls";
        %template.behaviorType = "Input";
        %template.description  = "Shooter style movement control";

        %template.addBehaviorField(upKey, "Key to bind to upward movement", keybind, "keyboard up");
        %template.addBehaviorField(downKey, "Key to bind to downward movement", keybind, "keyboard down");
        %template.addBehaviorField(leftKey, "Key to bind to left movement", keybind, "keyboard left");
        %template.addBehaviorField(rightKey, "Key to bind to right movement", keybind, "keyboard right");

        %template.addBehaviorField(verticalSpeed, "Speed when moving vertically", float, 20.0);
        %template.addBehaviorField(horizontalSpeed, "Speed when moving horizontally", float, 20.0);
    }
Don’t let the curly braces at the begin and end of this section throw you. This is not a function! What we have is an if statement at the global level. When this file is exec'd, this if statement will run immediately. And, really, it is just a sanity measure around the real code. If the BehaviorTemplate named ShooterControlsBehavior is already defined, this section will be skipped. Otherwise, this section will create it. This is only covered here because it is standard to use an if protector around your BehaviorTemplate.
So what is a BehaviorTemplate and why is it created here? A BehaviorTemplate is similar to a class definition. You have to have one in order to instantiate behavior instances. One line above provides the new template.
%template = new BehaviorTemplate(ShooterControlsBehavior);
And using the TorqueScript grammar, we now have a global name ShooterControlsBehavior which we can use anywhere. The rest of the lines are all to give this behavior some reusability weight. It has a friendly name, a description, and even a type. By the way, this type is simply for documentation. It does not effect when and how you can use the behavior.
This leaves six more sophisticated lines of code, all calling the function addBehaviorField. Each one adds one field to the behavior. For instance, in our case, we get new instance variables named upKey, leftKey, verticalSpeed, etc. Each can be used within an instance behavior as %this.upKey, and so on. Again, this is similar to a class.
So these relatively complex looking functions each create one field. The parameters of addBehaviorField aren't too confusing when you break them down. The first is the name of the field that will be created for the behavior. The second is a description. The next two are more interesting. The third parameter expresses the type of the field while the fourth is the default value.
Check out the definition of upKey above. Its type is a keybind and it’s default is keyboard up. (Remember in our WASD example we change the value to keyboard W and it worked. There are a few different parameter types all of which help to constrain the meaning of the field. We are probably going too deep for now, however. But notice one last thing. The defaults are often helpful. If set right, you don't need to set each field for the behavior instance, which is what we got away with when using the arrow keys.
The astute reader may wonder, since TorqueScript is a dynamic language and any object can have dynamic fields added to it, couldn’t we skip all this Behavior setup? The only real line here was
%template = new BehaviorTemplate(ShooterControlsBehavior);And then later when we create an instance, we could still careful provide each important field:
    %controls = ShooterControlsBehavior.createInstance();
    %controls.upKey = "keyboard w";
    %controls.downKey = "keyboard s";
    %controls.leftKey = "keyboard A";
    %controls.rightKey = "keyboard D";
    %fish.addBehavior(%controls);
The answer is, yes, you could just do that. However, describing your
BehaviorTemplateis good practice. There are other benefits to defining each field withaddBehaviorFieldas well. First, your fields now have sensible defaults. Second, you can constraint the type to float, color, etc. But enough philosophy for a while…
Let’s tweak our behavior and discover a new field owner. You may have noticed that the seahorse always faces the same direction. It would be nice if he turned to face the direction he was moving. We can do this in two lines of code. Go into your shooterControls.cs script and add the following lines in context.
    In ShooterControls.cs

    function ShooterControlsBehavior::updateMovement(%this)
    {
        %flip = %this.right - %this.left < 0;
        %this.owner.setFlipX(%flip);
        %this.owner.setLinearVelocityX((%this.right - %this.left) * %this.horizontalSpeed);
        %this.owner.setLinearVelocityY((%this.up - %this.down) * %this.verticalSpeed);
    }
Give this a test first and see if it worked. Then let’s go over a few more basics.
First, notice how each function in a behavior is like a class method. It is scoped with the function name ShooterControlsBehavior. It also has a %this “pointer” so you can affect the behavior's values. But notice that our two new lines go a bit further. We also have a special field owner. We can act on %this.owner as well and the action will be handled by the scene object on which the behavior is attached, whatever that may be!
Again, a behavior can have methods and fields for itself. But it can also reach the behaviors and fields of the object to which it is attached. Your choice. This way, several behaviors attached to the same scene object can keep their bookkeeping variables to themselves.
If you remember, we attached our behavior to the seahorse object. Ultimately we’ll want to affect the object that the behavior is attached to. In the current case, we change the seahorse Sprite value of flipX which turns around the sprite image.
To review, we now have a seahorse, in an ocean scene, and we can move that seahorse around using our choice of keyboard keys. We are at a good stage to implement some basic game play aspects. First, we will add falling food to the level, so we can move our fish to gather the food. Later we can add obstacles, but first we need to get the food spawning and the gathering working.
Let’s recap the steps involved in adding an object, so we can add some fish food to our game. We need a new SceneObject with a food-like image asset on it. It needs a position, size, collision bounds, etc. If we plan to control this object with behaviors instead of a class definition, we don’t need to add a class name or any class script (although you can have a class and behaviors on the same object).
To affect our new object with behaviors, we'll need to create a new script or two for our project. And, once we have these new behavior scripts, we need to be sure and exec the new behaviors into our game. Only then can be add behavior instances to our new object.
Always going for the quickest visually rewarding test, we’ll put the food scene object in first. It won't do much yet. Go to the end of your DeadlyReef/main.cs file and add the following function.
    In DeadlyReef/main.cs

    function DeadlyReef::spawnFishFood()
    {
        %food = new Sprite()
        {
            Image = "TropicalAssets:bubble";
            class = "FishFoodClass";
            position = "20 20";
            size = "3 3";
            SceneLayer = "15";
            SceneGroup = "10";
            CollisionCallback = true;
        };

        %food.createPolygonBoxCollisionShape(5, 5);
        %food.setCollisionShapeIsSensor(0, true);
        // fish food need only collide with walls
        %food.setCollisionGroups( 15 );
        mainScene.add( %food );
    }
Go to you create function in the same file and add a call to your new function by adding to it as follows:
    In DeadlyReef/main.cs

    ...
    DeadlyReef.spawnPlayerFish();

    for (%i = 0; %i < 2; %i++)
        DeadlyReef.spawnFishFood();
    ...
You can now run it and see the food. That little bubble will be our food. (Any image asset in a pinch!)
Let’s check a few things in that code. We create a Sprite with an image asset on it. (We don’t have an animation for this object.) We place it in a scene layer so that it is drawn between the front and back rocks giving it a nice effect. (That is, we use layer 15. You can look at the buildAquarium code to see which layers the rocks are in.) We used the same layer as the fish but this wasn’t strictly necessary. Then we gave it a group setting of 10, which has not been used yet. This is because we plan to set up collisions between our fish and this food and it seems reasonable to have them in different groups. The food will need a collision callback as you’ll soon see, so it has been turned on.
So far, so good. We have two equally important things to do: Make the food drift so it will be fun to chase; and make the seahorse capable of eating the food.
To make the fish food drift down the aquarium, we’ll make a new behavior, and get a little experience with that. Browse out to your DeadlyReef/scripts/behaviors/movement folder. Now create a new text file and name it drift.cs.
Now that we have created the script file, we need to make sure it gets included when we run the game. Open up DeadlyReef/main.cs. In your create function add the following one line in context.
    In DeadlyReef/main.cs

    exec("./scripts/behaviors/movement/shooterControls.cs");
    exec("./scripts/behaviors/movement/drift.cs");
You could run it now and make sure your log does not have any new errors in it. However, there isn’t much to see yet. We still have to write the behavior and attach it to the fish. Let’s fill in drift.cs quickly. We'll study it soon.
    In drift.cs

    if (!isObject(DriftBehavior))
    {
        %template = new BehaviorTemplate(DriftBehavior);

        %template.friendlyName = "Drift Down";
        %template.behaviorType = "Movement";
        %template.description  = "Drift Down.  Recycle Object At Bottom";

        %template.addBehaviorField(minSpeed, "Minimum speed to fall", float, 5.0);
        %template.addBehaviorField(maxSpeed, "Maximum speed to fall", float, 15.0);
    }

    function DriftBehavior::onBehaviorAdd(%this)
    {
        %this.recycle();
    }

    function DriftBehavior::onCollision(%this, %object, %collisionDetails)
    {
        %this.recycle(%object.side);
    }

    function DriftBehavior::recycle(%this)
    {
        %this.owner.setPosition(getRandom(-50, 50), 40);
        %this.owner.setLinearVelocityX( 0 );
        %this.owner.setLinearVelocityY( -getRandom(%this.minSpeed, %this.maxSpeed) );
    }
That wasn't too many lines for a new BehaviorTemplate that provides a new independent feature. Now to attach this behavior to the food, go back into DeadlyReef/main.cs and then into the function DeadlyReef::spawnFishFood. Add the following lines in context:
    In DeadlyReef/main.cs

    ...
    %food.setCollisionGroups( "15" );

    %move = DriftBehavior.createInstance();
    %food.addBehavior(%move);

    mainScene.add( %food );
    ...
If you start up your game again, there should be a piece of fish food floating down the screen. When it hits the bottom, you see a “new” piece of fish food for your seahorse start to fall from the top.
There are a few new ideas worth mentioning here. The method onBehaviorAdd is called any time a behavior is attached to a scene object. This is the perfect place to do a little initialization required by this behavior, and so we call to reposition and start the slow descent of any scene object it is attached to. (It doesn't have to be fish food.)
Second, we want a continuous stream of fish food, but we'll use the rule that any one piece only gets replaced after it is finished. So we use a trick. Instead of actually creating a new piece of fish food or deleting an old piece of fish food, we simply move the one piece back to a random starting position and drifting speed whenever DriftBehavior::recycle is called.
Eventually, our piece of food may make it the bottom of the tank. If so, we will consider it "finished" and replace it with a new piece. (As described before, we will really recycle the current piece.) But how do we know when we've reached the bottom?
We have an aquarium, built with the aquarium.cs script in our DeadlyReef module. Specifically, if you want to follow along, go to the DeadlyReef/scripts/aquarium.cs:buildAquarium function. And this function, in turn calls addAquariumBoundaries. Now it’s the addAquariumBoundaries function that we need to talk about. It creates four scene objects which surround the aquarium and act as passive triggers or sensors, that can be collided with. This is how we know when a fish or a piece of fish food has reached the edge of the aquarium.
We can use these triggers, to know when our fish food has reached the bottom of the tank. There are three possible ways to do this.
First, the sensors around the tank have been given the class AquariumBoundary. They don't have any class methods so this is just to allow other objects to poll for the class. Our drift behavior could do the following:
function DriftBehavior::onCollision(%this, %object, %collisionDetails)
{
    if (%object.class $= "AquariumBoundary")
    {
        // we've hit an aquarium boundary.  act appropriately.
    }
}
If we were coming into contact with several classes, we could decide what to do based on the %object.class.
Second, the aquarium boundary sensors were laced with a dynamic field named side. You could create any number of dynamic fields of any name. The different sides of the aquarium are marked "left", "right", "top," or "bottom". We could poll this value and even know which side we are colliding with:
function DriftBehavior::onCollision(%this, %object, %collisionDetails)
{
    if (%object.side $= "bottom")    {
        // we've hit the aquarium bottom.  act appropriately.
    }
}
We could also combine class and side in our case to make sure this is a fish tank and that this is the bottom of the fish tank.
Finally, we come to the choice made in our tutorial. The aquarium bounds were set to group 15. We have kept this group dedicated to the bounds. Then we set the fish food to collide with objects in group 15 only:
%food.setCollisionGroups( "15" );Because only the aquarium bounds are in that group, we know that any callback to the DriftBehavior instance attached to our fish food must be the boundaries. We used collision masks to do the selecting for us. We can always add specificity later.
function DriftBehavior::onCollision(%this, %object, %collisionDetails)
{
    // we know this will be the "bottom" of the aquarium.  so recycle
}
To recap, when our fish food hits the bottom of the aquarium (the only direction it drifts) it will recycle itself...
Actually that was a little fib but it got the point across. In actuality, the DriftBehavior will handle the collision! If our scene object collides, one or all of our behaviors get a chance to handle it! That is serious power.
Want to see the aquarium triggers? Well they are invisible by design, but let’s do a little debug session. If we turn on the debug visualization of scene object bounds, we can see the boundary sensors. We haven’t been to your project’s main.cs in the top level directory in a while. Go there now and add the following lines of code in context. Remember this is the top level main.cs not the one in DeadlyReef:
    In /main.cs
    ...
    ModuleDatabase.LoadGroup( "game" );

    mainScene.setDebugOn( "aabb" );
    mainWindow.setCameraSize(200, 150);

    //---------------------------------------------
When you restart, you will see axis-aligned bounding boxes (aka AABBs) around your items.
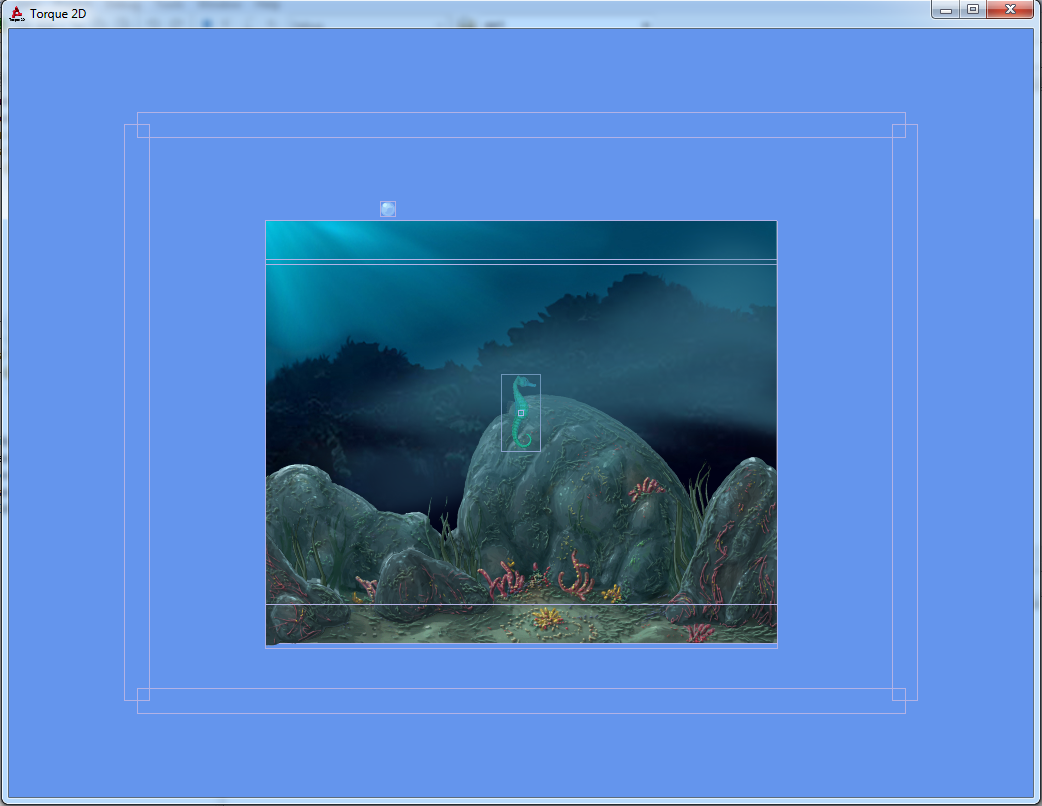
You don’t care about some of them for now, but you can see the triggers around the aquarium. The camera also surveys a bigger screen area, as if zoomed out. This allows you to see “off screen” relative to the game in play. When you are satisfied, remove or comment out the debug lines.
Well, this is getting a bit interesting! We are designing a game that’s starting to look more fun, and we are integrating code with the rest of the game, all the while organizing bits of our gameplay into coordinated behaviors. Sweet!
We need to give the fish a goal of eating the food, and provide a motivation for reaching that goal. Why does it need to eat the food? We will give the fish some hit points, which will slowly decrease. When it eats food it will gain hit points. If the fish doesn't eat food quickly enough it will die.
We need to visually represent the fish's life somehow, and we need to give it a death event. One of the easiest visual ways to notify the player that the fish is dying is to make is smaller the less hit points it has. That way if you don't get food you shrink and die, and if you get food you grow larger. If it gets to less than 30% of its size then it will die.
We will create another behavior to encase all of this. Without further ado, let’s dig in.
Go to your DeadlyReef/scripts/behaviors directory. Within it, create another directory named life where we will put our new script and perhaps more scripts over time. Create a blank script within the life directory named lifeTimer.cs.
Go back to your DeadlyReef/main.cs file and updated it to add the new behavior script:
    In DeadlyReef/main.cs
    ...
    exec("./scripts/behaviors/movement/shooterControls.cs");
    exec("./scripts/behaviors/movement/drift.cs");
    exec("./scripts/behaviors/life/lifeTimer.cs");

    buildAquarium(mainScene);
While still in main.cs, go to DeadlyReef::spawnPlayerFish and update it to match the following:
        ...
        %fish.addBehavior(%controls);

        %life = LifeTimerBehavior.createInstance();
        %fish.addBehavior(%life);
    }
Congratulations! You just created your first scene object with more than one behavior attached! Things are going to start happening now! We just have to actually write that behavior. Go back to your new lifeTimer.cs script and put the following code in it:
    In lifeTimer.cs

    if (!isObject(LifeTimerBehavior))
    {
        %template = new BehaviorTemplate(LifeTimerBehavior);

        %template.friendlyName = "Lifetime with Burn";
        %template.behaviorType = "Life";
        %template.description  = "Slowly lose hit points.  Allow replinishing of hit points.";

        %template.addBehaviorField(burnRate, "milliseconds between timer-based point loss", int, 1000);
        %template.addBehaviorField(burnPoints, "points of life lost per period", float, 5.0);
    }

    function LifeTimerBehavior::onBehaviorAdd(%this)
    {
        // Store our size on start-up as our "normal" size.
        // We will shrink or grow relative to this.
        %this.normalHeight = %this.owner.size.height;
        %this.normalWidth = %this.owner.size.width;

        // hit points of life left
        %this.life = 100;

        %this.schedule(%this.burnRate, "lowerLife");
    }

    function LifeTimerBehavior::modifyLife(%this, %dmg)
    {
        %this.life += %dmg;

        if(%this.life > 100)
        {
            %this.life = 100;
        }

        if(%this.life <= 30)
        {
             %this.die();
        }
        else
        {
             %this.updateLifeSize();
        }
    }
Here we added a new BehaviorTemplate, an initialize function (onBehaviorAdd) and a method called modifyLife. The %dmg value will actually represent either damage or life gained. If we want to add life we pass a positive value, and if we want to subtract life we pass a negative value. We don't want hit points to go above 100, so we check to see if this new life value is greater than 100, if so, we set it to 100. If our fish has 30 life or less, then it is should be dead and we call the die function (this is a function we need to add). If the fish's life isn't zero, then it is still alive and we need to update its size, so we call updateLifeSize (this is also a function we need to create). Now, let’s create our updateLifeSize function. So add this after our modifyLife function.
    In lifeTimer.cs

    function LifeTimerBehavior::updateLifeSize(%this)
    {
        %sizeRatio = %this.life / 100;

        %newWidth = %this.normalWidth* %sizeRatio;
        %newHeight = %this.normalHeight * %sizeRatio;

        %this.owner.setSize(%newWidth, %newHeight);
    }
First we create a local variable called %sizeRatio. We original saved our size as a base, and kept it in %this.normalWidth and %this.normalHeight. What we do here is get a percentage difference from 100 hit points and then resize to some portion of our original size. And now the die function:
    In lifeTimer.cs

    function LifeTimerBehavior::die(%this)
    {
        %this.owner.setFlipY(true);
        %this.owner.setLinearVelocityX(0);
        %this.owner.setLinearVelocityY(10);
        %this.dead = true;
    }
As a visual of our fish's death, we flip its Y direction so it is upside-down. We then set it to a positive velocity in the Y direction, so it will float up. Our final line sets the dead field on the fish object to true. Our final function will be one that we can call to constantly lower our fish's life. You can add this function after our previous function.
    In lifeTimer.cs

    function LifeTimerBehavior::lowerLife(%this)
    {
        %this.modifyLife(-%this.burnPoints);

        if(! %this.dead)
        {
            %this.schedule(%this.burnRate, "lowerLife");
        }
    }
This function first calls our modifyLife() function, passing it the %this.burnPoints field. This will effectively decrease our fish's life by however much we specified. We want to continue running this function every %this.burnRate milliseconds as long as the fish is alive, so we check to make sure that our fish isn't dead before rescheduling.
This may be your first self-scheduling method? After accomplishing our purpose -- adjusting our owner's hit points -- we schedule ourself to run again. But we want to make sure there is a stopping point or we could run forever. And in this case that stopping point is the fish's death. We have effectively created a “loop”. We also needed to "seed" this loop by calling it once from outside the loop. As you can see, this was done in onBehaviorAdd.
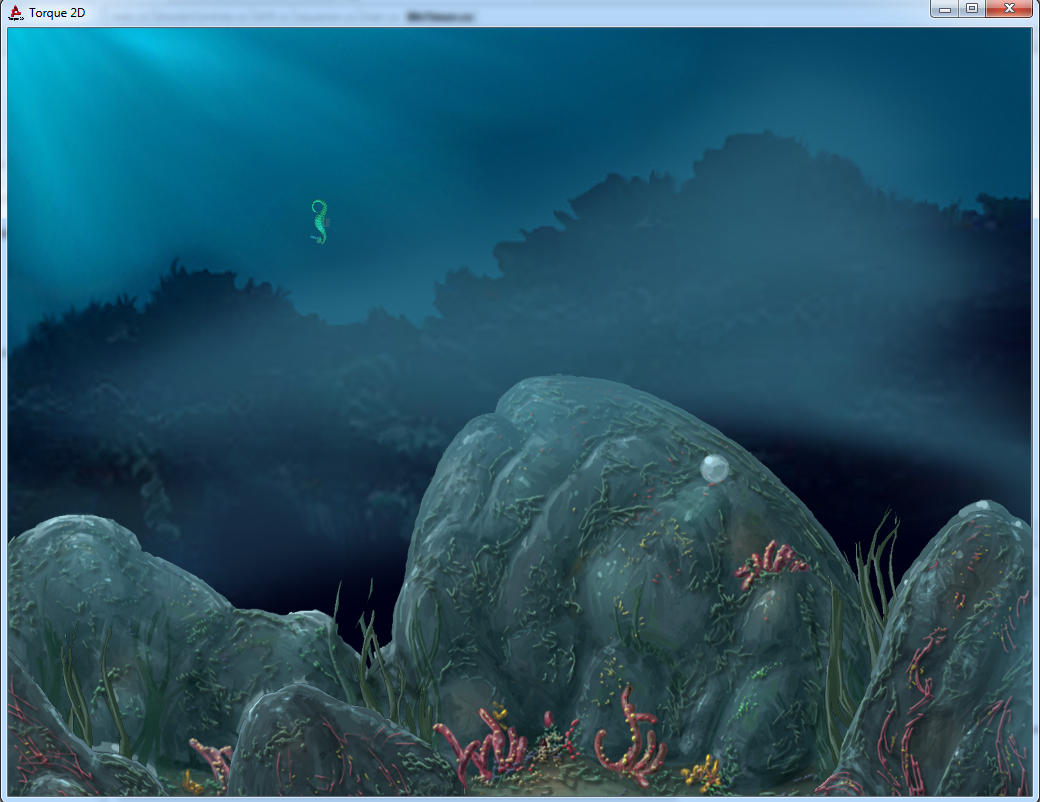
If you start up the engine, you will see your fish withering away. You can try to eat the food, but there is no collision set up between the two yet. After a little time, our fish dies.
But you may have noticed a bug in your last run. After the fish dies, you can still move it around with your keyboard. As a matter of fact, you can stop the seahorse’s movement toward the top of the screen because any control key will reset the direction of the seahorse.
To fix this, you are about to do your first cross-behavior callback. Movement is controlled by ShooterControlsBehavior but death is controlled by LifeTimerBehavior. Not a problem. First, add the following line to the end of your LifetimerBehavior::die method in context:
    In LifetimerBehavior.cs

    function LifeTimerBehavior::die(%this)
    {
        ...
        %this.dead = true;
        %this.owner.blockControls();
    }
There is no function in LifetimerBehavior that is called blockControls. But notice that we didn’t send the call to %this.blockControls. We sent it to the owner with %this.owner.blockControls! You are also about to see that any behavior (or more than one) can run when a function is called on the owner.
Go to your ShooterControlsBehavior and add the following method
    In ShooterControlsBehavior

    function ShooterControlsBehavior::blockControls(%this)
    {
        %this.override = true;
    }
Also add the following lines to the beginning of updateMovement in the same file in context.
    In ShooterControlsBehavior

    function ShooterControlsBehavior::updateMovement(%this)
    {
        if (%this.override)
            return;

        ...
    }
Run your game again. This time your fish should be uncontrollable once he has died. You just sent a function call to the owner which in turn allows any or many of the behaviors to respond. In our case ShooterControlsBehavior responded.
This is not the first time we have seen a behavior do its magic. Remember
onCollision? Torque sendsonCollisioncalls directly to the scene objects that have collided. But it was the behavior, attached to the scene object, that handled theonCollisioncall.
There is a subtle difference this time, however. Whereas
onCollisionis a built-in, or engine, function, we have just sent our fish a custom script functionblockControls. It still works!
It’s hard to watch that little seahorse die over and over on each test. Let’s get him fed. What we need is a way to know when the fish comes in contact with the fish food. And when it does, to get some sustenance from the food. Finally, once the food is "eaten" it should be deleted from the scene. To keep the game fun, we will create a new piece of food when the current one is eaten, which we know we can do with the DriftBehavior::recycle function.
For this experiment, we’ll put the nutritional value of the food directly in the food. Open your DeadlyReef/main.cs file and go to the DeadlyReef::spawnFishFood method. Add the following lines near the end
    In DeadlyReef/main.cs

    function DeadlyReef::spawnFishFood(%this, %count)
    {
        ....

        %food.nutrition = 10;
    }
Note, we could probably set a negative nutrition value and make a toxic pellet. Hmm. Register that idea away for later.
While we are in main.cs, we have another addition to make. Currently fish only collide with objects in group 15 -- the aquarium boundaries group. To see this, look in the spawnPlayerFish function and see the line
%fish.setCollisionGroups( 15 );Food is in group 10. To be sure, look into spawnFishFood and see the Sprite set with a sceneGroup of 10. What we need to do is make sure the fish and the food collide so we can get a callback. In spawnPlayerFish, change the collision groups line to the following.
%fish.setCollisionGroups( "10 15" );Note that the fish did the colliding with the fish food. We don't have to set the fish food's collision group in response. If either one is set to collide with the other, the collision will happen. Further the
onCollisioncall will only go to the object(s) that are set to collide. This is a nice way of receiving anonCollisionfor a fish when it touches the food, while avoiding getting anonCollisionfor the fish food, which doesn't take an active role in this collision.
To collect our nutrients, and start a new piece of fish food falling, add the following onCollision function to your LifeTimerBehavior.
    function LifeTimerBehavior::onCollision(%this, %object, %collisionDetails)
    {
        if (%object.class $= "FishFoodClass") {
            %this.modifyLife(%object.nutrition);
            %object.recycle();
        }
    }
Run your game. You should be able to touch the fish food with your seahorse for a increase in hit points.
Let's get one last easy update into our game. We need some competition for the fish food, so we'll create some meandering fish that just may snap it up before we get it.
We already know how to create fish and get fish food. What we need is one more behavior for moving the new fish around. In we go again...
Let's make the behavior first. Go into DeadlyReef/main.cs and add exec the new behavior script we are going to write.
    In DeadlyReef/main.cs

    exec("./scripts/behaviors/movement/shooterControls.cs");
    exec("./scripts/behaviors/movement/drift.cs");
    exec("./scripts/behaviors/movement/meander.cs");
    exec("./scripts/behaviors/life/lifeTimer.cs");
Now go to DeadlyReef/behaviors/movement and add the code below to a new script named meander.cs
    In meander.cs

    if (!isObject(MeanderBehavior))
    {
        %template = new BehaviorTemplate(MeanderBehavior);

        %template.friendlyName = "Meander";
        %template.behaviorType = "Movement";
        %template.description  = "Meander from left to right.  Provide a Recycle Feature";

        %template.addBehaviorField(minSpeed, "Minimum speed to meander", float, 5.0);
        %template.addBehaviorField(maxSpeed, "Maximum speed to meander", float, 15.0);
    }

    function MeanderBehavior::onCollision(%this, %object, %collisionDetails)
    {
        if (%object.class $= "AquariumBoundary")
        {
            %this.recycle(%object.side);
        }
        else if (%object.class $= "FishFoodClass")
        {
            %object.recycle();
        }
    }

    function MeanderBehavior::onBehaviorAdd(%this)
    {
        %speed = getRandom(%this.minSpeed, %this.maxSpeed);

        if (getRandom(0, 10) > 5)
        {
            %this.owner.setLinearVelocityX(%speed);
            %this.owner.setFlipX(false);
        }
        else
        {
            %this.owner.setLinearVelocityX(-%speed);
            %this.owner.setFlipX(true);
        }
    }

    function MeanderBehavior::recycle(%this, %side)
    {
        // Fish has turned around, so set a new random speed
        %speed = getRandom(%this.minSpeed, %this.maxSpeed);

        %this.owner.setLinearVelocityY(getRandom(-3, 3));
        %this.owner.setPositionY(getRandom(-15, 15));

        if (%side $= "left")
        {
            %this.owner.setLinearVelocityX(%speed);
            %this.owner.setFlipX(false);
        }
        else if (%side $= "right")
        {
            %this.owner.setLinearVelocityX(-%speed);
            %this.owner.setFlipX(true);
        }
    }
We wont' go into as much detail studying the code this time. It has similarities to our other behaviors. Upon being added to a scene object, this behavior begins its owner wandering left or right. The onCollision has double duty as well. If it hits an AquariumBoundary it reverses, and if it hits a FishFoodClass it gobbles it up. (It doesn't bother to check the nutrition.)
We just need the new fish. So go into DeadlyReef/main.cs and add the following spawnEnemyFish loop after the spawnFishFood loop (the latter will already be there):
    In DeadlyReef/main.cs

    for (%i = 0; %i < 2; %i++)
        DeadlyReef.spawnFishFood();

    for (%i = 0; %i < 5; %i++)
        DeadlyReef.spawnEnemyFish();
And then provide the spawnEnemyFish that was just called at the bottom of the script.
In DeadlyReef/main.cs
function DeadlyReef::spawnEnemyFish(%this)
{
%position = getRandom(-55, 55) SPC getRandom(-20, 20);
%index = getRandom(0, 5);
%anim = getUnit(getFishAnimationList(), %index, ",");
%fishSize = getFishSize(%anim);
%fish = new Sprite()
{
Animation = %anim;
class = "NPCFishClass";
position = %position;
size = %fishSize;
SceneLayer = "15";
SceneGroup = "14";
CollisionCallback = true;
};
%fish.createPolygonBoxCollisionShape( %fishSize );
%fish.setCollisionShapeIsSensor(0, true);
%fish.setCollisionGroups( "10 15" );
%fish.fixedAngle = true;
%move = MeanderBehavior.createInstance();
%fish.addBehavior(%move);
mainScene.add( %fish );
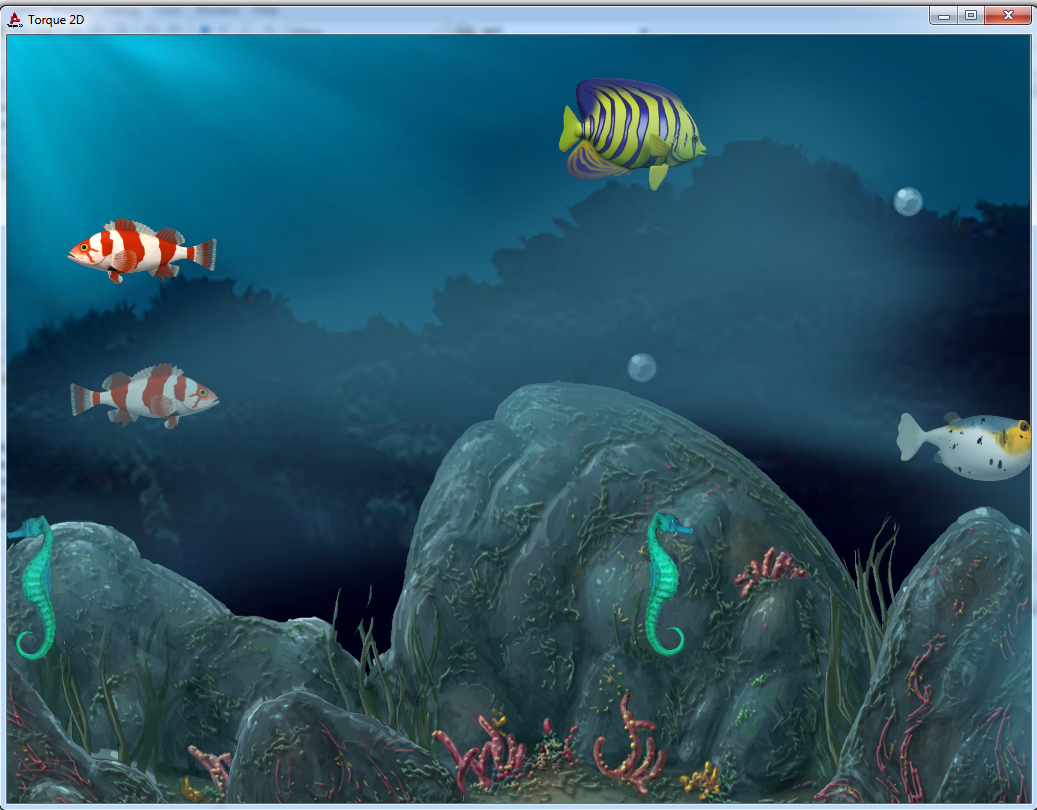
}We have already added the MeanderBehavior to the enemy fish. You should be set to run the game once again, with competition.
This concludes the behavior tutorial. As a quick review, we have learned how to
- Borrow modules to get a quick asset boost
- Create and understand a
BehaviorTemplate - Instantiate a behavior with
createInstance - Attach one or more behaviors to
SceneObjects - Handle method calls sent to the
SceneObjectwith the behaviors attached to it - Keep fields and functions localized to behaviors thus separating concerns
- Keep code uncoupled by sending calls from any behavior to another unspecified behavior via the
owner - Experimented with collision groups and onCollision parameters
Thanks!