User Interface Customizations
The Quick Settings located at the top of the web page can be configured to your needs
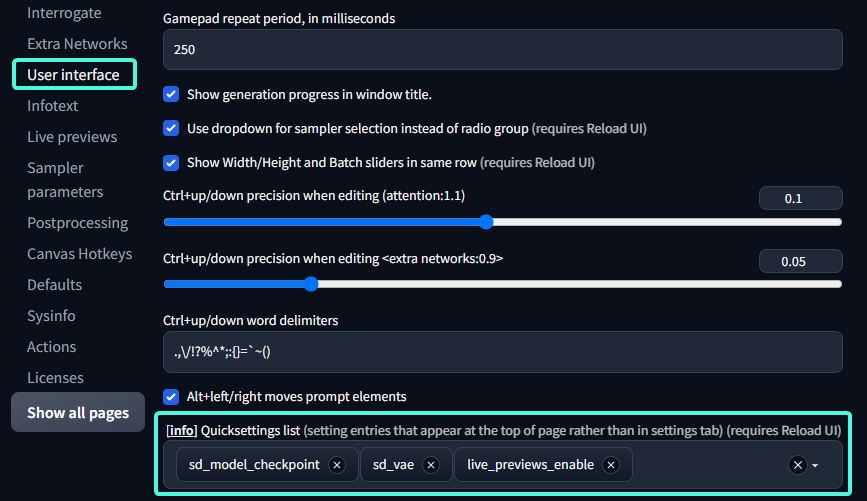
Setting -> User interface -> Quick settings list
Any settings can be placed in the Quick Settings, changes to the settings hear will be immediately saved and applied and save to config.
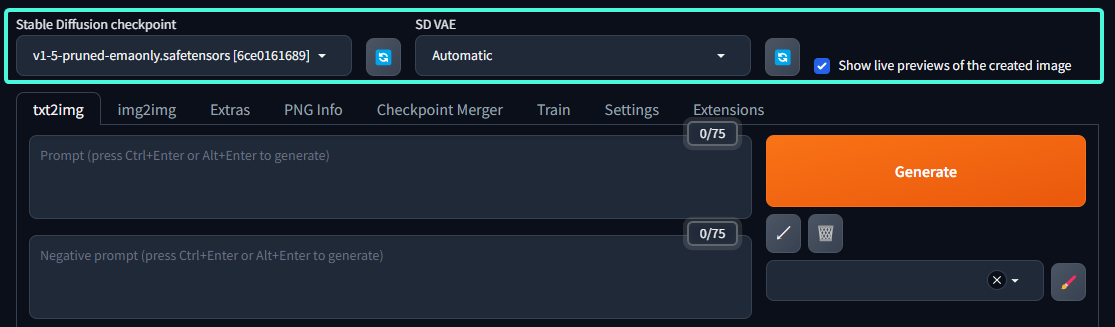
In the example screenshots Stable Diffusion checkpoint SD VAE Show live preview for the created images are placed in Quick Settings.
By default only Stable Diffusion checkpoint are in Quick Settings.
Even though technically all settings can be relocated to
Quick Settings, it doesn't make sense place settings that requires reloading or restarting to take effect inQuick Settings
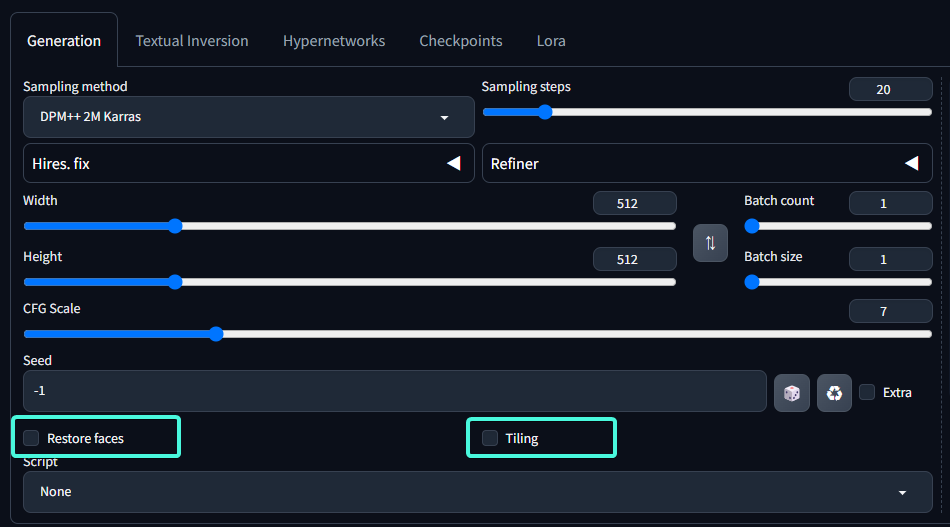
How to get Face Restore or Tiling back
it's possible to add additional settings to txt2img or img2img
We allows user to add additional settings to the image generation interface, the settings can be found under
Setting -> Settings in UI -> Settings for txt2img/img2img
In webui 1.6 the setting was
Setting->interface->Options in main UI - txt2img/img2imgthis functionality is added via the built-in extension
extra-options-section, if you are not seeing the setting options, check if it's enable on the extensions tab.
most if not all settings can be added here if needed
Previously Face Restoration and Tiling are built into the interface and cannot be modified, for users that finds them useful you can add them back manually
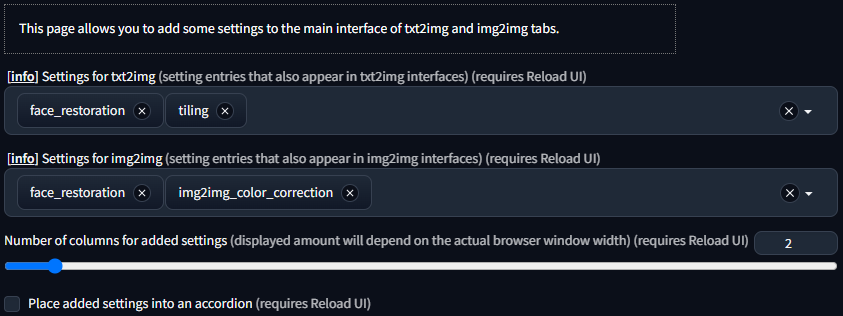
We also support additional option to change the look of how the options is displayed
Customizing the basic look of webui
It is possible to customize the look of webui without using extensions suche as Lobe Them or Nevysha's Cozy Nest
this can be done via gradio themes
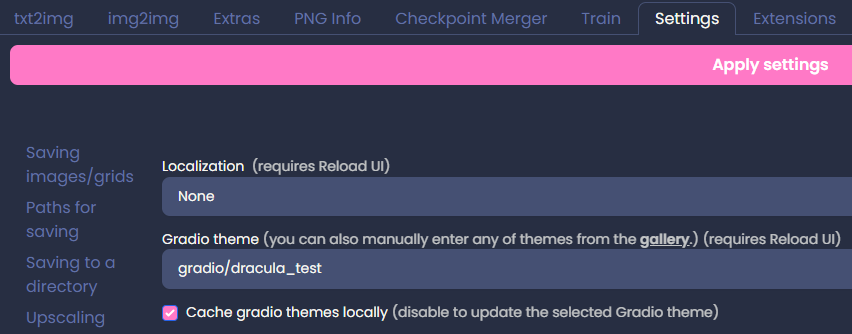
We provide a small list of options choose from but you can manually input other themes from gradio/theme-gallery
if you find one you like you can inpot the corresponding XXX/YYY from the url https://huggingface.co/spaces/XXX/YYY in to ther dropdown menu
By default webui will cache the theme locally, this is so that it doesn't have to download it every time, but there's also means that if the theme is updated you won't received the updates to the theme, if you wish to update the theme (redownload) uncheck Cache gradio themes locally or or delete the corresponding theme cache.
The cached theme is stored under stable-diffusion-webui/tmp/gradio_themes/your_selected_theme.json (the slashes is replaced by underscore)
It also possible create your own theme locally or modify the cached themes
Customizing UI item order for txt2img/img2img tabs
The generation parameter UI elements can can be rewarded using Setting -> User interface -> UI item order for txt2img/img2img tabs
 default order (1.7)
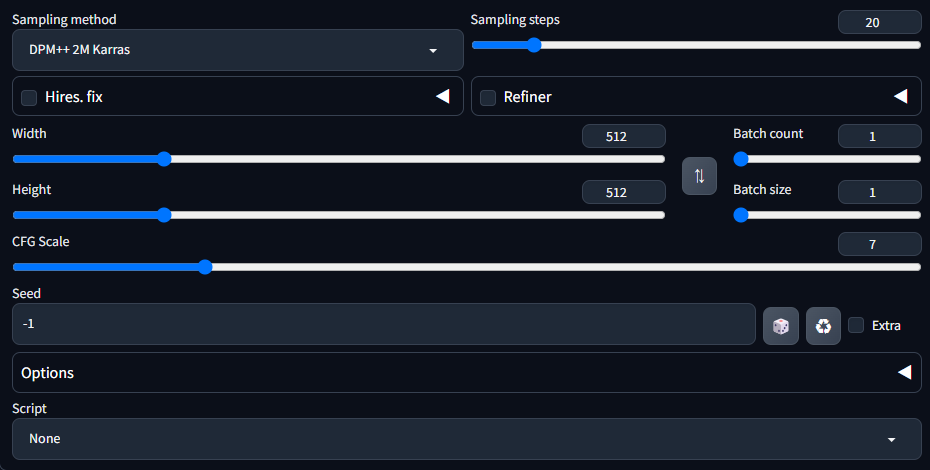 Custom order

Customizing UI element values
Webui allows the user to chenge the default vaule of UI elements, elements dropdown / radio menus checkbox slider input boxes.
- Refresh WebUI's webpage so that all UI elements are at it's default values with no changes.
- Find the UI elements you wish to change and adjust them to your desire default valuse.
- Go to
Setting > Defaults. - CLick
View changes, you will be presented with a list of element values that you have changed. - Confirm if you're happy with these changes and if so click
Apply. - The new values will be saved to
ui-config.jsonand will be used as default vaules after the nextReload UIorRestart(not webpage refresh but WebUI server Reload).
Advanced adjustments such as like change the maximum range of a slide, can also be done by editing the corresponding values in ui-config.json, you have to edit the file manually as there currently is no in UI method of changing these values.
finding the correct value to change might be difficult, but you can locate the correct value bye utilizing the View changes on Setting > Defaults.
for example if you wish to increase the maximum limit of the Image Width slider for txt2img.
- reload your web page, let's make sure all element values are at their default values.
- On txt2img tab change Image Width slider to any value that is not the default.
- Go to
Setting > DefaultsCLickView changesthen you should see one entry like so.
| Path | Old value | New Value |
|---|---|---|
| txt2img/Width/value | 512 | 1024 |
- Note down the Path
txt2img/Widthwithout the typevalue. - open you
ui-config.jsonand search fortxt2img/Width. - you will find other value under the same path like so:
    "txt2img/Width/visible": true,
    "txt2img/Width/value": 512,
    "txt2img/Width/minimum": 64,
    "txt2img/Width/maximum": 2048,
"txt2img/Width/step": 8,- you can adjust
"txt2img/Width/maximum": 2048,to"txt2img/Width/maximum": 4096,to raze the maximum range limit of the slider. - save
ui-config.jsonandReload UIorRestartwebui the slider should be updated with the new range.
Caution: recommended to make a backup before changing, especially if you're editing the file manually, the file can get corrupted if they syntax is incorrect.
note: some values have hidden limitations.
for example stable diffusion image resolution needed to be a multiple of 8, so even though you can customize the slider `step`` size to any value it is unwise to do so as it can cause unexpected errors